
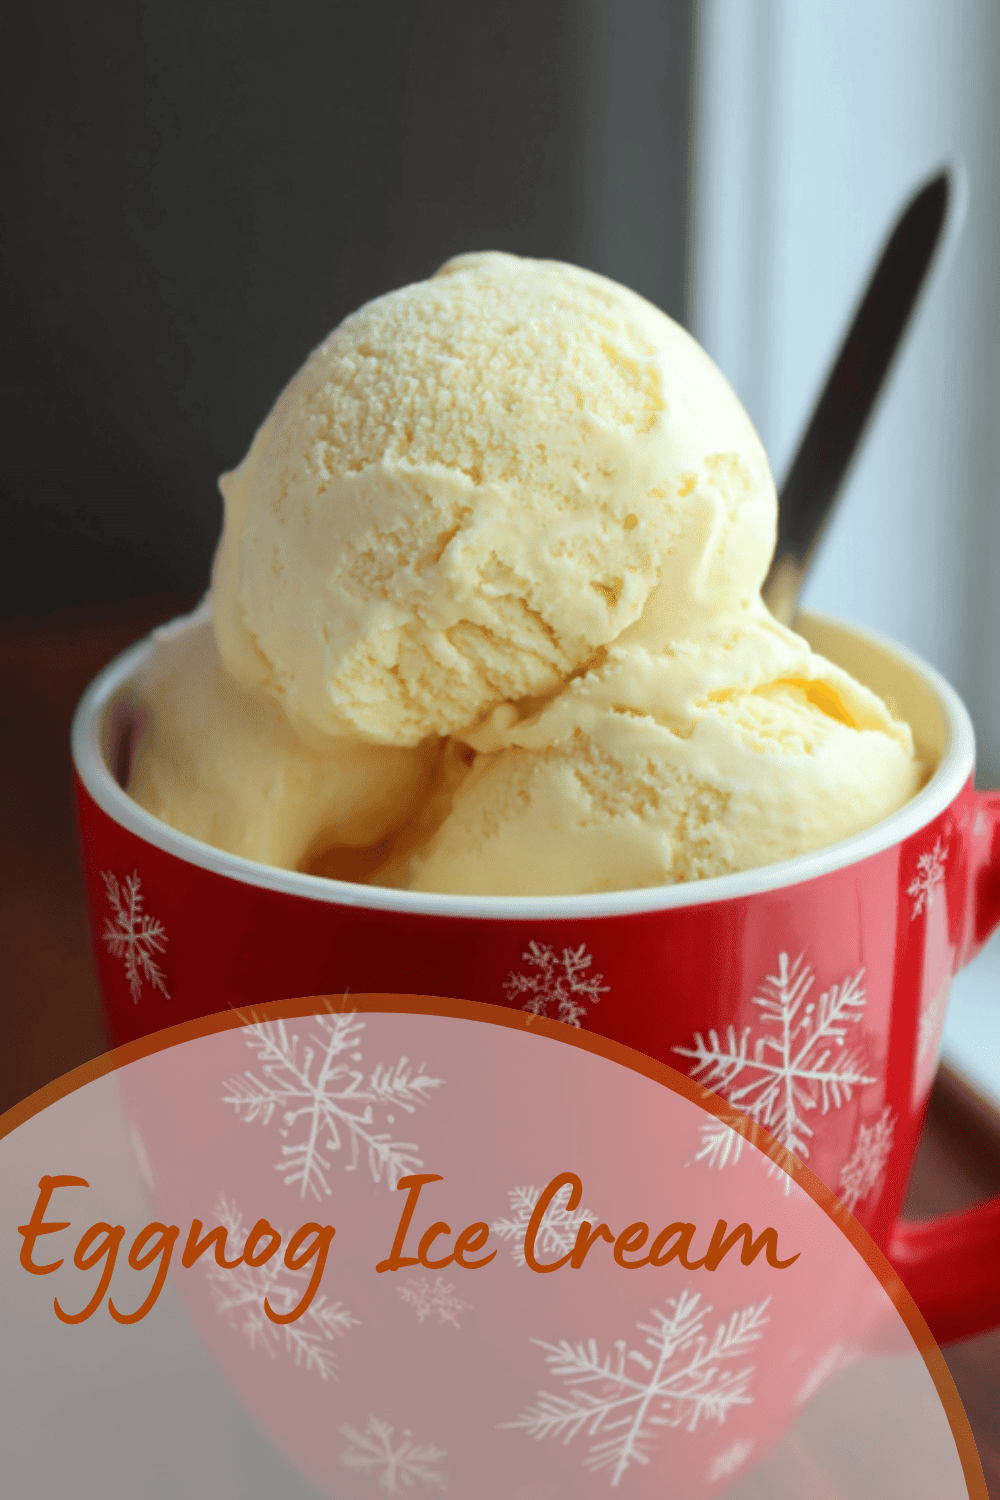
Why You’ll Love This Eggnog Ice Cream
Imagine whipping up a creamy treat that brings the holiday spirit straight to your freezer, and that’s exactly what this eggnog ice cream delivers. It’s so simple that even if you’re juggling kids’ homework and dinner prep, you can mix it up in a flash. Picture yourself scooping out that rich, spiced goodness for a festive family night trust me, it’ll become your go-to dessert without a fuss.
This eggnog ice cream recipe stands out for its straightforward prep, making it a hit for anyone from busy parents to baking newbies. You’ll appreciate how it uses everyday ingredients to create something special, turning ordinary moments into celebrations. Whether you’re serving it at a party or as a quick treat, it’s versatile enough to fit any occasion and leaves everyone smiling.
Beyond the ease, this ice cream packs in the warm flavors of nutmeg and vanilla that make holidays feel magical. Think about how it adapts to different tastes, from adding your favorite toppings to swapping ingredients for dietary needs. Overall, it’s not just dessert; it’s a joyful experience that sparks happy memories around the table.
To dive deeper, the health side is pretty neat too using fresh dairy gives you a boost of vitamins and minerals, and you can tweak it for lighter options. For folks watching their intake, options like low-calorie versions keep it fun and accessible. If you’re curious about eggnog’s background, check out this helpful read on Before you drink eggnog, read this to learn more about its benefits.
Key Benefits and Features
- Ease of preparation: Just mix and freeze it’s ready before you know it, ideal for quick treats on busy days.
- Health benefits: Packed with nutrients from eggs and dairy, plus easy swaps for vegan or low-calorie diets to keep things balanced.
- Versatility: Adapt it for any meal or diet, from topping pies to fitting gluten-free needs.
- Distinctive flavor: That classic eggnog taste with spices makes it a standout, perfect for holidays or anytime you crave comfort.
Now, if you’ve tried other frozen treats, you might want to explore more ideas like this one in our homemade mango ice cream recipe, which adds a tropical twist to your dessert lineup.
Jump To
- 1. Why You’ll Love This Eggnog Ice Cream
- 2. Essential Ingredients for Eggnog Ice Cream
- 3. How to Prepare the Perfect Eggnog Ice Cream: Step-by-Step Guide
- 4. Dietary Substitutions to Customize Your Eggnog Ice cream
- 5. Mastering Eggnog Ice Cream: Advanced Tips and Variations
- 6. How to Store Eggnog Ice Cream: Best Practices
- 7. FAQs: Frequently Asked Questions About Eggnog Ice Cream
- 8. Eggnog Ice Cream
Essential Ingredients for Eggnog Ice Cream
Getting the ingredients just right is what makes this eggnog ice cream so irresistible, and I’ve got the list straight from my kitchen experiments. Start with quality items to capture that creamy texture and festive spice we all love. Remember, fresh is best, especially for something this simple and quick.
In my trials, I found that using premium eggnog really amps up the flavor, so don’t skimp there. It’s all about balancing sweetness and spice without overcomplicating things this recipe keeps it light and fun. Let’s break down what you’ll need, based on the exact mix that works every time.
Core Ingredients List
- 2 cups eggnog
- 1 cup half and half
- ½ cup sugar
- 1 teaspoon pure vanilla extract
- ½ teaspoon freshly grated nutmeg
These measurements ensure a smooth blend, and I always measure twice to avoid any mix-ups it’s my little trick for perfect results. If you’re new to this, think of it as building a flavor foundation that’s easy to customize later.
Special Notes on Ingredients
One thing I learned the hard way is that freshly grated nutmeg makes all the difference; it’s like a secret ingredient that wakes up the whole dish. For substitutions, we’ll cover those in another section, but for now, stick to this list for the best outcome.
| Ingredient | Purpose |
|---|---|
| 2 cups eggnog | Provides the base flavor and creaminess |
| 1 cup half and half | Adds richness for a silky texture |
| ½ cup sugar | Sweetens and helps with freezing consistency |
| 1 teaspoon pure vanilla extract | Enhances the overall taste with warmth |
| ½ teaspoon freshly grated nutmeg | Brings that classic spicy note |
Nutritional details are just estimates, so use a nutrition calculator based on your specific ingredients to get accurate info.
How to Prepare the Perfect Eggnog Ice Cream: Step-by-Step Guide
Let’s get hands-on with this recipe it’s as easy as my go-to family dinners that come together in no time. I remember the first time I made this; it turned a rainy afternoon into a party, and now it’s a tradition. Grab your bowl and let’s mix up some magic that takes just 5 minutes of prep.
First off, combine all the ingredients in a bowl or pitcher, and whisk gently until the sugar fully dissolves no fancy mixer required, just a simple stir does the trick. Once that’s smooth, pour it into your ice cream maker and let it freeze according to the machine’s instructions. If you’re in a rush, serve it as soft serve right away for that instant joy.
Key Preparation Steps
- Gather all ingredients and ensure your ice cream maker bowl is fully frozen trust me, this step saves headaches.
- Whisk the mixture gently in a bowl with a spout for easy pouring, keeping things neat and simple.
- Pour into the ice cream maker and follow the device instructions; it varies, but aim for a soft serve consistency first.
- For firmer ice cream, transfer to a container, press plastic wrap directly on the surface, and freeze for at least 4 hours.
Preparation time is super quick: mixing takes only 5 minutes, and freezing depends on your machine and how firm you want it. Rich eggnog makes for creamier results, while fat-free versions give a lighter feel like ice milk. If you don’t have an ice cream maker, don’t worry; there are alternative methods we’ll touch on soon.
I always say, the best recipes are the ones that bring people together, and this one does just that with its straightforward steps and delightful outcome.
By the way, if you’re into creamy desserts, check out our vanilla custard cream squares for another easy win in the kitchen.

Dietary Substitutions to Customize Your Eggnog Ice cream
One of the best parts about this recipe is how flexible it is I’ve tweaked it for various crowds, and it always turns out great. Whether you’re catering to a vegan friend or watching calories, these swaps keep the fun alive without losing that eggnog charm. Let me share how I make it work for everyone at my table.
For instance, last holiday season, I swapped in coconut cream for a dairy-free version, and it was a hit with my plant-based pals. It’s all about keeping the creamy texture while adapting to preferences, so let’s break it down. You can adjust spices or sweetness based on what you have on hand.
- Replace half and half with heavy cream for a richer feel, or use coconut cream for dairy-free options.
- Swap sugar with honey or maple syrup if you’re looking for natural sweeteners.
- For low-calorie needs, go with almond milk instead of eggnog to lighten things up.
More Options for Every Diet
Protein alternatives include using flax mixtures for eggs if going vegan, and vegetable modifications might mean adding pumpkin spice for a seasonal twist. These changes ensure your ice cream stays delicious and inclusive, no matter the occasion.
Mastering Eggnog Ice Cream: Advanced Tips and Variations
Once you’ve nailed the basics, let’s amp things up with some pro tricks I’ve picked up over the years think of it as leveling up your dessert game. I once added a splash of rum extract for a grown-up twist, and it became the talk of the party. These tips make your ice cream even more special without much extra effort.
Use a double boiler to gently cook the base for smoother results, and always temper your mixtures to avoid lumps it’s a game-changer. For flavor boosts, fresh nutmeg is key, and you can experiment with additions like pumpkin puree. Serving it in chilled bowls with a sprinkle of cinnamon makes it look as good as it tastes.
- Gentle whisking ensures the sugar dissolves without overworking the mix.
- Try bourbon for a classic flair or ginger for something new.
- Make ahead by prepping the base overnight for deeper flavors.
Creative Variations
Serving ideas include scooping it into hot coffee or over pie, and for texture, rich eggnog makes it ultra-creamy. If you’re exploring more, our homemade mango ice cream offers fun ideas for twists.
How to Store Eggnog Ice Cream: Best Practices
Storing your ice cream right keeps it tasting fresh, and I’ve got tips from my own freezer mishaps to share. Seal it tightly to avoid that icy feel, and you’ll enjoy it for weeks. It’s all about simple habits that preserve that creamy goodness.
Keep it in an airtight container in the freezer, and press plastic wrap on the surface to stop ice crystals. For short-term, the fridge works if you’re eating it soon, and portioning into smaller containers makes grabbing a scoop easy. Follow these steps, and your treat stays perfect.
FAQs: Frequently Asked Questions About Eggnog Ice Cream
What ingredients do I need to make homemade eggnog ice cream?
To make homemade eggnog ice cream, you’ll need egg yolks, sugar, whole milk, heavy cream, and eggnog (store-bought or homemade). Additional flavorings often include ground nutmeg, vanilla extract, and a pinch of cinnamon. Some recipes add alcohol like rum or bourbon for a traditional eggnog flavor. These ingredients come together to create a creamy custard base that’s churned into smooth ice cream, capturing the classic holiday taste.
How can I make eggnog ice cream without an ice cream maker?
You can make eggnog ice cream without a machine using the no-churn method. Start by whipping heavy cream until stiff peaks form. Separately, mix sweetened condensed milk with eggnog and vanilla extract. Gently fold the whipped cream into the eggnog mixture, then pour into a freezer-safe container. Freeze for at least 6 hours, stirring every couple of hours to break up ice crystals. This method yields creamy ice cream without the need for specialized equipment.
Is it safe to use raw eggs in eggnog ice cream recipes?
Using raw eggs in ice cream can pose a risk of salmonella. To reduce this risk, it’s best to use pasteurized eggs or cook the egg yolks in a custard base by gently heating them with milk and sugar to 160°F (71°C). This temperature kills harmful bacteria while thickening the mixture. Homemade eggnog ice cream made with cooked custard is both safe and rich-tasting.
Can eggnog ice cream be made vegan or dairy-free?
Yes, vegan or dairy-free eggnog ice cream can be made using plant-based milks such as coconut, almond, or oat milk and coconut cream instead of dairy cream. For richness, use soaked cashews blended into the base and a vegan eggnog alternative or pumpkin spice flavoring to mimic traditional eggnog spices. Sweeten with maple syrup or agave. Churn or use the no-churn method, and enjoy a dairy-free seasonal treat.
How long does eggnog ice cream last in the freezer?
Eggnog ice cream stored properly in an airtight container lasts about 2 to 3 weeks in the freezer while maintaining its best texture and flavor. To prevent freezer burn, press a piece of parchment or plastic wrap directly on the ice cream surface before sealing the container. For optimal taste, consume within a month, as prolonged freezing can cause ice crystallization and dull the flavors.
Eggnog Ice Cream
🍨 Creamy and festive, this Eggnog Ice Cream recipe brings the classic holiday flavor to your dessert table in just five minutes.
🎉 Perfect for quick preparation, it’s an easy and delightful treat that everyone will love during the holiday season.
- Total Time: 5 minutes plus freezing time
- Yield: About 1.5 quarts (6 servings)
Ingredients
– 2 cups eggnog Provides the base flavor and creaminess
– 1 cup half and half Adds richness for a silky texture
– ½ cup sugar Sweetens and helps with freezing consistency
– 1 teaspoon pure vanilla extract Enhances the overall taste with warmth
– ½ teaspoon freshly grated nutmeg Brings that classic spicy note
Instructions
1-Gather all ingredients and ensure your ice cream maker bowl is fully frozen trust me, this step saves headaches.
2-Whisk the mixture gently in a bowl with a spout for easy pouring keeping things neat and simple.
3-Pour into the ice cream maker and follow the device instructions; it varies, but aim for a soft serve consistency first.
4-For firmer ice cream, transfer to a container, press plastic wrap directly on the surface, and freeze for at least 4 hours.
Notes
🥄 Whisk gently by hand; no electric mixer is necessary to dissolve the sugar.
🧊 Ensure your ice cream maker’s bowl is fully frozen for the best results; do not pre-freeze the mixture.
🌰 Freshly grated nutmeg is key for authentic and rich flavor in the ice cream.
- Prep Time: 5 minutes
- Freezing time: 4 hours (or as per ice cream maker)
- Category: Dessert
- Method: Churning (Ice Cream Maker)
- Cuisine: American
- Diet: Vegetarian
Nutrition
- Serving Size: 1/2 cup
- Calories: 180 kcal per serving
- Sugar: 20 g
- Sodium: 90 mg
- Fat: 9 g
- Saturated Fat: 5 g
- Unsaturated Fat: 3 g
- Trans Fat: 0 g
- Carbohydrates: 22 g
- Fiber: 0 g
- Protein: 3 g
- Cholesterol: 80 mg


Wow, this eggnog ice cream turned my holiday memories into a spoon!
I used a pinch of nutmeg instead of cinnamon and it was perfect.
Thanks for the recipe 😊