

Why You’ll Love This Gluten Free White Bread
Gluten free white bread doesn’t have to be tough or tasteless, and this recipe proves it. It’s simple enough for busy parents or students to whip up on a weekday, yet it delivers a soft, tasty loaf that rivals store-bought options. Let me share why I’ve come to rely on this recipe in my own kitchen it’s become a staple for family meals because it fits so many diets without skimping on flavor.
First, the ease of preparation stands out. This gluten free white bread recipe uses basic ingredients and follows quick steps, so you can have fresh bread ready in under two hours, perfect for home cooks who are always on the go. Plus, it offers real health benefits by skipping gluten, which helps folks with sensitivities feel their best while enjoying a slice. I remember my first attempt; it turned out so well that my family asked for it every week, boosting my confidence in baking.
What I love most is the versatility. You can tweak it for vegan options or add nuts for extra crunch, making it ideal for diet-conscious individuals or food enthusiasts experimenting with flavors. And the taste? It’s that soft, comforting texture of traditional white bread, but without the gluten, which makes every bite a delight. Whether you’re a baking beginner or a pro, this recipe will quickly become your favorite way to enjoy gluten free white bread.
To build on this, let’s talk about how it supports various lifestyles. For working professionals, it’s a simple way to have homemade bread without hours in the kitchen. Travelers can pack slices for easy, gluten-free snacks on the road. Meanwhile, seniors might appreciate how it pairs with lighter meals. In my experience, sharing this bread at gatherings has created those memorable moments around the table that my blog is all about.
Another perk is how it adapts to what you have on hand. If you’re new to gluten free baking, like I was at first, you’ll find the instructions encouraging and straightforward, leading to consistent results. This means less waste and more wins in your kitchen, whether you’re feeding a crowd or just yourself. Overall, it’s the kind of recipe that makes gluten free white bread accessible and enjoyable for everyone.
Jump To
- 1. Why You’ll Love This Gluten Free White Bread
- 2. Essential Ingredients for Gluten Free White Bread
- 3. How to Prepare the Perfect Gluten Free White Bread: Step-by-Step Guide
- 4. Dietary Substitutions to Customize Your Gluten Free White Bread
- 5. Mastering Gluten Free White Bread: Advanced Tips and Variations
- 6. How to Store Gluten Free White Bread: Best Practices
- 7. FAQs: Frequently Asked Questions About Gluten Free White Bread
- 8. Gluten Free White Bread
Essential Ingredients for Gluten Free White Bread
When I first started baking gluten free white bread, I realized that the right ingredients make all the difference. They come together to create that soft, tasty loaf you’ve been craving. Below, I’ll list out everything you need, pulling from my go-to recipe to ensure it’s clear and easy to follow.
To keep things straightforward, here’s the full list of ingredients with precise measurements. Remember, accuracy is key for the best results, especially in gluten free baking where small changes can affect the texture.
- 3 cups gluten-free bread flour blend
- 3 teaspoons xanthan gum (omit if included in flour blend)
- 2 ½ teaspoons instant yeast
- ¼ teaspoon cream of tartar
- 2 tablespoons granulated sugar
- 2 teaspoons kosher salt
- 1 ½ cups warm milk (95°F / 35°C)
- 4 tablespoons unsalted butter, melted and cooled
- 1 teaspoon apple cider vinegar
- 2 large egg whites, room temperature
- Optional: Toasted sesame seeds for topping
This structured list covers every item needed, so you won’t miss a thing. For special dietary options, you can easily swap in plant-based milk and vegan butter to make it dairy-free, or use chia eggs for an egg-free version. I always suggest checking labels to confirm everything is gluten free, as that keeps the recipe reliable.
In my early baking days, I learned that using a digital scale for measuring the flour helps avoid mistakes. It’s one of those tips that transformed my loaves from okay to outstanding. If you’re curious about more gluten free baking ideas, check out my recipe for fluffy cheese chive biscuits, which pairs perfectly with this bread.
How to Prepare the Perfect Gluten Free White Bread: Step-by-Step Guide
Ready to bake? I’ll walk you through the steps for making gluten free white bread, based on a method that’s worked wonders for me and my readers. It’s all about keeping things simple while nailing that soft texture. Start by gathering your ingredients and setting up your workspace for smooth sailing.
First, prepare your pan by greasing a 9×5-inch loaf pan with sides at least 4 inches tall, or use a 1-pound Pullman pan. This ensures your bread has room to rise properly. Next, mix the dry ingredients: whisk together the 3 cups gluten-free bread flour blend, 3 teaspoons xanthan gum (if not in the blend), 2 ½ teaspoons instant yeast, ¼ teaspoon cream of tartar, 2 tablespoons granulated sugar, and 2 teaspoons kosher salt in a large bowl.
Then, combine the wet ingredients: add the 1 ½ cups warm milk, 4 tablespoons melted and cooled unsalted butter, 1 teaspoon apple cider vinegar, and 2 large egg whites to the dry mix. Start mixing on low speed, then beat on medium-high for 3 minutes until the dough is smooth and whipped. This step is crucial for activating the xanthan gum and getting that airy crumb.
Shape the dough by transferring it to your prepared pan and smoothing the top with a wet spatula. Cover it loosely with oiled plastic wrap and add the Pullman lid if you’re using one then let it proof in a warm, draft-free spot until it’s 150% larger, about 30 to 45 minutes. Stop when the top almost cracks to avoid overproofing.
While the dough rises, preheat your oven to 375°F (190°C). Once ready, you can optionally slash the top ¼-inch deep, brush it with butter, and sprinkle on those toasted sesame seeds for extra flavor. Bake for 45 to 60 minutes, removing the Pullman lid after 40 minutes if used, until the internal temperature hits 205°F (96°C), the crust is golden brown, and the loaf sounds hollow when tapped.
If the crust feels soft, pop it back in the oven at 300°F (150°C) for up to 20 minutes to firm up. Finally, let the bread rest in the pan for 10 minutes, then transfer it to a wire rack to cool completely for 1 to 2 hours before slicing. The total time is about 2 hours and 15 minutes, including prep, rising, baking, and cooling. For more tips on gluten free baking, I recommend checking out an external resource like the Gluten-Free Baking Guide.
Preparation Time Breakdown
Here’s a quick overview of the timing to help you plan:
- Prep: 15 minutes
- Rising: About 1 hour
- Bake: 45-60 minutes
- Total: Around 2 hours 15 minutes (including cooling)
Nutritional Highlights
For a sense of what you’re baking, each slice (from a 10-slice loaf) packs in about 237 calories, with 39g carbohydrates, 5g protein, and 6g fat. It also includes 3g fiber, 4g sugar, and essential nutrients like Vitamin A, Calcium, Potassium, and Iron. I like to think of it as a wholesome choice for everyday eating.

Dietary Substitutions to Customize Your Gluten Free White Bread
One of the best parts of this gluten free white bread recipe is how flexible it is. I often adjust it based on what my family needs, and you can too. Whether you’re aiming for more protein or a vegan twist, these swaps keep the bread soft and tasty.
For protein boosts, try substituting part of the flour with almond flour or chickpea flour. This adds nutrients and a nutty flavor that works great in sandwiches. If you’re vegan, go for plant-based milk and vegan butter instead of the originals the texture stays light and airy.
You can also mix in herbs like rosemary or vegetables such as spinach for added taste and health benefits. These changes make the bread even more versatile, fitting for busy parents or health-focused eaters. In my trials, adding sun-dried tomatoes turned it into a flavorful favorite for picnics.
Mastering Gluten Free White Bread: Advanced Tips and Variations
Once you’re comfortable with the basics, let’s level up your gluten free white bread game. I’ve picked up some pro techniques that make a big difference, like using a stand mixer with a dough hook for better aeration and a smoother dough. It’s one of those tools that helped me get consistent results every time.
For flavor variations, experiment with garlic powder or onion flakes to create something unique, like a savory loaf for dinners. Presentation is key too slice evenly and add a drizzle of olive oil or fresh herbs to make it look as good as it tastes. If you’re planning ahead, prepare the dough the night before and refrigerate it; this deepens the flavors and saves time on busy mornings.
I also love making mini loaves for portion control, which is perfect for students or working pros. Remember, beating the dough thoroughly activates the xanthan gum, preventing that gummy texture. Over the years, these tips have made my baking more enjoyable and reliable.
When I first tried these advanced methods, it felt like a breakthrough I went from decent bread to loaves that everyone raved about at family brunches.
How to Store Gluten Free White Bread: Best Practices
| Storage Method | Duration | Tips |
|---|---|---|
| Room Temperature | Up to 2 days | Wrap tightly in plastic or a bag to keep it fresh. |
| Refrigerator | Up to 3 days | Use an airtight container to prevent drying out. |
| Freezer | Up to 3 months | Wrap slices separately with parchment paper for easy thawing. |
Storing your gluten free white bread properly helps it stay soft and tasty. For short-term use, wrap it tightly and keep it at room temperature. If you’re freezing, thaw slices at room temperature then warm them in the oven at 350°F for 10 minutes to bring back that fresh-baked feel.
This approach works well for meal prep, letting you bake in batches and grab what you need. I’ve found that toasting frozen slices directly makes for a quick breakfast, which is a lifesaver for busy schedules. For another easy breakfast idea, try my recipe for cornbread muffins.

FAQs: Frequently Asked Questions About Gluten Free White Bread
Why isn’t my gluten free white bread rising properly?
Gluten free bread often struggles to rise because gluten, which provides structure, is missing. Common issues include using the wrong flour blend, incorrect measurements, not activating the yeast properly, or improper proofing conditions. Make sure to measure ingredients by weight, use a reliable gluten free flour mix, proof yeast in warm water with sugar until bubbly, and keep dough in a warm, draft-free spot. Adding xanthan gum or guar gum can help improve elasticity and rise.
How can I tell when gluten free white bread is fully baked?
Gluten free bread is done when the internal temperature reaches about 205°F (96°C). The crust should be golden brown and firm to the touch. Tapping the bottom of the loaf should produce a hollow sound. Because gluten free breads can be denser, use a digital thermometer for accuracy rather than relying solely on appearance.
What are the main reasons gluten free bread sinks after baking?
Sinking usually happens due to overproofing, too much yeast or liquid, or baking at too high a temperature. Overproofing weakens the dough structure so it can’t hold up, while excess liquid causes collapse during baking. Baking at very high heat can set the crust too fast, leaving the inside undercooked and prone to sinking. Follow recipe proofing times and measure liquids carefully.
Can I make gluten free white bread without a stand mixer?
Yes, you can mix gluten free bread dough by hand or with a food processor. Hand mixing requires extra effort to combine ingredients fully, and the dough may feel stickier or less uniform, but it can still rise well if the recipe is followed carefully. When using a food processor, pulse gently to avoid overheating the dough.
How do I adjust gluten free bread recipes for high altitude baking?
At high altitudes, lower the amount of yeast slightly to prevent overproofing, increase oven temperature by 15-25°F to help set the crust, and reduce liquids by about 1-2 tablespoons per cup to maintain dough stability. Keep proofing times shorter since dough rises faster in lower air pressure. Experiment with small adjustments based on your specific altitude.
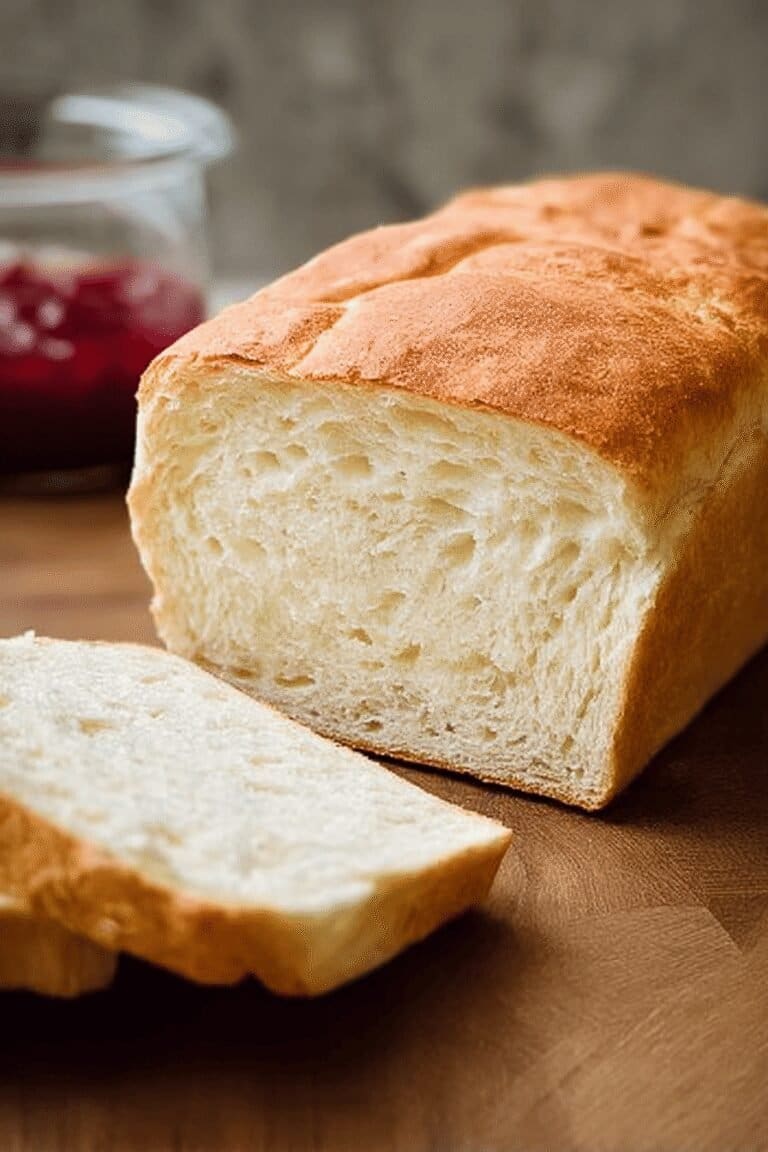
Gluten Free White Bread
🍞 This Gluten Free Bread Recipe provides simple steps to create soft, airy, and tasty loaves perfect for everyday enjoyment.
🥖 Its reliable texture and flavor make gluten-free baking accessible and rewarding for all skill levels.
- Total Time: 2 hours 15 minutes (including cooling)
- Yield: 1 loaf (10 slices) 1x
Ingredients
3 cups gluten-free bread flour blend
3 teaspoons xanthan gum (omit if included in flour blend)
2 ½ teaspoons instant yeast
¼ teaspoon cream of tartar
2 tablespoons granulated sugar
2 teaspoons kosher salt
1 ½ cups warm milk (95°F / 35°C)
4 tablespoons unsalted butter, melted and cooled
1 teaspoon apple cider vinegar
2 large egg whites, room temperature
Optional: Toasted sesame seeds for topping
Instructions
1-Prepare your pan by greasing a 9×5-inch loaf pan with sides at least 4 inches tall, or use a 1-pound Pullman pan. This ensures your bread has room to rise properly.
2-Mix the dry ingredients: whisk together the 3 cups gluten-free bread flour blend, 3 teaspoons xanthan gum (if not in the blend), 2 ½ teaspoons instant yeast, ¼ teaspoon cream of tartar, 2 tablespoons granulated sugar, and 2 teaspoons kosher salt in a large bowl.
3-Combine the wet ingredients: add the 1 ½ cups warm milk, 4 tablespoons melted and cooled unsalted butter, 1 teaspoon apple cider vinegar, and 2 large egg whites to the dry mix. Start mixing on low speed, then beat on medium-high for 3 minutes until the dough is smooth and whipped. This step is crucial for activating the xanthan gum and getting that airy crumb.
4-Shape the dough by transferring it to your prepared pan and smoothing the top with a wet spatula. Cover it loosely with oiled plastic wrap and add the Pullman lid if you’re using one then let it proof in a warm, draft-free spot until it’s 150% larger, about 30 to 45 minutes. Stop when the top almost cracks to avoid overproofing.
5-Preheat your oven to 375°F (190°C). Once ready, you can optionally slash the top ¼-inch deep, brush it with butter, and sprinkle on those toasted sesame seeds for extra flavor. Bake for 45 to 60 minutes, removing the Pullman lid after 40 minutes if used, until the internal temperature hits 205°F (96°C), the crust is golden brown, and the loaf sounds hollow when tapped.
6-If the crust feels soft, pop it back in the oven at 300°F (150°C) for up to 20 minutes to firm up.
7-Finally, let the bread rest in the pan for 10 minutes, then transfer it to a wire rack to cool completely for 1 to 2 hours before slicing. The total time is about 2 hours and 15 minutes, including prep, rising, baking, and cooling.
Notes
⚖️ Use a digital scale to weigh gluten-free flour for accuracy.
⏳ Avoid overproofing to prevent the dough from collapsing and ensure proper rise.
🌡️ Verify oven temperature with a thermometer and bake until internal temperature reaches 205°F (96°C) to avoid gummy texture.
- Prep Time: 15 minutes
- Rising time: 30-45 minutes
- Cook Time: 45-60 minutes
- Category: Bread
- Method: Mixing and Baking
- Cuisine: Gluten-Free
- Diet: Gluten-Free, Vegetarian
Nutrition
- Serving Size: 1 slice
- Calories: 237 kcal
- Sugar: 4 g
- Sodium: 533 mg
- Fat: 6 g
- Saturated Fat: 4 g
- Trans Fat: 0 g
- Carbohydrates: 39 g
- Fiber: 3 g
- Protein: 5 g
- Cholesterol: 16 mg






Thanks for sharing this!
I’ve been looking for a gluten free sandwich bread and your recipe looks promising.
Do you think adding a tablespoon of honey would help with the crust? 🍞