
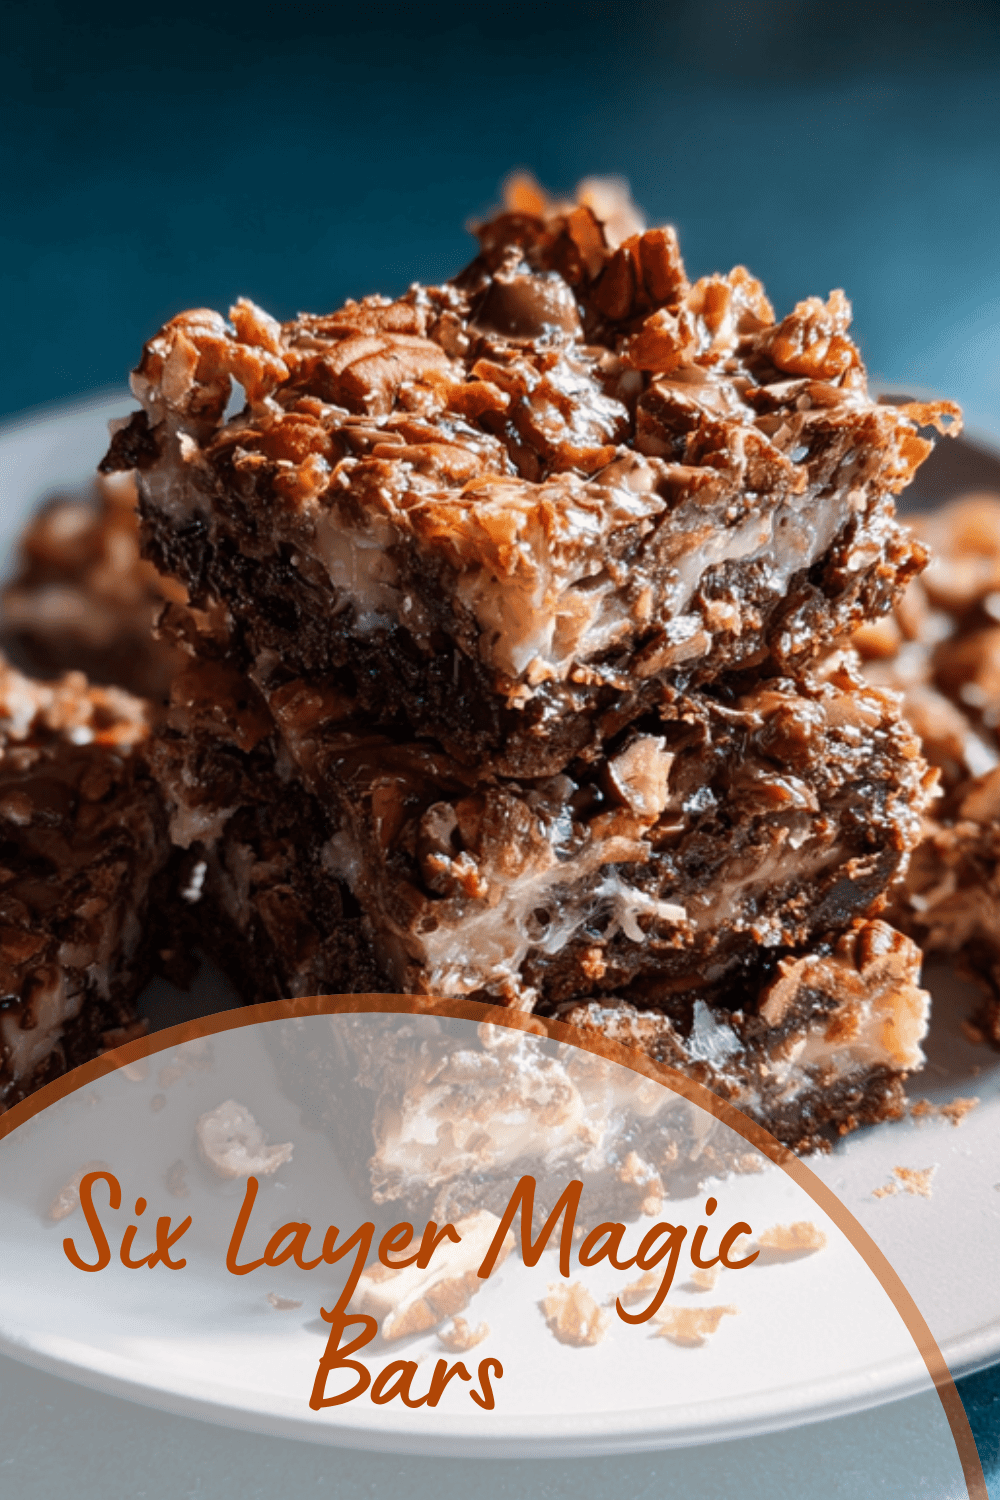
Why You’ll Love This Six Layer Magic Bars
As someone who loves baking simple treats that bring people together, I can tell you these Six Layer Magic Bars are a go-to favorite in my kitchen. They’re super easy to put together, perfect if you’re new to baking or just in a hurry, and they turn out delicious every time. Let’s dive into what makes this recipe a winner for home cooks like you and me.
This Six Layer Magic Bars recipe stands out because of its straightforward assembly that takes just minutes, making it ideal for busy parents or students looking for a quick dessert fix. You’ll appreciate how the wholesome ingredients deliver enjoyable flavors without needing fancy tools or skills. Plus, the bars offer nice nutritional perks, like fiber from the coconut and healthy fats from the nuts, turning a sweet snack into something that feels a bit more balanced.
What really makes these bars special is their adaptability, letting you tweak them for different dietary needs while keeping that irresistible taste. Imagine sharing these at a family gathering or a casual get-together, where the mix of crunchy, creamy, and sweet layers creates a memorable moment. Whether you’re pairing them with coffee or serving them at a potluck, these bars will quickly become a staple in your recipe collection.
To give you more ideas, check out this delicious carrot cake cheesecake bars on our blog for another easy baking option that complements your dessert lineup.
Jump To
- 1. Why You’ll Love This Six Layer Magic Bars
- 2. Essential Ingredients for Six Layer Magic Bars
- 3. How to Prepare the Perfect Six Layer Magic Bars: Step-by-Step Guide
- 4. Dietary Substitutions to Customize Your Six Layer Magic Bars
- 5. Mastering Six Layer Magic Bars: Advanced Tips and Variations
- 6. How to Store Six Layer Magic Bars: Best Practices
- 7. FAQs: Frequently Asked Questions About Six Layer Magic Bars
- 8. Six Layer Magic Bars
Essential Ingredients for Six Layer Magic Bars
Gathering the right ingredients is the first fun step in making Six Layer Magic Bars, and I always feel excited about how a few simple items can create something amazing. Based on my tried-and-true recipe, these bars rely on basic pantry staples that stack up into layers of pure joy. Let’s break it down so you can shop with ease and get baking right away.
Main Ingredients List
As promised, here’s the full list of ingredients pulled straight from the recipe I use all the time. I’ve formatted it clearly so you can see exactly what’s needed:- 1½ cups graham cracker crumbs (about 10 to 10½ sheets)
- 1 stick (113g or 8 tablespoons) butter, melted
- 1 cup shredded sweetened coconut
- 1 (12-ounce) package (2 cups) semi-sweet chocolate chips
- 1 cup chopped pecans (walnuts or a mix can be substituted)
- 1 (14-ounce) can sweetened condensed milk (only regular, not low-fat or fat-free)
This lineup gives you everything required for a perfect batch, with each measurement designed to ensure the bars come out just right. I like to think of it as building blocks for a tasty treat that everyone can enjoy.
Special Dietary Options
If you’re adjusting for different needs, it’s simple to swap things around. For a vegan twist, try plant-based margarine instead of butter and dairy-free chocolate chips to keep the magic alive. Going gluten-free? Just use gluten-free graham cracker crumbs to hold the base together without any issues.
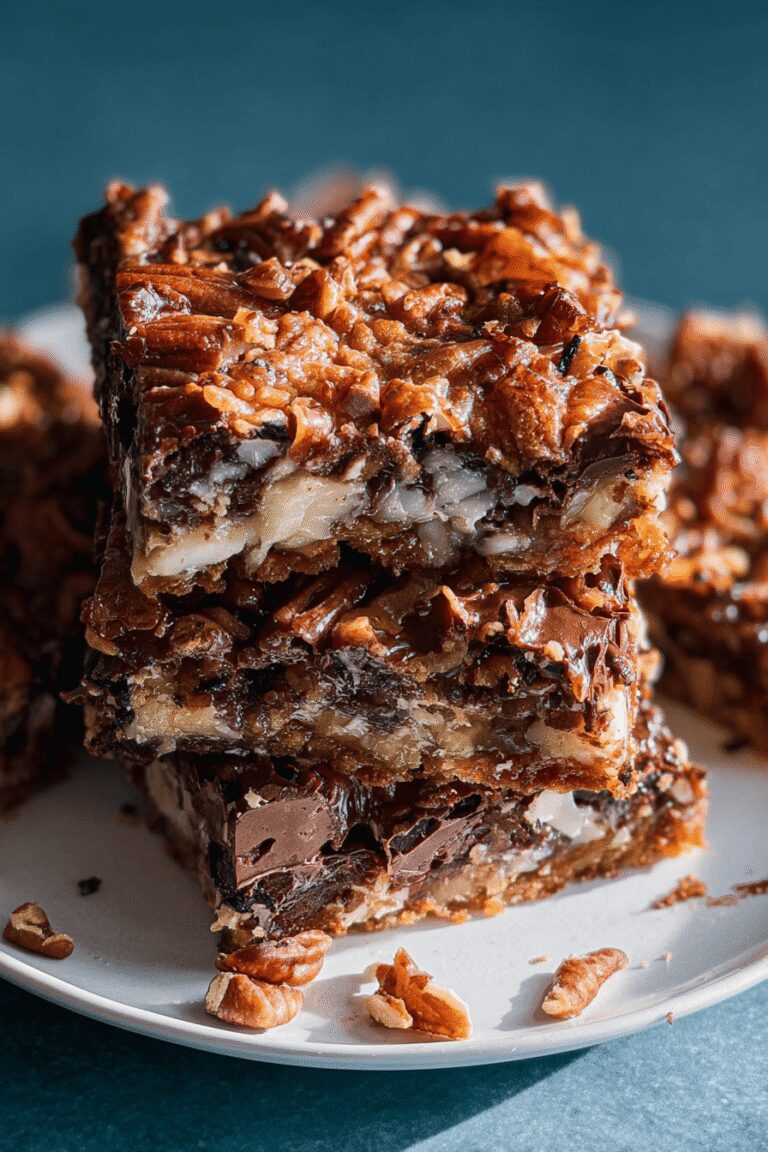
How to Prepare the Perfect Six Layer Magic Bars: Step-by-Step Guide
Getting started with Six Layer Magic Bars feels like a warm hug from the kitchen, and I’ll walk you through each step like we’re chatting over a cup of tea. Preheat your oven first to set the stage, then layer everything with care for that signature gooey finish. Follow along, and you’ll have bars ready in no time.
- Preheat oven to 350°F (175°C). Grease or spray a 9 x 13-inch baking pan, or line with parchment paper for easy removal.
- For the crust, combine graham cracker crumbs and melted butter in a bowl. Mix until crumbs hold together when squeezed, then firmly press the mixture into an even layer in the pan.
- Layer the ingredients evenly: first shredded coconut, then chocolate chips, followed by chopped nuts.
- Pour sweetened condensed milk evenly over all layers, gently spreading to cover the top without mixing the layers.
- Bake for 26 30 minutes until edges are golden and the top is lightly browned. Cool completely before cutting into bars. Optionally, sprinkle flaky sea salt on top for a salty-sweet contrast.
This process, with a prep time of about 15 minutes and cook time of 28 minutes, yields around 24 generous bars that are perfect for sharing. For anyone making adjustments, like a gluten-free version, swap in the right crumbs during the crust step to keep things smooth.

Dietary Substitutions to Customize Your Six Layer Magic Bars
One of the best parts about Six Layer Magic Bars is how flexible they are, letting you tailor them to your family’s preferences without losing that wonderful taste. Whether you’re watching your diet or accommodating allergies, small changes can make a big difference. Let’s explore some easy swaps that I use in my own kitchen.
- Replace traditional butter with coconut oil or vegan margarine for a dairy-free option.
- Use gluten-free graham cracker crumbs to cater to gluten intolerance.
- Opt for sugar-free or natural sweeteners in place of sweetened condensed milk for lower sugar content.
- Add nuts like walnuts or pecans for extra protein and crunch.
- Incorporate dried fruits such as cranberries or raisins to introduce natural sweetness.
- Experiment with spices like cinnamon or nutmeg to enhance flavor while keeping the recipe flexible.
These tweaks, like using vegan alternatives, help keep the bars enjoyable for everyone, from busy professionals to baking enthusiasts.
Mastering Six Layer Magic Bars: Advanced Tips and Variations
Once you’re comfortable with the basics, taking your Six Layer Magic Bars to the next level is a blast, and I’ve picked up some handy tricks along the way. Press that butter-crumb mixture firmly into the pan for a crust that doesn’t crumble, and consider lining with parchment paper for easy cleanup. This recipe’s versatility shines through in so many fun ways.
Pro Cooking Techniques
Use a food processor to finely crush graham crackers for a uniform crust that holds up well. Chill the assembled bars before baking to keep those layers distinct and delicious.
Flavor Variations
Try adding espresso powder for a mocha twist or white chocolate chips for extra sweetness. You can even swap in butterscotch chips or peanut butter chips to mix things up, turning your bars into a personalized treat.
| Variation | Benefit |
|---|---|
| Gluten-free base | Ensures everyone can enjoy without worry |
| Add dried fruits | Boosts natural sweetness and nutrition |
As a fun link, if you’re into more layered desserts, check out our butter pecan layer cake recipe for another crowd-pleaser.
How to Store Six Layer Magic Bars: Best Practices
Keeping your Six Layer Magic Bars fresh is key to enjoying them later, and I always make sure to store them properly so they taste just as good the next day. Store bars in an airtight container for up to 5 days at room temperature, or pop them in the fridge for longer freshness. Freezing works great too, wrapping them tightly for up to 2 months.
These methods help maintain that chewy texture, making meal prep a breeze for working professionals or seniors. Whether you’re grabbing a quick snack or planning ahead, these tips keep your treats ready to go.
FAQs: Frequently Asked Questions About Six Layer Magic Bars
What ingredients do I need to make Six Layer Magic Bars?
To make Six Layer Magic Bars, you will need graham cracker crumbs, melted butter, sweetened condensed milk, semi-sweet chocolate chips, butterscotch chips, shredded coconut, and chopped nuts (like walnuts or pecans). These layers combine to create a rich, chewy dessert with a mix of textures and flavors. Most recipes call for about 1 1/2 cups each of the chips, 1 1/2 cups shredded coconut, and 1 cup nuts, but you can adjust according to taste.
How do I bake Six Layer Magic Bars so they have the perfect texture?
To bake Six Layer Magic Bars with the right texture, preheat your oven to 350°F (175°C). Press the graham cracker crumbs combined with melted butter firmly into the bottom of a greased 9×13-inch pan. Layer the chocolate chips, butterscotch chips, coconut, and nuts evenly, then pour the sweetened condensed milk evenly over the top. Bake for 25-30 minutes until the edges are golden and the center is set but still slightly soft. Let cool completely before cutting to achieve bars that hold together well.
Can I customize Six Layer Magic Bars for dietary restrictions?
Yes, Six Layer Magic Bars can be adapted for various dietary needs. For a gluten-free version, use gluten-free graham cracker crumbs. Substitute dairy ingredients with vegan butter and sweetened condensed coconut milk to make them dairy-free. Nut-free versions can be made by simply omitting the nuts or replacing them with seeds like pumpkin or sunflower seeds. Keep in mind that these swaps might slightly change the texture and flavor.
How should I store Six Layer Magic Bars to keep them fresh?
Store Six Layer Magic Bars in an airtight container at room temperature for up to 3 days. If you want them to last longer, keep them refrigerated; they will stay fresh for up to a week. To maintain the chewy texture, bring the bars to room temperature before serving. For extended storage, you can also freeze the bars for up to 2 months—wrap them tightly in plastic wrap and foil, then thaw overnight in the fridge before serving.
Why do the layers in my Six Layer Magic Bars sometimes mix together?
The layers in Six Layer Magic Bars may blend if the sweetened condensed milk isn’t poured evenly or if the bars are disturbed before baking. To keep distinct layers, evenly sprinkle each layer separately and pour the condensed milk slowly across the entire surface. Pressing the crust firmly helps prevent mixing as well. Baking at the right temperature without opening the oven door too often ensures the layers set properly without merging.
Six Layer Magic Bars
✨ Magic Six Layer Bars combine simple ingredients into a rich, decadent treat with layers of crunch and sweetness.
🍫 Perfect for parties or a cozy snack, these bars are easy to make and deliver satisfying flavors and textures.
- Total Time: 43 minutes
- Yield: 24 bars
Ingredients
– 1½ cups graham cracker crumbs (about 10 to 10½ sheets)
– 1 stick (113g or 8 tablespoons) butter, melted
– 1 cup shredded sweetened coconut
– 1 (12-ounce) package (2 cups) semi-sweet chocolate chips
– 1 cup chopped pecans (walnuts or a mix can be substituted)
– 1 (14-ounce) can sweetened condensed milk (only regular, not low-fat or fat-free)
Instructions
1- Preheat oven to 350°F (175°C). Grease or spray a 9 x 13-inch baking pan, or line with parchment paper for easy removal.
2- For the crust, combine graham cracker crumbs and melted butter in a bowl. Mix until crumbs hold together when squeezed, then firmly press the mixture into an even layer in the pan.
3- Layer the ingredients evenly: first shredded coconut, then chocolate chips, followed by chopped nuts.
4- Pour sweetened condensed milk evenly over all layers, gently spreading to cover the top without mixing the layers.
5- Bake for 26 30 minutes until edges are golden and the top is lightly browned. Cool completely before cutting into bars. Optionally, sprinkle flaky sea salt on top for a salty-sweet contrast.
Notes
🔪 Press the butter-crumb mixture firmly for a sturdy crust that resists crumbling.
📄 Use parchment paper or greased foil for easy removal.
🌾 For gluten-free, substitute gluten-free graham cracker crumbs and adjust quantity for stability.
- Prep Time: 15 minutes
- Cook Time: 28 minutes
- Category: Dessert
- Method: Baking
- Cuisine: American


I tried these Six Layer Magic Bars for my daughter’s birthday and they were a hit!
I swapped the white chocolate for a dark chocolate chip and it added a nice bitterness. 🌟