
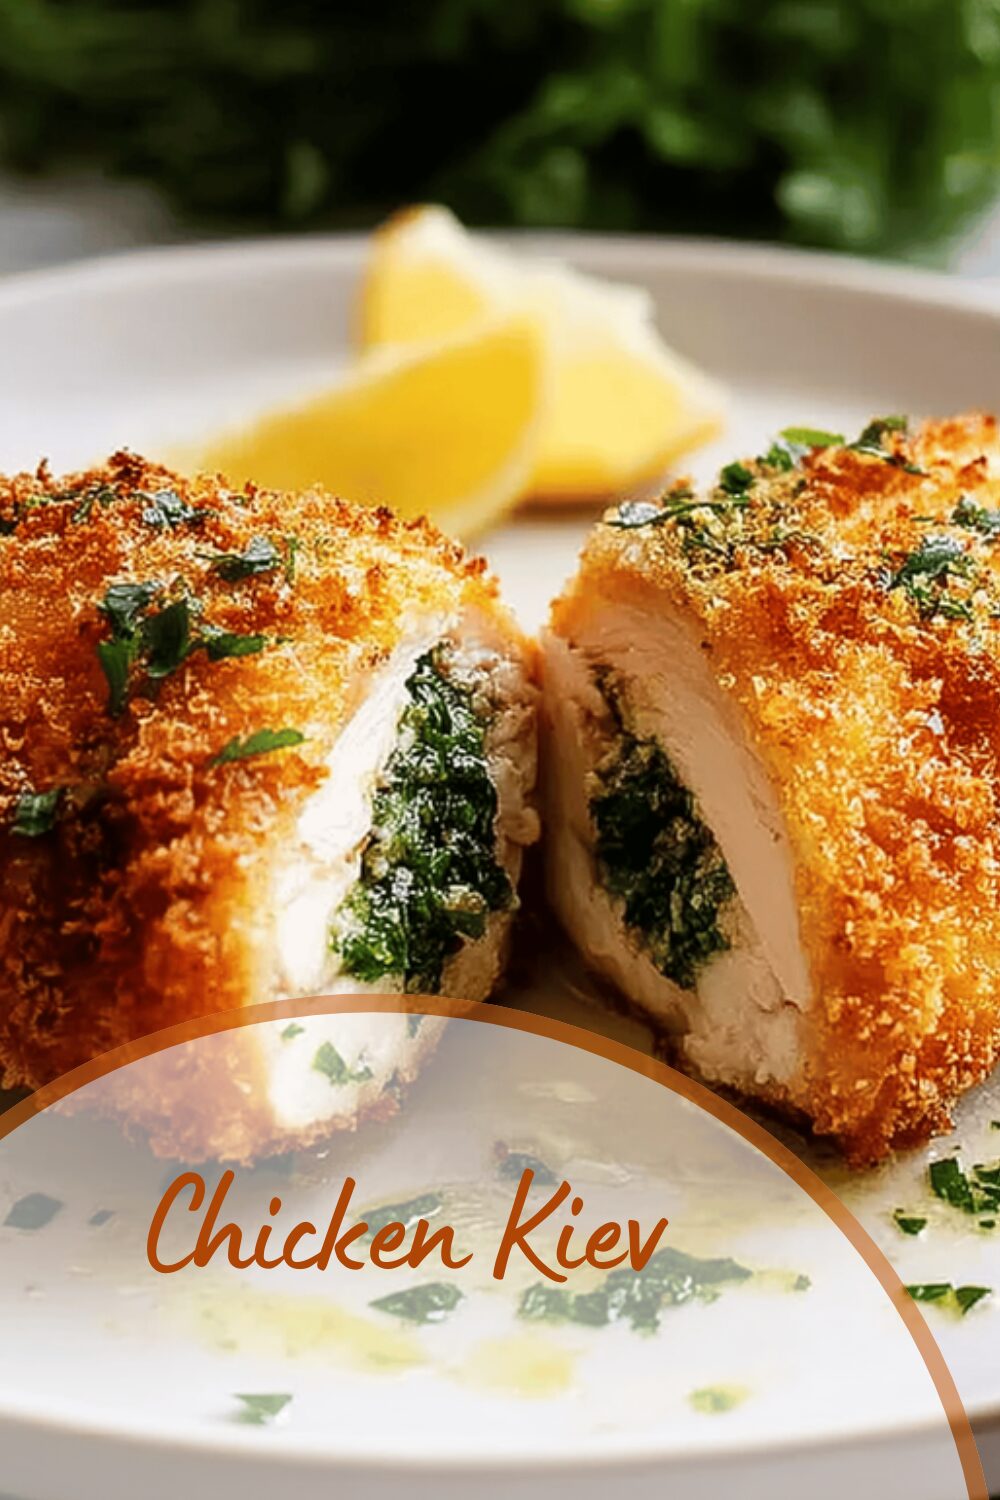
Why You’ll Love This Chicken Kiev
Discover the charm of Chicken Kiev, a classic dish that combines tender chicken with a burst of garlic butter filling and a crispy breaded coating. This recipe stands out for its ease, making it ideal for home cooks like busy parents or students looking for a quick yet impressive meal. With its flavorful profile and adaptability, Chicken Kiev fits into various lifestyles, from family dinners to special occasions.
The simple steps mean you can whip up this hearty dish in under an hour, perfect for those hectic weeknights. It provides satisfying nutrition without overwhelming the palate, appealing to food enthusiasts and diet-conscious folks alike. Whether you’re a newlywed experimenting in the kitchen or a senior enjoying comforting foods, this Chicken Kiev recipe brings joy and deliciousness to your table.
This Chicken Kiev offers a delightful balance of textures and tastes, ensuring everyone finds something to love. For more ideas on family-friendly meals, check out our parmesan crusted chicken breast recipe, which pairs well with similar flavors. Its versatility allows for tweaks, making it a go-to option for creating memorable moments around the table.
Health and Versatility Benefits
Chicken Kiev is not just tasty; it supports a healthy lifestyle with lean protein that aids muscle health and energy. Fresh herbs like parsley add vibrant flavors while keeping things wholesome. You can easily adapt it for dietary needs, such as gluten-free options or lighter versions, making it suitable for working professionals and baking enthusiasts.
Preparation is straightforward, requiring minimal ingredients for maximum flavor. This recipe’s flexibility lets you swap items to fit preferences, like using panko for extra crunch. Overall, it’s a dish that inspires cooking with joy and exploration of new flavors.
Jump To
- 1. Why You’ll Love This Chicken Kiev
- 2. Essential Ingredients for Chicken Kiev
- 3. How to Prepare the Perfect Chicken Kiev: Step-by-Step Guide
- 4. Dietary Substitutions to Customize Your Chicken Kiev
- 5. Mastering Chicken Kiev: Advanced Tips and Variations
- 6. How to Store Chicken Kiev: Best Practices
- 7. FAQs: Frequently Asked Questions About Chicken Kiev
- 8. Chicken Kiev
Essential Ingredients for Chicken Kiev
Gathering the right ingredients is key to making this Chicken Kiev recipe shine. Below is a complete list based on the precise measurements provided, ensuring you have everything needed for a successful cook. This structured list makes it easy to follow and shop for.
- 6 tablespoons unsalted butter at room temperature
- 1 large garlic clove, minced
- 1 tablespoon lemon juice, plus more lemon wedges for serving
- 2 tablespoons chopped fresh parsley, plus extra for garnish
- 1/2 teaspoon sea salt
- 1/2 teaspoon freshly ground black pepper
- 3 large chicken breasts (12 oz each)
- 2 eggs, beaten
- 1/2 cup all-purpose flour
- 2 cups panko bread crumbs (regular breadcrumbs can be used if needed)
- 1/2 teaspoon salt and pepper for seasoning
- Extra light olive oil or canola oil for sautéing (the amount needed to reach about 1/4 inch in the skillet; avoid butter or extra virgin olive oil for frying)
These ingredients form the foundation of the dish, blending to create that signature garlic butter filling and crispy coating. For more inspiration on garlic-infused recipes, visit our garlic butter rice with kale page, which complements this meal nicely.
Special Dietary Options
To accommodate different needs, consider substitutions like vegan butter for the unsalted butter or gluten-free flour for the all-purpose flour. This keeps the recipe accessible and enjoyable for everyone, from diet-conscious individuals to travelers seeking familiar tastes abroad.
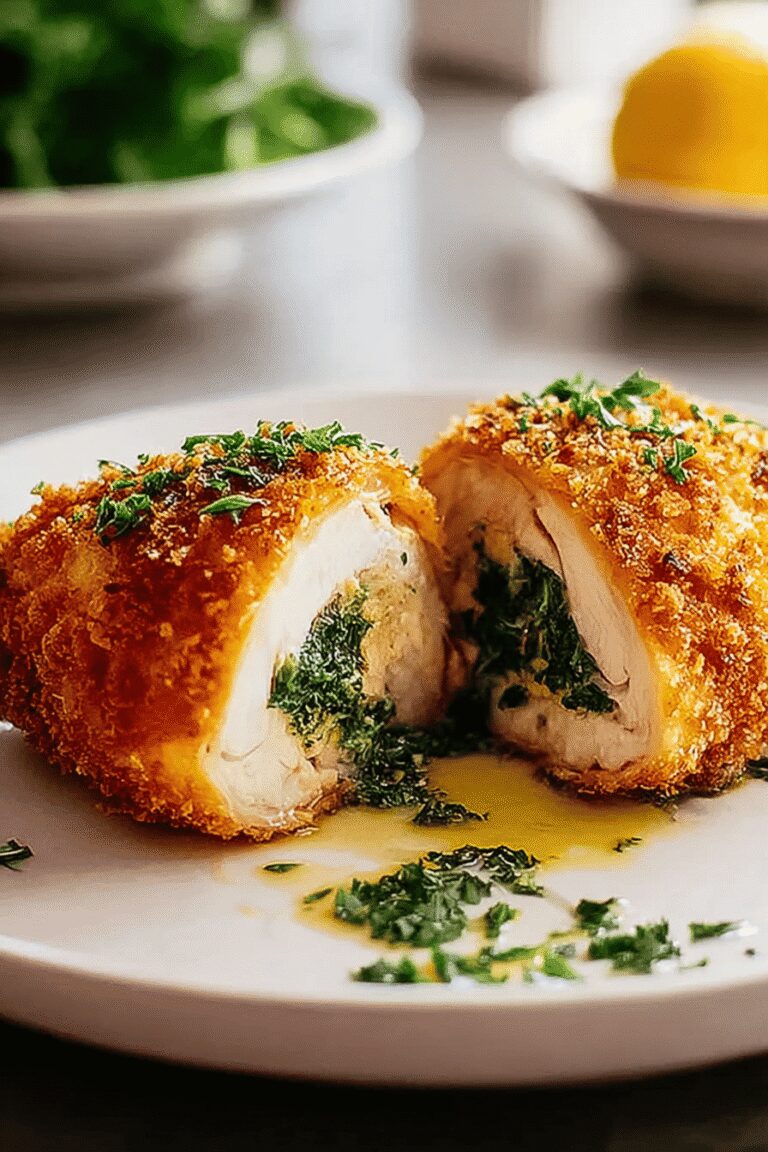
How to Prepare the Perfect Chicken Kiev: Step-by-Step Guide
Follow this detailed guide to make Chicken Kiev that’s packed with garlic butter filling and a crunchy breaded exterior. Start by preparing your workspace and ingredients to ensure smooth cooking. The process is simple, even for those with moderate kitchen experience, and takes just about 40 minutes total.
First, make the lemon-herb garlic butter by mashing 6 tablespoons of softened unsalted butter with 1 large minced garlic clove, 1 tablespoon lemon juice, 2 tablespoons chopped fresh parsley, 1/2 teaspoon sea salt, and 1/2 teaspoon freshly ground black pepper until well combined. This mixture adds the heart of the dish’s flavor. Slice each of the 3 large chicken breasts (12 oz each) in half lengthwise to create a total of 6 cutlets, then carefully cut a pocket in each without going through.
Stuffing and Breading the Chicken
Stuff each pocket with about 1 tablespoon of the flavored butter, seal the edges, and season with 1/2 teaspoon salt and pepper. Set up a breading station with 1/2 cup all-purpose flour, 2 beaten eggs, and 2 cups panko bread crumbs. Dredge each piece in flour, dip in eggs, and coat with crumbs for that crispy layer.
Heat oil in a skillet to 350-375°F and fry the chicken in batches for 4 minutes per side until golden. Check for doneness at 165°F. Serve with a sprinkle of salt, fresh parsley, and lemon wedges. Adaptations for dietary needs include using plant-based alternatives, as mentioned in other sections.

Dietary Substitutions to Customize Your Chicken Kiev
Personalize your Chicken Kiev with easy swaps to fit various diets, making it versatile for home cooks and busy families. For protein alternatives, replace chicken with portobello mushrooms or tofu to suit vegetarians. These changes keep the dish exciting and inclusive.
- Swap parsley with cilantro or basil for a fresh twist on flavors.
- Use gluten-free breadcrumbs to accommodate gluten-free diets.
- Opt for light butter to reduce calories while maintaining taste.
This flexibility ensures everyone, from seniors to baking enthusiasts, can enjoy the meal. Experimenting with these options adds fun to your cooking routine.
Mastering Chicken Kiev: Advanced Tips and Variations
Take your Chicken Kiev to the next level with pro tips and creative twists. Use techniques like double coating in breadcrumbs for enhanced crispiness, or infuse flavors with additions like sun-dried tomatoes. These ideas build on the basic recipe for more impressive results.
| Tips | Benefits |
|---|---|
| Butterfly chicken breasts | Ensures even cooking |
| Use panko crumbs | Provides extra crunch |
| Air fry at 400°F | Offers a lighter option |
Presentation matters too slice the chicken to show the melted butter inside. For more marinade ideas, check out our Italian dressing chicken marinade recipe.
How to Store Chicken Kiev: Best Practices
Proper storage keeps your Chicken Kiev fresh and tasty for later. Refrigerate cooked portions in an airtight container for up to 3 days to maintain quality. Freezing uncooked or cooked pieces wrapped tightly can preserve them for up to 2 months.
- Label frozen items with the date for easy tracking.
- Reheat in an oven at 350°F to keep the crispiness.
- Avoid microwaving to prevent sogginess.
Meal prep by assembling ahead and freezing for busy days, as this saves time without losing flavor. Leftovers can be reheated by sautéing or using an air fryer, extending the dish’s enjoyment.
FAQs: Frequently Asked Questions About Chicken Kiev
How do I make the garlic butter filling for Chicken Kiev?
To make the garlic butter filling, soften unsalted butter at room temperature. Mix in minced garlic, chopped fresh parsley, a squeeze of lemon juice, and a pinch of salt and pepper. Combine well until smooth. Chill the mixture briefly to firm it up before stuffing into the chicken breasts. This flavored butter melts inside the chicken while cooking, giving Chicken Kiev its signature taste.
What is the best way to prepare chicken breasts for Chicken Kiev?
Start with skinless, boneless chicken breasts. Cut each breast horizontally to create a pocket, being careful not to cut all the way through. Stuff the pocket with the chilled garlic butter mixture, then fold and seal the edges tightly using toothpicks or kitchen twine. Season the outside with salt and pepper before breading. This seals in the butter and keeps the chicken juicy.
How should I bread Chicken Kiev to get a crispy crust?
Set up three bowls: one with flour, one with beaten eggs, and one with panko breadcrumbs. First, dredge the stuffed chicken in flour, shaking off excess. Next, dip it in the eggs, then coat thoroughly with panko crumbs. Press gently to help the crumbs adhere. This triple coating creates a golden, crispy crust when fried or air fried.
Can I cook Chicken Kiev using an air fryer instead of frying in oil?
Yes, Chicken Kiev can be cooked in an air fryer for a healthier option. Preheat the air fryer to 400°F. Lightly spray the breaded chicken with oil, place it in the basket without crowding, and cook for 6 to 8 minutes. Flip halfway through to ensure even browning. The air fryer crisps the coating while keeping the chicken tender and juicy.
What side dishes go well with Chicken Kiev?
Chicken Kiev pairs nicely with a variety of sides. Traditional options include mashed potatoes, steamed vegetables like green beans or asparagus, and a fresh garden salad. Rice pilaf or buttered noodles also complement the rich, buttery flavor of Chicken Kiev well. Choose sides that balance the dish’s richness with freshness or mild seasoning.
Chicken Kiev
🧈 Chicken Kiev Recipe features a luscious garlic butter filling that melts inside tender chicken breasts for a rich and flavorful experience.
🍗 The crispy breaded coating provides a satisfying crunch, making this classic dish perfect for special dinners and comforting meals.
- Total Time: 40 minutes
- Yield: 6 servings 1x
Ingredients
6 tablespoons unsalted butter at room temperature
1 large garlic clove, minced
1 tablespoon lemon juice
lemon wedges for serving
2 tablespoons chopped fresh parsley
extra parsley for garnish
1/2 teaspoon sea salt
1/2 teaspoon freshly ground black pepper
3 large chicken breasts (12 oz each)
2 eggs, beaten
1/2 cup all-purpose flour
2 cups panko bread crumbs (regular breadcrumbs can be used if needed)
1/2 teaspoon salt and pepper for seasoning
Extra light olive oil or canola oil for sautéing
Instructions
1-First: make the lemon-herb garlic butter by mashing 6 tablespoons of softened unsalted butter with 1 large minced garlic clove, 1 tablespoon lemon juice, 2 tablespoons chopped fresh parsley, 1/2 teaspoon sea salt, and 1/2 teaspoon freshly ground black pepper until well combined. This mixture adds the heart of the dish’s flavor. Slice each of the 3 large chicken breasts (12 oz each) in half lengthwise to create a total of 6 cutlets, then carefully cut a pocket in each without going through.
2-Stuffing and Breading the Chicken: Stuff each pocket with about 1 tablespoon of the flavored butter, seal the edges, and season with 1/2 teaspoon salt and pepper. Set up a breading station with 1/2 cup all-purpose flour, 2 beaten eggs, and 2 cups panko bread crumbs. Dredge each piece in flour, dip in eggs, and coat with crumbs for that crispy layer.
3-Heat oil in a skillet to 350-375°F and fry the chicken in batches for 4 minutes per side until golden. Check for doneness at 165°F. Serve with a sprinkle of salt, fresh parsley, and lemon wedges. Adaptations for dietary needs include using plant-based alternatives, as mentioned in other sections.
Notes
🔪 If pocket is accidentally cut through, fold a flap to seal from outside.
🥄 Use panko breadcrumbs for extra crunchy coating.
🔥 Use neutral, high-smoke point oils like canola or extra light olive oil for frying.
- Prep Time: 20 minutes
- Cook Time: 20 minutes
- Category: Main Course
- Method: Stuffing, Breaded Frying
- Cuisine: European
- Diet: Gluten
Nutrition
- Serving Size: 1 piece (one stuffed chicken cutlet)
- Calories: 384
- Sugar: 1 g
- Sodium: 623 mg
- Fat: 24 g
- Saturated Fat: 9 g
- Trans Fat: 0.5 g
- Carbohydrates: 23 g
- Fiber: 1 g
- Protein: 18 g
- Cholesterol: 121 mg


