
Why You’ll Love This Candy Corn Rice Krispie Treats
Let me share why this Candy Corn Rice Krispie Treats recipe has become a family favorite in our house. It’s super easy to whip up, taking only a few minutes, which makes it ideal for busy parents like me who want to create something fun without spending forever in the kitchen. Plus, the mix of crunchy rice krispies and sweet layers brings that classic candy corn vibe straight to your Halloween snacks table.
One thing I love is how these treats appeal to everyone, from kids to adults, with their festive colors and taste that feels just right for the season. You can make them gluten-free too, which means no one gets left out at your Halloween party. Overall, it’s a simple joy that turns ordinary moments into memorable ones, perfect for baking with children or surprising friends with festive treats.
To add more excitement, these Candy Corn Rice Krispie Treats let you get creative with colors and flavors, making them a hit for holiday gatherings. If you’re looking for more ideas on seasonal desserts, check out our pumpkin cheesecake recipe for another fun fall option. This recipe really shines as a quick, tasty way to celebrate Halloween without any fuss.
Key Benefits of This Recipe
First off, the ease of preparation means you can involve the little ones and turn it into a fun activity, just like when I make these with my kids and we end up laughing through the messes. It’s not only simple but also packs in some nutritional perks since it’s naturally gluten-free and uses basic ingredients. That way, you get to enjoy festive halloween snacks that feel a bit lighter on the wellness side.
Another great part is the versatility you can tweak it for different diets, making it accessible for busy parents, students, or even baking enthusiasts. I always find that adding these to our family traditions brings everyone together around the table. You’ll love how this candy corn rice krispie treats recipe delivers a distinctive flavor that mixes nostalgia with a modern twist.
If you’re new to making festive treats, this one is a game-changer because it’s kid-friendly and doesn’t require fancy tools. We’ve made it so many times that it’s now our go-to for halloween recipes. For more inspiration on easy desserts, you might enjoy our chocolate-covered strawberries guide, which adds a sweet touch to any occasion.
Jump To
- 1. Why You’ll Love This Candy Corn Rice Krispie Treats
- 2. Essential Ingredients for Candy Corn Rice Krispie Treats
- 3. How to Prepare the Perfect Candy Corn Rice Krispie Treats: Step-by-Step Guide
- 4. Dietary Substitutions to Customize Your Candy Corn Rice Krispie Treats
- 5. Mastering Candy Corn Rice Krispie Treats: Advanced Tips and Variations
- 6. How to Store Candy Corn Rice Krispie Treats: Best Practices
- 7. FAQs: Frequently Asked Questions About Candy Corn Rice Krispie Treats
- 8. Candy Corn Rice Krispie Treats
Essential Ingredients for Candy Corn Rice Krispie Treats
When it comes to making these delightful Candy Corn Rice Krispie Treats, the ingredients are what bring the magic. This recipe focuses on creating three colorful layers that mimic the look of real candy corn, making it a standout choice for festive treats. Let’s break it down into a clear, structured list so you can follow along easily and grab exactly what you need.
Ingredients for the Yellow Layer
- 2 1/2 cups mini marshmallows
- 2 tablespoons butter
- Big pinch of salt
- 5 drops yellow food gel
- 2 1/4 cups crisp rice cereal
Ingredients for the Orange Layer
- 1 3/4 cups mini marshmallows
- 2 tablespoons butter
- Big pinch of salt
- 5 drops yellow food gel
- 1-2 drops red food gel
- 1 1/4 cups plus 2 tablespoons crisp rice cereal
Ingredients for the White Layer
- 3/4 cup mini marshmallows
- 1 tablespoon butter
- Big pinch of salt
- 3/4 cup crisp rice cereal
Overall, this recipe uses about one 10-ounce bag of mini marshmallows, keeping things straightforward and efficient. It’s naturally sweet and gluten-free, which makes it perfect for families with various dietary needs. Remember, measuring your marshmallows in a liquid measuring cup without compressing them helps get the right amount every time.
How to Prepare the Perfect Candy Corn Rice Krispie Treats: Step-by-Step Guide
Getting these Candy Corn Rice Krispie Treats just right is all about following a simple process that even beginners can master. This layered approach makes them look like actual candy corn, turning your kitchen into a Halloween fun zone. Start by gathering your ingredients and greasing an 8 or 9-inch cake pan to avoid any sticking issues.
Step-by-Step Directions
- Spray or grease an 8 or 9-inch cake pan to prepare it for the layers.
- For the Yellow Layer: In a microwave-safe bowl, melt 2 1/2 cups mini marshmallows, 2 tablespoons butter, and a big pinch of salt on high for about 30 seconds, or until smooth. Stir in 5 drops yellow food gel and 2 1/4 cups crisp rice cereal until combined, then press the mixture around the edges of the pan to form a ring.
- For the Orange Layer: Using the same bowl without washing it, melt 1 3/4 cups mini marshmallows, 2 tablespoons butter, and a big pinch of salt on high until smooth. Stir in 5 drops yellow food gel and 1-2 drops red food gel for the perfect orange shade, then mix in 1 1/4 cups plus 2 tablespoons crisp rice cereal. Press this firmly inside the yellow ring in the pan.
- For the White Layer: In a clean microwave-safe bowl, melt 3/4 cup mini marshmallows, 1 tablespoon butter, and a big pinch of salt on high until smooth. Stir in 3/4 cup crisp rice cereal until combined, then press it into the center of the pan, filling the space inside the orange layer.
- Let the layered treat cool completely in the pan for at least 2 hours so it sets properly.
- Once cooled, remove from the pan and slice into wedge-shaped pieces to make them resemble candy corn.
The whole process takes about 25 minutes total, with 20 minutes for prep and 5 minutes for cooking, making it a quick activity for baking with children. Buttering your hands can help when pressing the mixtures to prevent sticking, and you can adjust the food gel drops for brighter colors if you like.

Dietary Substitutions to Customize Your Candy Corn Rice Krispie Treats
One of the best parts about this Candy Corn Rice Krispie Treats recipe is how easy it is to adapt for different needs. Whether you’re cooking for vegans, those with gluten issues, or anyone watching their calories, a few tweaks go a long way. Let’s look at some simple changes to make these treats work for everyone in your group.
Options for Different Diets
| Dietary Need | Substitution |
|---|---|
| Vegan | Replace butter with coconut oil and use vegan marshmallows to keep the layers sticky and delicious. |
| Gluten-Free | Ensure the crisp rice cereal is certified gluten-free, as the recipe already is by nature. |
| Low-Calorie | Opt for sugar-free marshmallows and reduce butter slightly to cut down on sweetness without losing the fun. |
For added flavor, you might try mixing in a dash of cinnamon for a seasonal twist, though the original stays true to classic halloween snacks. These adjustments help make your Candy Corn Rice Krispie Treats a hit for busy parents, students, or food enthusiasts exploring new options.
Mastering Candy Corn Rice Krispie Treats: Advanced Tips and Variations
Once you’re comfortable with the basics of Candy Corn Rice Krispie Treats, it’s time to level up with some pro tips and fun variations. Melting the marshmallows on low heat ensures a smooth texture, avoiding any burnt bits that could ruin the fun. I always experiment a bit to keep things exciting, like adding white chocolate chips for an extra burst of flavor.
Tips for Better Results
- Melt marshmallows slowly while stirring to get that perfect gooey consistency.
- Mix in flavors like sea salt or white chocolate to enhance the taste of your festive treats.
- Cut into candy corn shapes with cookie cutters for a cool presentation that kids will love.
- Prepare ahead and store in an airtight container for up to a week, ideal for busy schedules.
As
one baking enthusiast shared, ‘These treats are a lifesaver for holiday parties they look amazing and taste even better with a few tweaks!’, which really captures the joy of customizing. For more dessert ideas, try our butter pecan layer cake recipe to expand your baking skills.
How to Store Candy Corn Rice Krispie Treats: Best Practices
Storing your Candy Corn Rice Krispie Treats properly keeps them fresh and tasty, so you can enjoy them beyond the day you make them. Keep them at room temperature in an airtight container for up to 3 days to maintain that soft, chewy texture. If you want them to last longer, freezing is a great option.
Storage Methods
- Store in an airtight container at room temperature for up to 3 days.
- Wrap pieces in plastic wrap and freeze for up to 2 months.
- Thaw frozen treats at room temperature without microwaving to keep the texture intact.
- Plan ahead for meal prep by making batches and storing them for easy snacks during the week.
This approach works well for anyone on the go, like working professionals or newlyweds looking for quick treats.

FAQs: Frequently Asked Questions About Candy Corn Rice Krispie Treats
How do you make Candy Corn Rice Krispie Treats at home?
To make Candy Corn Rice Krispie Treats, melt 3 tablespoons of butter in a large saucepan over low heat. Add a 10-ounce bag of mini marshmallows and stir until completely melted. Remove from heat and quickly stir in 6 cups of Rice Krispies cereal until well coated. Fold in about 1 to 1.5 cups of candy corn pieces. Press the mixture into a greased 9×13-inch pan using a buttered spatula for even spreading. Let it cool for at least 30 minutes, then cut into squares. This recipe delivers a festive, sweet treat perfect for Halloween or fall gatherings.
Can I substitute candy corn with other candies in Rice Krispie Treats?
Yes, candy corn can be substituted with other candies like chocolate chips, M&M’s, or festive sprinkles to customize your Rice Krispie Treats. Keep in mind that some candies like chocolate chips may melt if added while the marshmallow mixture is still hot, so let the mixture cool slightly before folding them in. Using candies with different textures can add unique flavor and visual interest, allowing you to tailor treats to different holidays or personal preferences.
How should Candy Corn Rice Krispie Treats be stored to keep them fresh?
Store Candy Corn Rice Krispie Treats in an airtight container at room temperature to keep them fresh for up to 3 days. For longer storage, you can wrap individual pieces tightly in plastic wrap and freeze them for up to 2 weeks. When ready to eat, thaw at room temperature for about 30 minutes. Avoid refrigerating, as this can cause the treats to harden and lose their soft, chewy texture.
Are Candy Corn Rice Krispie Treats suitable for kids with dietary restrictions?
Traditional Candy Corn Rice Krispie Treats contain ingredients like marshmallows and candy corn, which may have gelatin and artificial colors, making them unsuitable for vegans or those with certain dietary restrictions. For gluten-free options, ensure you use gluten-free Rice Krispies cereal. To make the treats vegetarian or vegan, substitute marshmallows with plant-based alternatives and use allergy-friendly candy. Always check ingredient labels carefully to accommodate specific dietary needs.
What is the best way to cut Candy Corn Rice Krispie Treats without crumbling?
To cut Candy Corn Rice Krispie Treats cleanly, first allow them to cool and set completely at room temperature. Use a sharp knife sprayed lightly with cooking spray or dipped in hot water to prevent sticking. Slice the treats in a single, firm motion without sawing back and forth to maintain clean edges and prevent crumbling. Wiping the knife between cuts helps keep the slices neat, making your treats look as good as they taste.
Candy Corn Rice Krispie Treats
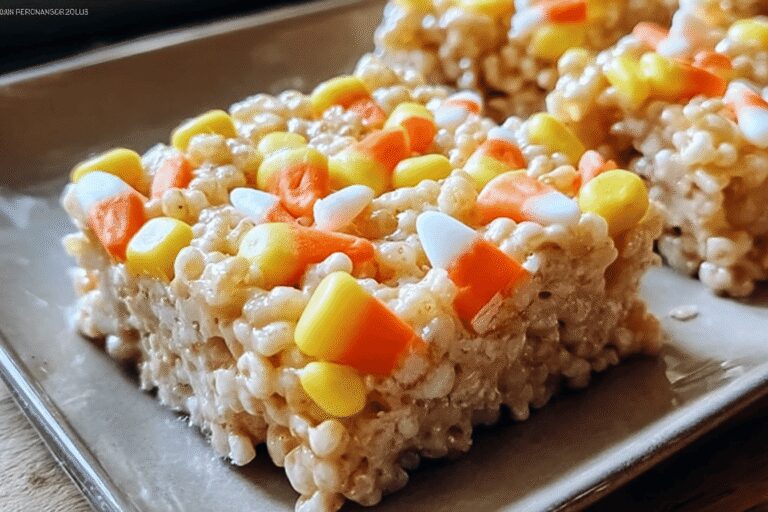
🍬 These Candy Corn Rice Krispies Treats bring festive Halloween fun with colorful, layered sweetness that kids and adults will love.
🎃 The three distinct layers of yellow, orange, and white mimic classic candy corn, making these treats perfect for holiday parties and family activities.
- Total Time: 25 minutes
- Yield: 8-10 pieces
Ingredients
– 2 1/2 cups mini marshmallows
– 2 tablespoons butter
– Big pinch of salt
– 5 drops yellow food gel
– 2 1/4 cups crisp rice cereal
– 1 3/4 cups mini marshmallows
– 2 tablespoons butter
– Big pinch of salt
– 5 drops yellow food gel
– 1-2 drops red food gel
– 1 1/4 cups plus 2 tablespoons crisp rice cereal
– 3/4 cup mini marshmallows
– 1 tablespoon butter
– Big pinch of salt
– 3/4 cup crisp rice cereal
Instructions
1-Spray or grease an 8 or 9-inch cake pan to prepare it for the layers.
2-For the Yellow Layer: In a microwave-safe bowl, melt 2 1/2 cups mini marshmallows, 2 tablespoons butter, and a big pinch of salt on high for about 30 seconds, or until smooth. Stir in 5 drops yellow food gel and 2 1/4 cups crisp rice cereal until combined, then press the mixture around the edges of the pan to form a ring.
3-For the Orange Layer: Using the same bowl without washing it, melt 1 3/4 cups mini marshmallows, 2 tablespoons butter, and a big pinch of salt on high until smooth. Stir in 5 drops yellow food gel and 1-2 drops red food gel for the perfect orange shade, then mix in 1 1/4 cups plus 2 tablespoons crisp rice cereal. Press this firmly inside the yellow ring in the pan.
4-For the White Layer: In a clean microwave-safe bowl, melt 3/4 cup mini marshmallows, 1 tablespoon butter, and a big pinch of salt on high until smooth. Stir in 3/4 cup crisp rice cereal until combined, then press it into the center of the pan, filling the space inside the orange layer.
5-Let the layered treat cool completely in the pan for at least 2 hours so it sets properly.
6-Once cooled, remove from the pan and slice into wedge-shaped pieces to make them resemble candy corn.
Notes
🍴 Measure marshmallows using a liquid measuring cup without compressing them for best results.
🧼 Use the same bowl for the yellow and orange layers to reduce cleanup but a clean bowl for the white layer to keep it pure white.
🖐️ Butter your hands to prevent sticking when pressing each layer into the pan.
- Prep Time: 20 minutes
- Cook Time: 5 minutes
- Category: Snack, Dessert
- Method: Melting, Pressing
- Cuisine: American
- Diet: Gluten-Free
Nutrition
- Serving Size: 1 piece


