
Why You’ll Love This Pilgrim Hat Cookies
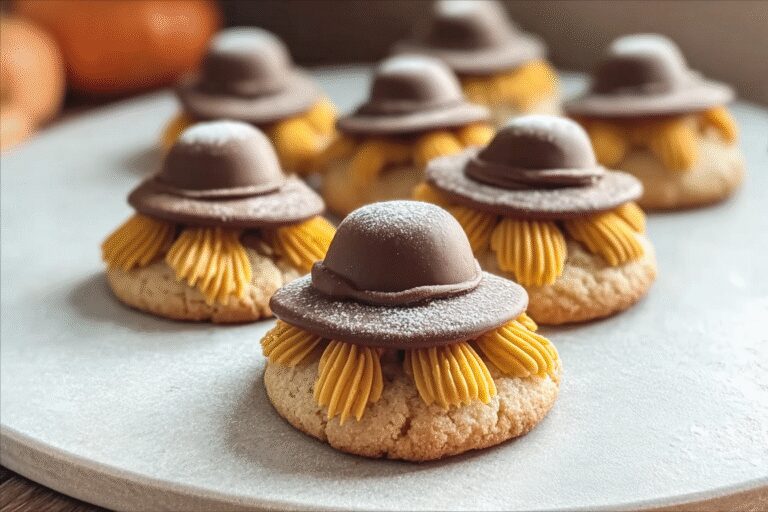
Pilgrim Hat Cookies are a fun and festive treat that captures the spirit of Thanksgiving without any baking required. This recipe stands out for its simplicity, taking just about 25 minutes from start to finish, which makes it ideal for busy parents or anyone hosting a holiday gathering. Whether you’re a baking enthusiast or a beginner, these no bake cookies offer a delightful way to get creative in the kitchen.
One of the best parts about Pilgrim Hat Cookies is how easy they are to put together, using everyday ingredients that you might already have on hand. They provide a touch of holiday magic with their cute shape and flavors that everyone enjoys. Plus, you can customize them to fit different tastes, making them a versatile option for family events or quick desserts.
Beyond the ease, these Thanksgiving treats bring a sense of joy and togetherness. Imagine sharing them at a table full of loved ones, evoking memories of past holidays with every bite. This recipe not only satisfies your sweet tooth but also adds a playful element to your celebrations, perfect for home cooks looking for easy Thanksgiving Pilgrim Hat Cookies.
Jump To
- 1. Why You’ll Love This Pilgrim Hat Cookies
- 2. Essential Ingredients for Pilgrim Hat Cookies
- 3. How to Prepare the Perfect Pilgrim Hat Cookies: Step-by-Step Guide
- 4. Dietary Substitutions to Customize Your Pilgrim Hat Cookies
- 5. Mastering Pilgrim Hat Cookies: Advanced Tips and Variations
- 6. How to Store Pilgrim Hat Cookies: Best Practices
- 7. FAQs: Frequently Asked Questions About Pilgrim Hat Cookies
- 8. Pilgrim Hat Cookies
Essential Ingredients for Pilgrim Hat Cookies
Gathering the right ingredients is key to making perfect Pilgrim Hat Cookies. Below is a structured list of all the items you’ll need, based on the recipe details. Each ingredient is listed with its precise measurement to ensure you get the quantities just right for a successful batch.
- 12 fudge-striped cookies
- 1/3 cup yellow frosting
- 12 miniature peanut butter candy cups, unwrapped
- 12 orange mini candy-coated chocolates
This list covers everything required for the recipe, keeping it straightforward and fun. For instance, the fudge-striped cookies serve as the base, while the yellow frosting acts as the glue that holds everything together in the classic hat shape.
How to Prepare the Perfect Pilgrim Hat Cookies: Step-by-Step Guide
Getting started with Pilgrim Hat Cookies is as simple as following a few easy steps. Begin by lining a baking sheet with parchment paper and arranging the 12 fudge-striped cookies in a single layer with the striped side facing up. This sets the stage for building your adorable treats and ensures they hold their shape well.
Next, fill a piping bag fitted with a large round tip with the 1/3 cup of yellow frosting. Pipe a dollop of frosting that’s slightly larger than the peanut butter candy onto the center of each cookie. If you don’t have a piping bag, a zip-lock bag with a small cut corner works just as well for this step.
Then, press a miniature peanut butter candy cup upside down into the frosting so it spreads out like a hatband. Add an orange mini candy-coated chocolate on top of the frosting band to create a buckle, giving your cookies that signature Pilgrim Hat Cookies look. Finally, refrigerate the cookies for 15 to 20 minutes to let the frosting set before serving them up.
For more ideas on no bake desserts, check out our brown butter oatmeal chocolate chip cookies recipe, which offers another quick treat option.

Dietary Substitutions to Customize Your Pilgrim Hat Cookies
Making Pilgrim Hat Cookies even more inclusive is easy with a few smart swaps. For those following plant-based diets, consider using a vegan yellow frosting alternative to replace the traditional one, keeping the fun assembly process intact. This way, everyone at your Thanksgiving gathering can enjoy these no bake cookies without missing a beat.
If you’re dealing with gluten sensitivities, the fudge-striped cookies might need checking for gluten-free options, as they form the base of the recipe. You can also experiment with low-sugar candy alternatives for the peanut butter cups and orange chocolates to cater to diet-conscious individuals. These changes help maintain the recipe’s charm while adapting to various needs.
- Replace yellow frosting with a vegan version for plant-based diets
- Use gluten-free fudge-striped cookies if available
- Opt for sugar-free candy-coated chocolates for a lighter option
With these adjustments, your Pilgrim Hat Cookies can become a hit for busy parents or seniors looking for easy Thanksgiving Pilgrim Hat Cookies that fit their lifestyle.
Mastering Pilgrim Hat Cookies: Advanced Tips and Variations
Taking your Pilgrim Hat Cookies to the next level involves some handy tips that make the process smoother. For example, chill the miniature peanut butter candy cups in the fridge before unwrapping them to keep their shape and avoid any sticking issues. This simple step ensures your cookies look as good as they taste, enhancing the overall experience.
Flavor variations can add a personal twist; try different frosting colors beyond yellow or swap the frosting with melted chocolate for a richer version. You might also include festive decorations like candy corn on top for more detail, making these Thanksgiving treats even more eye-catching. Our chocolate covered strawberries recipe shares similar ideas for creative additions.
Presentation is key, so arrange your cookies on a platter with other no bake desserts for a stunning display. If you’re preparing ahead, remember to store them properly to keep that fresh appeal, turning your baking sessions into memorable family activities.
| Tips | Benefits |
|---|---|
| Use enough frosting to secure the candy | Prevents cookies from falling apart |
| Experiment with decorations | Boosts visual appeal for holidays |
How to Store Pilgrim Hat Cookies: Best Practices
Keeping your Pilgrim Hat Cookies fresh is straightforward with the right methods. Store them in an airtight container at room temperature, in a single layer, for up to one week to maintain their shape and flavor. This approach works well for busy schedules, letting you prepare ahead without worry.
For longer storage, consider freezing the cookies in a sealed bag or container, using parchment paper between layers to prevent sticking. When you’re ready to enjoy them, simply thaw at room temperature. These practices ensure your easy Thanksgiving Pilgrim Hat Cookies stay delightful for future occasions.
This quick recipe not only saves time but also brings families together for holiday fun, perfect for home cooks exploring new flavors.

FAQs: Frequently Asked Questions About Pilgrim Hat Cookies
Can I make Pilgrim Hat Cookies if I don’t have a piping bag for the frosting?
Yes, you can easily frost Pilgrim Hat Cookies without a piping bag. Use a zip-lock bag and cut a tiny hole in one corner to pipe the frosting. This DIY method gives you good control over the frosting flow and is perfect for detailed decorating. Alternatively, you can use a small spoon or knife to spread the frosting if precision is less important.
How long do Pilgrim Hat Cookies stay fresh, and what’s the best way to store them?
Store Pilgrim Hat Cookies in a single layer inside an airtight container at room temperature. Properly stored, they remain fresh for up to one week. Avoid stacking the cookies directly on top of each other to prevent the frosting from smudging. For longer storage, you can freeze them in a sealed container with parchment paper between layers for up to a month.
Can Pilgrim Hat Cookies be prepared ahead of time for a party or event?
Absolutely! You can bake and decorate Pilgrim Hat Cookies a day or two in advance. Once decorated, keep them in an airtight container at room temperature to preserve their texture and taste. If you need to prepare them even earlier, freeze the fully decorated cookies as described above and thaw them at room temperature before serving.
What ingredients are needed to make the frosting for Pilgrim Hat Cookies?
The frosting for Pilgrim Hat Cookies typically requires powdered sugar, butter, vanilla extract, and milk or cream. These ingredients combine to create a smooth, pipeable consistency perfect for decorating. Adjust the milk quantity to achieve your desired thickness—thicker for detailed piping, thinner for spreading.
What’s the easiest way to assemble Pilgrim Hat Cookies to get the classic hat shape?
To assemble Pilgrim Hat Cookies, start by frosting a chocolate wafer cookie, which forms the hat’s brim. Then, pipe frosting onto the center of the wafer and place a chocolate kiss or similar candy on top as the hat’s crown. Add a small strip of fondant or a contrasting frosting band around the base of the chocolate kiss to complete the classic Pilgrim hat look.
Pilgrim Hat Cookies
🧢 Create festive, no-bake Pilgrim Hat Cookies that are quick and perfect for easy Thanksgiving treats.
🍪 These fun cookies combine simple ingredients and require no oven time, making them great for a family activity or last-minute dessert.
- Total Time: 40-45 minutes
- Yield: 12 cookies
Ingredients
– 12 fudge-striped cookies
– 1/3 cup yellow frosting
– 12 miniature peanut butter candy cups, unwrapped
– 12 orange mini candy-coated chocolates
Instructions
1-Getting started with Pilgrim Hat Cookies: Begin by lining a baking sheet with parchment paper and arranging the 12 fudge-striped cookies in a single layer with the striped side facing up. This sets the stage for building your adorable treats and ensures they hold their shape well.
2-Next: fill a piping bag fitted with a large round tip with the 1/3 cup of yellow frosting. Pipe a dollop of frosting that’s slightly larger than the peanut butter candy onto the center of each cookie. If you don’t have a piping bag, a zip-lock bag with a small cut corner works just as well for this step.
3-Then, press a miniature peanut butter candy cup upside down into the frosting so it spreads out like a hatband. Add an orange mini candy-coated chocolate on top of the frosting band to create a buckle, giving your cookies that signature Pilgrim Hat Cookies look. Finally, refrigerate the cookies for 15 to 20 minutes to let the frosting set before serving them up.
Notes
🎯 Using fudge-striped cookies helps achieve the perfect shape and balance with the peanut butter candy cups.
🛠 If a piping bag is not available, use a zip-lock bag with a small cut corner to pipe the frosting.
❄️ Refrigerate the cookies after decorating to set the frosting, and store in an airtight container at room temperature, in a single layer, for up to a week.
- Prep Time: 25 minutes
- Refrigeration Time: 15-20 minutes
- Cook Time: 0 minutes
- Category: Dessert
- Method: No-Bake
- Cuisine: American
- Diet: Vegetarian
Nutrition
- Serving Size: 1 cookie
- Calories: 120
- Sugar: 12g
- Sodium: 70mg
- Fat: 6g
- Saturated Fat: 2g
- Unsaturated Fat: 3g
- Trans Fat: 0g
- Carbohydrates: 16g
- Fiber: 0g
- Protein: 2g
- Cholesterol: 5mg


