
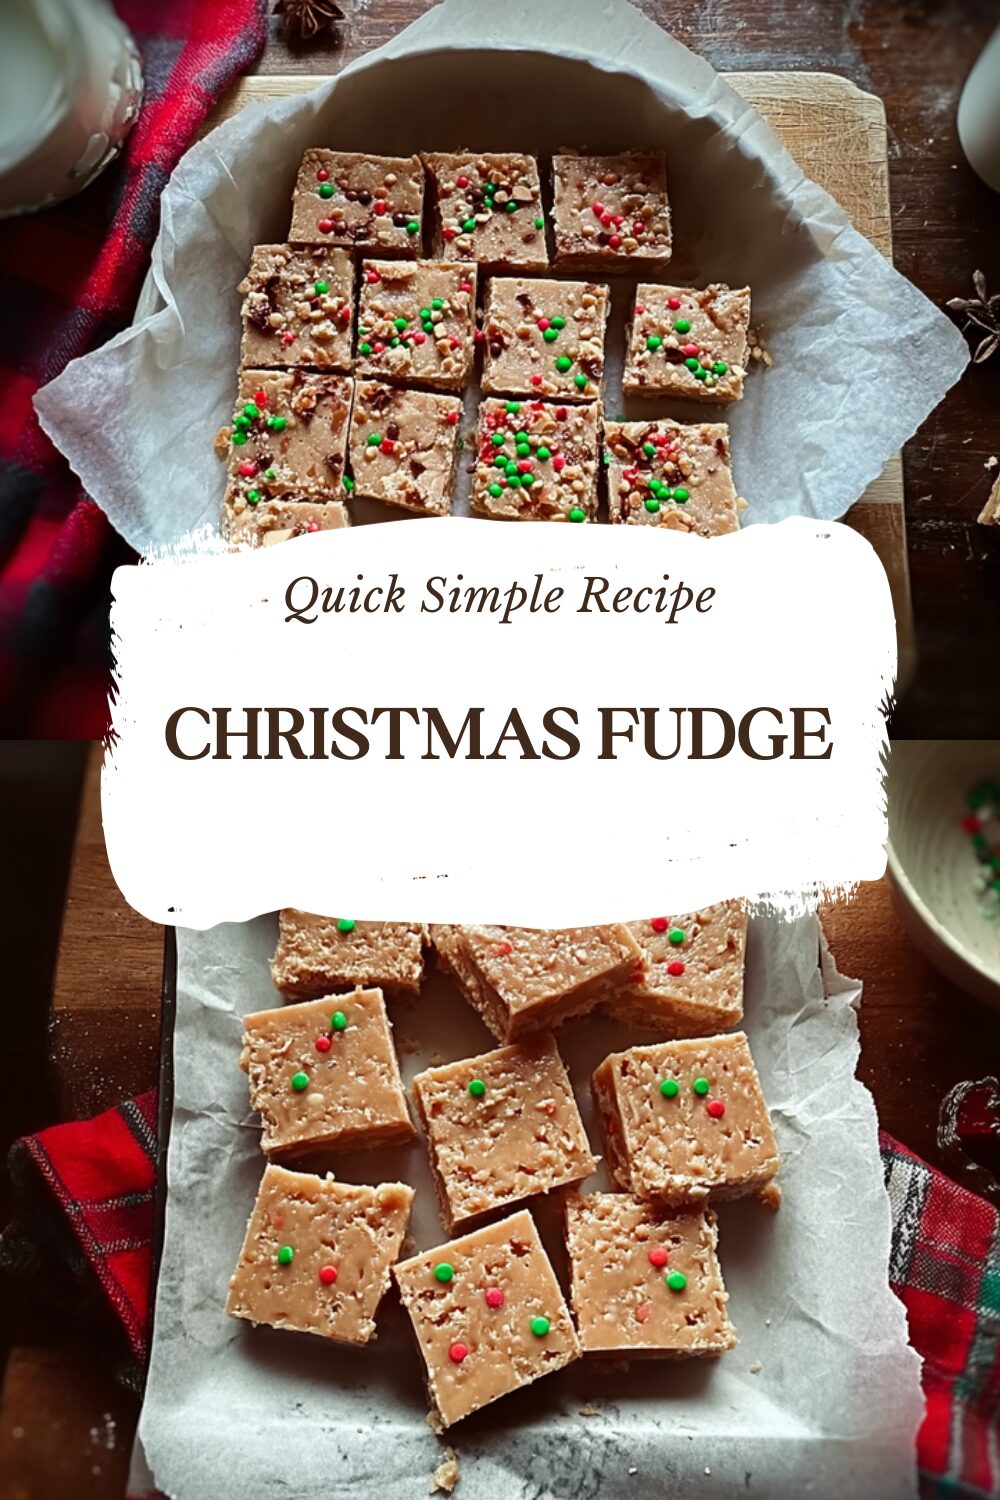
Why You’ll Love This Christmas Fudge
This Christmas fudge recipe stands out as a go-to treat during the holidays, blending simplicity with festive charm that makes it a favorite for busy families. It’s easy to whip up, especially when you’re juggling holiday preparations, and offers a creamy texture that melts in your mouth. Plus, the vibrant colors and rich flavors bring a special touch to your celebrations, making it ideal for sharing with loved ones.
One of the best parts is how straightforward the process is, perfect for home cooks new to baking. You’ll appreciate the minimal ingredients that come together quickly, allowing more time for holiday fun. Whether you’re a student in a dorm or a working professional, this recipe fits right into your schedule without needing fancy tools.
It also caters to various dietary needs, letting everyone enjoy the fun. For instance, you can tweak it slightly for vegan options, ensuring no one feels left out at gatherings. Overall, this fudge combines ease, taste, and versatility into one delightful holiday staple.
Benefits of Easy Preparation
Preparing this Christmas fudge takes just about 15 minutes of active time, plus 2 to 3 hours of chilling, so it’s simple enough for busy parents or seniors. The steps are clear and beginner-friendly, reducing any kitchen stress during the festive season. This means you can focus on creating memories instead of complicated cooking.
From the rich, creamy base made with high-quality white chocolate chips to the festive swirls of red and green, every bite showcases unique flavors. It’s versatile too, letting you adapt it for different tastes while keeping the holiday spirit alive. For more ideas on fun desserts, check out this delicious chocolate treats recipe on our site.
Nutritionally, each piece offers a balance that includes essential fats and vitamins from ingredients like butter and chocolate. While it’s a treat, enjoying it in moderation fits into diets for food enthusiasts or diet-conscious individuals. This fudge not only satisfies your sweet tooth but also adds a nutritious twist to your holiday spread.
Jump To
- 1. Why You’ll Love This Christmas Fudge
- 2. Essential Ingredients for Christmas Fudge
- 3. How to Prepare the Perfect Christmas Fudge: Step-by-Step Guide
- 4. Dietary Substitutions to Customize Your Christmas Fudge
- 5. Mastering Christmas Fudge: Advanced Tips and Variations
- 6. How to Store Christmas Fudge: Best Practices
- 7. FAQs: Frequently Asked Questions About Christmas Fudge
- 8. Christmas Fudge
Essential Ingredients for Christmas Fudge
Gathering the right ingredients is key to making perfect Christmas fudge, and this recipe keeps things simple with everyday items. Each one plays a role in creating that smooth, creamy texture we all love. Below is a complete list of everything you’ll need, measured precisely for accuracy.
- 22 ounces white chocolate chips
- 14-ounce can sweetened condensed milk
- 4 tablespoons unsalted butter, cold and cut into small cubes
- ¼ to ½ teaspoon red gel food coloring
- ¼ to ½ teaspoon green gel food coloring
These ingredients ensure your fudge turns out rich and festive, with the white chocolate providing a sweet base and the food coloring adding holiday vibes. Use full-fat sweetened condensed milk and measure everything accurately to help the fudge set properly. For more inspiration on creamy desserts, explore our tasty cheesecake bars that pair well with holiday treats.
How to Prepare the Perfect Christmas Fudge: Step-by-Step Guide
Creating Christmas fudge at home is easier than you might think, and this guide walks you through it with simple steps. Start by getting your ingredients ready to keep everything smooth and efficient. Follow along for that creamy, swirled delight that’s perfect for any holiday event.
First, line an 8 by 8 inch baking pan with parchment paper, letting excess hang over the sides, and grease the paper to avoid sticking. Then, in a medium saucepan over medium-low heat, combine the white chocolate chips, sweetened condensed milk, and cold butter cubes, stirring constantly for 4 to 6 minutes until melted and smooth. Once off the heat, divide the mixture into three parts, mixing red gel food coloring into one third and green into another, leaving the rest white.
Next, spoon dollops of the white, red, and green fudge randomly into the prepared pan. Use a skewer or butter knife to gently swirl the colors for a decorative pattern. Press a piece of parchment paper on top to smooth it without messing up the design, then refrigerate for 2 to 3 hours until set. Finally, lift the fudge from the pan using the parchment and slice it into 64 pieces of 1 by 1 inch squares before serving.
Preparation Tips for Success
To get the best results, work quickly when adding the gel food coloring since the mixture firms up fast once cooled. Stir constantly while melting to avoid any grainy texture, and use a warm knife for clean cuts by running it under hot water and drying it first. This recipe’s total preparation time is just 15 minutes of active work plus chilling, making it ideal for baking enthusiasts on a tight schedule.
For external resources, check out this guide on holiday fudge ideas that can add more tips to your baking routine.

Dietary Substitutions to Customize Your Christmas Fudge
Everyone has different needs during the holidays, so customizing your Christmas fudge is a great way to make it inclusive. You can swap ingredients to fit vegan, gluten-free, or other preferences while keeping the recipe delicious. Let’s look at some easy changes that maintain the fudge’s rich taste.
For instance, replace sweetened condensed milk with coconut cream for a vegan version, and use dairy-free white chocolate chips. Other options include swapping butter for coconut oil to keep it creamy. These adjustments help ensure that busy parents, students, or seniors can still enjoy this treat.
- Introduce warm spices like cinnamon or nutmeg for added flavor depth.
- Swap nuts for dried fruits if you need a nut-free option.
- Add extracts like peppermint for a festive twist.
These modifications keep the fudge’s integrity intact, making it adaptable for newlyweds or working professionals. Experimenting with these keeps the fun alive while meeting dietary goals.
Mastering Christmas Fudge: Advanced Tips and Variations
Once you’re comfortable with the basics, take your Christmas fudge to the next level with these expert tips. Proper techniques can make your fudge shine, from achieving a smooth finish to adding creative flavors. This section helps you refine your skills for impressive results.
Temper the chocolate by melting it slowly to get that glossy look and prevent any graininess. For variations, try mixing in sea salt or a spicy kick with chili powder. Presentation matters too, so cut into uniform squares and top with edible glitter for a festive touch.
| Tip Category | Description |
|---|---|
| Flavor Enhancements | Add peanut butter swirls or nuts for texture and taste variety. |
| Storage Advice | Prepare ahead and store for up to 5 days in the fridge. |
| Melting Technique | Stir constantly to avoid overheating and keep it smooth. |
Remember to line your pan well and work quickly with colors. To loosen fudge if needed, gently warm it in the microwave for 15-20 seconds and stir without overheating. For external inspiration, explore top fudge collections that offer more ideas.
How to Store Christmas Fudge: Best Practices
Proper storage keeps your Christmas fudge tasting fresh and creamy, extending its enjoyment beyond the holidays. Whether you’re making it ahead or saving leftovers, these methods help maintain quality. Follow these steps to keep your treats just right for family gatherings or quick snacks.
Store the fudge in an airtight container in the refrigerator for up to two weeks. For longer keeping, wrap it tightly and freeze for up to three months. When ready, let it thaw in the fridge overnight to preserve the texture. This approach works well for meal prep, allowing you to portion it out easily.
- Always use airtight containers to prevent moisture.
- Avoid microwave reheating to keep the creamy consistency.
- Label your storage for easy tracking during busy times.
FAQs: Frequently Asked Questions About Christmas Fudge
What ingredients do I need to make Christmas fudge at home?
To make Christmas fudge, you will need white chocolate chips (high quality like Ghirardelli works best), sweetened condensed milk, cold unsalted butter cut into cubes, and gel food coloring in red and green for festive colors. Avoid using evaporated milk or liquid food coloring, as these can affect texture and cause the chocolate to seize. Optional add-ins include crushed candy canes, nuts, or sprinkles to personalize the fudge.
How do I make smooth and creamy Christmas fudge without a candy thermometer?
Melt white chocolate chips, sweetened condensed milk, and butter together slowly over low to medium heat while stirring constantly until smooth. Divide the mixture and add gel food coloring to create red and green portions. Spoon dollops of each color into a lined baking dish and swirl gently with a skewer or knife for a marbled effect. Chill the fudge in the refrigerator for 2 to 3 hours until firm before slicing.
What is the best way to store homemade Christmas fudge?
Store Christmas fudge in an airtight container in the refrigerator to keep it fresh for up to one week. For longer storage, freeze the fudge for up to two months. When ready to eat, thaw it completely in the fridge to maintain the right texture. This prevents moisture buildup and preserves the rich, creamy consistency of the fudge.
Can I customize the flavors and appearance of Christmas fudge?
Yes, you can easily customize Christmas fudge by adjusting the amount of gel food coloring to create your preferred holiday colors. You can also add flavor extracts like peppermint, vanilla, lemon, or coconut to the melted mixture before chilling. Toppings like crushed candy canes, nuts, or festive sprinkles can add texture and visual appeal to your fudge.
What common mistakes should I avoid when making Christmas fudge?
Avoid overheating the mixture, which can cause grainy texture or burning—stir constantly over low heat. Don’t use liquid food coloring, as this may cause the chocolate to seize. Work quickly when adding colors because the fudge firms up fast. Line your pan with parchment paper and grease it lightly to prevent sticking. Cutting the fudge into small squares helps with portion control since the fudge is rich and dense.
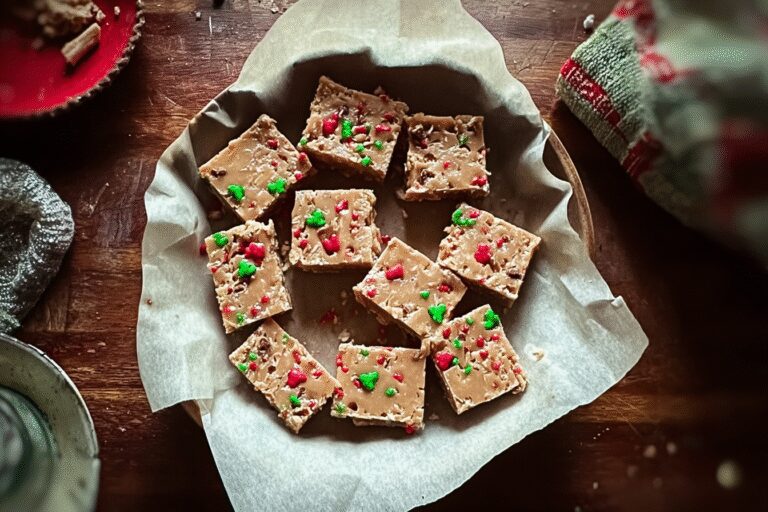
Christmas Fudge
🎄 These Christmas Fudge Recipes offer a rich and creamy holiday treat that’s perfect for festive celebrations.
🍬 With colorful swirls of red, green, and white, they add a decorative touch and irresistible flavor to your dessert table.
- Total Time: 2 hours 21 minutes
- Yield: 64 pieces
Ingredients
– 22 ounces white chocolate chips
– 14-ounce can sweetened condensed milk
– 4 tablespoons unsalted butter, cold and cut into small cubes
– ¼ to ½ teaspoon red gel food coloring
– ¼ to ½ teaspoon green gel food coloring
Instructions
1-First, line an 8 by 8 inch baking pan with parchment paper, letting excess hang over the sides, and grease the paper to avoid sticking.
2-Then, in a medium saucepan over medium-low heat, combine the white chocolate chips, sweetened condensed milk, and cold butter cubes, stirring constantly for 4 to 6 minutes until melted and smooth.
3-Once off the heat, divide the mixture into three parts, mixing red gel food coloring into one third and green into another, leaving the rest white.
4-Next, spoon dollops of the white, red, and green fudge randomly into the prepared pan.
5-Use a skewer or butter knife to gently swirl the colors for a decorative pattern.
6-Press a piece of parchment paper on top to smooth it without messing up the design, then refrigerate for 2 to 3 hours until set.
7-Finally, lift the fudge from the pan using the parchment and slice it into 64 pieces of 1 by 1 inch squares before serving.
Notes
🧈 Line the pan with parchment or foil and grease well, leaving enough overhang to easily lift the fudge out.
🎨 Work quickly when mixing gel food coloring as the fudge firms rapidly once off heat.
💡 To loosen fudge, warm gently in the microwave for 15-20 seconds and stir without overheating.
- Prep Time: 15 minutes
- Chilling Time: 2 to 3 hours
- Cook Time: 6 minutes
- Category: Dessert
- Method: Melting and Swirling
- Cuisine: Western
- Diet: Vegetarian
Nutrition
- Serving Size: 1 piece (1×1 inch)
- Calories: 315 kcal
- Sugar: 36 g
- Sodium: 67 mg
- Fat: 18 g
- Saturated Fat: 11 g
- Unsaturated Fat: 6 g
- Trans Fat: 0.1 g
- Carbohydrates: 37 g
- Fiber: 0.1 g
- Protein: 4 g
- Cholesterol: 24 mg


