
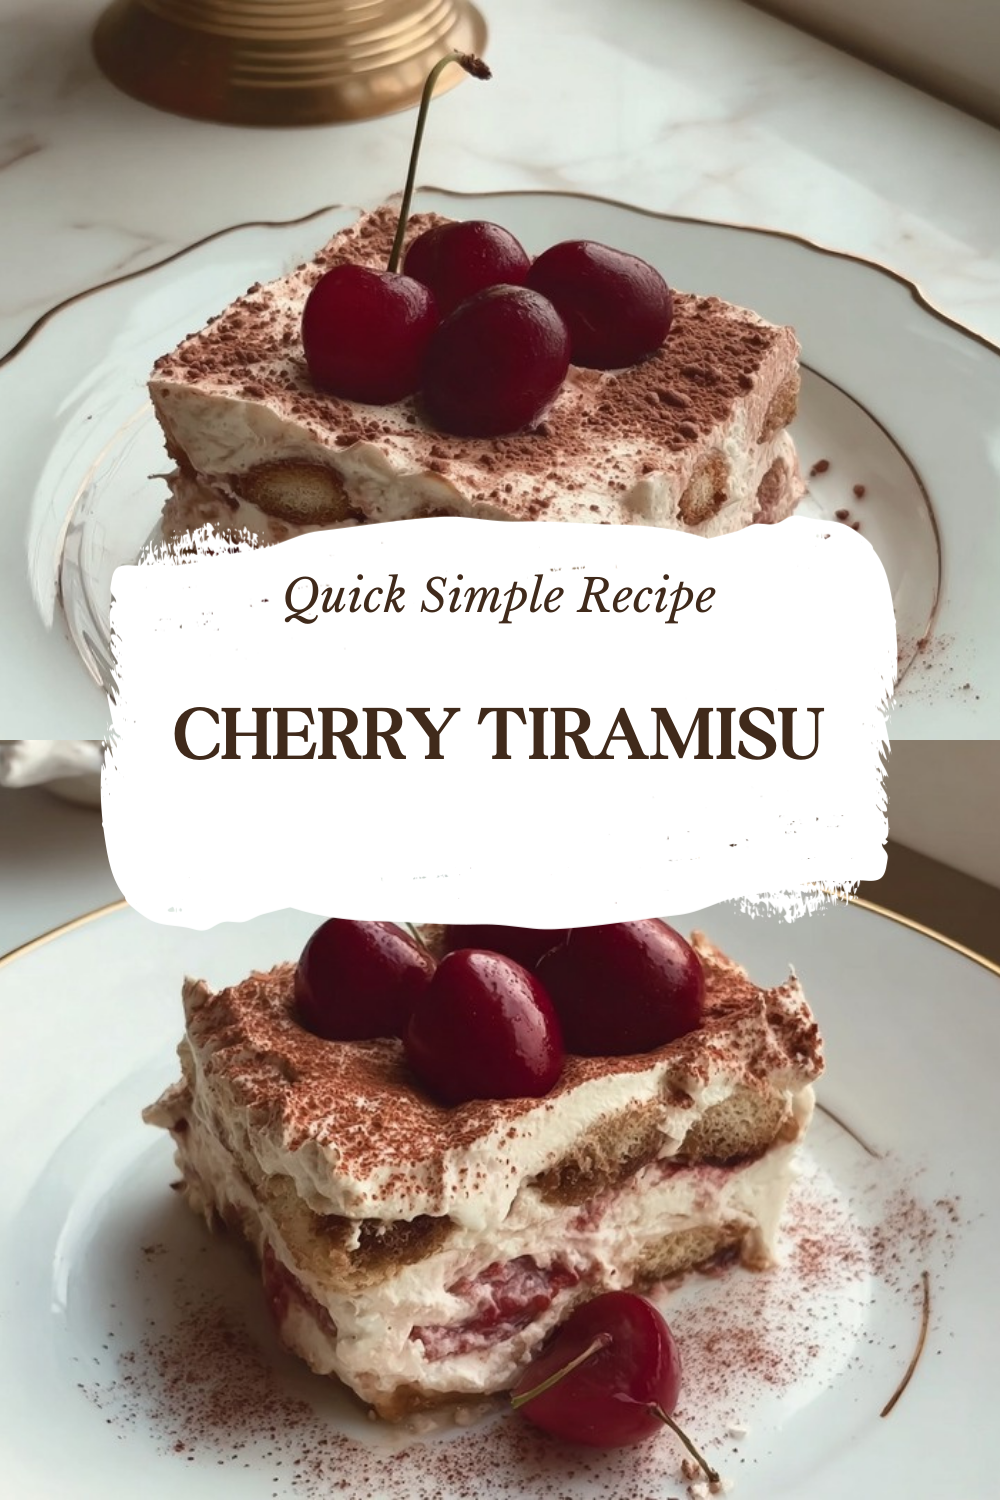
Why You’ll Love This Cherry Tiramisu
If you’re looking for a dessert that feels fancy but doesn’t require hours of fussing in the kitchen, this cherry tiramisu is exactly what you need. It’s one of those recipes that looks impressive on the table but comes together with simple steps anyone can follow. Trust me, your family and friends will think you spent all day making it!
Here’s why this cherry tiramisu deserves a spot in your recipe collection:
- Ease of preparation: No baking required! The most involved part is making a quick cherry compote on the stovetop. After that, it’s just layering ingredients and letting the fridge do the work. Total hands-on time is about an hour, and even beginner cooks can nail it on the first try.
- Health benefits: Sweet cherries pack a nutritional punch they’re loaded with antioxidants, vitamin C, and potassium. According to research on cherry benefits, these vibrant fruits support better sleep and reduce inflammation. Plus, this recipe uses real fruit rather than artificial flavorings.
- Versatility: Whether you need a make-ahead dessert for a dinner party or a sweet treat for a weeknight, this tiramisu adapts beautifully. You can make it alcohol-free, use frozen cherries year-round, or even switch up the presentation with different toppings.
- Distinctive flavor: The combination of juicy cherries, creamy mascarpone, and almond-kissed Amaretto creates something truly special. It’s like a Black Forest cake met an Italian classic, and they decided to be best friends. The tartness from cherries balances perfectly with the rich, sweet cream layers.
Quick prep tip: This dessert actually tastes better after resting overnight, so it’s perfect for entertaining. Make it the day before and relax when your guests arrive!
Jump To
- 1. Why You’ll Love This Cherry Tiramisu
- 2. Essential Ingredients for Cherry Tiramisu
- 3. How to Prepare the Perfect Cherry Tiramisu: Step-by-Step Guide
- 4. Dietary Substitutions to Customize Your Cherry Tiramisu
- 5. Mastering Cherry Tiramisu: Advanced Tips and Variations
- 6. How to Store Cherry Tiramisu: Best Practices
- 7. FAQs: Frequently Asked Questions About Cherry Tiramisu
- 8. Cherry Tiramisu
Essential Ingredients for Cherry Tiramisu
Before diving into this cherry tiramisu recipe, let’s gather everything you’ll need. Having all your ingredients measured and ready makes the process so much smoother you know?
Cherry Layer Ingredients
- 1½ cups pitted sweet cherries, roughly chopped (250g) These form the fruity backbone of the dessert. Fresh sweet cherries work best during summer, but frozen ones are totally fine too.
- 2 tablespoons granulated sugar (25g) Helps draw out the cherry juices and creates a jammy texture when cooked.
- 1 teaspoon cornstarch Thickens the compote so it doesn’t make your layers soggy.
- 2 teaspoons water Mixed with cornstarch to create a smooth slurry before adding to the cherries.
Ladyfinger Soaking Mixture
- 2 tablespoons granulated sugar (25g) Creates a simple syrup base for the Amaretto.
- 2 tablespoons water Dissolves the sugar for a smooth soaking liquid.
- ¼ cup Amaretto (60mL) Adds that signature almond flavor. You can substitute with almond extract plus water for a non-alcoholic version.
- 15 ladyfingers The structural foundation of your tiramisu. Look for crisp, not soft, ladyfingers for best results.
Mascarpone Cream Layer
- 8 oz cold mascarpone cheese The star of any tiramisu! Keep this cold for the fluffiest results. High-quality, thick mascarpone makes a huge difference.
- ¼ cup granulated sugar (50g) Sweetens the cream to balance the tart cherries.
- 2 cold egg yolks Adds richness and helps create that light, airy texture. Keep them cold!
- 2 tablespoons heavy whipping cream (30g) Loosens the mascarpone just enough for easy spreading.
- 1 teaspoon vanilla paste or extract Rounds out the flavors beautifully.
Optional Whipped Cream Topping
- ¾ cup heavy whipping cream (179g) For an extra fluffy finish on top.
- 2 tablespoons powdered sugar (15g) Sweetens the whipped cream without making it grainy.
- 1 teaspoon vanilla Enhances the creamy flavor.
- Freeze-dried cherry powder or cocoa powder For that gorgeous finishing dust!
Special Dietary Options
For those with dietary restrictions, here are some modifications to consider:
- Gluten-free: Use gluten-free ladyfingers, which are available at specialty stores or can be made from scratch.
- Alcohol-free: Replace Amaretto with ¼ cup water plus 1 teaspoon almond extract for the same lovely almond notes.
- Lower calorie: Skip the whipped cream topping and dust directly with cocoa or cherry powder. You can also reduce the sugar in the compote slightly.
- Raw egg concerns: Cook the egg yolks with sugar over a double boiler (bain-marie) until they reach 160°F before whipping with mascarpone.
How to Prepare the Perfect Cherry Tiramisu: Step-by-Step Guide
Alright, let’s walk through making this cherry tiramisu together. Don’t worry it’s easier than you might think! Just follow each step, and you’ll end up with a stunning dessert that tastes as good as it looks.
Step 1: Make the Cherry Compote
Start by preparing the fruity layer that gives this tiramisu its personality. Pit your cherries and roughly chop them you want some texture, not a puree. A boba straw works amazingly well for pitting if you don’t have a cherry pitter!
Place the chopped cherries and 2 tablespoons of granulated sugar in a saucepan over medium heat. Cook them for about 5-7 minutes, stirring occasionally. You’ll notice the cherries releasing their juices and softening up. Keep an eye on them you want them tender but still holding some shape, not turning into mush.
While the cherries cook, mix 1 teaspoon of cornstarch with 2 teaspoons of water in a small bowl to create a smooth slurry. When the cherries are ready, pour this mixture in and stir constantly for about 1 minute until everything thickens nicely. Transfer the compote to a bowl and refrigerate, stirring occasionally as it cools.
Step 2: Prepare the Amaretto Soaking Mixture
Next up is the liquid that gives the ladyfingers their boozy, almond-scented personality. In a small saucepan, combine 2 tablespoons of sugar with 2 tablespoons of water. Heat over medium, stirring until the sugar dissolves completely. Let this simple syrup cool for a few minutes.
Once cooled, stir in the ¼ cup of Amaretto. The smell at this point is absolutely divine! If you’re going alcohol-free, simply add the almond extract to the cooled syrup instead of the liqueur.
Step 3: Whip Up the Mascarpone Cream
Here’s where the magic happens! Make sure your mascarpone, egg yolks, and cream are all cold straight from the fridge this is crucial for getting that light, fluffy texture.
In a mixing bowl, combine 8 oz of cold mascarpone cheese, ¼ cup of granulated sugar, 2 cold egg yolks, 2 tablespoons of heavy whipping cream, and 1 teaspoon of vanilla. Beat everything on medium-high speed for 2-3 minutes until the mixture turns light and fluffy. You’ll see it transform from dense to airy and spreadable.
Pro tip: Don’t overbeat! Stop once the cream looks smooth and fluffy. Overmixing can make the mascarpone separate and turn grainy.
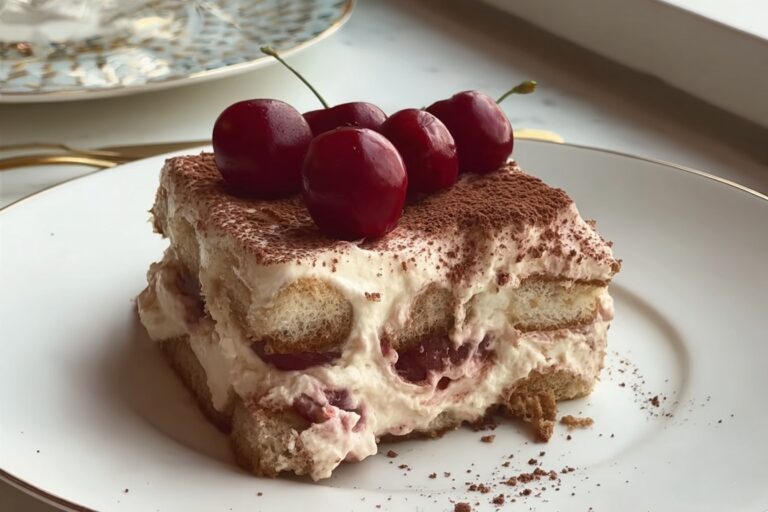
Step 4: Assemble Your Cherry Tiramisu Layers
Now comes the fun part putting it all together! Grab a loaf pan (a 9×5 inch pan works perfectly) and let’s build those beautiful layers.
Take your ladyfingers one at a time and dip them briefly into the Amaretto mixture. Roll them quickly to coat all sides, then place them in the bottom of your pan. You’ll need about 6-7 ladyfingers for the first layer, depending on their size. Work quickly ladyfingers absorb liquid fast, and you don’t want them soaking wet, just dampened.
Spread half of your cooled cherry compote evenly over the ladyfingers. Then add half of the mascarpone cream, spreading it all the way to the edges. Repeat these layers one more time: remaining ladyfingers (dipped and drained), the rest of the cherries, and finally the remaining mascarpone cream.
Step 5: Chill Overnight for Best Results
Cover your assembled tiramisu with plastic wrap or a lid and pop it in the refrigerator. Here’s the thing this dessert needs time. Plan for at least 6 hours of chilling, but overnight (about 12 hours) is honestly best. The flavors meld together, the ladyfingers soften to just the right consistency, and the whole thing becomes sliceable rather than messy.
The waiting is the hardest part, but so worth it! While you’re waiting, you might want to check out this gorgeous zuccotto cake for another stunning Italian-inspired dessert.
Step 6: Add the Optional Whipped Cream Topping
Before serving, you can add an extra layer of indulgence with whipped cream. Chill your mixing bowl and whisk attachment in the freezer for 15 minutes this helps the cream whip up faster and fluffier.
Beat ¾ cup of heavy whipping cream with 2 tablespoons of powdered sugar and 1 teaspoon of vanilla until soft peaks form. Spread this over the top of your chilled tiramisu, then dust with freeze-dried cherry powder for a tart finish or cocoa powder for classic Black Forest vibes.
Slice and serve! This recipe makes about 8 servings, perfect for sharing with family or friends.
| Nutritional Information | Per Serving (Estimate) |
|---|---|
| Calories | 404 kcal |
| Carbohydrates | 35g |
| Protein | 6g |
| Fat | 26g (Saturated: 15g) |
| Cholesterol | 158mg |
| Sodium | 59mg |
| Potassium | 108mg |
| Fiber | 1g |
| Sugar | 20g |

Dietary Substitutions to Customize Your Cherry Tiramisu
One of the things I love about this cherry tiramisu is how adaptable it is. Whether you’re dealing with dietary restrictions or just missing an ingredient, there’s usually a workaround that still delivers delicious results.
Protein and Main Component Alternatives
The mascarpone cheese is really the heart of any tiramisu, and I have to be honest with you substituting it changes the character of the dessert. Some folks ask about using cream cheese, but it’s tangier and denser than mascarpone, which creates a different texture entirely. If you absolutely need to substitute, blend 12 oz of room-temperature cream cheese with ¼ cup heavy cream and 2 tablespoons powdered sugar to lighten it up.
For those avoiding dairy, plant-based mascarpone alternatives exist at specialty grocery stores. Coconut cream can also work in a pinch just make sure to chill it overnight and scoop out the solid part, leaving the liquid behind. Whip it with sugar just like regular cream.
Regarding the eggs: raw egg yolks traditional in tiramisu can concern some people. If you prefer cooked eggs, whisk the yolks with sugar in a heatproof bowl over simmering water (bain-marie) until the mixture reaches 160°F and thickens. Cool completely before whipping with mascarpone. This pasteurizes the eggs while maintaining that silky texture.
Vegetable, Sauce, and Seasoning Modifications
The cherry compote offers lots of room for creativity. When fresh cherries aren’t in season, frozen cherries work beautifully just thaw them completely and drain excess liquid before cooking. You might need to adjust cooking time slightly since frozen cherries release more water.
Want deeper cherry flavor? A splash of Kirsch (cherry brandy) in the compote intensifies the fruit notes beautifully. Or try adding a pinch of cinnamon or a strip of lemon zest while cooking the cherries for subtle flavor variations.
For the soaking liquid, Amaretto brings that wonderful almond essence, but you’ve got options. Kirsch leans more cherry-forward, while coffee creates a more traditional tiramisu flavor profile. For a totally non-alcoholic version, combine ¼ cup extra water with 1 teaspoon almond extract and your simple syrup. The almond flavor still comes through beautifully!
The topping is another place to play. Freeze-dried cherry powder creates a stunning ruby dust that tastes tart and fruity. Cocoa powder gives more classic tiramisu vibes. Or try finely chopped toasted almonds for crunch and extra almond flavor. Research published in the Journal of Nutritional Science suggests that incorporating varied fruit-based toppings can increase antioxidant intake while adding visual appeal.
Mastering Cherry Tiramisu: Advanced Tips and Variations
Ready to take your cherry tiramisu game to the next level? Let’s talk about some techniques that’ll make your dessert truly memorable.
Pro Cooking Techniques
The temperature of your mascarpone mixture matters more than you might think. Cold ingredients whip up fluffier because the fat stays solid and creates structure. If your mascarpone is room temperature, the mixture will be softer and harder to layer neatly. So plan ahead and pull everything cold from the fridge right before whipping.
Another game-changer: don’t oversoak your ladyfingers. A quick dip and roll is all they need. Soggy ladyfingers make a mushy tiramisu, and nobody wants that. The biscuits should feel slightly damp but not waterlogged.
When spreading the mascarpone layer, use gentle strokes with an offset spatula. Press too hard and you’ll push the cherries around. Light, feathering motions give you the smoothest surface.
Flavor Variations
Once you’ve mastered the classic cherry tiramisu, try these delicious twists:
- Black Forest Style: Dust with cocoa powder and add shaved dark chocolate between layers. This leans into the chocolate-cherry combination and tastes absolutely decadent.
- Summer Berry Mix: Substitute half the cherries with mixed berries (raspberries, blueberries, blackberries) for a more complex fruit profile. The varying sweetness levels create interesting flavor dimension.
- Chocolate Cherry: Spread a thin layer of chocolate ganache over the ladyfingers before adding the cherry compote. Rich and intensely satisfying!
- Spiced Version: Add a pinch of cardamom or a cinnamon stick to the cherry compote while cooking. Warm spices complement the cherries beautifully, especially in fall and winter.
Presentation Tips
For a dinner party, consider making individual tiramisu servings in small glass cups or ramekins. Layer the same way, just in smaller vessels. Guests love having their own personal desserts! Plus, the layers show beautifully through clear glass.
When slicing a large tiramisu, use a sharp knife dipped in hot water and wiped clean between cuts. This gives you picture-perfect slices with distinct layers. For extra wow-factor, serve each slice with a fresh cherry on top and a sprig of mint.
Make-Ahead Options
This dessert is a meal-prepper’s dream! You can make the cherry compote up to 2 days ahead and store it covered in the fridge. The mascarpone cream can be prepared a day ahead too just give it a quick whisk before assembling.
For entertaining, fully assemble the tiramisu the day before your event. It actually improves with time! Add the whipped cream topping and dust just before serving. Speaking of make-ahead desserts, this pumpkin cheesecake is another fantastic option for entertaining.
How to Store Cherry Tiramisu: Best Practices
So you’ve made this gorgeous cherry tiramisu now how do you keep it fresh and delicious for as long as possible? Here’s everything you need to know about storage.
Refrigeration
Your tiramisu should always be stored covered in the refrigerator. It will stay fresh for up to 5 days when properly stored. Cover the surface directly with plastic wrap to prevent a skin from forming on the mascarpone, then add another layer of wrap or a lid over the container.
The texture may soften slightly over time as the ladyfingers continue absorbing moisture, but flavors will actually develop and deepen. Day two or three tiramisu often tastes even better than day one!
Freezing
Can you freeze tiramisu? Technically yes, but I wouldn’t recommend it. The mascarpone cream tends to separate when thawed, and the texture becomes watery and grainy. The cherry layer also releases additional liquid during the freeze-thaw cycle, making everything soggy.
If you absolutely must freeze it, wrap individual slices tightly in plastic, then foil, and freeze for up to one month. Thaw overnight in the fridge. Just know the quality won’t be quite the same.
Reheating and Serving
Tiramisu is served cold, so no reheating needed! Simply slice and enjoy straight from the fridge. If you’ve made it more than a day ahead and stored it well, the flavors will be perfectly melded and ready to serve.
Meal Prep Considerations
For meal prepping, consider making the components separately and assembling fresh each time you want to serve. The cherry compote and mascarpone cream both keep well for 3-4 days in airtight containers. Ladyfingers stay fresh in their original packaging. This way, you can assemble smaller portions throughout the week.
FAQs: Frequently Asked Questions About Cherry Tiramisu
How do I make cherry tiramisu without alcohol?
Making cherry tiramisu alcohol-free is simple and keeps the fruity almond notes intact. Skip the cherry liqueur or amaretto and prepare a simple syrup soak instead: In a saucepan, combine 1/2 cup sugar and 1/2 cup water. Bring to a boil, stirring until sugar dissolves, then cool completely. Stir in 1/4 cup additional water and 1 teaspoon almond extract for flavor depth. Dip ladyfingers briefly in this mixture before layering with cherry compote and mascarpone cream. This method maintains moisture without sogginess. The tiramisu still needs 4-6 hours to chill for best texture. Yields 8-10 servings. Pro tip: Add a splash of cherry juice to the syrup for extra tartness. Store covered in the fridge up to 3 days.
Can I use frozen cherries instead of fresh for cherry tiramisu compote?
Yes, pitted frozen cherries work perfectly as a substitute for fresh ones in cherry tiramisu compote—they’re often more consistent in sweetness and availability. Thaw 2 cups frozen cherries completely, then drain excess liquid. In a saucepan over medium heat, cook with 1/4 cup sugar, 1 tablespoon lemon juice, and a pinch of salt for 10-12 minutes until thickened and jammy. Stir occasionally to prevent sticking. Let cool before layering. This yields about 1.5 cups compote, enough for a standard 9×13-inch dish. Frozen cherries save time on pitting and are great year-round. If using sweetened frozen, reduce sugar by half. Compote can be made 2 days ahead and refrigerated.
How do you make the red cherry powder for cherry tiramisu topping?
The vibrant red cherry powder adds a tart, colorful finish to cherry tiramisu. Start with 1/2 cup freeze-dried cherries (available at grocery stores or online). Pulse them in a blender, coffee grinder, or food processor until finely powdered—about 30-60 seconds. Avoid over-processing to prevent clumping from natural oils. Sift through a fine mesh strainer over the chilled tiramisu for an even dusting. This creates a light, 2-3 tablespoon yield. For a twist, mix with cocoa powder for Black Forest vibes. Powder keeps in an airtight container for months. Fun fact: Freeze-dried cherries concentrate flavor 10x, mimicking fresh without moisture. Dust just before serving to maintain crunch.
Can I use cream cheese instead of mascarpone in cherry tiramisu?
Substituting cream cheese for mascarpone in cherry tiramisu isn’t ideal due to flavor and texture differences—mascarpone’s mild, creamy richness pairs best with cherries, while cream cheese is tangier and denser. If you must, blend 12 oz room-temperature cream cheese with 1/4 cup heavy cream and 2 tablespoons powdered sugar to lighten it, then fold in whipped egg yolks and sugar as per recipe. Expect a firmer set and less authentic taste. For closest results, use full-fat versions. The egg yolks provide essential fluffiness, so don’t skip them. Test a small batch first. Traditional mascarpone ensures the silky layers that make tiramisu shine. Recipe serves 8-10; prep time 45 minutes plus chilling.
How long does cherry tiramisu need to chill and how do I store it?
Cherry tiramisu requires at least 4-6 hours of chilling time in the fridge to set properly—overnight is best for flavors to meld and ladyfingers to soften ideally. Cover loosely with plastic wrap to avoid condensation. It serves 8-10 people in a 9×13-inch dish. Store leftovers covered in the fridge for up to 3-4 days; beyond that, texture may soften. Do not freeze, as dairy separation occurs upon thawing. For make-ahead, assemble up to 24 hours early. Before serving, dust with cherry powder. This resting period enhances the cherry-mascarpone balance. Tip: If rushing, chill 2 hours minimum but expect firmer layers. Total prep and cook time: about 1 hour.
Cherry Tiramisu
🍒 Dive into a luscious Cherry Almond Tiramisu with tart cherry compote, amaretto ladyfingers, and creamy mascarpone – a no-bake holiday showstopper.
🥛 Make-ahead magic that chills overnight for perfect layers, freeing you to enjoy the festivities without kitchen stress!
- Total Time: 13 hours
- Yield: 6 servings
Ingredients
– 1½ cups pitted sweet cherries, roughly chopped (250g)
– 2 tablespoons granulated sugar (25g)
– 1 teaspoon cornstarch
– 2 teaspoons water
– 2 tablespoons granulated sugar (25g)
– 2 tablespoons water
– ¼ cup Amaretto (60mL)
– 15 ladyfingers
– 8 oz cold mascarpone cheese
– ¼ cup granulated sugar (50g)
– 2 cold egg yolks
– 2 tablespoons heavy whipping cream (30g)
– 1 teaspoon vanilla paste or extract
– ¾ cup heavy whipping cream (179g)
– 2 tablespoons powdered sugar (15g)
– 1 teaspoon vanilla
– Freeze-dried cherry powder or cocoa powder
Instructions
1-Step 1: Make the Cherry Compote Start by preparing the fruity layer that gives this tiramisu its personality. Pit your cherries and roughly chop them you want some texture, not a puree. A boba straw works amazingly well for pitting if you don’t have a cherry pitter! Place the chopped cherries and 2 tablespoons of granulated sugar in a saucepan over medium heat. Cook them for about 5-7 minutes, stirring occasionally. You’ll notice the cherries releasing their juices and softening up. Keep an eye on them you want them tender but still holding some shape, not turning into mush. While the cherries cook, mix 1 teaspoon of cornstarch with 2 teaspoons of water in a small bowl to create a smooth slurry. When the cherries are ready, pour this mixture in and stir constantly for about 1 minute until everything thickens nicely. Transfer the compote to a bowl and refrigerate, stirring occasionally as it cools.
2-Step 2: Prepare the Amaretto Soaking Mixture Next up is the liquid that gives the ladyfingers their boozy, almond-scented personality. In a small saucepan, combine 2 tablespoons of sugar with 2 tablespoons of water. Heat over medium, stirring until the sugar dissolves completely. Let this simple syrup cool for a few minutes. Once cooled, stir in the ¼ cup of Amaretto. The smell at this point is absolutely divine! If you’re going alcohol-free, simply add the almond extract to the cooled syrup instead of the liqueur.
3-Step 3: Whip Up the Mascarpone Cream Here’s where the magic happens! Make sure your mascarpone, egg yolks, and cream are all cold straight from the fridge this is crucial for getting that light, fluffy texture. In a mixing bowl, combine 8 oz of cold mascarpone cheese, ¼ cup of granulated sugar, 2 cold egg yolks, 2 tablespoons of heavy whipping cream, and 1 teaspoon of vanilla. Beat everything on medium-high speed for 2-3 minutes until the mixture turns light and fluffy. You’ll see it transform from dense to airy and spreadable.
4-Step 4: Assemble Your Cherry Tiramisu Layers Now comes the fun part putting it all together! Grab a loaf pan (a 9×5 inch pan works perfectly) and let’s build those beautiful layers. Take your ladyfingers one at a time and dip them briefly into the Amaretto mixture. Roll them quickly to coat all sides, then place them in the bottom of your pan. You’ll need about 6-7 ladyfingers for the first layer, depending on their size. Work quickly ladyfingers absorb liquid fast, and you don’t want them soaking wet, just dampened. Spread half of your cooled cherry compote evenly over the ladyfingers. Then add half of the mascarpone cream, spreading it all the way to the edges. Repeat these layers one more time: remaining ladyfingers (dipped and drained), the rest of the cherries, and finally the remaining mascarpone cream.
5-Step 5: Chill Overnight for Best Results Cover your assembled tiramisu with plastic wrap or a lid and pop it in the refrigerator. Here’s the thing this dessert needs time. Plan for at least 6 hours of chilling, but overnight (about 12 hours) is honestly best. The flavors meld together, the ladyfingers soften to just the right consistency, and the whole thing becomes sliceable rather than messy. The waiting is the hardest part, but so worth it! While you’re waiting, you might want to check out this gorgeous zuccotto cake for another stunning Italian-inspired dessert.
6-Step 6: Add the Optional Whipped Cream Topping Before serving, you can add an extra layer of indulgence with whipped cream. Chill your mixing bowl and whisk attachment in the freezer for 15 minutes this helps the cream whip up faster and fluffier. Beat ¾ cup of heavy whipping cream with 2 tablespoons of powdered sugar and 1 teaspoon of vanilla until soft peaks form. Spread this over the top of your chilled tiramisu, then dust with freeze-dried cherry powder for a tart finish or cocoa powder for classic Black Forest vibes. Slice and serve! This recipe makes about 8 servings, perfect for sharing with family or friends.
Notes
🍒 Pit cherries easily with a straw or use frozen if fresh unavailable.
🥄 Keep mascarpone and eggs cold for the fluffiest cream texture.
⏰ Chill overnight for the best flavor infusion and structure.
- Prep Time: 1 hour
- Chill: 12 hours
- Category: Dessert
- Method: No-Bake
- Cuisine: Italian
- Diet: Vegetarian
Nutrition
- Serving Size: 1 serving
- Calories: 404
- Sugar: 20g
- Sodium: 59mg
- Fat: 26g
- Saturated Fat: 15g
- Unsaturated Fat: 11g
- Trans Fat: 0g
- Carbohydrates: 35g
- Fiber: 1g
- Protein: 6g
- Cholesterol: 158mg


