
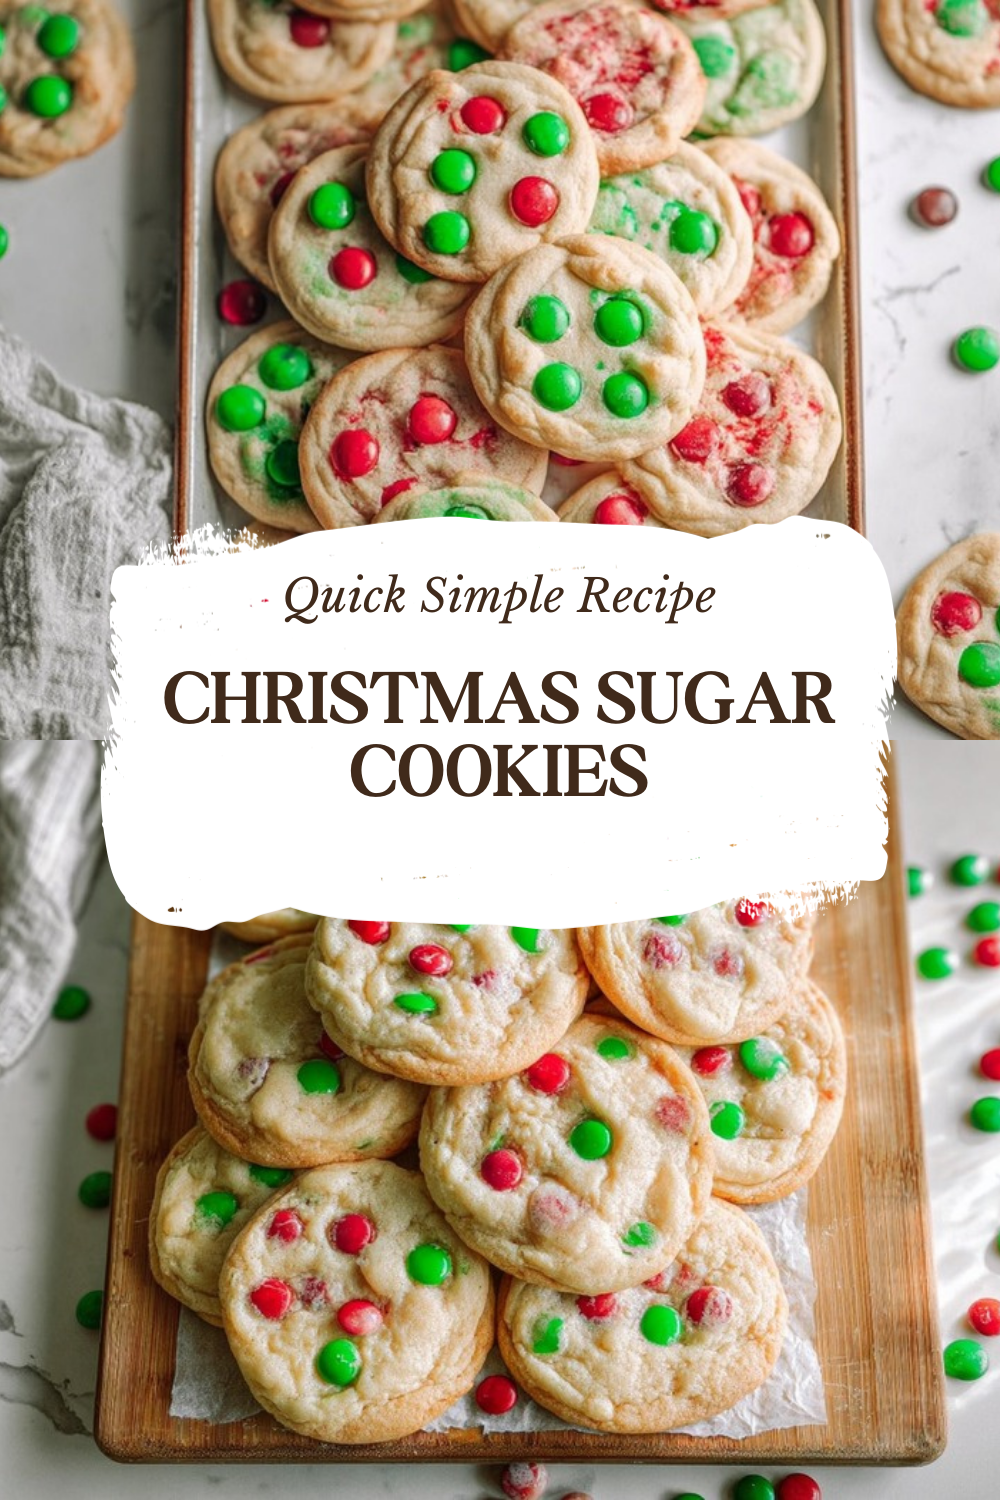
Why You’ll Love This Christmas Sugar Cookies
There’s something truly magical about baking Christmas sugar cookies during the holiday season. The warm aroma filling your kitchen, the joy of cutting out festive shapes, and the creativity of decorating each cookie make this recipe a beloved tradition for families everywhere. This particular recipe has become a go-to for home bakers because it delivers consistently beautiful results without demanding hours of complicated work.
Here’s why this recipe deserves a permanent spot in your holiday baking repertoire:
- Ease of preparation: This recipe comes together with simple pantry staples and straightforward steps. The dough comes together in minutes, and the make-ahead chilling option means you can spread the work over multiple days. Even beginner bakers can achieve professional-looking results with the clear, step-by-step instructions provided.
- Perfect texture every time: These cookies bake up with a tender, buttery crumb that holds its shape beautifully. No more spreading, no more misshapen trees or stars just crisp edges and soft centers that taste as good as they look.
- Versatility for all occasions: While perfect for Christmas with shapes like trees, stars, and snowflakes, this recipe adapts easily to any holiday or celebration. Change the cookie cutters and icing colors, and you have Valentine hearts, Easter eggs, or birthday treats.
- Family-friendly fun: Kids love getting involved with rolling, cutting, and especially decorating. The easy icing recipe works beautifully with squeeze bottles, making it safe and simple for little hands to create their own masterpieces.
The best recipes are the ones that bring people together. This Christmas sugar cookies recipe does exactly that creating sweet memories along with sweet treats.
Jump To
- 1. Why You’ll Love This Christmas Sugar Cookies
- 2. Essential Ingredients for Christmas Sugar Cookies
- 3. How to Prepare the Perfect Christmas Sugar Cookies: Step-by-Step Guide
- 4. Dietary Substitutions to Customize Your Christmas Sugar Cookies
- 5. Mastering Christmas Sugar Cookies: Advanced Tips and Variations
- 6. How to Store Christmas Sugar Cookies: Best Practices
- 7. FAQs: Frequently Asked Questions About Christmas Sugar Cookies
- 8. Christmas Sugar Cookies
Essential Ingredients for Christmas Sugar Cookies
Quality ingredients make all the difference when baking Christmas sugar cookies. Each component plays a specific role in creating that perfect texture and flavor we all love. Here’s everything you’ll need to make both the cookies and the simple, glossy icing:
Cookie Ingredients
- 2 and 1/4 cups all-purpose flour, plus more for rolling and work surface – Forms the foundation of your cookies, providing structure while keeping them tender. Using a kitchen scale for accurate measurement prevents dry, crumbly results.
- 1/2 teaspoon baking powder – Gives the cookies just a touch of lift, helping them maintain a soft interior while keeping their decorative shapes intact.
- 1/4 teaspoon salt – Balances the sweetness and enhances all the other flavors. It’s a small amount that makes a noticeable difference.
- 3/4 cup unsalted butter, room temperature – The heart of any great sugar cookie, butter provides richness, flavor, and that melt-in-your-mouth texture. Room temperature butter creams properly with sugar for the best results. Butter contains essential nutrients and creates the tender crumb that makes these cookies irresistible.
- 3/4 cup granulated sugar – Sweetens the dough while creaming with butter to incorporate air, which helps create a lighter texture. Granulated sugar provides quick energy and that classic sweet taste we expect in holiday treats.
- 1 large egg, room temperature – Binds the ingredients together and adds richness. Room temperature eggs blend more smoothly into the creamed butter mixture.
- 2 teaspoons pure vanilla extract – Adds warm, aromatic flavor that complements the butter and creates that classic sugar cookie taste everyone recognizes and loves.
- 1/4 or 1/2 teaspoon almond extract (optional) – This optional addition gives the cookies a bakery-style flavor boost. Even a small amount creates a wonderful depth of taste.
Easy Icing Ingredients
- 3 cups confectioners’ sugar – Creates a smooth, sweet base that sets to a beautiful finish. Also called powdered sugar, it dissolves easily for lump-free icing.
- 1/2 teaspoon pure vanilla extract – Omit and replace with water if you want stark white icing for your designs. Otherwise, it adds lovely flavor that complements the cookies.
- 2 teaspoons light corn syrup – The secret to that glossy, professional finish. It helps the icing set with a slight sheen rather than a matte appearance.
- 4.5 to 5 tablespoons room temperature water – Adjusts the icing consistency for different decorating techniques. Less water makes thicker icing for details; more creates a flood consistency.
- Pinch of salt – Balances the intense sweetness of the confectioners’ sugar, making the icing more flavorful.
- Optional: food coloring and sprinkles – Gel food coloring works best as it won’t thin the icing. Choose holiday colors like red, green, white, and gold for festive designs.
Special Dietary Options
Here are some simple swaps for common dietary needs:
| Dietary Need | Ingredient to Replace | Substitution |
|---|---|---|
| Vegan | Butter | Vegan butter sticks (not tub spread) |
| Vegan | Egg | 1 flax egg (1 Tbsp ground flaxseed + 3 Tbsp water) |
| Gluten-Free | All-purpose flour | 1:1 gluten-free flour blend with xanthan gum |
| Dairy-Free | Butter | Plant-based butter alternative or coconut oil |
How to Prepare the Perfect Christmas Sugar Cookies: Step-by-Step Guide
Creating beautiful Christmas sugar cookies is easier than you might think. Follow these detailed steps, and you’ll have a batch of perfectly shaped, delicious cookies ready for decorating. The key is taking your time and not rushing the chilling step.
Step 1: Prepare Your Dry Ingredients
Start by whisking together 2 and 1/4 cups all-purpose flour, 1/2 teaspoon baking powder, and 1/4 teaspoon salt in a medium bowl. This ensures the leavening and salt are evenly distributed throughout the flour. Set this mixture aside while you work on the wet ingredients. Having everything measured and ready makes the process smoother and more enjoyable.
Step 2: Cream the Butter and Sugar
In a large mixing bowl or stand mixer, beat 3/4 cup room temperature unsalted butter with 3/4 cup granulated sugar. You want to beat this mixture for about 3 minutes on medium speed until it’s smooth, creamy, and slightly lighter in color. This creaming process incorporates tiny air pockets that help the cookies maintain their tender texture. The butter should be cool to the touch around 65°F and soft enough to leave a gentle fingerprint when pressed, but not so soft that it looks greasy or melted.
Step 3: Add Egg and Flavorings
Add 1 large room temperature egg, 2 teaspoons pure vanilla extract, and the optional 1/4 to 1/2 teaspoon almond extract to the creamed butter mixture. Beat until everything is fully combined, scraping down the sides of the bowl as needed. The mixture should look uniform and creamy. If you’ve ever enjoyed our brown butter oatmeal chocolate chip cookies, you know how much flavor a good extract can add to a recipe.
Step 4: Combine Wet and Dry Ingredients
With your mixer on low speed, gradually add the dry flour mixture to the wet ingredients. Mix only until the flour is just incorporated overmixing develops gluten and leads to tough cookies. The dough should come together in a cohesive ball but still look slightly soft. Stop mixing as soon as you no longer see streaks of dry flour.
Step 5: Roll and Chill the Dough
Divide the dough in half for easier handling. Roll each portion to about 1/4-inch thickness on a lightly floured piece of parchment paper or a silicone baking mat. Rolling before chilling is much easier than trying to roll cold, hard dough. Stack the rolled dough sheets with floured parchment between them, cover the stack with plastic wrap or foil, and refrigerate for 1 to 2 hours, or up to 2 days. This chilling step is essential because it firms up the butter, which prevents the cookies from spreading too much in the oven.
Pro tip: Always roll your dough before chilling. Cold dough is difficult to work with and can crack when you try to roll it thin.
Step 6: Preheat and Prepare Baking Sheets
When you’re ready to bake, preheat your oven to 350°F and line your baking sheets with fresh parchment paper or silicone baking mats. These liners prevent sticking and make cleanup incredibly easy. Remove the chilled dough from the refrigerator and let it sit at room temperature for about 5 minutes if it’s very firm.
Step 7: Cut Out Your Shapes
Using your favorite cookie cutters, cut shapes from the chilled dough. Press the cutter straight down without wiggling, which helps maintain crisp edges. Place the cut cookies about 3 inches apart on the prepared baking sheets to give them room to expand slightly. Gather the scraps, re-roll them, and cut more shapes until all the dough is used. Try to keep the re-rolled pieces to a minimum for the most even baking results.
Step 8: Bake to Perfection
Bake the cookies for 11 to 12 minutes. You’re looking for edges that are dry and set but not browned this keeps them soft and tender. The tops should look matte and no longer shiny. Every oven is slightly different, so check a minute early on your first batch. Pull them out when they still look slightly underdone in the center, as they’ll continue cooking on the hot baking sheet.
Step 9: Cool the Cookies
Let the cookies cool on the baking sheets for 5 minutes before carefully transferring them to wire cooling racks. This brief rest allows them to firm up enough to move without breaking. Cool the cookies completely before icing warm cookies will melt the icing and create a mess rather than a beautiful design.
Step 10: Prepare the Icing
While the cookies cool, make the easy icing. In a bowl, stir together 3 cups confectioners’ sugar, 1/2 teaspoon pure vanilla extract (or substitute water for white icing), 2 teaspoons light corn syrup, a pinch of salt, and 4.5 to 5 tablespoons room temperature water. Start with less water and add more gradually until the icing ribbons off a spoon and holds its shape briefly before smoothing out. The corn syrup creates that gorgeous, glossy finish that makes decorated cookies look so professional.
Step 11: Decorate Your Cookies
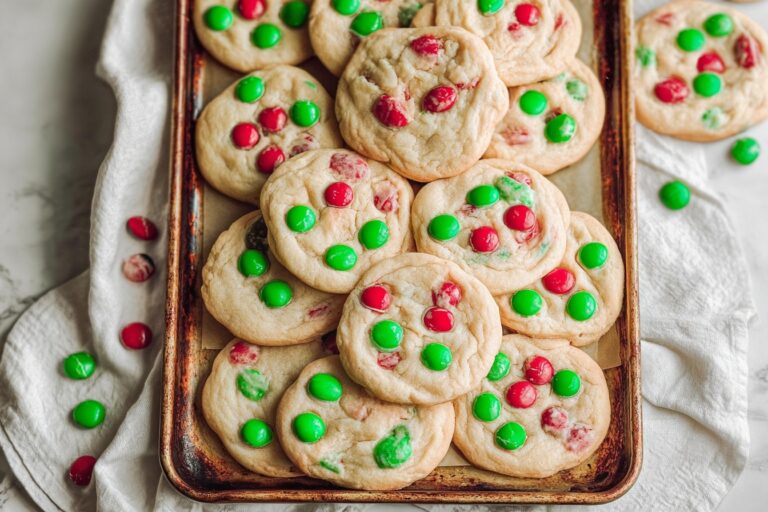
Divide the icing into small bowls if you want multiple colors. Tint each portion with gel food coloring a small amount goes a long way, and gel won’t thin the icing like liquid food coloring can. Use piping bags for detailed work or squeeze bottles for flooding larger areas and kid-friendly decorating. Dip cookie tops directly into thicker icing, or pipe outlines and fill them in with thinner icing. Add sprinkles while the icing is still wet so they adhere properly.
Step 12: Let the Icing Set
This final step requires patience but is absolutely essential. Let the decorated cookies sit at room temperature for 24 hours before stacking or packaging. The icing needs this time to fully harden so it won’t smudge or stick to other cookies. Place them in a single layer on wire racks or flat surfaces, away from fans or humid conditions. Once set, your beautiful Christmas sugar cookies are ready to share, gift, or enjoy!

Dietary Substitutions to Customize Your Christmas Sugar Cookies
One of the best things about this Christmas sugar cookies recipe is how easily it adapts to different dietary needs. Whether you’re baking for someone with allergies, dietary restrictions, or personal preferences, simple ingredient swaps let everyone enjoy these holiday treats.
Protein and Main Component Alternatives
The butter and egg in this recipe can be easily modified for various needs:
For vegan cookies: Replace the butter with high-quality vegan butter sticks the kind found in sticks rather than tubs works best because it has the right consistency for creaming. Substitute the egg with a flax egg by mixing 1 tablespoon of ground flaxseed with 3 tablespoons of water and letting it sit for 5 minutes until it gels. The texture will be slightly different but still delicious, and the almond extract helps mask any subtle flavor differences.
For dairy-free needs: Plant-based butter alternatives work well, or you can use coconut oil in solid form. If using coconut oil, choose refined coconut oil to avoid any coconut flavor in your cookies. Keep the coconut oil cool around 65°F so it creams properly with the sugar.
For egg allergies: Besides flax eggs, you can use commercial egg replacers or even unsweetened applesauce (use 3 tablespoons per egg). The cookies will be slightly softer and more cake-like but still tasty and perfect for decorating.
Flour, Seasoning, and Flavor Modifications
Gluten-free adaptations: Use a 1:1 gluten-free flour blend that contains xanthan gum. These blends are designed to replace all-purpose flour measure for measure. The dough may feel slightly different often a bit more sticky so chill it thoroughly. You might need to dust your rolling surface a bit more generously with gluten-free flour.
Flavor variations: The basic dough welcomes all sorts of flavor additions. Try adding 1/2 teaspoon of peppermint extract for candy cane-flavored cookies, 1 teaspoon of cinnamon for a warm spice note, or 1 teaspoon of lemon zest for bright, fresh flavor. Pumpkin pie spice (about 1 teaspoon) gives the cookies autumnal warmth perfect for Thanksgiving or fall baking.
Lower sugar options: For a less sweet cookie, reduce the granulated sugar to 1/2 cup. You can also use coconut sugar as a substitute for a slightly different flavor profile and lower glycemic impact. The cookies will be darker in color but still delicious.
For more holiday treat inspiration that you can also customize for dietary needs, check out our chocolate covered strawberries recipe, which offers its own set of adaptation options.
Mastering Christmas Sugar Cookies: Advanced Tips and Variations
Once you’ve mastered the basic Christmas sugar cookies recipe, you might want to take your baking to the next level. These professional tips and creative variations will help you create showstopping cookies that taste as amazing as they look.
Pro Baking Techniques
Butter temperature matters: The ideal butter temperature is around 65°F cool enough that it doesn’t feel warm to the touch, but soft enough to yield slightly when pressed. If your butter is too cold, it won’t cream properly with the sugar. Too warm, and the cookies will spread too much. If you’ve softened butter too much, pop it in the refrigerator for 10 minutes before starting.
Measure flour accurately: Using a kitchen scale is the most precise method 2 and 1/4 cups of flour weighs approximately 270 grams. If measuring by volume, fluff the flour, spoon it gently into the measuring cup, and level it off with a straight edge. Never pack flour into the cup, or you’ll end up with dry, tough cookies.
Rotate baking sheets: For even baking, rotate your baking sheets halfway through the baking time, swapping the positions of the top and bottom sheets. This ensures all cookies bake evenly regardless of where they sit in your oven.
Flavor Variations Worth Trying
- Maple sugar cookies: Replace the vanilla extract with maple extract and add 1 tablespoon of real maple syrup to the dough. This creates a warm, cozy flavor perfect for autumn and winter holidays.
- Citrus sparkle: Add 1 tablespoon of fresh lemon or orange zest to the dough. The bright, fresh flavor pairs beautifully with a simple vanilla or citrus-flavored icing.
- Warm spice cookies: Add 1 teaspoon of ground cinnamon, 1/2 teaspoon of ground ginger, and a pinch of nutmeg for gingerbread-style flavor without the molasses.
- Peppermint dreams: Replace the almond extract with peppermint extract, then top with crushed candy cane pieces. These taste like the holidays in every bite.
Presentation and Decorating Ideas
Squeeze bottles for easy decorating: While piping bags offer precision, squeeze bottles are incredibly kid-friendly and work beautifully for flooding cookies with icing. They’re affordable, reusable, and give you great control over the icing flow.
Layer decorations: Start with a base layer of flooded icing, let it set for about 15-20 minutes, then add detailed piping, edible pearls, or sprinkles. This layered approach creates dimension and a professional bakery look.
Use multiple icing consistencies: Thicker icing works for outlines and details, while thinner icing floods the centers. Achieve different consistencies by adjusting the water in small increments literally half a teaspoon at a time.
Make-Ahead Strategies
The dough can be made and rolled out up to 2 days before baking keep it covered in the refrigerator. For even longer storage, freeze the rolled dough sheets between layers of parchment in a freezer bag for up to 3 months. Thaw overnight in the refrigerator before cutting and baking.
You can also freeze baked, undecorated cookies. This is perfect for breaking up the work: bake one weekend, decorate another. The cookies freeze beautifully for up to 3 months when stored airtight.
How to Store Christmas Sugar Cookies: Best Practices
Proper storage keeps your Christmas sugar cookies fresh and delicious, whether you’re saving them for your family or preparing them as gifts. Here’s everything you need to know about storing both decorated and undecorated cookies.
Room Temperature Storage
Fully decorated cookies with hardened icing can be stored at room temperature for up to 5 days. Place them in an airtight container with sheets of parchment paper between layers to prevent the icing from sticking. Keep the container in a cool, dry spot away from direct sunlight and heat sources. Room temperature storage maintains the best texture the cookies stay tender while the icing remains intact.
Refrigerator Storage
For longer storage, refrigerated iced cookies keep for up to 10 days. The cool temperature actually helps maintain the icing’s hardness. Store them in airtight containers with parchment between layers. Let refrigerated cookies come to room temperature before serving for the best flavor and texture cold cookies don’t taste as sweet or have the same buttery mouthfeel.
Freezing Options
Freezing works wonderfully for make-ahead preparation:
- Freeze unbaked dough: Roll the dough to 1/4-inch thickness, wrap tightly in plastic and foil, and freeze flat for up to 3 months. Thaw overnight in the refrigerator before cutting shapes.
- Freeze baked, undecorated cookies: Place cooled cookies in freezer-safe containers with parchment between layers. They keep for 3 months and can be decorated straight from thawed.
- Freeze decorated cookies: Once the icing has fully set for 24 hours, freeze decorated cookies in single layers with parchment between. This option is perfect for advanced holiday prep.
Reheating and Serving
Sugar cookies are best enjoyed at room temperature no reheating required. If you’ve frozen baked cookies, thaw them at room temperature for about 30 minutes before serving. Thawed iced cookies should be handled carefully until the icing returns to its fully hardened state.
FAQs: Frequently Asked Questions About Christmas Sugar Cookies
Can I use salted butter in Christmas sugar cookies?
Yes, you can use salted butter in your Christmas sugar cookie recipe, but adjust by omitting the salt called for in the ingredients list to avoid overly salty cookies. Salted butter adds a subtle flavor boost, but unsalted is preferred for precise control over taste and texture. Start with room-temperature butter around 65°F—cool to the touch, yielding slightly to a finger poke without being greasy. Cream it with sugar until light and fluffy, about 2-3 minutes on medium speed. This ensures tender, evenly baked cookies that hold festive shapes like stars, trees, or snowflakes. If substituting, measure by weight for accuracy: 1 cup (226g) salted butter equals unsalted. Test a small batch first to confirm seasoning suits your preference.
How long can I chill Christmas sugar cookie dough?
Chill Christmas sugar cookie dough for at least 1-2 hours, but you can refrigerate it overnight or up to 2 days wrapped tightly in plastic. Chilling firms the butter, prevents spreading during baking, and helps cookies retain crisp edges and detailed shapes for holiday decorating. For best results, roll the dough thin (1/4-inch) on parchment or silicone mats while soft, then chill the sheets flat. Divide dough into discs for easier handling—half at a time works well. If too soft and sticky, add 1 tablespoon flour. After chilling, let sit 5-10 minutes at room temp before cutting shapes. Bake at 350°F for 8-12 minutes until edges are lightly golden. This step is key for professional-looking treats.
Can I freeze Christmas sugar cookie dough?
Yes, freeze Christmas sugar cookie dough up to 3 months for fresh-baked cookies anytime. Portion into discs, wrap tightly in plastic then foil or a freezer bag, and label with date. Thaw overnight in the fridge before rolling and cutting—no refreezing needed. Alternatively, freeze scooped balls on a tray, then transfer to bags for drop cookies. Rolled-out dough sheets freeze well too; bake from frozen, adding 1-2 extra minutes. Freezing preserves flavor and texture since fat solidifies evenly. Avoid overcrowding the oven post-thaw to maintain even baking. Pro tip: Freeze baked, undecorated cookies and decorate after thawing at room temp. This makes holiday prep stress-free.
How long does icing take to dry on sugar cookies?
Icing on Christmas sugar cookies sets in 4-6 hours for touch-dry but fully dries in 24 hours, allowing safe stacking, freezing, or gifting. Use royal or buttercream icing thinned for flooding—outline edges first, then fill. Place cookies on wire racks in a cool, dry spot away from fans or humidity. For faster setting, add meringue powder to royal icing or use a fan on low. Decorated cookies firm enough for light handling after 2 hours but wait 24 hours before packaging. If stacking, separate layers with parchment. Test dryness by gently pressing an edge; it shouldn’t dent. Properly dried icing withstands transport and stays vibrant for weeks. Store airtight at room temp up to 1 week or freeze up to 1 month.
Can I double the Christmas sugar cookie recipe?
Yes, double the Christmas sugar cookie recipe easily for larger batches—multiply ingredients exactly, like 4 cups flour and 2 cups butter for 8-10 dozen. Mix in a stand mixer to handle volume, chilling dough in multiple portions to prevent warming. Bake in batches for even results, rotating trays midway. Watch baking time; doubled dough may need 1 extra minute. Ideal for cookie swaps or parties. If dough seems sticky post-doubling, add flour 1 tablespoon at a time. Scale up icing too, tinting batches for variety like red/green floods. Prep tip: Weigh dry ingredients for precision (e.g., 500g flour). Cookies store 5-7 days airtight or freeze dough/baked up to 3 months, saving holiday hustle.
Christmas Sugar Cookies
🎄 Bake soft, crisp Christmas sugar cookies that hold perfect shapes for stunning holiday decorating.
🍪 Foolproof recipe with glossy icing – family fun yielding dozens of festive treats in one afternoon!
- Total Time: 3-4 hours active + drying
- Yield: 36 cookies
Ingredients
– 2 and 1/4 cups all-purpose flour, plus more for rolling and work surface
– 1/2 teaspoon baking powder
– 1/4 teaspoon salt
– 3/4 cup unsalted butter, room temperature
– 3/4 cup granulated sugar
– 1 large egg, room temperature
– 2 teaspoons pure vanilla extract
– 1/4 or 1/2 teaspoon almond extract (optional)
– 3 cups confectioners’ sugar
– 1/2 teaspoon pure vanilla extract
– 2 teaspoons light corn syrup
– 4.5 to 5 tablespoons room temperature water
– Pinch of salt
– Optional: food coloring and sprinkles
Instructions
1-Step 1: Prepare Your Dry Ingredients Start by whisking together 2 and 1/4 cups all-purpose flour, 1/2 teaspoon baking powder, and 1/4 teaspoon salt in a medium bowl. This ensures the leavening and salt are evenly distributed throughout the flour. Set this mixture aside while you work on the wet ingredients. Having everything measured and ready makes the process smoother and more enjoyable.
2-Step 2: Cream the Butter and Sugar In a large mixing bowl or stand mixer, beat 3/4 cup room temperature unsalted butter with 3/4 cup granulated sugar. You want to beat this mixture for about 3 minutes on medium speed until it’s smooth, creamy, and slightly lighter in color. This creaming process incorporates tiny air pockets that help the cookies maintain their tender texture. The butter should be cool to the touch around 65°F and soft enough to leave a gentle fingerprint when pressed, but not so soft that it looks greasy or melted.
3-Step 3: Add Egg and Flavorings Add 1 large room temperature egg, 2 teaspoons pure vanilla extract, and the optional 1/4 to 1/2 teaspoon almond extract to the creamed butter mixture. Beat until everything is fully combined, scraping down the sides of the bowl as needed. The mixture should look uniform and creamy. If you’ve ever enjoyed our brown butter oatmeal chocolate chip cookies, you know how much flavor a good extract can add to a recipe.
4-Step 4: Combine Wet and Dry Ingredients With your mixer on low speed, gradually add the dry flour mixture to the wet ingredients. Mix only until the flour is just incorporated overmixing develops gluten and leads to tough cookies. The dough should come together in a cohesive ball but still look slightly soft. Stop mixing as soon as you no longer see streaks of dry flour.
5-Step 5: Roll and Chill the Dough Divide the dough in half for easier handling. Roll each portion to about 1/4-inch thickness on a lightly floured piece of parchment paper or a silicone baking mat. Rolling before chilling is much easier than trying to roll cold, hard dough. Stack the rolled dough sheets with floured parchment between them, cover the stack with plastic wrap or foil, and refrigerate for 1 to 2 hours, or up to 2 days. This chilling step is essential because it firms up the butter, which prevents the cookies from spreading too much in the oven.
6-Step 6: Preheat and Prepare Baking Sheets When you’re ready to bake, preheat your oven to 350°F and line your baking sheets with fresh parchment paper or silicone baking mats. These liners prevent sticking and make cleanup incredibly easy. Remove the chilled dough from the refrigerator and let it sit at room temperature for about 5 minutes if it’s very firm.
7-Step 7: Cut Out Your Shapes Using your favorite cookie cutters, cut shapes from the chilled dough. Press the cutter straight down without wiggling, which helps maintain crisp edges. Place the cut cookies about 3 inches apart on the prepared baking sheets to give them room to expand slightly. Gather the scraps, re-roll them, and cut more shapes until all the dough is used. Try to keep the re-rolled pieces to a minimum for the most even baking results.
8-Step 8: Bake to Perfection Bake the cookies for 11 to 12 minutes. You’re looking for edges that are dry and set but not browned this keeps them soft and tender. The tops should look matte and no longer shiny. Every oven is slightly different, so check a minute early on your first batch. Pull them out when they still look slightly underdone in the center, as they’ll continue cooking on the hot baking sheet.
9-Step 9: Cool the Cookies Let the cookies cool on the baking sheets for 5 minutes before carefully transferring them to wire cooling racks. This brief rest allows them to firm up enough to move without breaking. Cool the cookies completely before icing warm cookies will melt the icing and create a mess rather than a beautiful design.
10-Step 10: Prepare the Icing While the cookies cool, make the easy icing. In a bowl, stir together 3 cups confectioners’ sugar, 1/2 teaspoon pure vanilla extract (or substitute water for white icing), 2 teaspoons light corn syrup, a pinch of salt, and 4.5 to 5 tablespoons room temperature water. Start with less water and add more gradually until the icing ribbons off a spoon and holds its shape briefly before smoothing out. The corn syrup creates that gorgeous, glossy finish that makes decorated cookies look so professional.
11-Step 11: Decorate Your Cookies Divide the icing into small bowls if you want multiple colors. Tint each portion with gel food coloring a small amount goes a long way, and gel won’t thin the icing like liquid food coloring can. Use piping bags for detailed work or squeeze bottles for flooding larger areas and kid-friendly decorating. Dip cookie tops directly into thicker icing, or pipe outlines and fill them in with thinner icing. Add sprinkles while the icing is still wet so they adhere properly.
12-Step 12: Let the Icing Set This final step requires patience but is absolutely essential. Let the decorated cookies sit at room temperature for 24 hours before stacking or packaging. The icing needs this time to fully harden so it won’t smudge or stick to other cookies. Place them in a single layer on wire racks or flat surfaces, away from fans or humid conditions. Once set, your beautiful Christmas sugar cookies are ready to share, gift, or enjoy!
Notes
🧈 Use cool room-temperature butter (around 65°F) for perfect creaming and texture.
❄️ Chill rolled dough sheets to prevent spreading and maintain sharp cutout shapes.
🎨 Squeeze bottles make icing easy and mess-free, especially for kids.
- Prep Time: 20 minutes
- Chilling + Icing Set: 1-2 hours + 24 hours
- Cook Time: 11-12 minutes per batch
- Category: Dessert
- Method: Baking
- Cuisine: American
- Diet: Vegetarian
Nutrition
- Serving Size: 1 cookie
- Calories: 120
- Sugar: 10g
- Sodium: 45mg
- Fat: 5g
- Saturated Fat: 3g
- Unsaturated Fat: 2g
- Trans Fat: 0g
- Carbohydrates: 18g
- Fiber: 0g
- Protein: 1g
- Cholesterol: 20mg


