
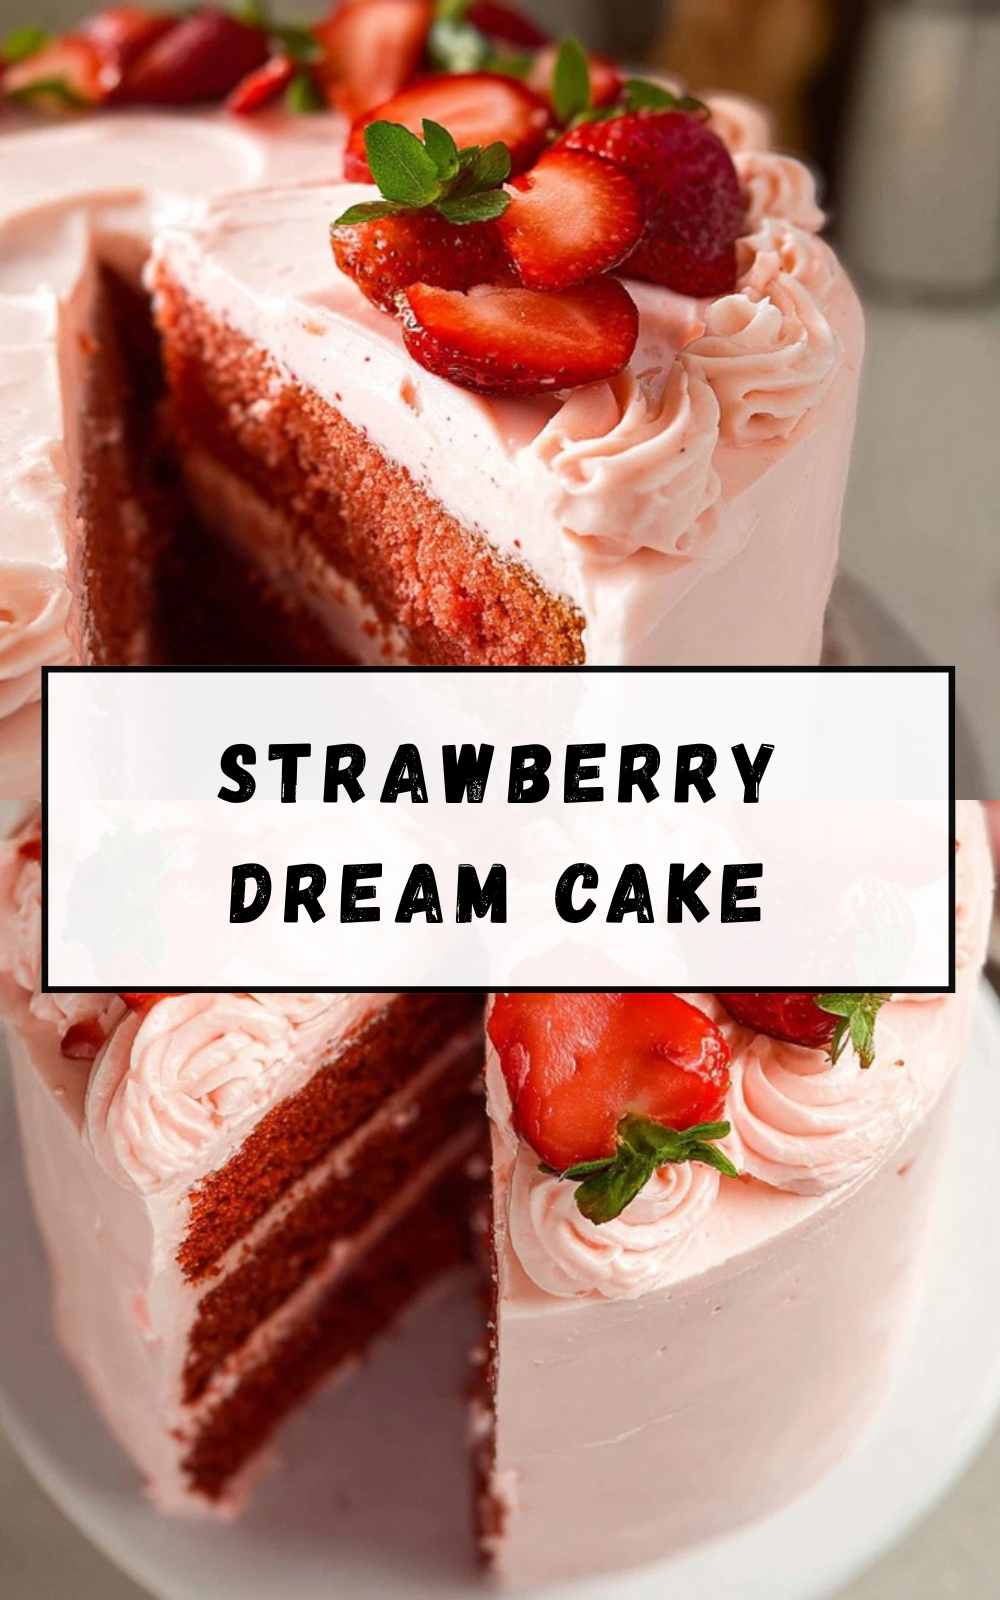
Why You’ll Love This Strawberry Dream Cake
If you’ve been searching for a dessert that combines real strawberry flavor with a tender, moist crumb, this Strawberry Dream Cake is exactly what you need. This recipe stands out because it uses actual strawberries rather than artificial flavorings or boxed mixes. The result is a bakery-quality cake that tastes like summer in every bite.
Here’s why home bakers keep coming back to this recipe:
- Ease of preparation: Despite its impressive appearance, this cake comes together with straightforward techniques. The process uses a simple mixing method where butter is cut into dry ingredients before adding liquids. Even beginners can achieve professional results with clear step-by-step guidance.
- Health benefits: Strawberries pack a nutritional punch with vitamin C, antioxidants, and fiber. Each serving delivers about 30mg of vitamin C, supporting immune health. This cake offers a more wholesome option compared to artificially flavored alternatives.
- Versatility: This recipe adapts beautifully to cupcakes for parties or can be dressed up for special occasions. The cream cheese frosting pairs wonderfully with the strawberry layers, creating a balanced flavor profile that appeals to all ages.
- Distinctive flavor: The reduced strawberry juice creates concentrated berry flavor throughout the cake, while the reserved solids add natural color and taste to the frosting. This dual-use technique maximizes every bit of strawberry goodness.
Whether you’re celebrating a birthday, hosting a weekend gathering, or simply treating your family, this Strawberry Dream Cake delivers both stunning presentation and unforgettable taste.
Jump To
- 1. Why You’ll Love This Strawberry Dream Cake
- 2. Essential Ingredients for Strawberry Dream Cake
- 3. How to Prepare the Perfect Strawberry Dream Cake: Step-by-Step Guide
- 4. Dietary Substitutions to Customize Your Strawberry Dream Cake
- 5. Mastering Strawberry Dream Cake: Advanced Tips and Variations
- 6. How to Store Strawberry Dream Cake: Best Practices
- 7. FAQs: Frequently Asked Questions About Strawberry Dream Cake
- 8. Strawberry Dream Cake
Essential Ingredients for Strawberry Dream Cake
Success starts with quality ingredients measured precisely. Here’s everything you need to create this beautiful dessert.
Cake Ingredients
- 10 ounces (2 cups) frozen whole strawberries – The base for both cake flavor and frosting; frozen berries release more juice than fresh
- ¾ cup whole milk, room temperature – Provides moisture and helps create tender texture; room temperature ensures proper mixing
- 6 extra-large egg whites, room temperature – Creates the signature light, fluffy crumb without heaviness from yolks
- 2 teaspoons vanilla extract – Enhances strawberry flavor and adds warmth
- 2 ¼ cups (9 ounces) cake flour – Produces a finer, more tender crumb than all-purpose flour
- 1 ¾ cups (12 ½ ounces) granulated sugar – Sweetens and helps create structure through creaming
- 4 teaspoons baking powder – Provides lift for a light, airy texture
- 1 teaspoon Kosher salt – Balances sweetness and enhances overall flavor
- 12 tablespoons (6 ounces) unsalted butter, softened and cut into 12 pieces – Creates richness and tenderness; cut pieces incorporate evenly
Frosting Ingredients
- 10 tablespoons (5 ounces) unsalted butter, softened – Forms the base of silky cream cheese frosting
- 2 ¼ cups (9 ounces) confectioners’ sugar – Sweetens frosting and helps it hold shape
- 12 ounces cream cheese, cold and cut into pieces – Adds tangy flavor and creamy texture; keep cold for best results
- 2 teaspoons vanilla extract – Rounds out the frosting flavor
- Pinch of Kosher salt – Brightens all flavors
- 8 ounces fresh strawberries, hulled and thinly sliced (about 1 ½ cups) – For layering and garnish
Having all ingredients at proper temperatures makes a significant difference in your final result. Room temperature egg whites whip better, while cold cream cheese keeps frosting stable.
How to Prepare the Perfect Strawberry Dream Cake: Step-by-Step Guide
Creating this stunning Strawberry Dream Cake requires attention to detail, but the process is manageable when broken into clear steps. Follow this guide for bakery-worthy results in your own kitchen.
Step One: Prepare Your Pans and Oven
Begin by preheating your oven to 350°F. This temperature allows the cake to bake evenly without overbrowning. While the oven heats, prepare two 9-inch round cake pans. Line each pan with parchment paper, pressing it into the bottom for easy removal. Lightly spray the pans with non-stick cooking spray, covering both the parchment and the sides. Proper preparation prevents sticking and ensures clean release.
Step Two: Extract Strawberry Juice and Create Flavor Base
Place the frozen strawberries in a microwave-safe bowl and heat until soft and juicy, approximately 5 minutes. The berries will release significant liquid during this process. Transfer the hot strawberries to a fine-mesh strainer positioned over a bowl. Press firmly to extract as much juice as possible. You need ¾ cup of strawberry juice for the cake. Reserve the strawberry solids left in the strainer for the frosting.
Pour the collected juice into a small saucepan and bring to a boil. Reduce the heat and simmer until the juice reduces to ¼ cup and becomes syrupy, typically 6-8 minutes. This concentration step intensifies the strawberry flavor dramatically. Remove from heat and stir in the whole milk, creating strawberry milk. Let this mixture cool slightly before proceeding.
Step Three: Prepare the Liquid Mixture
In a medium bowl, whisk together the strawberry milk, room temperature egg whites, and vanilla extract. Make sure these ingredients are well combined but not overbeaten. The mixture should be uniform in color with no streaks. Set aside while you prepare the dry ingredients.
Step Four: Mix Dry Ingredients and Incorporate Butter
In the bowl of a stand mixer fitted with the paddle attachment, combine the cake flour, granulated sugar, baking powder, and Kosher salt. Mix on low speed for about 30 seconds to distribute the leavening agent evenly throughout.
Add the softened butter pieces while the mixer runs on low. Continue mixing until the butter is incorporated and the mixture resembles coarse crumbs with pea-sized pieces of butter visible. This texture is essential for a tender crumb. The butter pieces create small pockets of steam during baking, resulting in a lighter cake.
Step Five: Combine Wet and Dry Ingredients
With the mixer still on low speed, add half of the strawberry-egg white mixture to the dry ingredients. Once incorporated, increase the speed to medium-high and beat for about 90 seconds. The batter will become noticeably lighter and fluffier. This extended mixing develops structure without toughness because there’s no gluten-developing liquid yet.
Reduce speed to low and add the remaining liquid mixture. Beat until just combined, about 20-30 seconds. Finish by stirring the batter by hand using a spatula, scraping the bottom and sides of the bowl. This ensures even distribution without overmixing.
Step Six: Bake the Cake Layers
Divide the batter evenly between your prepared pans. Use a kitchen scale for precision if available, or eye the batter to ensure equal distribution. Smooth the tops with a spatula.
Bake for 20-25 minutes, until the tops are lightly golden and a toothpick inserted in the center comes out clean. The cake should spring back when gently pressed. Avoid opening the oven door during the first 15 minutes to prevent collapse.
Let the cakes cool in their pans for exactly 10 minutes. This brief resting period allows them to set enough for handling. Run a thin knife around the edges, invert onto a wire rack, discard the parchment paper, and cool completely for about 2 hours before frosting.
Step Seven: Prepare the Cream Cheese Frosting
While the cakes cool, make the frosting. In a stand mixer with the paddle attachment, combine the softened butter and confectioners’ sugar on low speed for 30 seconds. The low speed prevents powdered sugar from flying out of the bowl.
Increase to medium-high speed and beat until the mixture becomes pale and fluffy, approximately 2 minutes. This aeration creates a smooth, spreadable consistency.
Add the cold cream cheese pieces and beat for about 1 minute until fully incorporated. The cream cheese should remain cold because warm cream cheese makes runny frosting. Add the reserved strawberry solids, vanilla extract, and pinch of salt. Mix until combined, scraping the bowl once. The frosting will have a beautiful pink color from the strawberry solids.
Step Eight: Assemble the Cake
Pat the sliced fresh strawberries dry with paper towels. Excess moisture can make the frosting slide, so take time with this step.
Place one cooled cake layer on your serving plate. Spread ¾ cup of frosting evenly over the top. Arrange 1 cup of sliced strawberries over the frosting in an even layer. Spread another ¾ cup of frosting gently over the strawberries, being careful not to disturb the fruit layer.
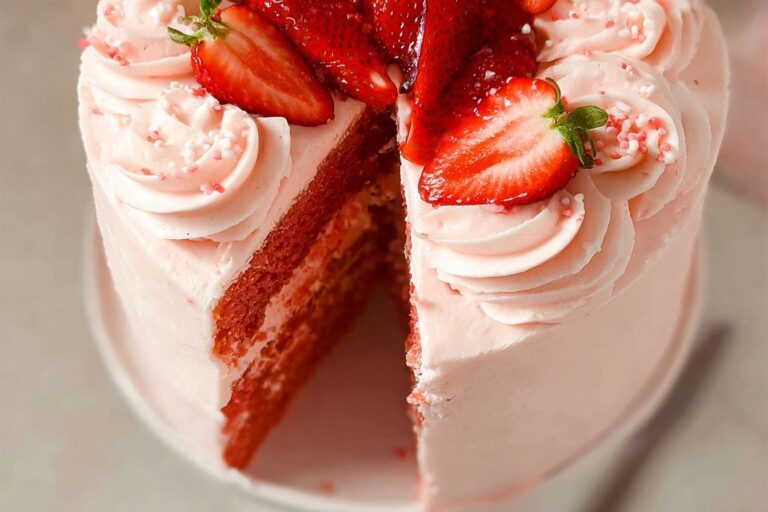
Position the second cake layer on top. Apply frosting to the top and sides of the cake using the remaining frosting. An offset spatula works best for smooth results. Garnish with the remaining strawberry slices arranged decoratively on top.
Your Strawberry Dream Cake is now ready to serve or refrigerate for later enjoyment.

Dietary Substitutions to Customize Your Strawberry Dream Cake
While the original Strawberry Dream Cake recipe delivers exceptional results, some bakers need alternatives for dietary restrictions or ingredient availability.
Flour and Gluten Modifications
For gluten-sensitive bakers, replace the cake flour with a gluten-free baking flour blend designed for cakes. Look for blends containing xanthan gum, which helps replicate the binding properties of gluten. The texture may be slightly denser, but flavor remains excellent. Avoid simply substituting almond flour or coconut flour, as these require additional recipe adjustments.
If cake flour is unavailable, create a substitute by removing 2 tablespoons of all-purpose flour per cup and replacing with cornstarch. Sift multiple times to distribute evenly. This approximation works reasonably well for most home baking needs.
Dairy-Free Alternatives
Replace whole milk with unsweetened almond milk, oat milk, or soy milk at a 1:1 ratio. The flavor remains delightful, though the crumb may be slightly less rich. For the butter, vegan butter sticks work better than tub spreads because they contain less water. Look for brands specifically formulated for baking.
Cream cheese frosting presents more challenges for dairy-free adaptation. Vegan cream cheese products exist but vary widely in stability when whipped. Consider a vegan buttercream made with shortening and vegan butter for more predictable results. The strawberry solids can still be incorporated for flavor.
Reducing Sugar Content
For those monitoring sugar intake, the granulated sugar in the cake can be reduced by about 25% without severely affecting texture. However, the confectioners’ sugar in the frosting provides structural integrity. Reducing it significantly results in a frosting that won’t hold its shape. Consider serving the cake with a dusting of powdered sugar and fresh strawberries instead of full frosting for a lighter option.
Mastering Strawberry Dream Cake: Advanced Tips and Variations
Transform your Strawberry Dream Cake from great to extraordinary with these professional techniques and creative adaptations.
Professional Baking Techniques
Use a potato ricer to press the frozen strawberries after microwaving. This kitchen tool extracts maximum juice while keeping solids contained. The more juice you extract, the more intense your strawberry flavor becomes in both cake and frosting.
When separating egg whites, do so while the eggs are cold for easier separation. Then let the whites come to room temperature before whipping. Cold whites separate cleanly but room temperature whites whip to greater volume.
For perfectly even cake layers, weigh your batter. Divide the total weight by two and portion exactly. This simple step eliminates lopsided cakes and ensures even baking.
Creative Flavor Variations
Transform this into a strawberry-lemon dream by adding 1 tablespoon of fresh lemon zest to the batter and replacing half the vanilla with lemon extract. The bright citrus notes complement strawberry beautifully.
For chocolate-strawberry lovers, add ¼ cup of mini chocolate chips to the batter and garnish with chocolate shavings. The chocolate adds richness without overwhelming the strawberry essence.
Summer bakers might enjoy adding other berries to the fresh strawberry layer. Raspberries, blueberries, or blackberries create a mixed berry version that celebrates seasonal abundance.
Presentation Ideas
For special occasions, pipe decorative borders around the top and bottom edges of the cake using a star tip. Fresh flowers between strawberry slices add an elegant touch for weddings or showers.
Create a naked cake version by applying frosting only between layers and a thin coating on the outside, letting the cake layers show through. This rustic style works beautifully for casual gatherings.
Make-Ahead Strategies
Bake the cake layers up to 2 days ahead. Wrap cooled layers tightly in plastic wrap and store at room temperature. The frosting can be made ahead and refrigerated for up to 2 days. Bring to room temperature and rewhip briefly before using.
For longer storage, wrap unfrosted cake layers in plastic and foil, then freeze for up to 3 months. Thaw wrapped at room temperature before frosting.
How to Store Strawberry Dream Cake: Best Practices
Proper storage preserves the quality of your Strawberry Dream Cake, maintaining both flavor and food safety.
Refrigeration Guidelines
Because this cake features cream cheese frosting and fresh strawberries, refrigeration is essential. Store the fully assembled cake in an airtight container or under a cake dome in the refrigerator for up to 2 days. The cold environment keeps the frosting stable and prevents fresh strawberry garnishes from spoiling.
Before serving refrigerated cake, remove it from the fridge 30-60 minutes beforehand. Bringing the cake to room temperature softens the frosting and enhances the strawberry flavor. Cold cake can taste muted and have a firmer texture.
Freezing Options
For longer storage, freeze unfrosted cake layers individually. Wrap each cooled layer in plastic wrap, then aluminum foil. Label with the date and freeze for up to 3 months. Thaw at room temperature while still wrapped to prevent condensation from making the cake soggy.
Frosted cake can also be frozen for up to 1 month. Place the cake in the freezer unwrapped until the frosting hardens, then wrap in plastic and foil. Thaw in the refrigerator overnight before bringing to room temperature.
Transportation Tips
When transporting this cake, chill it thoroughly first. Cold frosting holds its shape better during travel. Use a cake carrier with a secure base, and consider placing non-slip padding under the cake board.
For longer journeys, assemble the cake at your destination. Transport layers and frosting separately in insulated bags with ice packs. This approach prevents sliding and maintains optimal frosting texture.
FAQs: Frequently Asked Questions About Strawberry Dream Cake
Can I make Strawberry Dream Cake as cupcakes?
Yes, you can adapt the Strawberry Dream Cake recipe for cupcakes, though exact baking times may vary since it hasn’t been tested this way. Prepare the batter as directed, then fill cupcake liners 2/3 full. Bake at 350°F for 18-22 minutes, checking with a toothpick for doneness— it should come out clean. Cool completely before frosting. This yields about 24 cupcakes. For best results, use a light hand when mixing to maintain fluffiness from the egg whites. Cupcakes hold the strawberry flavor well and are great for parties. Store in an airtight container in the fridge for up to 3 days. If stacking or transporting, chill first to set the frosting. (87 words)
Can I use whole eggs instead of egg whites in Strawberry Dream Cake?
No, stick to 6 egg whites only—don’t substitute whole eggs. The extra whites create the cake’s signature tender, fluffy texture by trapping air during whipping. Yolks add fat that weighs it down and yellows the crumb. Save yolks for custard, mayo, or ice cream. Room-temperature whites whip best: separate eggs cold, then let whites sit 30 minutes. Beat to stiff peaks with cream of tartar for stability. Fold gently into batter to preserve volume. This technique ensures the light strawberry-infused layers that make the cake dreamy. (92 words)
Can I use fresh strawberries instead of frozen in Strawberry Dream Cake?
Yes, but freeze fresh strawberries first for best results, mimicking the recipe’s method. Wash, hull, and freeze 20 ounces (about 4 cups) overnight or until solid. Thaw slightly, puree with sugar, then microwave to reduce and intensify flavor—this concentrates the juices without excess water. Microwaving fresh ones alone risks a watery puree, leading to dense cake or runny frosting. Press solids through a sieve thoroughly. Fresh frozen berries work year-round; aim for ripe, sweet ones. This step extracts 1-1.5 cups puree needed. (94 words)
How do I make Strawberry Dream Cake less dense?
Prevent a dense Strawberry Dream Cake by handling the batter carefully. Whip egg whites to stiff peaks separately, then fold them into the base batter in three additions using a spatula—cut through the center and turn gently to keep air bubbles intact. Avoid overmixing after adding flour; stir just until no streaks remain. Use cake flour for finer texture and measure by spooning lightly into the cup, not scooping. Bake immediately in prepared pans at 350°F. Cool upside down on a wire rack to retain height. Test doneness early to avoid overbaking. (98 words)
Why is my Strawberry Dream Cake frosting runny and how do I fix it?
Runny frosting usually comes from excess liquid in the strawberry puree solids—squeeze them dry through a fine-mesh sieve or cheesecloth until no juice drips out. This removes up to 1/4 cup extra moisture. Chill the bowl and beaters before whipping the cream for better structure. Beat on medium until soft peaks, then gradually add powdered sugar and vanilla. Fold in reduced puree last. If still soft, refrigerate 30 minutes and re-whip briefly. Pipe or spread on cooled cake; it firms up in the fridge. Yields enough for a 9-inch layer cake. Store frosted cake chilled up to 2 days. (102 words)
Strawberry Dream Cake
🍓 Indulge in fluffy, moist strawberry dream cake layers bursting with real fruit puree and creamy frosting – a homemade delight that’s tender and celebration-worthy!
🍰 Easy recipe with stunning results from simple steps, perfect for birthdays or gatherings with superior fresh flavor over boxed mixes.
- Total Time: 3 hours
- Yield: 12 servings
Ingredients
– 10 ounces (2 cups) frozen whole strawberries
– ¾ cup whole milk, room temperature
– 6 extra-large egg whites, room temperature
– 2 teaspoons vanilla extract
– 2 ¼ cups (9 ounces) cake flour
– 1 ¾ cups (12 ½ ounces) granulated sugar
– 4 teaspoons baking powder
– 1 teaspoon Kosher salt
– 12 tablespoons (6 ounces) unsalted butter, softened and cut into 12 pieces
– 10 tablespoons (5 ounces) unsalted butter, softened
– 2 ¼ cups (9 ounces) confectioners’ sugar
– 12 ounces cream cheese, cold and cut into pieces
– 2 teaspoons vanilla extract
– Pinch of Kosher salt
– 8 ounces fresh strawberries, hulled and thinly sliced (about 1 ½ cups)
Instructions
1-Step One: Prepare Your Pans and Oven Begin by preheating your oven to 350°F. This temperature allows the cake to bake evenly without overbrowning. While the oven heats, prepare two 9-inch round cake pans. Line each pan with parchment paper, pressing it into the bottom for easy removal. Lightly spray the pans with non-stick cooking spray, covering both the parchment and the sides. Proper preparation prevents sticking and ensures clean release.
2-Step Two: Extract Strawberry Juice and Create Flavor Base Place the frozen strawberries in a microwave-safe bowl and heat until soft and juicy, approximately 5 minutes. The berries will release significant liquid during this process. Transfer the hot strawberries to a fine-mesh strainer positioned over a bowl. Press firmly to extract as much juice as possible. You need ¾ cup of strawberry juice for the cake. Reserve the strawberry solids left in the strainer for the frosting. Pour the collected juice into a small saucepan and bring to a boil. Reduce the heat and simmer until the juice reduces to ¼ cup and becomes syrupy, typically 6-8 minutes. This concentration step intensifies the strawberry flavor dramatically. Remove from heat and stir in the whole milk, creating strawberry milk. Let this mixture cool slightly before proceeding.
3-Step Three: Prepare the Liquid Mixture In a medium bowl, whisk together the strawberry milk, room temperature egg whites, and vanilla extract. Make sure these ingredients are well combined but not overbeaten. The mixture should be uniform in color with no streaks. Set aside while you prepare the dry ingredients.
4-Step Four: Mix Dry Ingredients and Incorporate Butter In the bowl of a stand mixer fitted with the paddle attachment, combine the cake flour, granulated sugar, baking powder, and Kosher salt. Mix on low speed for about 30 seconds to distribute the leavening agent evenly throughout. Add the softened butter pieces while the mixer runs on low. Continue mixing until the butter is incorporated and the mixture resembles coarse crumbs with pea-sized pieces of butter visible. This texture is essential for a tender crumb. The butter pieces create small pockets of steam during baking, resulting in a lighter cake.
5-Step Five: Combine Wet and Dry Ingredients With the mixer still on low speed, add half of the strawberry-egg white mixture to the dry ingredients. Once incorporated, increase the speed to medium-high and beat for about 90 seconds. The batter will become noticeably lighter and fluffier. This extended mixing develops structure without toughness because there’s no gluten-developing liquid yet. Reduce speed to low and add the remaining liquid mixture. Beat until just combined, about 20-30 seconds. Finish by stirring the batter by hand using a spatula, scraping the bottom and sides of the bowl. This ensures even distribution without overmixing.
6-Step Six: Bake the Cake Layers Divide the batter evenly between your prepared pans. Use a kitchen scale for precision if available, or eye the batter to ensure equal distribution. Smooth the tops with a spatula. Bake for 20-25 minutes, until the tops are lightly golden and a toothpick inserted in the center comes out clean. The cake should spring back when gently pressed. Avoid opening the oven door during the first 15 minutes to prevent collapse. Let the cakes cool in their pans for exactly 10 minutes. This brief resting period allows them to set enough for handling. Run a thin knife around the edges, invert onto a wire rack, discard the parchment paper, and cool completely for about 2 hours before frosting.
7-Step Seven: Prepare the Cream Cheese Frosting While the cakes cool, make the frosting. In a stand mixer with the paddle attachment, combine the softened butter and confectioners’ sugar on low speed for 30 seconds. The low speed prevents powdered sugar from flying out of the bowl. Increase to medium-high speed and beat until the mixture becomes pale and fluffy, approximately 2 minutes. This aeration creates a smooth, spreadable consistency. Add the cold cream cheese pieces and beat for about 1 minute until fully incorporated. The cream cheese should remain cold because warm cream cheese makes runny frosting. Add the reserved strawberry solids, vanilla extract, and pinch of salt. Mix until combined, scraping the bowl once. The frosting will have a beautiful pink color from the strawberry solids.
8-Step Eight: Assemble the Cake Pat the sliced fresh strawberries dry with paper towels. Excess moisture can make the frosting slide, so take time with this step. Place one cooled cake layer on your serving plate. Spread ¾ cup of frosting evenly over the top. Arrange 1 cup of sliced strawberries over the frosting in an even layer. Spread another ¾ cup of frosting gently over the strawberries, being careful not to disturb the fruit layer. Position the second cake layer on top. Apply frosting to the top and sides of the cake using the remaining frosting. An offset spatula works best for smooth results. Garnish with the remaining strawberry slices arranged decoratively on top. Your Strawberry Dream Cake is now ready to serve or refrigerate for later enjoyment.
Notes
🍓 Press frozen strawberries thoroughly using a potato ricer for maximum juice and best texture.
🥄 Avoid overmixing batter to keep the cake light and tender.
❄️ Assemble cake ahead; flavors improve after refrigeration up to 2 days.
- Prep Time: 45 minutes
- Cooling Time: 2 hours
- Cook Time: 20-25 minutes
- Category: Dessert
- Method: Bake
- Cuisine: American
- Diet: Vegetarian
Nutrition
- Serving Size: 1 slice
- Calories: 723 kcal
- Sugar: 66g
- Sodium: 551mg
- Fat: 38g
- Saturated Fat: 23g
- Unsaturated Fat: 12g
- Trans Fat: 1g
- Carbohydrates: 90g
- Fiber: 2g
- Protein: 9g
- Cholesterol: 103mg


