
Why You’ll Love This Lucky Charm Marshmallow Treats
There’s something magical about Lucky Charm Marshmallow Treats that brings out the kid in everyone. Whether you’re making them for a St. Patrick’s Day celebration, a birthday party, or just a fun weekend snack with the family, these colorful, chewy bars deliver pure joy in every bite. The best part? They come together in just minutes with minimal effort.
- Ease of preparation: With only four simple ingredients and about 12 minutes from start to finish, this recipe is perfect for busy parents, students, or anyone who wants a quick sweet treat without turning on the oven. Even kids can help make these with supervision!
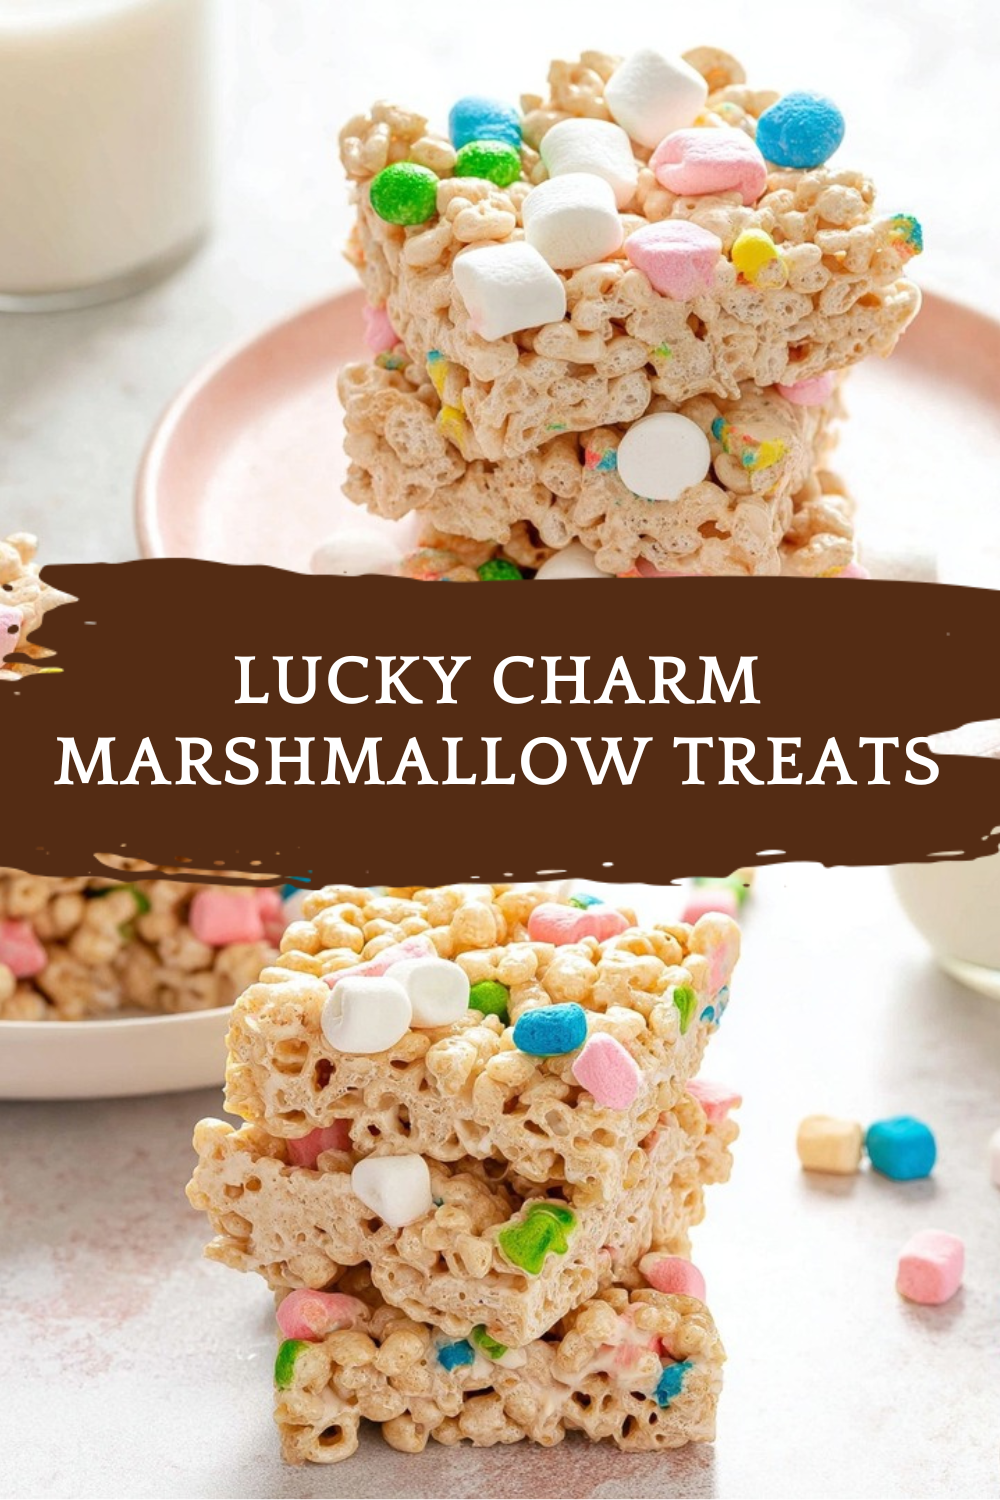
- Nostalgic appeal: The colorful marshmallow bits from Lucky Charms cereal create a fun, festive look that reminds adults of childhood while delighting a new generation. These treats are always a hit at potlucks, bake sales, and classroom parties.
- Versatility: This recipe works with Lucky Charms cereal or any other marshmallow cereal variety. You can also swap in vegan butter for a dairy-free version or experiment with different cereals like Cocoa Pebbles or Fruity Pebbles for entirely new flavor combinations.
- Perfect texture: When made correctly, these bars stay light, fluffy, and chewy rather than dense and hard. The secret lies in pressing gently and working quickly, which we’ll cover in detail below.
These colorful treats have become a St. Patrick’s Day tradition in our house. The kids love helping press the mixture into the pan, and I love that they’re ready in under 15 minutes!
If you enjoy sweet treats like our salted caramel popcorn, you’ll find these marshmallow bars equally irresistible. They’re the perfect blend of buttery, sweet, and crunchy with that signature marshmallow cereal charm everyone loves.
Jump To
- 1. Why You’ll Love This Lucky Charm Marshmallow Treats
- 2. Essential Ingredients for Lucky Charm Marshmallow Treats
- 3. How to Prepare the Perfect Lucky Charm Marshmallow Treats: Step-by-Step Guide
- 4. Dietary Substitutions to Customize Your Lucky Charm Marshmallow Treats
- 5. Mastering Lucky Charm Marshmallow Treats: Advanced Tips and Variations
- 6. How to Store Lucky Charm Marshmallow Treats: Best Practices
- 7. Nutritional Information
- 8. FAQs: Frequently Asked Questions About Lucky Charm Marshmallow Treats
- 9. Lucky Charm Marshmallow Treats
Essential Ingredients for Lucky Charm Marshmallow Treats
Getting the right ingredients is key to making the perfect Lucky Charm Marshmallow Treats. Here’s everything you’ll need with precise measurements:
Main Ingredients
- ½ cup unsalted butter – The base that creates richness and helps bind everything together. Unsalted butter is preferred for a rich, buttery flavor, though salted butter works too if you adjust or omit the added salt.
- ½ teaspoon salt (optional) – This might seem surprising for a sweet treat, but a touch of salt creates that perfect sweet and salty balance that makes treats truly memorable.
- 1 (16 oz) bag mini marshmallows – Mini marshmallows melt faster and more evenly than large ones, making your prep quicker. You can use any size marshmallow, but mini ones are definitely more convenient.
- 1 (11.5 oz) box marshmallow cereal (approximately 8 to 9 cups) – Lucky Charms is the classic choice, but any marshmallow cereal works beautifully. You can also substitute with other cereals for fun variations.
Special Dietary Options
- Vegan/Dairy-Free: Replace unsalted butter with an equal amount of vegan or plant-based butter. Results may vary slightly in texture, but the treats will still be delicious.
- Gluten-Free: Check your cereal packaging carefully. Some marshmallow cereals contain gluten, while others are certified gluten-free. Always verify if serving guests with celiac disease or gluten sensitivity.
- Lower-Calorie Option: While these treats are definitely an indulgence, you can reduce the butter slightly or cut the bars into smaller pieces for portion control.
How to Prepare the Perfect Lucky Charm Marshmallow Treats: Step-by-Step Guide
Making Lucky Charm Marshmallow Treats is incredibly straightforward, but following each step carefully ensures the best results. Here’s your complete guide:
Step 1: Prepare Your Pan
Before you begin cooking, grease a 9×13 inch pan with cooking spray or butter. This step is crucial because the marshmallow mixture is incredibly sticky. If you prefer thicker bars, you can use two 8×8 inch pans instead. Taking time to grease properly means your treats will release cleanly and look beautiful when cut.
Pro tip: Line your pan with parchment paper, leaving overhang on the sides. This makes lifting the entire block of treats out of the pan incredibly easy for cutting!
Step 2: Melt the Butter
Place your large pot on the stove and set it to low heat. Add the ½ cup of unsalted butter and let it melt slowly. Using low heat is essential here because it prevents the butter from browning or burning. Patience at this stage pays off with smoother, creamier treats.
You’ll know the butter is ready when it’s completely liquid and coats the bottom of your pot evenly. This should take about 2-3 minutes on low heat. If you notice any foam or bubbling, your heat might be too high.
Step 3: Add Salt and Marshmallows
Once your butter has melted completely, add the ½ teaspoon of salt (if using) and pour in the entire 16 oz bag of mini marshmallows. Stir constantly with a rubber spatula, which prevents sticking and helps the marshmallows melt evenly without scorching.
Keep stirring until every last marshmallow has melted and you have a smooth, glossy mixture. This typically takes 5-7 minutes. Don’t rush this process by increasing the heat because burnt marshmallows create an unpleasant taste and texture in your finished treats.
Work quickly once your marshmallows are fully melted. The mixture starts to firm up fast, so have your cereal measured and your pan ready before you begin melting.
Step 4: Fold in the Cereal
Remove your pot from the heat immediately after the marshmallows have melted completely. Pour in your 8-9 cups of Lucky Charms cereal and gently fold it into the marshmallow mixture. The key word here is gently because you want to preserve those colorful marshmallow bits and avoid crushing the cereal pieces.
Use a folding motion rather than vigorous stirring. Continue until every piece of cereal is evenly coated with the marshmallow mixture. This should only take about 30-45 seconds of gentle folding.
Step 5: Press into the Pan
Transfer your mixture into the prepared pan(s). Now here’s where many people go wrong: do not press down hard! Pressing too firmly compacts the treats and makes them dense and tough instead of light and fluffy.
Grease your hands with cooking spray or butter before touching the mixture. This prevents sticking and allows you to spread the treats evenly. Use a light touch, gently patting the mixture into an even layer. If using waxed paper or parchment paper, you can press through that to avoid direct contact.
Step 6: Cool and Cut
Let your treats cool completely before cutting. This usually takes 30-60 minutes depending on your kitchen temperature. Cutting while warm causes the bars to squish and lose their shape, so patience is important here.
Once cooled, use a sharp knife to cut into squares. The recipe yields approximately 16 bars when cut in a standard 9×13 pan. Store any leftovers properly to maintain freshness.

Dietary Substitutions to Customize Your Lucky Charm Marshmallow Treats
Protein and Main Component Alternatives
While the classic recipe uses butter and marshmallows, several substitutions work well for different dietary needs. The most common swap involves butter alternatives for those avoiding dairy.
Vegan or plant-based butter can replace unsalted butter in equal amounts. The texture might be slightly different, but most people won’t notice a significant change in taste. Coconut oil is another option, though it adds a subtle coconut flavor. Margarine works too, but results may vary depending on the brand.
If you find yourself with less than 16 oz of marshmallows, you have two options. Either halve the entire recipe for proper proportions, or accept that your treats will be less sticky and more cereal-forward. Both approaches work; it just depends on your texture preference.
For the cereal component, Lucky Charms isn’t your only option. Any marshmallow cereal works beautifully, or you can substitute entirely different cereals for unique variations. Cocoa Pebbles create chocolatey treats, Fruity Pebbles add bright colors, and Rice Krispies give you the classic version.
Vegetable, Sauce, and Seasoning Modifications
The beauty of Lucky Charm Marshmallow Treats lies in how easily you can customize them. Adding a drizzle of white chocolate on top creates an elegant presentation perfect for parties or gift-giving. Simply melt white chocolate chips in the microwave and drizzle over your cooled bars.
Food coloring opens up even more possibilities. Add a few drops of green food coloring to your melted marshmallow mixture for extra St. Patrick’s Day fun, or use any color that matches your event theme. Just remember that the Lucky Charms marshmallows already add plenty of color!
Salted butter can replace unsalted butter if that’s what you have on hand. Simply omit the additional salt called for in the recipe, or adjust by taste. Some people actually prefer the slightly saltier flavor because it balances the sweetness beautifully.
Mastering Lucky Charm Marshmallow Treats: Advanced Tips and Variations
Once you’ve mastered the basic recipe, these pro techniques will help you create Lucky Charm Marshmallow Treats that truly stand out:
Pro Cooking Techniques
The single most important tip is maintaining low heat throughout the melting process. High heat causes the sugar in marshmallows to caramelize or burn, resulting in hard, unpleasant treats. Low and slow is the way to go.
Always use a rubber spatula rather than a wooden spoon or metal utensil. Rubber spatulas prevent marshmallows from sticking and allow you to scrape every bit of mixture from the pot. This means less waste and easier cleanup.
Timing matters more than you might think. The moment your marshmallows finish melting, you have a short window to work with the mixture before it starts setting. Having everything prepped and ready measured cereal, greased pan, and clean workspace ensures smooth execution.
Flavor Variations
While classic Lucky Charms are delicious, creative variations make this recipe even more fun. Try mixing different cereals together for unique flavor combinations. Half Lucky Charms and half Cocoa Pebbles create a chocolate-marshmallow treat that kids and adults love.
For special occasions, consider adding mix-ins like mini chocolate chips, sprinkles, or crushed cookies. Fold these in after adding the cereal but before pressing into the pan. The possibilities are endless!
Presentation Tips
Cut your bars into neat squares using a sharp knife, wiping the blade clean between cuts for the cleanest edges. For parties, consider cutting smaller squares or even using cookie cutters for fun shapes. A light drizzle of white chocolate or a sprinkle of additional Lucky Charms marshmallows on top adds visual appeal.
If you’re looking for other crowd-pleasing desserts, our carrot cake cheesecake bars offer another delicious option for gatherings and celebrations.
Make-Ahead Options
These treats store well, making them perfect for advance preparation. You can make them a day or two before your event and store them properly. They also freeze beautifully for longer storage. Some families make double batches and keep half in the freezer for unexpected guests or sudden sweet cravings.
How to Store Lucky Charm Marshmallow Treats: Best Practices
Proper storage keeps your Lucky Charm Marshmallow Treats fresh and delicious:
Short-Term Storage
Store leftovers in an airtight container at room temperature for 2 to 3 days. Avoid refrigeration because the humidity makes treats sticky and unpleasant. Room temperature storage maintains the perfect chewy texture.
Freezing for Long-Term Storage
For longer storage, freeze your treats for up to 2 months. First, place bars in a single layer on a baking sheet and freeze until solid. Then transfer to freezer bags with parchment paper between layers to prevent sticking. Thaw at room temperature for about 30 minutes before serving.
Reheating Tips
These treats are best enjoyed at room temperature, but if you want that fresh-made warm taste, microwave individual bars for 5-8 seconds. Don’t overheat or they’ll become too soft and lose their shape.
Meal Prep Considerations
If you’re making treats for lunchboxes or grab-and-go snacks, cut them into individual portions before storing. Wrap each bar in plastic wrap or place in small containers. This makes morning routines easier and keeps portions controlled.
Heat sealing may extend shelf life to about 3 weeks, though this method hasn’t been extensively tested. Traditional airtight containers remain the most reliable storage method.
Nutritional Information
Understanding what’s in your treats helps you make informed decisions about portions and substitutions. Here’s the nutritional breakdown per bar (based on 16 bars per recipe):
| Nutrient | Amount per Bar |
|---|---|
| Calories | 219 |
| Fat | 7g (Saturated Fat 4g) |
| Cholesterol | 16mg |
| Sodium | 228mg |
| Carbohydrates | 40g (Fiber 1g, Sugar 24g) |
| Protein | 2g |
| Vitamin A | 575 IU |
| Vitamin C | 5.4mg |
| Calcium | 89mg |
| Iron | 4.6mg |
These numbers are approximate and may vary based on specific brands and exact portion sizes. For more detailed nutritional information about marshmallows and their properties, you can reference resources like Healthline’s guide to marshmallow root.
FAQs: Frequently Asked Questions About Lucky Charm Marshmallow Treats
How do you make Lucky Charms marshmallow treats?
To make Lucky Charms marshmallow treats, gather 4 tablespoons butter, 1/4 teaspoon salt, 16 ounces mini marshmallows, and about 8-9 cups Lucky Charms cereal from an 11.5-ounce box. Melt butter in a large pot over low heat. Add salt and marshmallows, stirring until fully melted and smooth, about 5-7 minutes. Remove from heat and gently fold in the cereal until evenly coated—avoid overmixing to keep them fluffy. Press the mixture lightly into a greased 9×13-inch pan using waxed paper or lightly oiled hands. Let cool for 30-60 minutes, then cut into 12-16 squares. Total time: 15 minutes prep plus cooling. This no-bake recipe yields chewy, colorful treats perfect for kids’ parties or snacks. Store as noted below for best results.
Can you substitute ingredients in Lucky Charms marshmallow treats recipe?
Yes, substitutions work well for Lucky Charms marshmallow treats. Swap butter for plant-based or vegan butter (same amount) for dairy-free versions—coconut oil or margarine also holds up, though texture might be slightly softer. Use 16 ounces of any marshmallow size; large ones just take longer to melt. Omit salt if preferred, but it balances the sweetness for better flavor. For gluten-free, confirm your Lucky Charms box label. Avoid watery substitutes like applesauce, as they make treats soggy. Test small batches first. These tweaks keep the treats chewy and fun, ideal for allergies or preferences. Yields the same 12-16 bars with minimal changes to prep time.
How do you press Lucky Charms marshmallow treats into the pan without making them hard?
Pressing too firmly compacts Lucky Charms marshmallow treats, turning them dense and tough. Instead, lightly grease your hands or use waxed paper over the mixture in a 9×13-inch pan. Pat gently with fingertips or the back of a spoon until even, about 1-inch thick—aim for minimal pressure to preserve air pockets for fluffiness. If sticky, chill the pan briefly first. This method keeps bars soft and chewy for days. Pro tip: Work quickly after mixing, as the mixture sets fast in warm kitchens. Results in perfect texture every time, matching classic marshmallow treat standards without common pitfalls.
How should you store Lucky Charms marshmallow treats?
Store Lucky Charms marshmallow treats in an airtight container at room temperature for 2-3 days—they stay soft and fresh. For longer, freeze in a single layer on a tray first, then transfer to freezer bags for up to 2 months; thaw at room temp for 30 minutes. Avoid fridge humidity, which makes them sticky. Heat-sealed packaging might extend room-temp life to 3 weeks, but test for your climate. Layer with parchment paper to prevent sticking. These steps maintain color and crunch from the cereal charms, making them great for lunchboxes or gifts. Always check for staleness before serving.
How many calories are in one Lucky Charms marshmallow treat bar?
One Lucky Charms marshmallow treat bar (cut from a 9×13 pan into 16 pieces) has about 219 calories, based on standard ingredients: 4 tbsp butter (408 cal), 16 oz marshmallows (2,080 cal), and 8-9 cups cereal (around 3,200 cal total recipe). Per bar: roughly 26g carbs, 3g fat, 2g protein. Variations like less butter drop it to 200 calories. Track with apps for precision. These treats pack nostalgia with marshmallow sweetness and cereal crunch, but portion control helps—great for occasional indulgences. Compare to Rice Krispies version (similar at 210 cal). Full nutrition boosts featured snippet visibility for health-conscious searches.

Lucky Charm Marshmallow Treats
🍀 Irresistible Lucky Charms marshmallow treats blend gooey melted marshmallows with crunchy colorful cereal – no-bake magic ready in 10 minutes for kids!
🌈 Buttery sweet-salty bars store 3 days or freeze 2 months, perfect St. Patrick’s Day fun or anytime treat with easy cereal swaps.
- Total Time: 42 minutes
- Yield: 16 bars
Ingredients
– ½ cup unsalted butter
– ½ teaspoon salt (optional)
– 1 (16 oz) bag mini marshmallows
– 1 (11.5 oz) box marshmallow cereal (approximately 8 to 9 cups)
Instructions
1-Step 1: Prepare Your Pan Before you begin cooking, grease a 9×13 inch pan with cooking spray or butter. This step is crucial because the marshmallow mixture is incredibly sticky. If you prefer thicker bars, you can use two 8×8 inch pans instead. Taking time to grease properly means your treats will release cleanly and look beautiful when cut.
2-Step 2: Melt the Butter Place your large pot on the stove and set it to low heat. Add the ½ cup of unsalted butter and let it melt slowly. Using low heat is essential here because it prevents the butter from browning or burning. Patience at this stage pays off with smoother, creamier treats. You’ll know the butter is ready when it’s completely liquid and coats the bottom of your pot evenly. This should take about 2-3 minutes on low heat. If you notice any foam or bubbling, your heat might be too high.
3-Step 3: Add Salt and Marshmallows Once your butter has melted completely, add the ½ teaspoon of salt (if using) and pour in the entire 16 oz bag of mini marshmallows. Stir constantly with a rubber spatula, which prevents sticking and helps the marshmallows melt evenly without scorching. Keep stirring until every last marshmallow has melted and you have a smooth, glossy mixture. This typically takes 5-7 minutes. Don’t rush this process by increasing the heat because burnt marshmallows create an unpleasant taste and texture in your finished treats.
4-Step 4: Fold in the Cereal Remove your pot from the heat immediately after the marshmallows have melted completely. Pour in your 8-9 cups of Lucky Charms cereal and gently fold it into the marshmallow mixture. The key word here is gently because you want to preserve those colorful marshmallow bits and avoid crushing the cereal pieces. Use a folding motion rather than vigorous stirring. Continue until every piece of cereal is evenly coated with the marshmallow mixture. This should only take about 30-45 seconds of gentle folding.
5-Step 5: Press into the Pan Transfer your mixture into the prepared pan(s). Now here’s where many people go wrong: do not press down hard! Pressing too firmly compacts the treats and makes them dense and tough instead of light and fluffy. Grease your hands with cooking spray or butter before touching the mixture. This prevents sticking and allows you to spread the treats evenly. Use a light touch, gently patting the mixture into an even layer. If using waxed paper or parchment paper, you can press through that to avoid direct contact.
6-Step 6: Cool and Cut Let your treats cool completely before cutting. This usually takes 30-60 minutes depending on your kitchen temperature. Cutting while warm causes the bars to squish and lose their shape, so patience is important here. Once cooled, use a sharp knife to cut into squares. The recipe yields approximately 16 bars when cut in a standard 9×13 pan. Store any leftovers properly to maintain freshness.
Notes
🔥 Melt marshmallows low and slow, stirring constantly to avoid scorching.
👐 Grease hands or spatula before pressing for non-stick fluffy texture.
❄️ Store airtight at room temp 2-3 days or freeze up to 2 months.
- Prep Time: 2 minutes
- Cooling: 30 minutes
- Cook Time: 10 minutes
- Category: Dessert
- Method: No Bake
- Cuisine: American
- Diet: Vegetarian
Nutrition
- Serving Size: 1 bar
- Calories: 219 kcal
- Sugar: 24g
- Sodium: 228mg
- Fat: 7g
- Saturated Fat: 4g
- Unsaturated Fat: 3g
- Trans Fat: 0g
- Carbohydrates: 40g
- Fiber: 1g
- Protein: 2g
- Cholesterol: 16mg


