
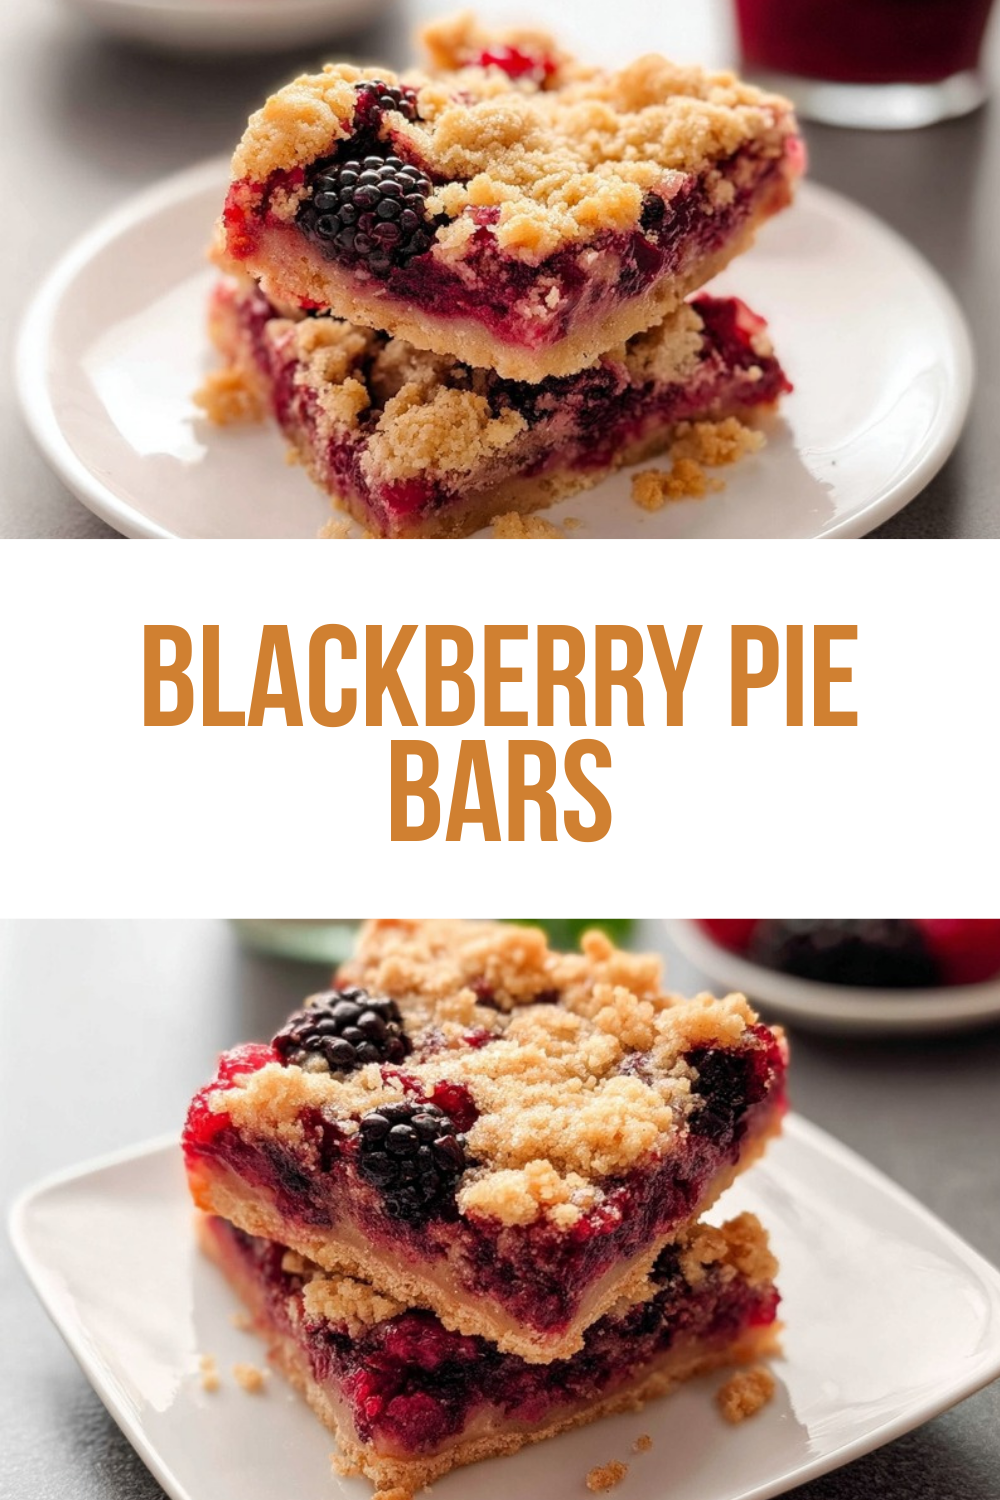
Why You’ll Love This Blackberry Pie Bars
These Blackberry Pie Bars have become a family favorite in our house, and it’s easy to see why. They bring together the best parts of a classic blackberry pie but in a convenient, shareable bar form that’s perfect for any occasion. Whether you’re an experienced baker or just starting out, this blackberry pie bars recipe delivers delicious results every single time.
Here’s what makes this dessert truly special:
- Ease of preparation: With just 20 minutes of prep time and straightforward steps, these easy blackberry pie bars come together without any fuss. The food processor does most of the work for the crust, and the filling requires simple mixing. No rolling pins or pie plates needed, making this recipe approachable for bakers of all skill levels.
- Health benefits: Blackberries pack a nutritional punch with antioxidants, vitamins, and fiber. According to Healthline’s guide to blackberry benefits, these berries support immune function and provide essential nutrients. Each serving contains only 315 calories, making this blackberry dessert a reasonable treat for those watching their intake.
- Versatility: These bars work beautifully for casual family dinners, potlucks, BBQs, or elegant dinner parties. Serve them warm with ice cream for dessert or enjoy them cold as an afternoon snack. The recipe also adapts well to different berries, so you can customize based on what’s in season or what you have on hand.
- Distinctive flavor: The combination of buttery, crumbly crust with sweet-tart blackberry filling creates an irresistible contrast. The sour cream adds a subtle tanginess that balances the sweetness, while the crumb topping provides a delightful crunch that complements the soft fruit filling.
What sets these fresh blackberry pie bars apart from other desserts is the way they capture homemade comfort without demanding hours in the kitchen. If you enjoyed our blueberry cream cake, you’ll find these bars offer that same berry-forward appeal in a more portable package.
Jump To
- 1. Why You’ll Love This Blackberry Pie Bars
- 2. Essential Ingredients for Blackberry Pie Bars
- 3. How to Prepare the Perfect Blackberry Pie Bars: Step-by-Step Guide
- 4. Dietary Substitutions to Customize Your Blackberry Pie Bars
- 5. Mastering Blackberry Pie Bars: Advanced Tips and Variations
- 6. How to Store Blackberry Pie Bars: Best Practices
- 7. FAQs: Frequently Asked Questions About Blackberry Pie Bars
- 8. Blackberry Pie Bars
Essential Ingredients for Blackberry Pie Bars
Creating the perfect blackberry pie bars starts with gathering quality ingredients. The beauty of this recipe lies in its simplicity most items are pantry staples you likely already have on hand. Here’s everything you’ll need to make this crowd-pleasing blackberry dessert.
Crust and Crumb Topping Ingredients
- 3 cups all purpose flour Forms the base of the buttery crust and crumb topping, providing structure and that satisfying texture.
- 1 1/2 cups sugar Adds sweetness to the crust mixture and helps create that golden-brown color during baking.
- 1/4 teaspoon salt Balances the sweetness and enhances all the flavors in the crust.
- 1 1/2 cups chilled butter The secret to a flaky, tender crust. Keep it cold for best results.
Filling Ingredients
- 4 large eggs Provide structure and help set the filling during baking.
- 2 cups sugar (for filling) Sweetens the blackberry filling to balance the natural tartness of the berries.
- 1 cup sour cream or plain Greek yogurt Adds richness, moisture, and a subtle tang that complements the blackberries beautifully.
- 3/4 cup all purpose flour (for filling) Acts as a thickener to give the filling the perfect consistency.
- Pinch of salt (for filling) A small but important addition that rounds out all the flavors.
- 4 cups blackberries, fresh or defrosted and drained The star of the show! Fresh blackberries give the best texture and flavor.
Special Dietary Options
For those with dietary restrictions, this blackberry pie bars easy recipe can be adapted:
- Vegan: Replace butter with cold coconut oil or vegan butter sticks. Substitute eggs with a flax egg mixture (3 tablespoons ground flaxseed mixed with 9 tablespoons water). Use coconut yogurt instead of sour cream.
- Gluten-free: Swap the all purpose flour for a 1:1 gluten-free flour blend. Make sure your blend contains xanthan gum for proper binding, or add 1 teaspoon separately.
- Lower calorie: Reduce the sugar in both the crust and filling by 25%. Use Greek yogurt instead of sour cream for a protein boost. You can also cut the finished bars into 32 smaller pieces for portion control.
How to Prepare the Perfect Blackberry Pie Bars: Step-by-Step Guide
Making these easy blackberry pie bars is straightforward when you follow these detailed steps. The process involves creating a buttery crust, preparing a luscious fruit filling, and finishing with a crumbly topping that bakes to golden perfection.
First Step: Prepare Your Baking Setup
Start by preheating your oven to 350 degrees F (175 degrees C). Proper oven temperature is crucial for even baking. While the oven heats, grease a 9 x 13 baking pan thoroughly. You can use butter, cooking spray, or line the pan with parchment paper for easier removal. If using parchment, leave some overhang on the sides this makes lifting the bars out much simpler after cooling.
Second Step: Create the Crust and Crumb Mixture
This step is where a food processor becomes your best friend. Combine the 3 cups all purpose flour, 1 1/2 cups sugar, and 1/4 teaspoon salt in your food processor. Pulse a few times to blend everything evenly.
Next, cut your 1 1/2 cups chilled butter into 1/2 inch cubes. Cold butter is essential here warm butter will make the crust tough instead of flaky. Add the butter cubes to the flour mixture in the food processor. Process until the mixture becomes crumbly and starts to clump together when pressed. This usually takes about 30-45 seconds of processing.
Pro tip: If you don’t have a food processor, you can use a pastry blender or two forks to cut the butter into the dry ingredients until the texture resembles coarse crumbs with pea-sized butter pieces throughout.
Measure out 1 1/2 cups of the crumb mixture and set it aside for the topping. This reserved portion will create that beautiful streusel-like finish on your bars.
Third Step: Press and Par-Bake the Crust
Take the remaining crumb mixture and press it firmly into the bottom of your prepared 9 x 13 pan. Use the bottom of a measuring cup or your hands to create an even, compact layer. Work from the center outward to ensure uniform thickness.
Place the pan in your preheated oven and bake the crust for 12 to 15 minutes. You’re looking for the edges to begin browning slightly. This par-baking step ensures your crust won’t become soggy once the filling is added.
After removing from the oven, let the crust cool for at least 10 minutes. This cooling period is important adding the filling to a hot crust can cause the eggs to scramble, creating an undesirable texture.
Fourth Step: Prepare the Blackberry Filling
While the crust cools, prepare your filling. In a large bowl, whisk 4 large eggs and 2 cups sugar together until well combined and slightly frothy. This takes about 1 minute of vigorous whisking.
Add the 1 cup sour cream (or Greek yogurt), 3/4 cup flour, and pinch of salt to the egg mixture. Whisk until smooth with no lumps remaining. The filling should have a creamy, pourable consistency.
Gently fold in the 4 cups blackberries. If using frozen berries, make sure they’re completely thawed and well-drained. Excess moisture will make your bars watery. Use a spatula to fold the berries in carefully you want them coated with the filling mixture but not crushed.
Fifth Step: Assemble and Bake
Pour the blackberry filling over your cooled crust, spreading it evenly to all corners. A spatula helps distribute the berries uniformly throughout the pan.
Sprinkle the reserved 1 1/2 cups of crumb mixture evenly over the top. The crumbs should cover most of the filling but don’t worry about complete coverage some spots of filling showing through is normal and creates visual interest.
Return the pan to the oven and bake for 45 to 55 minutes. The bars are done when the crust is lightly browned and the filling appears set with only a slight jiggle in the center. A toothpick inserted near the center should come out mostly clean with a few moist crumbs.
Sixth Step: Cool and Serve
Patience is key here. Cool the bars for at least 1 hour before cutting. This cooling time allows the filling to set properly, making clean cuts possible. Cutting too soon will result in messy, fallen-apart bars.
For the neatest slices, refrigerate the cooled bars for another hour before cutting. Use a sharp knife dipped in hot water and wiped clean between cuts.
Preparation Time Summary
| Task | Duration |
|---|---|
| Prep time | About 20 minutes |
| Cook time | About 1 hour |
| Total time | Approximately 1 hour 20 minutes |

Dietary Substitutions to Customize Your Blackberry Pie Bars
One of the wonderful aspects of this blackberry pie bars recipe is its adaptability. Whether you’re accommodating dietary restrictions or simply working with what’s in your pantry, several substitutions can help you customize these bars to your needs.
Protein and Main Component Alternatives
The primary ingredients that may need substitution are butter, eggs, and sour cream. Each plays a specific role in the recipe, and understanding their function helps you choose suitable alternatives.
Butter substitutes: For dairy-free baking, cold coconut oil or high-quality vegan butter sticks work well. Stick varieties (rather than tub spreads) are important because they maintain the right consistency for cutting into the flour. Coconut oil adds a subtle coconut flavor that pairs nicely with blackberries.
Egg replacements: Each egg can be replaced with a flax egg (1 tablespoon ground flaxseed mixed with 3 tablespoons water, left to sit for 5 minutes). Commercial egg replacers also work, though they may slightly alter the texture. The filling will be a bit more dense but still delicious.
Sour cream alternatives: Full-fat coconut milk, cashew cream, or dairy-free yogurt can replace sour cream for vegan versions. Greek yogurt remains a great option for those avoiding sour cream but still consuming dairy it actually increases the protein content slightly.
Vegetable, Sauce, and Seasoning Modifications
While blackberries are the traditional filling fruit, this pie bars recipe welcomes creative variations. Different fruits and seasonings can transform this dessert entirely.
Berry substitutions: Blueberries and raspberries make excellent alternatives to blackberries. A mixed berry combination using all three creates a beautiful color and complex flavor. Raspberries bring more tartness, while blueberries add sweetness. Adjust sugar slightly based on your berries’ natural sweetness.
What to avoid: Strawberries aren’t recommended for this recipe. Their high water content creates a mushy, watery filling that doesn’t set properly. If you’re craving strawberry bars, look for recipes specifically developed for that fruit.
Flavor enhancements: A teaspoon of lemon zest brightens the filling beautifully. A pinch of cinnamon in the crumb topping adds warmth. A splash of vanilla extract in the filling deepens the overall flavor profile. These additions are optional but delightful.
If you’re looking for another crowd-pleasing dessert bar, our carrot cake cheesecake bars offer a completely different flavor profile with that same convenient bar format.
Mastering Blackberry Pie Bars: Advanced Tips and Variations
Taking your fresh blackberry pie bars from good to exceptional requires a few insider techniques. These pro tips and creative variations will help you master this blackberry dessert and keep it exciting every time you make it.
Pro Cooking Techniques
Keep ingredients cold: The success of your crust depends on keeping the butter cold throughout the process. If your kitchen is warm, chill your flour and sugar beforehand. Work quickly when cutting butter into the dry ingredients. If the mixture seems too soft, pop it in the refrigerator for 15 minutes before pressing into the pan.
Don’t skip the par-bake: That initial 12-15 minute bake for the crust is non-negotiable. Without it, your crust will be gummy and undercooked. The edges should show just the beginning of golden color when it comes out.
Test for doneness correctly: The center should still have a slight wobble when you remove the bars from the oven it will continue cooking from residual heat. Overbaking leads to a rubbery filling, so err on the side of slightly underdone.
Flavor Variations
Spiced blackberry bars: Add 1/2 teaspoon cinnamon and 1/4 teaspoon nutmeg to the flour mixture for the crust. These warm spices complement blackberries beautifully, especially for fall baking.
Citrus twist: Add 1 tablespoon fresh lemon juice and 1 teaspoon lemon zest to the filling. The citrus brightens the blackberry flavor and cuts through the richness.
Double berry delight: Use 2 cups blackberries and 2 cups blueberries for a mixed berry version. The blueberries add sweetness while blackberries provide tartness.
Presentation Tips
Perfect cuts: For bakery-style presentation, refrigerate your completely cooled bars for at least 2 hours before cutting. Use a sharp knife dipped in hot water and wiped clean between each slice. Clean cuts showcase the beautiful filling layers.
Serving suggestions: These bars are delicious on their own but transform into an elegant dessert when served with vanilla ice cream or fresh whipped cream. A sprig of fresh mint or a dusting of powdered sugar adds a professional touch.
Make-Ahead Options
The crust and crumb mixture can be prepared up to 3 days ahead and stored in the refrigerator. The assembled, unbaked bars can wait in the refrigerator for up to 24 hours before baking add 5 extra minutes to the baking time if baking cold. For busy schedules, this flexibility makes the recipe practical for weeknight desserts or planned gatherings.
For more detailed guidance and visual references, you can check out this comprehensive blackberry pie bars resource that walks through similar techniques.
How to Store Blackberry Pie Bars: Best Practices
Proper storage ensures your blackberry pie bars maintain their delicious taste and appealing texture for as long as possible. These easy blackberry pie bars actually taste better the second day, as the flavors have time to meld together.
Refrigeration Guidelines
Store leftover bars in an airtight container in the refrigerator for 2 to 3 days. Place parchment paper between layers if you need to stack them this prevents the crumb topping from sticking to the bar beneath it. Always let the bars cool completely at room temperature before refrigerating to avoid condensation, which can make the crust soggy.
Freezing Considerations
Freezing is not recommended for this recipe. The fruit filling can become icy and watery upon thawing, causing the crust to soften unappealingly. If you must freeze, wrap individual portions tightly in plastic wrap followed by aluminum foil, and use within 1 month. Thaw overnight in the refrigerator. Understand that the texture won’t be quite the same as freshly baked.
A better approach: Freeze extra blackberries separately and bake fresh bars when the craving strikes. This preserves that just-baked quality.
Reheating Recommendations
These bars are wonderful cold, at room temperature, or slightly warmed. To reheat, place individual bars in a 300 degrees F oven for about 5 minutes. This gentle warming revives the buttery aroma of the crust without overcooking the filling. Avoid microwaving, which creates hot spots and can make the texture rubbery.
Serving Temperature Flexibility
One of the joys of this blackberry pie bars easy recipe is its temperature versatility. Enjoy them warm for a comforting dessert, at room temperature for potlucks, or cold from the refrigerator for a refreshing summer treat. Each temperature offers a slightly different experience the crust feels more crisp when cold, while warm bars have a softer, more yielding texture.
FAQs: Frequently Asked Questions About Blackberry Pie Bars
Can I use frozen blackberries in blackberry pie bars?
Yes, you can use frozen blackberries in blackberry pie bars, though fresh berries give the best texture and flavor. If using frozen, thaw them completely in the fridge overnight, then drain thoroughly in a colander lined with paper towels. Press gently to remove excess liquid—this prevents a watery filling and soggy crust. Pat dry with more towels if needed. Toss the drained berries with sugar, cornstarch, and lemon juice as directed in the recipe. Expect slightly softer bars, but they’ll still taste great. For best results, avoid adding extra liquid to the filling. This swap works well in a pinch during off-season months when fresh blackberries aren’t available. Always test one bar first to check consistency before serving a crowd. (92 words)
What other berries can I use in blackberry pie bars?
Blackberry pie bars shine with fresh blackberries, but you can swap or mix in blueberries, raspberries, or a combination for variety. Frozen versions of these work too if thawed and drained well, just like blackberries. These berries hold their shape better during baking, creating a jammy filling without falling apart. Avoid strawberries—they release too much water, leading to mushy, soupy bars. Try a blackberry-blueberry mix for a tart-sweet balance or raspberries for extra brightness. Adjust sugar slightly if your berries are very tart. Experiment with 2-3 cups total fruit to keep the bars sturdy. This flexibility makes the recipe perfect for using up seasonal produce or farmers’ market finds. (108 words)
How do I store blackberry pie bars?
Store leftover blackberry pie bars in an airtight container in the refrigerator, where they stay fresh for 2-3 days. Let them cool completely at room temperature first (about 2 hours) to avoid condensation, which can make the crust soggy. Layer with parchment paper between stacks to prevent sticking from the juicy filling. For short-term room temp storage (up to 1 day in cool conditions), cover loosely with foil. Bring to room temperature or warm slightly in a 300°F oven for 5 minutes before serving to restore crispness. Discard if they smell off or show mold. These steps keep the crumbly crust intact and the fruit filling flavorful. (102 words)
Can I freeze blackberry pie bars?
Freezing blackberry pie bars isn’t ideal, as the fruit filling can become icy and watery upon thawing, softening the crust texture. If you must freeze, cool bars completely, then wrap individual pieces tightly in plastic wrap followed by aluminum foil or place in a freezer-safe bag. Freeze for up to 1 month. Thaw overnight in the fridge and serve cold or at room temp—avoid microwaving to prevent mushiness. The bars may not regain their original crispness, so enjoy fresh when possible. For better results, freeze extra berries separately and bake fresh batches. This preserves flavor better than freezing the assembled bars. (98 words)
How do I cut blackberry pie bars neatly?
For clean cuts on blackberry pie bars, chill them in the fridge for at least 2 hours after baking—this firms up the filling and crust. Use a sharp chef’s knife dipped in hot water and wiped dry between slices for smooth edges without dragging berry bits. Score the outline first lightly, then cut firmly in one motion. A bench scraper works great for lifting portions from the pan. If bars are for a party, line your baking pan with foil or parchment overhanging the sides for easy removal. Cut into 16-24 squares depending on size. Wipe the knife often to keep lines precise. This method yields bakery-style presentation every time. (105 words)
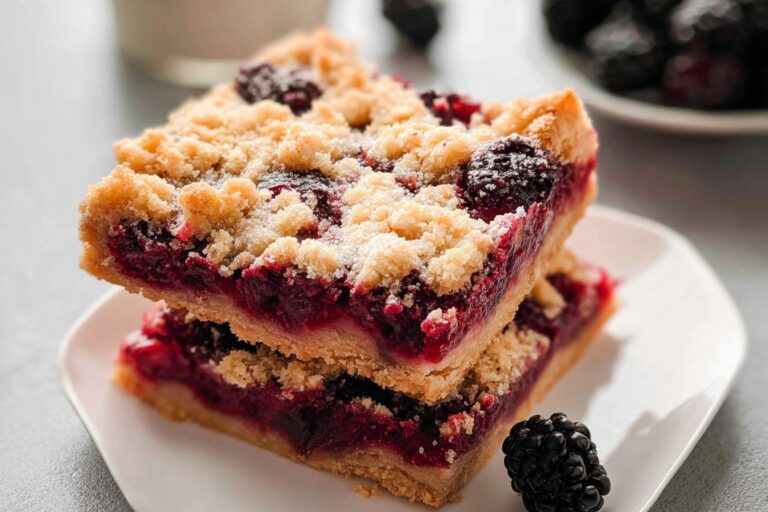
Blackberry Pie Bars
🫐 Buttery crumb-crusted blackberry pie bars ooze fresh juicy filling in creamy custard – easy no-roll pie alternative bursting with summer fruit!
🍰 Portable potluck stars slice perfectly, chill 3 days, swap berries for endless variations without mushy sogginess.
- Total Time: 1 hour 20 minutes
- Yield: 24 bars
Ingredients
– 3 cups all purpose flour
– 1 1/2 cups sugar
– 1/4 teaspoon salt
– 1 1/2 cups chilled butter
– 4 large eggs
– 2 cups sugar for filling
– 1 cup sour cream or plain Greek yogurt
– 3/4 cup all purpose flour for filling
– Pinch of salt for filling
– 4 cups blackberries, fresh or defrosted and drained
Instructions
1-First Step: Prepare Your Baking Setup Start by preheating your oven to 350 degrees F (175 degrees C). Proper oven temperature is crucial for even baking. While the oven heats, grease a 9 x 13 baking pan thoroughly. You can use butter, cooking spray, or line the pan with parchment paper for easier removal. If using parchment, leave some overhang on the sides this makes lifting the bars out much simpler after cooling.
2-Second Step: Create the Crust and Crumb Mixture This step is where a food processor becomes your best friend. Combine the 3 cups all purpose flour, 1 1/2 cups sugar, and 1/4 teaspoon salt in your food processor. Pulse a few times to blend everything evenly. Next, cut your 1 1/2 cups chilled butter into 1/2 inch cubes. Cold butter is essential here warm butter will make the crust tough instead of flaky. Add the butter cubes to the flour mixture in the food processor. Process until the mixture becomes crumbly and starts to clump together when pressed. This usually takes about 30-45 seconds of processing. Measure out 1 1/2 cups of the crumb mixture and set it aside for the topping. This reserved portion will create that beautiful streusel-like finish on your bars.
3-Third Step: Press and Par-Bake the Crust Take the remaining crumb mixture and press it firmly into the bottom of your prepared 9 x 13 pan. Use the bottom of a measuring cup or your hands to create an even, compact layer. Work from the center outward to ensure uniform thickness. Place the pan in your preheated oven and bake the crust for 12 to 15 minutes. You’re looking for the edges to begin browning slightly. This par-baking step ensures your crust won’t become soggy once the filling is added. After removing from the oven, let the crust cool for at least 10 minutes. This cooling period is important adding the filling to a hot crust can cause the eggs to scramble, creating an undesirable texture.
4-Fourth Step: Prepare the Blackberry Filling While the crust cools, prepare your filling. In a large bowl, whisk 4 large eggs and 2 cups sugar together until well combined and slightly frothy. This takes about 1 minute of vigorous whisking. Add the 1 cup sour cream (or Greek yogurt), 3/4 cup flour, and pinch of salt to the egg mixture. Whisk until smooth with no lumps remaining. The filling should have a creamy, pourable consistency. Gently fold in the 4 cups blackberries. If using frozen berries, make sure they’re completely thawed and well-drained. Excess moisture will make your bars watery. Use a spatula to fold the berries in carefully you want them coated with the filling mixture but not crushed.
5-Fifth Step: Assemble and Bake Pour the blackberry filling over your cooled crust, spreading it evenly to all corners. A spatula helps distribute the berries uniformly throughout the pan. Sprinkle the reserved 1 1/2 cups of crumb mixture evenly over the top. The crumbs should cover most of the filling but don’t worry about complete coverage some spots of filling showing through is normal and creates visual interest. Return the pan to the oven and bake for 45 to 55 minutes. The bars are done when the crust is lightly browned and the filling appears set with only a slight jiggle in the center. A toothpick inserted near the center should come out mostly clean with a few moist crumbs.
6-Sixth Step: Cool and Serve Patience is key here. Cool the bars for at least 1 hour before cutting. This cooling time allows the filling to set properly, making clean cuts possible. Cutting too soon will result in messy, fallen-apart bars. For the neatest slices, refrigerate the cooled bars for another hour before cutting. Use a sharp knife dipped in hot water and wiped clean between cuts.
Notes
🫐 Use fresh blackberries or thawed/drained frozen; avoid strawberries for less mush.
❄️ Store airtight in fridge up to 3 days; enjoy warm, room temp, or cold.
🍨 Pair with ice cream or whipped cream for indulgent dessert upgrade.
- Prep Time: 20 minutes
- Cooling: 1 hour
- Cook Time: 1 hour
- Category: Dessert
- Method: Bake
- Cuisine: American
- Diet: Vegetarian
Nutrition
- Serving Size: 1 bar
- Calories: 315 kcal
- Sugar: 29g
- Sodium: 140mg
- Fat: 14g
- Saturated Fat: 9g
- Unsaturated Fat: 5g
- Trans Fat: 0g
- Carbohydrates: 44g
- Fiber: 1g
- Protein: 3g
- Cholesterol: 63mg


