
Why You’ll Love This Red Velvet Cake
Author: Camille Hayes
My blog shares my passion for cooking by offering a variety of recipes that are simple and accessible to everyone. My ambition is to inspire readers to explore new flavors, cook with joy, and create memorable moments around the table.
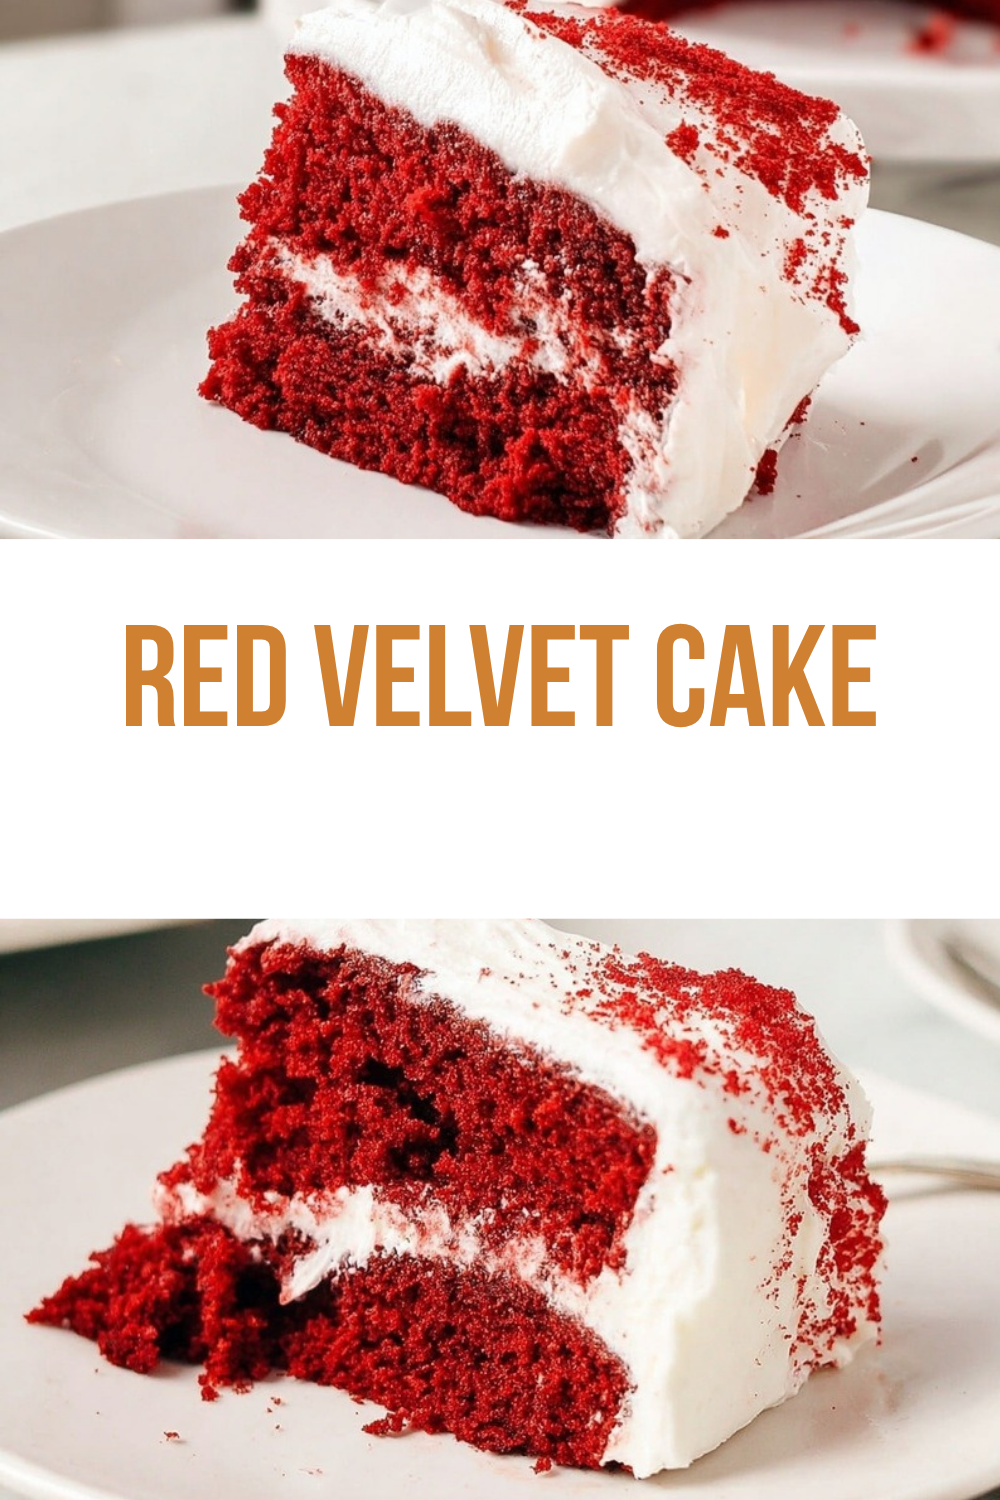
This Red Velvet Cake is a must-try for bakers who want a reliable, show-stopping dessert that tastes as good as it looks. The classic combination of a tender red cake and tangy cream cheese frosting makes this red velvet cake a favorite at birthdays, holidays, and casual get-togethers.
- Ease of preparation: This red velvet recipe is straightforward and friendly for bakers at any level. With a clear step-by-step process and a total time of about 3 hours including cooling and assembly, you can produce two layered cakes without fuss.
- Health and ingredient sense: While dessert is an indulgence, this homemade red velvet cake uses balanced fats: a mix of butter and oil for moistness and flavor. You can also adapt the recipe to meet dietary needs like lower-calorie or gluten-free versions if needed.
- Versatility: The recipe adapts well to cupcakes, sheet cakes, or layered celebration cakes. The cream cheese frosting pairs well with other cakes too, so you can repurpose the frosting for cupcakes or bars.
- Distinctive flavor: What sets this red velvet cake apart is its mild cocoa tone, tangy buttermilk, and a soft, velvety crumb. The cream cheese frosting adds a slightly tangy-sweet contrast that many find irresistible.
Whether you are a busy parent looking for a reliable dessert or a baking enthusiast aiming for picture-perfect layers, this red velvet cake recipe will deliver consistent results.
Jump To
- 1. Why You’ll Love This Red Velvet Cake
- 2. Essential Ingredients for Red Velvet Cake
- 3. How to Prepare the Perfect Red Velvet Cake: Step-by-Step Guide
- 4. Dietary Substitutions to Customize Your Red Velvet Cake
- 5. Mastering Red Velvet Cake: Advanced Tips and Variations
- 6. How to Store Red Velvet Cake: Best Practices
- 7. FAQs: Frequently Asked Questions About Red Velvet Cake
- 8. Red Velvet Cake
Essential Ingredients for Red Velvet Cake
The ingredients below list exact quantities and quick notes on their role so you can shop and prep with confidence. Each ingredient appears on its own line with the measurement first for clarity.
Main Ingredients
- 3 cups (360g) cake flour – creates a lighter, softer crumb than all-purpose flour.
- 1 teaspoon baking soda – helps the cake rise and gives a tender texture.
- 2 Tablespoons (10g) unsweetened natural cocoa powder – provides mild cocoa flavor and classic red velvet depth.
- 1/2 teaspoon salt – balances sweetness and brings out flavor.
- 1/2 cup (113g) unsalted butter, softened – adds richness and flavor.
- 2 cups (400g) granulated sugar – sweetens and helps with structure.
- 1 cup (240ml) canola or vegetable oil – keeps the cake moist and tender.
- 4 large eggs, room temperature and separated – egg yolks add richness; whipped egg whites lighten the batter for that velvety texture.
- 1 Tablespoon pure vanilla extract – adds warm, sweet aroma and depth.
- 1 teaspoon distilled white vinegar – reacts with baking soda and helps create tender crumb and brighter color.
- Liquid or gel red food coloring (1-2 teaspoons recommended) – gives the cake its signature red hue; gel is concentrated so use less.
- 1 cup (240ml) buttermilk, at room temperature – adds tang, moisture, and helps with leavening.
Cream Cheese Frosting Ingredients
- 16 ounces (452g) full-fat brick cream cheese, softened to room temperature – the base for the tangy, creamy frosting.
- 3/4 cup (170g) unsalted butter, softened – adds richness and pipeable texture to the frosting.
- 5 cups (600g) confectioners’ sugar – sweetens and thickens the frosting to a spreadable consistency.
- 1 and 1/2 teaspoons pure vanilla extract – rounds out the frosting flavor.
- Pinch of salt to taste – balances the sweetness in the frosting.
Special Dietary Options
- Vegan: Substitute plant-based butter, use a vegan cream cheese alternative, replace eggs with aquafaba (whip 3/4 cup to peaks), and use a non-dairy milk mixed with 1 tablespoon vinegar in place of buttermilk.
- Gluten-free: Use a 1:1 gluten-free flour blend designed for cakes or replace cake flour with a fine rice/cornstarch blend formulated to mimic cake flour; weigh ingredients for best results.
- Lower-calorie: Reduce sugar slightly or use a granulated sugar substitute suitable for baking; swap half the oil for apple sauce for reduced fat while keeping some oil for moisture.
How to Prepare the Perfect Red Velvet Cake: Step-by-Step Guide
First Step: Mise en place and oven prep
Preheat your oven to 350°F (177°C). Grease two 8- or 9-inch round cake pans, line the bottoms with parchment paper, and lightly grease the parchment. This prevents sticking and helps you remove layers cleanly when cool.
Measure all ingredients precisely. Bring cold items like eggs and buttermilk to room temperature for more even mixing and a smoother batter.
Second Step: Combine dry ingredients
In a large bowl, whisk together 3 cups (360g) cake flour, 1 teaspoon baking soda, 2 Tablespoons (10g) unsweetened natural cocoa powder, and 1/2 teaspoon salt. Sift or whisk well to remove lumps and to aerate the flour for a lighter result.
Third Step: Cream fats and sugar, then add wet ingredients
In a stand mixer or large bowl with a hand mixer, beat 1/2 cup (113g) softened unsalted butter and 2 cups (400g) granulated sugar on medium-high speed until combined, about 1 minute. Add 1 cup (240ml) canola or vegetable oil, the 4 egg yolks (reserve the whites), 1 Tablespoon pure vanilla extract, and 1 teaspoon distilled white vinegar. Beat on high for 2 minutes to incorporate and create a smooth, slightly aerated mixture.
Fourth Step: Alternate dry ingredients and buttermilk
Reduce mixer speed to low. Add the dry ingredients and 1 cup (240ml) buttermilk in 2 to 3 additions, beginning and ending with the dry mix. Mix just until combined; overmixing can make the crumb tough. Add liquid or gel red food coloring a little at a time until you reach the desired color, keeping in mind color deepens slightly when baked.
Fifth Step: Whip egg whites and fold in
In a clean bowl, whip the 4 reserved egg whites until fluffy peaks form, about 3 minutes. Gently fold the whites into the batter in three additions, using a spatula to keep as much air as possible. This step is what creates the soft, velvety texture that distinguishes a great red velvet cake.
Sixth Step: Bake and cool
Divide the batter evenly between the prepared pans. Tap each pan gently on the counter to remove large air bubbles. Bake 30 to 32 minutes, or until a toothpick inserted into the center comes out clean. Ovens vary, so start checking near 28 minutes.
Cool the layers completely in the pans on a wire rack. When cooled, run a knife around the edges and invert to remove. If the tops domed in the oven, level them with a serrated knife or cake leveler before frosting.
Seventh Step: Make the cream cheese frosting
In a mixing bowl, beat 16 ounces (452g) full-fat brick cream cheese and 3/4 cup (170g) unsalted butter on medium-high until smooth, about 2 minutes. Add 5 cups (600g) confectioners’ sugar, 1 and 1/2 teaspoons pure vanilla extract, and a pinch of salt. Begin mixing on low for 30 seconds to prevent a sugar cloud, then increase to high and beat for 3 minutes until light and fluffy. Adjust consistency: if too thin, add a little more confectioners’ sugar; if too thick, add a teaspoon of milk at a time.
Final Step: Assemble and chill
Level the cake tops by slicing a thin layer off each. Place one layer on your serving plate, spread an even layer of frosting, then top with the second cake layer. Cover the entire cake with the remaining frosting. For cleaner slices, chill the assembled cake in the refrigerator for 30 to 60 minutes before slicing.
Storage: Keep the finished cake tightly covered and refrigerated for up to 5 days or freeze for 2 to 3 months; thaw in the refrigerator before serving.
| Prep | Cook | Total Time | Yield |
|---|---|---|---|
| 30 minutes | 30 minutes | Approximately 3 hours (including cooling and assembly) | Two 8- or 9-inch layers (serves 12-16) |
Tip: Use gel food coloring for a richer red without changing batter consistency; add color to the wet ingredients for more even distribution.

Dietary Substitutions to Customize Your Red Velvet Cake
Protein and Main Component Alternatives
If you need to swap major components, here are reliable alternatives that keep the texture and flavor close to the original red velvet cake.
- Egg substitutes: For vegan versions, whip 3/4 cup aquafaba until foamy to mimic whipped egg whites. Use store-bought vegan egg replacer for yolk replacement in the batter.
- Butter and oil: Use plant-based butter in place of dairy butter for vegan cakes. Keep some oil for moisture; replacing all oil with butter can dry the cake over time.
- Buttermilk: Make a quick swap by adding 1 tablespoon white vinegar or lemon juice to 1 cup non-fat milk and letting it sit 5 minutes. For dairy-free, use soy or oat milk with the vinegar trick.
- Flour: Cake flour gives the best texture. If unavailable, make a cake flour substitute by removing 2 tablespoons all-purpose flour per cup and replacing with 2 tablespoons cornstarch, then sift well.
Vegetable, Sauce, and Seasoning Modifications
Red velvet is a subtle cake, so small seasoning changes can alter its character. Here are safe swaps and seasonal ideas.
- Cocoa powder: Stick with unsweetened natural cocoa powder for the classic flavor and reaction with the buttermilk and vinegar. For an antioxidant boost and reading about its benefits, check this cocoa powder nutrition benefits article.
- Food coloring: Use beet powder or concentrated beet juice if you want a natural tint, but expect more subtle color variations.
- Frosting flavor twists: Add 1 teaspoon of orange zest to the frosting for a bright twist or 1/2 teaspoon of espresso powder to deepen the chocolate notes.
Mastering Red Velvet Cake: Advanced Tips and Variations
Pro cooking techniques
To get bakery-style layers, chill baked layers for 30 minutes before leveling and stacking; cold cakes slice more cleanly. When whipping egg whites, make sure the bowl and whisk are grease-free for the best volume.
For even baking, rotate pans front to back halfway through the baking time. If using a convection oven, reduce the temperature by 25 degrees Fahrenheit and monitor closely.
Flavor variations
Try these creative spins while keeping the red velvet core intact:
- Chocolate lovers: Increase cocoa to 3 Tablespoons and slightly reduce flour for a richer taste.
- Fruity notes: Fold a thin layer of raspberry jam between layers for a tangy contrast that complements cream cheese frosting.
- Spiced red velvet: Add 1/2 teaspoon cinnamon and a pinch of ground nutmeg for a warm, seasonal twist.
Presentation tips
Use a piping bag and a large round tip to create even swirls or a smooth finish. Garnish with white chocolate curls, fresh berries, or a dusting of cocoa powder for contrast. For a rustic look, do a semi-naked finish and leave some of the red crumb visible.
Make-ahead options
Prepare the cake layers a day ahead and wrap them tightly in plastic wrap, then refrigerate. Make the frosting and keep it chilled; bring to room temperature and rewhip briefly before frosting. This is a great strategy for busy schedules and events.
How to Store Red Velvet Cake: Best Practices
Refrigeration
Because the frosting contains cream cheese, store your finished red velvet cake in an airtight container in the refrigerator. Keep it tightly covered to prevent drying and to avoid absorbing other fridge odors. Refrigerated, the cake stays fresh for up to 5 days.
Freezing
Unfrosted layers can be wrapped tightly in plastic wrap and foil and frozen for up to 2 to 3 months. For the best result, thaw overnight in the refrigerator before assembling and frosting. Finished frosted cakes do not freeze as well because the frosting can become soggy.
Reheating and serving
Bring slices to room temperature before serving to allow the cream cheese frosting to soften and deliver the best texture. For individual slices from the fridge, remove 30 to 45 minutes before serving.
Meal prep considerations
Portion into cupcakes or bars for grab-and-go options. Frost cupcakes after thawing if you freeze them unfrosted. Label and date frozen layers so you can rotate them properly for future events.
FAQs: Frequently Asked Questions About Red Velvet Cake
What does red velvet cake taste like?
Red velvet cake offers a unique balance of mild cocoa flavor from a small amount of cocoa powder, tangy notes from buttermilk, sweet vanilla, and rich butteriness. It’s not overly chocolatey like a traditional chocolate cake but has a subtle earthy undertone. The texture is dense yet soft with a moist, velvety crumb that melts in your mouth. Paired with creamy cream cheese frosting, it creates a tangy-sweet contrast. Many describe it as a cross between chocolate and vanilla cake with a signature tang. This combination makes it distinct and addictive, perfect for celebrations. (78 words)
How do you make red velvet cake from scratch?
Start by whisking dry ingredients: 2 1/2 cups cake flour, 1/2 cup cocoa powder, 1 tsp baking soda, and 1 tsp salt. In another bowl, beat 1/2 cup softened butter and 1 1/2 cups sugar until fluffy. Add 2 eggs one at a time, then 1 tsp vanilla and 1 oz red gel food coloring. Alternate adding dry mix with 1 cup buttermilk and 1 tsp vinegar. Whip 2 egg whites to stiff peaks and fold in gently. Bake in two 9-inch pans at 350°F for 25-30 minutes. Cool completely before frosting. Yields a moist, tender cake. (112 words)
What type of flour is best for red velvet cake?
Cake flour is ideal for red velvet cake because its lower protein content (around 7-9%) creates a lighter, softer crumb with fine texture. All-purpose flour works but results in a denser cake. For a DIY substitute, remove 2 tbsp all-purpose flour per cup and replace with 2 tbsp cornstarch, then sift well. This mimics cake flour’s tenderness. Always measure by spooning into the cup and leveling off to avoid packing. Using the right flour ensures the signature velvety mouthfeel without chewiness. Test bake a small batch if substituting. (98 words)
Is food coloring necessary for red velvet cake?
Food coloring isn’t essential for flavor but gives red velvet cake its iconic vibrant red hue, originally from natural beet juice in older recipes. Use 1-2 tsp gel food coloring for intense color without thinning the batter—liquid drops can alter texture. Without it, the cake bakes cocoa-brown, like a red devil’s food cake, but tastes identical with mild cocoa, tang, and vanilla. Omit for natural appeal or allergies. For best results, add coloring with wet ingredients and mix evenly. The cake remains moist and delicious either way. (92 words)
How do you store red velvet cake layers or the finished cake?
Unfrosted layers store wrapped tightly in plastic at room temperature for 1-2 days or freeze up to 3 months—thaw overnight in fridge. Frosted cake refrigerates in an airtight container for 3-5 days due to cream cheese frosting; bring to room temp before serving for best texture. Avoid direct freezer storage of frosted cake to prevent sogginess. For cupcakes, freeze unfrosted and frost after thawing. This keeps the moist crumb fresh. Label with dates and wrap twice to block freezer burn. Perfect for prepping ahead for events. (96 words)
Red Velvet Cake
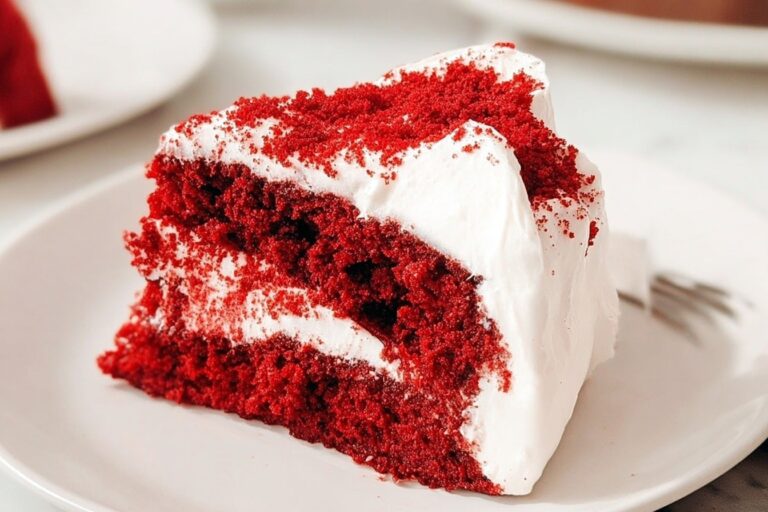
🍰 Indulge in the ultimate southern classic with this moist and velvety red cake that melts in your mouth
🧀 Rich cream cheese frosting perfectly complements the subtle chocolate notes for a dessert that steals the show at any celebration
- Total Time: 3 hours
- Yield: 12-16 servings
Ingredients
– 3 cups (360g) cake flour for lighter, softer crumb
– 1 teaspoon baking soda for rising and tender texture
– 2 Tablespoons (10g) unsweetened natural cocoa powder for mild cocoa flavor and red velvet depth
– 1/2 teaspoon salt for balancing sweetness and bringing out flavor
– 1/2 cup (113g) unsalted butter, softened for richness and flavor
– 2 cups (400g) granulated sugar for sweetness and structure
– 1 cup (240ml) canola or vegetable oil for moisture and tenderness
– 4 large eggs, room temperature and separated for richness and velvety texture
– 1 Tablespoon pure vanilla extract for warm, sweet aroma and depth
– 1 teaspoon distilled white vinegar for tender crumb and brighter color
– Liquid or gel red food coloring (1-2 teaspoons recommended) for signature red hue
– 1 cup (240ml) buttermilk, at room temperature for tang, moisture, and leavening
– 16 ounces (452g) full-fat brick cream cheese, softened for tangy, creamy frosting base
– 3/4 cup (170g) unsalted butter, softened for richness and pipeable texture
– 5 cups (600g) confectioners’ sugar for sweetness and spreadable consistency
– 1 and 1/2 teaspoons pure vanilla extract for rounding out frosting flavor
– Pinch of salt for balancing sweetness
Instructions
1-First Step: Mise en place and oven prep Preheat your oven to 350°F (177°C). Grease two 8- or 9-inch round cake pans, line the bottoms with parchment paper, and lightly grease the parchment. This prevents sticking and helps you remove layers cleanly when cool. Measure all ingredients precisely. Bring cold items like eggs and buttermilk to room temperature for more even mixing and a smoother batter.
2-Second Step: Combine dry ingredients In a large bowl, whisk together 3 cups (360g) cake flour, 1 teaspoon baking soda, 2 Tablespoons (10g) unsweetened natural cocoa powder, and 1/2 teaspoon salt. Sift or whisk well to remove lumps and to aerate the flour for a lighter result.
3-Third Step: Cream fats and sugar, then add wet ingredients In a stand mixer or large bowl with a hand mixer, beat 1/2 cup (113g) softened unsalted butter and 2 cups (400g) granulated sugar on medium-high speed until combined, about 1 minute. Add 1 cup (240ml) canola or vegetable oil, the 4 egg yolks (reserve the whites), 1 Tablespoon pure vanilla extract, and 1 teaspoon distilled white vinegar. Beat on high for 2 minutes to incorporate and create a smooth, slightly aerated mixture.
4-Fourth Step: Alternate dry ingredients and buttermilk Reduce mixer speed to low. Add the dry ingredients and 1 cup (240ml) buttermilk in 2 to 3 additions, beginning and ending with the dry mix. Mix just until combined; overmixing can make the crumb tough. Add liquid or gel red food coloring a little at a time until you reach the desired color, keeping in mind color deepens slightly when baked.
5-Fifth Step: Whip egg whites and fold in In a clean bowl, whip the 4 reserved egg whites until fluffy peaks form, about 3 minutes. Gently fold the whites into the batter in three additions, using a spatula to keep as much air as possible. This step is what creates the soft, velvety texture that distinguishes a great red velvet cake.
6-Sixth Step: Bake and cool Divide the batter evenly between the prepared pans. Tap each pan gently on the counter to remove large air bubbles. Bake 30 to 32 minutes, or until a toothpick inserted into the center comes out clean. Ovens vary, so start checking near 28 minutes. Cool the layers completely in the pans on a wire rack. When cooled, run a knife around the edges and invert to remove. If the tops domed in the oven, level them with a serrated knife or cake leveler before frosting.
7-Seventh Step: Make the cream cheese frosting In a mixing bowl, beat 16 ounces (452g) full-fat brick cream cheese and 3/4 cup (170g) unsalted butter on medium-high until smooth, about 2 minutes. Add 5 cups (600g) confectioners’ sugar, 1 and 1/2 teaspoons pure vanilla extract, and a pinch of salt. Begin mixing on low for 30 seconds to prevent a sugar cloud, then increase to high and beat for 3 minutes until light and fluffy. Adjust consistency: if too thin, add a little more confectioners’ sugar; if too thick, add a teaspoon of milk at a time.
8-Final Step: Assemble and chill Level the cake tops by slicing a thin layer off each. Place one layer on your serving plate, spread an even layer of frosting, then top with the second cake layer. Cover the entire cake with the remaining frosting. For cleaner slices, chill the assembled cake in the refrigerator for 30 to 60 minutes before slicing.
Notes
🍰 Use cake flour for lighter, softer crumb – all-purpose flour can make the cake denser
🥣 Room temperature ingredients ensure even mixing – take cream cheese, butter, eggs, and buttermilk out 1 hour before baking
🎂 Chill assembled cake for 30-60 minutes before slicing for clean cuts – use a serrated knife for best results
- Prep Time: 30 minutes
- Cooling and assembly time: 2 hours
- Cook Time: 30 minutes
- Category: Dessert
- Method: Baking
- Cuisine: American
- Diet: Vegetarian
Nutrition
- Serving Size: 1 slice
- Calories: 420
- Sugar: 35g
- Sodium: 280mg
- Fat: 22g
- Saturated Fat: 12g
- Unsaturated Fat: 10g
- Trans Fat: 0g
- Carbohydrates: 48g
- Fiber: 1g
- Protein: 4g
- Cholesterol: 85mg


