
Baked Alaska at Home: Why These Mini Desserts Are So Fun
If you have ever wanted a dessert that feels a little dramatic in the best way, Baked Alaska is it. These mini baked alaska treats combine soft cake, cold ice cream, and fluffy meringue into one sweet bite that always gets attention at the table. They look fancy, but the method is simple once you break it into steps.
This baked alaska recipe is especially great for home cooks who want a special dessert without spending all day in the kitchen. The cake bakes quickly, the ice cream stays tucked inside, and the meringue gives you that toasted, bakery-style finish. It is one of those individual desserts that feels perfect for birthdays, dinner parties, or just a weekend treat with the family.
Meringue does more than make this dessert pretty. It also acts like a cozy blanket that helps protect the ice cream while you toast the top.
For readers who enjoy simple desserts with a little wow factor, this mini baked alaskas recipe delivers both fun and flavor. If you like easy sweet recipes, you may also enjoy these chocolate covered strawberries or a creamy treat like silky lemon cream treats.
Jump To
- 1. Baked Alaska at Home: Why These Mini Desserts Are So Fun
- 2. Why You’ll Love This Baked Alaska
- 3. Essential Ingredients for Baked Alaska
- 4. How to Prepare the Perfect Baked Alaska: Step-by-Step Guide
- 5. Protein and Main Component Alternatives
- 6. Vegetable, Sauce, and Seasoning Modifications
- 7. Mastering Baked Alaska: Advanced Tips and Variations
- 8. How to Store Baked Alaska: Best Practices
- 9. Nutrition and Serving Details
- 10. FAQs: Frequently Asked Questions About Baked Alaska
- 11. Baked Alaska
Why You’ll Love This Baked Alaska
- Easy to make in parts: The cake is baked first, then cooled, then topped with ice cream and meringue. That makes the process feel manageable, even for newer bakers.
- Great for special occasions: These easy individual baked alaskas look impressive on a serving plate, so they work well for birthdays, holidays, and dinner guests.
- Flexible for different tastes: You can use different ice cream flavors for each serving, which makes this dessert fun for kids and adults alike.
- Sweet but balanced: Each bite has soft cake, creamy ice cream, and light meringue, giving you a mix of textures that keeps the dessert interesting.
This dessert also works well when you want something that feels nostalgic and playful. It brings a classic diner-style dessert into your own kitchen without needing complicated equipment. Plus, the individual size makes serving easy, which is helpful when everyone wants a different flavor.
Essential Ingredients for Baked Alaska
Before you start, gather everything you need so the assembly moves fast. Since the ice cream softens quickly, having all the ingredients ready makes the process smoother and helps the dessert hold its shape.
Main Ingredients
- 8 tablespoons unsalted butter, at room temperature – Helps create a rich, tender cake base.
- Cooking spray or unsalted butter for the pan – Keeps the cake from sticking to the 9×13-inch pan.
- 1 cup granulated sugar – Sweetens the cake and helps the meringue turn glossy.
- 2 large eggs – Add structure and moisture to the cake.
- 1 teaspoon vanilla extract – Brings warm flavor to the cake and meringue.
- 1 1/2 cups all-purpose flour – Forms the base of the cake batter.
- 1/2 teaspoon baking powder – Helps the cake rise softly.
- 1/4 teaspoon kosher salt – Balances sweetness and deepens flavor.
- 1/2 cup whole or 2% milk – Adds moisture and keeps the cake tender.
- 6 large egg whites, at room temperature – Whip into the fluffy meringue topping.
- 2 pints ice cream – Forms the cold center of each mini dessert.
- 1/4 teaspoon cream of tartar – Helps stabilize the egg whites while whipping.
- 1 cup granulated sugar – Slowly beaten in to make a stiff, shiny meringue.
Ingredient notes that help
- Room-temperature butter creams more smoothly with sugar.
- Room-temperature egg whites whip higher and faster.
- Choose a sturdy ice cream flavor that freezes well, such as vanilla, chocolate, strawberry, coffee, or mint chip.
- If you want a party-friendly finish, use several flavors so each person gets a different mini baked alaska.
Special Dietary Options
- Vegan: Use plant-based butter, dairy-free ice cream, aquafaba instead of egg whites, and a vegan cake base.
- Gluten-free: Replace the all-purpose flour with a 1:1 gluten-free baking blend.
- Low-calorie: Use light ice cream or a reduced sugar frozen dessert, and keep portions small.
How to Prepare the Perfect Baked Alaska: Step-by-Step Guide
This baked alaska recipe has a few parts, but none of them are difficult. The key is timing. Bake and cool the cake first, freeze the ice cream portions well, and only whip the meringue when you are ready to assemble.
First Step: Prep the cake ingredients and pan
Start by softening the butter and letting the egg whites sit at room temperature. This small step makes both the cake and the meringue easier to mix. Preheat your oven to 350°F and grease a 9×13-inch pan with cooking spray or unsalted butter.
In a large bowl, cream together the 8 tablespoons of room-temperature unsalted butter and 1 cup granulated sugar until the mixture looks pale and fluffy. This step gives the cake a light texture. Beat in the 2 large eggs, one at a time, then mix in 1 teaspoon vanilla extract.
Second Step: Mix the batter
In a separate bowl, combine 1 1/2 cups all-purpose flour, 1/2 teaspoon baking powder, and 1/4 teaspoon kosher salt. Add the dry ingredients to the butter mixture in portions, alternating with 1/2 cup whole or 2% milk. Mix just until combined. Overmixing can make the cake dense, so stop when the batter looks smooth.
Spread the batter into the prepared pan and smooth the top. Bake for 20 to 25 minutes, or until the cake is golden and a toothpick inserted in the center comes out clean. The cake should spring back lightly when touched.
Third Step: Cool and prepare the ice cream
Let the cake cool completely in the pan. This matters because warm cake can melt the ice cream too quickly during assembly. Once cool, turn the ice cream into 8 scoopable portions from the 2 pints and place them on a parchment-lined tray. Freeze the scoops until firm.
If the ice cream is too soft, the dessert will be harder to assemble. A firm scoop makes the final dessert cleaner and easier to handle.
Fourth Step: Whip the meringue
Place the 6 room-temperature egg whites in a clean mixing bowl. Add 1/4 teaspoon cream of tartar and beat until soft peaks form. Then slowly add 1 cup granulated sugar, a little at a time, while continuing to beat. Keep going until the meringue is stiff, glossy, and holds its shape.
A clean bowl matters here. Even a little grease can stop egg whites from whipping properly.
The meringue should look shiny and thick. When you lift the beaters, it should form peaks that stand up without drooping.
Fifth Step: Assemble the mini desserts
Cut the cooled cake into 8 rounds. If you do not have a round cutter, you can use a glass or small bowl as a guide. Place each cake round on a baking sheet, then set one scoop of ice cream on top of each piece of cake.
Working quickly, cover each one completely with meringue. Make sure the meringue seals all the way to the edges so the ice cream is fully enclosed. This is one of the best parts of making easy mini baked alaska desserts because each serving becomes its own little showpiece.
Final Step: Toast and serve
Use a kitchen torch or place the baking sheet under a broiler for a very short time, just until the meringue turns golden brown. Watch closely, because the meringue can toast fast. Once the tops are browned, serve right away.
If you want more ice cream dessert inspiration, you may also like homemade mango ice cream for another frozen treat that works well for warm-weather entertaining.
Protein and Main Component Alternatives
Ice cream swaps for different tastes
The ice cream center is one of the easiest parts to customize. Vanilla is classic, but chocolate, strawberry, coffee, mint chip, or caramel swirl all work nicely. You can even make each mini baked alaska different so guests can choose their favorite flavor.
If you want a richer dessert, choose premium ice cream with a dense texture. If you want something lighter, try a reduced-fat frozen dessert. Just remember that very soft ice creams melt faster, so firmer options usually work better for assembly.
Cake base alternatives
The cake recipe in this baked alaska recipe is soft and sturdy, which makes it a good base. If you need a shortcut, you can use leftover pound cake or a simple sponge cake. The goal is a cake that slices neatly and holds the ice cream without falling apart.
For gluten-free baking, use a good 1:1 gluten-free flour blend. If you prefer a slightly different flavor, a vanilla bean cake or light chocolate cake also works well. The important thing is to keep the texture light but strong enough for stacking.
Vegetable, Sauce, and Seasoning Modifications
Flavor add-ins for the cake
Even though this is a dessert, small flavor changes can make it feel fresh. Add a little lemon zest to the cake batter for brightness, or swap in almond extract if you like a deeper bakery-style taste. A pinch of cinnamon can also add warmth without overpowering the dessert.
If you enjoy serving desserts with a sauce, keep it on the side so it does not melt the meringue. Warm chocolate sauce, berry coulis, or caramel drizzle are all good choices, but wait until serving to add them.
Presentation and finishing touches
Top the plate with fresh berries, a mint leaf, or a light dusting of cocoa powder. These little details make individual baked alaska recipe servings look polished without extra work. You can also serve them with a thin cookie or a few toasted nuts, if that fits your guest list and dietary needs.
For a pretty plated dessert spread, pair these mini desserts with a bright citrus treat like lemon tart or a creamy option such as vanilla custard cream squares.
Mastering Baked Alaska: Advanced Tips and Variations
Pro cooking techniques
The biggest secret to success is keeping everything cold until assembly time. Freeze the scoops well, and have the cake rounds ready before you whip the meringue. Since the meringue insulates ice cream from melting during toasting, you can brown the outside quickly without ruining the inside.
A second smart move is to work in batches if your kitchen is warm. Assemble two or three at a time, toast them, then move on to the next batch. That keeps the ice cream firmer and makes the process less stressful.
Flavor variations
Try chocolate cake with raspberry ice cream for a bold flavor combo. Or use vanilla cake with coffee ice cream for a more grown-up version. You could also make a holiday style dessert with peppermint ice cream and a few crushed candy pieces on top after toasting.
If you like rich party desserts, this recipe also pairs well with classic favorites such as butter pecan layer cake or Biscoff millionaires traybake on a dessert table.
Presentation tips
Serve each mini baked alaska on a chilled dessert plate so it stays neat longer. A small spoonful of berry sauce on the side can add color, and a tiny sprinkle of flaky salt on caramel flavors can make the sweetness pop. If you are serving guests, bring the tray to the table right after toasting for a little wow moment.
Make-ahead options
The cake can be made ahead and refrigerated for up to 1 day, or frozen for up to 1 month. Thaw it before assembly. You can also pre-scoop the ice cream and keep it frozen on a tray so it is ready to go. When you are ready to serve, whip the meringue fresh and assemble quickly to keep the ice cream firm.
How to Store Baked Alaska: Best Practices
Refrigeration
Once assembled and toasted, baked Alaska is best served right away. If you have leftovers, refrigeration is not ideal because the ice cream will soften and the meringue can weep. For short holding time, place any unused components separately in the fridge rather than storing fully assembled desserts.
Freezing
The baked cake layer freezes well for up to 1 month. Wrap it tightly and thaw before using. You can also freeze the ice cream scoops on a tray until firm, then transfer them to a freezer-safe container if needed.
Reheating
This dessert is not meant to be reheated in the usual sense. Instead, it should be assembled cold and toasted briefly at the end. If leftovers have softened too much, they are best treated as a chilled dessert rather than toasted again.
Meal prep considerations
For busy schedules, prep the cake and scoops ahead of time, then whip and assemble right before serving. That makes this one of the more practical individual desserts for entertaining. If you love make-ahead sweets, you might also enjoy browsing more recipes on Smart Family Recipes.
Nutrition and Serving Details
| Per serving | Amount |
|---|---|
| Calories | 580 |
| Fat | 22.8 g |
| Saturated fat | 12.5 g |
| Carbohydrates | 85.2 g |
| Fiber | 1.1 g |
| Sugars | 65.0 g |
| Protein | 9.6 g |
| Sodium | 204.6 mg |
This recipe makes 8 servings and is alcohol-free, shellfish-free, peanut-free, fish-free, pork-free, pescatarian, tree-nut-free, vegetarian, and red-meat-free. It is a fun treat for many different households and occasions, especially when you want dessert to feel a little more special than usual.

FAQs: Frequently Asked Questions About Baked Alaska
Print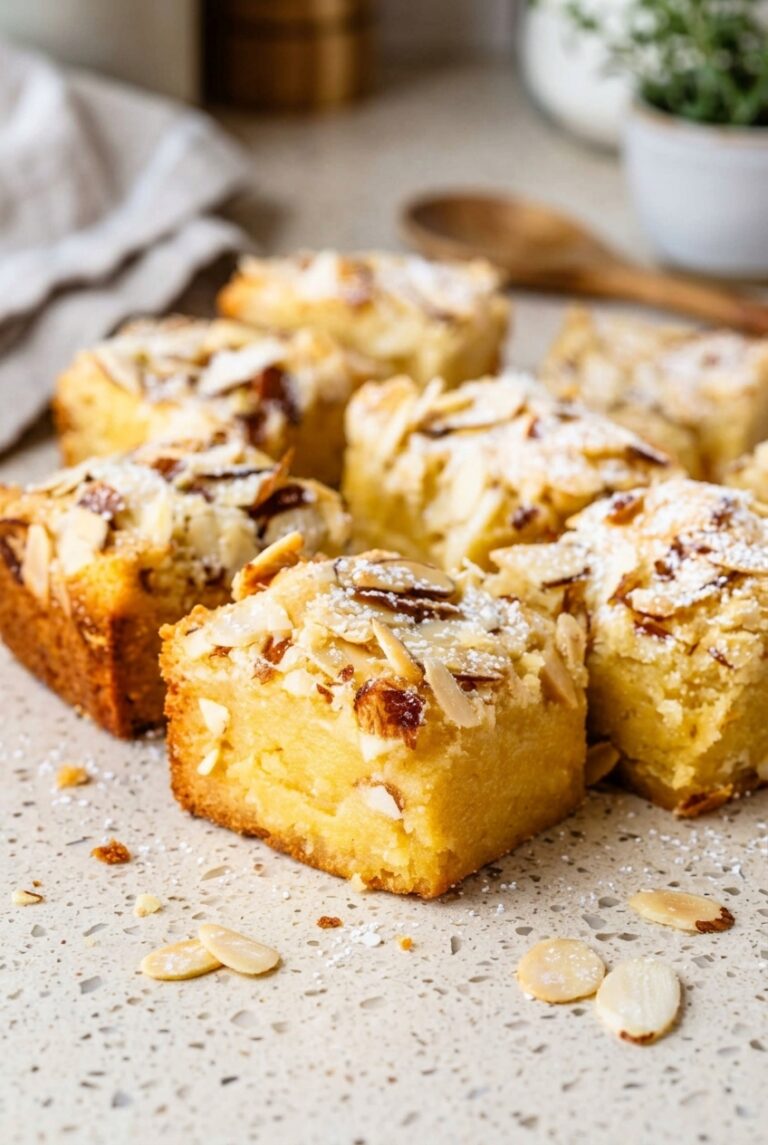
Baked Alaska
🍦 Delight in dramatic, mini Baked Alaskas – crispy meringue encasing creamy ice cream on fluffy cake for showstopping individual desserts!
🧁 Easy to make at home, fun for parties with customizable flavors – impress guests with this frozen treat that’s surprisingly simple!
- Total Time: 1 hour 5 minutes + freezing
- Yield: 8 servings
Ingredients
– 8 tablespoons unsalted butter, at room temperature for rich, tender cake base
– Cooking spray or unsalted butter for the pan to keep the cake from sticking
– 1 cup granulated sugar for sweetening the cake and helping the meringue turn glossy
– 2 large eggs for structure and moisture to the cake
– 1 teaspoon vanilla extract for warm flavor to the cake and meringue
– 1 1/2 cups all-purpose flour for the base of the cake batter
– 1/2 teaspoon baking powder for helping the cake rise softly
– 1/4 teaspoon kosher salt for balancing sweetness and deepening flavor
– 1/2 cup whole or 2% milk for moisture and keeping the cake tender
– 6 large egg whites, at room temperature for fluffy meringue topping
– 2 pints ice cream for the cold center of each mini dessert
– 1/4 teaspoon cream of tartar for stabilizing the egg whites while whipping
– 1 cup granulated sugar for stiff, shiny meringue
Instructions
1-First Step: Prep the cake ingredients and pan
Start by softening the butter and letting the egg whites sit at room temperature. This small step makes both the cake and the meringue easier to mix. Preheat your oven to 350°F and grease a 9×13-inch pan with cooking spray or unsalted butter.
In a large bowl, cream together the 8 tablespoons of room-temperature unsalted butter and 1 cup granulated sugar until the mixture looks pale and fluffy. This step gives the cake a light texture. Beat in the 2 large eggs, one at a time, then mix in 1 teaspoon vanilla extract.
2-Second Step: Mix the batter
In a separate bowl, combine 1 1/2 cups all-purpose flour, 1/2 teaspoon baking powder, and 1/4 teaspoon kosher salt. Add the dry ingredients to the butter mixture in portions, alternating with 1/2 cup whole or 2% milk. Mix just until combined. Overmixing can make the cake dense, so stop when the batter looks smooth.
Spread the batter into the prepared pan and smooth the top. Bake for 20 to 25 minutes, or until the cake is golden and a toothpick inserted in the center comes out clean. The cake should spring back lightly when touched.
3-Third Step: Cool and prepare the ice cream
Let the cake cool completely in the pan. This matters because warm cake can melt the ice cream too quickly during assembly. Once cool, turn the ice cream into 8 scoopable portions from the 2 pints and place them on a parchment-lined tray. Freeze the scoops until firm.
If the ice cream is too soft, the dessert will be harder to assemble. A firm scoop makes the final dessert cleaner and easier to handle.
4-Fourth Step: Whip the meringue
Place the 6 room-temperature egg whites in a clean mixing bowl. Add 1/4 teaspoon cream of tartar and beat until soft peaks form. Then slowly add 1 cup granulated sugar, a little at a time, while continuing to beat. Keep going until the meringue is stiff, glossy, and holds its shape.
A clean bowl matters here. Even a little grease can stop egg whites from whipping properly.
The meringue should look shiny and thick. When you lift the beaters, it should form peaks that stand up without drooping.
5-Fifth Step: Assemble the mini desserts
Cut the cooled cake into 8 rounds. If you do not have a round cutter, you can use a glass or small bowl as a guide. Place each cake round on a baking sheet, then set one scoop of ice cream on top of each piece of cake.
Working quickly, cover each one completely with meringue. Make sure the meringue seals all the way to the edges so the ice cream is fully enclosed. This is one of the best parts of making easy mini baked alaska desserts because each serving becomes its own little showpiece.
6-Final Step: Toast and serve
Use a kitchen torch or place the baking sheet under a broiler for a very short time, just until the meringue turns golden brown. Watch closely, because the meringue can toast fast. Once the tops are browned, serve right away.
Notes
🛡️ Meringue acts as insulation to keep ice cream from melting during toasting – seal edges well!
🍦 Customize with different ice cream flavors for each mini Alaska to suit preferences.
⏰ Bake cake ahead, refrigerate up to 1 day or freeze up to 1 month; thaw before assembling.
- Prep Time: 35 minutes
- Ice Cream Freezing: 1 hour
- Cook Time: 30 minutes
- Category: Dessert
- Method: Baking
- Cuisine: American
- Diet: Vegetarian, Pescatarian, Tree Nut-Free
Nutrition
- Serving Size: 1 mini Baked Alaska
- Calories: 580 calories
- Sugar: 65g
- Sodium: 205mg
- Fat: 23g
- Saturated Fat: 13g
- Unsaturated Fat: 9g
- Trans Fat: 0g
- Carbohydrates: 85g
- Fiber: 1g
- Protein: 10g
- Cholesterol: 140mg


