
Why You’ll Love Mini Triple Chocolate Mousse Cakes
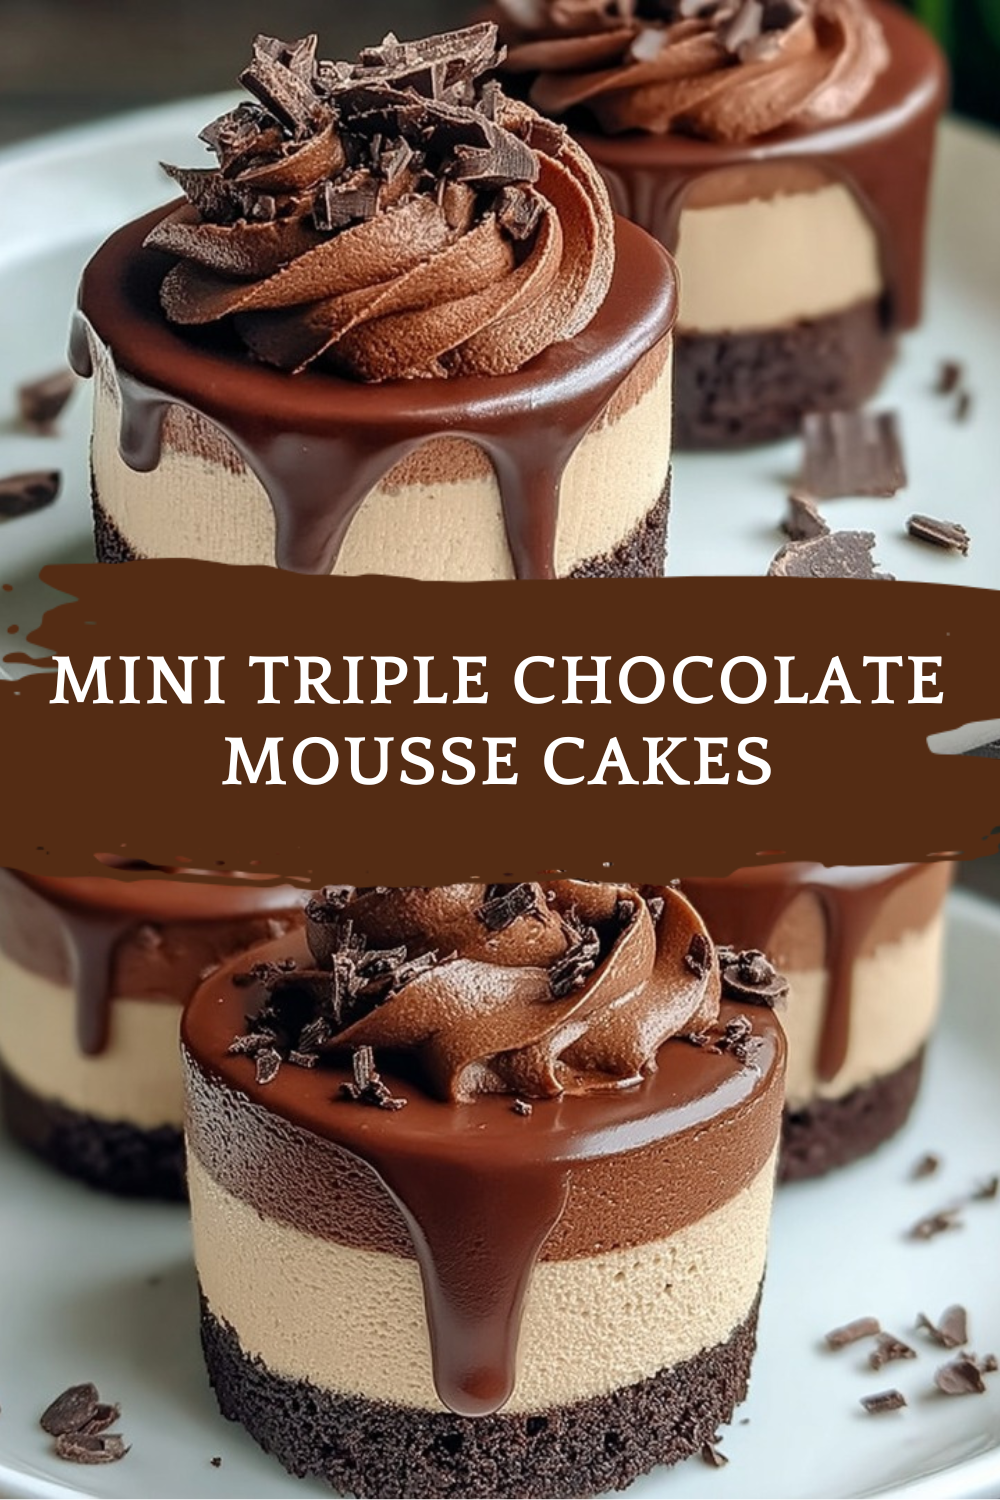
If you are a chocoholic, these Mini Triple Chocolate Mousse Cakes are the kind of dessert that makes people stop mid-bite and smile. They look fancy, taste rich, and still feel doable for a home baker with a busy schedule.
- Easy enough for home bakers: The brownie base bakes in one pan, and the mousse layers come together with simple whipping and folding. The active time is only about 50 minutes, which is great when you want a special dessert without spending all day in the kitchen.
- Fun for make-ahead planning: These cakes need chilling time, so they fit nicely into a busy day. You can bake the brownie layer, assemble the mousse stacks, then let the fridge do the hard work while you handle dinner, homework, or weekend plans.
- Rich chocolate flavor in every bite: You get three different chocolate moods in one dessert: dark, milk, and white mousse, plus a fudgy brownie base and milk chocolate ganache on top. That mix keeps every bite interesting.
- Pretty enough for guests: The individual size makes them feel bakery-worthy. They are perfect for birthdays, dinner parties, holiday trays, or just a treat for your own sweet tooth.
For readers who love dessert inspiration, you might also enjoy chocolate-covered strawberries for another chocolate-forward treat that feels special but stays simple.
These mini cakes are a little time-consuming, but the payoff is huge. If you love chocolate, they are absolutely worth it!
According to Allrecipes’ beginner chocolate mousse guide, mousse desserts are very approachable once you break the process into small steps, and that is exactly what makes this recipe feel manageable.
Jump To
- 1. Why You’ll Love Mini Triple Chocolate Mousse Cakes
- 2. Essential Ingredients for Mini Triple Chocolate Mousse Cakes
- 3. How to Prepare the Perfect Mini Triple Chocolate Mousse Cakes: Step-by-Step Guide
- 4. Dietary Substitutions to Customize Your Mini Triple Chocolate Mousse Cakes
- 5. Mastering Mini Triple Chocolate Mousse Cakes: Advanced Tips and Variations
- 6. How to Store Mini Triple Chocolate Mousse Cakes: Best Practices
- 7. FAQs: Frequently Asked Questions About Mini Triple Chocolate Mousse Cakes
- 8. Mini Triple Chocolate Mousse Cakes
Essential Ingredients for Mini Triple Chocolate Mousse Cakes
Brownie Layer Ingredients
- 1/2 cup unsalted butter, for a rich and tender brownie base
- 7 oz semi-sweet chocolate, chopped, for deep chocolate flavor
- 3/4 cup granulated sugar, to balance the cocoa and chocolate
- 2 large eggs, to bind the brownie batter
- 1 teaspoon vanilla, for warmth and sweetness
- 1/2 cup plus 2 tablespoons flour, for structure
- 2 tablespoons unsweetened cocoa powder, for extra chocolate depth
- 1/4 teaspoon salt, to sharpen the flavors
Chocolate Mousse Layers Ingredients
- 1 2/3 cups chilled heavy whipping cream, whipped and divided overall for all mousse layers
- 5.5 oz dark chocolate, chopped small, for the first mousse layer
- 5.5 oz milk chocolate, chopped small, for the second mousse layer
- 5.5 oz white chocolate, chopped small, for the third mousse layer
- 3 times 3/4 teaspoon unflavored gelatin powder, to help each mousse layer set
- 3 times 1 tablespoon cool water, to bloom the gelatin for each layer
- 3 times 1/4 cup heavy cream, heated for each chocolate layer
Milk Chocolate Ganache and Garnish
- 4 oz milk chocolate, chopped, for the finishing ganache
- 1/4 cup heavy cream, for the ganache
- 1 block semisweet baking chocolate, for chocolate curls
Special Dietary Options
- Vegan: Use plant-based butter, dairy-free chocolate, coconut cream instead of heavy cream, and a vegan gelatin alternative such as agar-agar. The texture will be a little different, but still delicious.
- Gluten-free: Swap the flour in the brownie layer with a good 1:1 gluten-free baking blend. Check that your chocolate is certified gluten-free too.
- Low-calorie: Use smaller portions, choose a darker chocolate with less sugar, and serve with fresh berries on the side for a lighter plate.
If you like creamy dessert recipes, you may also enjoy vanilla custard cream squares for a softer, custard-style sweet treat.
How to Prepare the Perfect Mini Triple Chocolate Mousse Cakes: Step-by-Step Guide
Step 1: Prepare the pan and oven
Preheat your oven to 350°F. Line a 7 x 11 inch pan with foil or baking paper. This makes it easier to lift the brownie layer out later, which matters when you need to cut neat little cake rounds.
Step 2: Make the brownie base
Place 1/2 cup unsalted butter and 7 oz semi-sweet chocolate in a saucepan over low heat. Stir gently until melted and smooth. Once the mixture is combined, stir in 3/4 cup granulated sugar. Let it cool slightly before adding the eggs so they do not scramble.
Add 2 large eggs and 1 teaspoon vanilla, then mix until glossy. Fold in 1/2 cup plus 2 tablespoons flour, 2 tablespoons unsweetened cocoa powder, and 1/4 teaspoon salt. Stir just until combined. A few streaks of flour are better than overmixing, because overmixing can make the brownies tough.
Step 3: Bake and cool the brownies
Pour the batter into the prepared pan and spread it evenly. Bake for 20 to 25 minutes at 350°F. The brownies should look set, with a slightly soft center that will finish firming as they cool. Let the pan cool fully before handling the base, because warm brownies can tear when you cut them.
Step 4: Cut the brownie disks
Once the brownies are cool, cut them into 6 disks. If your cutter is sticking, wipe it clean between cuts. Then make baking paper collars for each brownie disk. These collars act like little molds and help the mousse layers stay neat and tall.
Use the baking paper collars like tiny cake rings. They are simple, cheap, and they make the finished cakes look much more polished.
Step 5: Whip the cream for the mousse
Whip 1 2/3 cups chilled heavy whipping cream until soft peaks form. Do not overwhip it, or the mousse can become grainy. Keep the whipped cream cold while you work with the chocolate mixtures.
Step 6: Make the dark chocolate mousse layer
For the first layer, sprinkle 3/4 teaspoon unflavored gelatin powder over 1 tablespoon cool water. Let it sit briefly to bloom. Add 1/4 cup heavy cream and heat gently until the gelatin dissolves. Stir in 5.5 oz chopped small dark chocolate until melted and smooth. Let the mixture cool slightly, then fold it into a portion of the whipped cream.
Pipe or spoon this mousse over the brownie disks inside the paper collars. Smooth the tops lightly.
Step 7: Make the milk chocolate mousse layer
Repeat the same process with another 3/4 teaspoon unflavored gelatin powder, 1 tablespoon cool water, 1/4 cup heavy cream, and 5.5 oz chopped small milk chocolate. Fold into the whipped cream and pipe carefully over the dark chocolate layer. Chill briefly if needed so the layers stay distinct.
Step 8: Make the white chocolate mousse layer
Repeat once more with the final 3/4 teaspoon unflavored gelatin powder, 1 tablespoon cool water, 1/4 cup heavy cream, and 5.5 oz chopped small white chocolate. Fold into the whipped cream and add the final mousse layer on top. This gives the cakes their signature triple chocolate look.
Step 9: Chill until set
Place the cakes in the refrigerator for 4 to 5 hours. This chilling time is important because it helps each layer set properly and gives you clean slices later. If you are making these for guests, you can chill them overnight for even firmer results.
Step 10: Finish with ganache and curls
To make the ganache, heat 1/4 cup heavy cream until steaming, then pour it over 4 oz chopped milk chocolate. Let it sit for a moment, then stir until smooth. Remove the collars from the cakes, spoon or drizzle the ganache on top, and finish with semisweet chocolate curls made from the block of semisweet baking chocolate.
For a fruitier dessert table, these cakes pair nicely with blueberry cream cake if you want a colorful mix of flavors and textures.

Dietary Substitutions to Customize Your Mini Triple Chocolate Mousse Cakes
Protein and Main Component Alternatives
Although this recipe is built around chocolate, cream, eggs, and butter, you can still adjust it for different needs. For the brownie layer, swap the butter with a plant-based butter and use dairy-free chocolate. For the mousse, coconut cream works well in place of heavy cream if you chill it first and whip it carefully. If you need a gelatin-free version, agar-agar can help the mousse set, though the texture will be a bit firmer.
If you want a lighter brownie base, you can reduce the sugar slightly, but keep in mind that the dessert is meant to be rich. If you are baking for guests with gluten concerns, a 1:1 gluten-free baking flour can stand in for the flour in the brownie layer without changing the method much.
Vegetable, Sauce, and Seasoning Modifications
This dessert does not use vegetables, but you can still play with sauces and flavors. A raspberry sauce drizzled over the plate adds bright color and a tart bite that cuts through the chocolate. You could also serve the cakes with fresh strawberries or raspberries on the side.
For seasoning-style changes, try a tiny pinch of espresso powder in the brownie batter if you want the chocolate to taste deeper. A little orange zest in the ganache also works nicely. If you are serving the cakes in glasses instead of as molded rounds, layer brownie crumbs, mousse, and ganache for a more relaxed presentation.
Mastering Mini Triple Chocolate Mousse Cakes: Advanced Tips and Variations
Pro cooking techniques
The biggest trick is to work gently with the chocolate mixtures. Chocolate can seize or get grainy if it gets too hot, so keep the heat low and stir often. Let each melted chocolate mixture cool slightly before folding it into the whipped cream. That small pause helps protect the airy texture.
Using baking paper collars is one of the smartest parts of this recipe. They keep the layers tall and neat without special pans. If you want even cleaner edges, chill the cakes after each mousse layer before adding the next one.
Flavor variations
Once you have the basic version down, you can have fun with the flavors. Raspberry mousse layers are a popular twist if you want a sweet-tart contrast. You can also swap the white chocolate layer for extra milk chocolate if you want a deeper cocoa profile. For a playful twist, serve the mousse in glass cups instead of as cakes.
Presentation tips
Chocolate curls make the cakes look bakery-perfect, and a little shine from the ganache goes a long way. If you want an extra pretty plate, add a few fresh berries, a dusting of cocoa powder, or a light drizzle of berry sauce around the base. These little cakes are already charming, so you do not need much to make them look beautiful.
Make-ahead options
This recipe is time-consuming, but that also makes it great for planning ahead. You can bake the brownie layer a day early, or freeze the cakes without ganache for several weeks. When you are ready to serve, thaw them at room temperature for about 30 minutes before cutting, then add the ganache and curls.
These cakes are the kind of dessert that rewards patience. A little extra chill time makes them slice better and taste even more polished.
How to Store Mini Triple Chocolate Mousse Cakes: Best Practices
Refrigeration
Keep the cakes in the refrigerator in an airtight container for up to 3 days. If you have already added the ganache, store them carefully so the tops stay neat. They are best served cold, straight from the fridge after a short rest on the counter.
Freezing
These cakes freeze well without the ganache. Wrap each one tightly and place them in a freezer-safe container. They can stay frozen for weeks, which makes them a great dessert to prep in batches for holidays or special dinners.
Reheating
There is no real reheating needed for this dessert. Instead, thaw frozen cakes in the fridge or let them sit at room temperature for about 30 minutes before slicing. That helps the mousse soften just enough for a clean cut.
Meal prep considerations
If you like planning ahead, make the brownie base and mousse layers on one day, then finish with ganache right before serving. This keeps the chocolate curls crisp and the top looking fresh. It also makes the dessert feel less rushed when guests arrive.
FAQs: Frequently Asked Questions About Mini Triple Chocolate Mousse Cakes
Print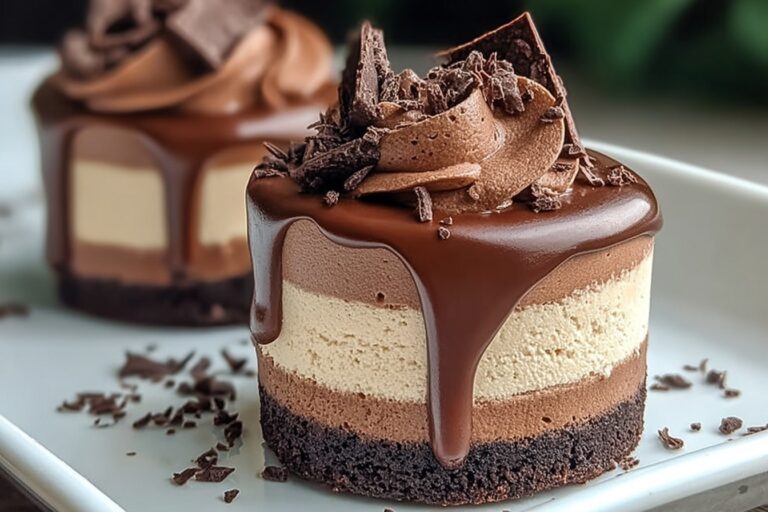
Mini Triple Chocolate Mousse Cakes
🍫 Indulge in rich layers of fudgy brownie, dark, milk, and white chocolate mousse for the ultimate chocolate experience.
🎂 These elegant mini cakes are perfect for parties, offering stunning presentation and intense flavor in every bite.
- Total Time: 4 hours 50 minutes to 5 hours 55 minutes
- Yield: 6 mini cakes
Ingredients
– 1/2 cup unsalted butter for a rich and tender brownie base
– 7 oz semi-sweet chocolate, chopped for deep chocolate flavor
– 3/4 cup granulated sugar to balance the cocoa and chocolate
– 2 large eggs to bind the brownie batter
– 1 teaspoon vanilla for warmth and sweetness
– 1/2 cup plus 2 tablespoons flour for structure
– 2 tablespoons unsweetened cocoa powder for extra chocolate depth
– 1/4 teaspoon salt to sharpen the flavors
– 1 2/3 cups chilled heavy whipping cream, whipped and divided overall for all mousse layers
– 5.5 oz dark chocolate, chopped small for the first mousse layer
– 5.5 oz milk chocolate, chopped small for the second mousse layer
– 5.5 oz white chocolate, chopped small for the third mousse layer
– 3 times 3/4 teaspoon unflavored gelatin powder to help each mousse layer set
– 3 times 1 tablespoon cool water to bloom the gelatin for each layer
– 3 times 1/4 cup heavy cream, heated for each chocolate layer
– 4 oz milk chocolate, chopped for the finishing ganache
– 1/4 cup heavy cream for the ganache
– 1 block semisweet baking chocolate for chocolate curls
Instructions
1-Step 1: Prepare the pan and oven. Preheat your oven to 350°F. Line a 7 x 11 inch pan with foil or baking paper. This makes it easier to lift the brownie layer out later, which matters when you need to cut neat little cake rounds.
2-Step 2: Make the brownie base. Place 1/2 cup unsalted butter and 7 oz semi-sweet chocolate in a saucepan over low heat. Stir gently until melted and smooth. Once the mixture is combined, stir in 3/4 cup granulated sugar. Let it cool slightly before adding the eggs so they do not scramble. Add 2 large eggs and 1 teaspoon vanilla, then mix until glossy. Fold in 1/2 cup plus 2 tablespoons flour, 2 tablespoons unsweetened cocoa powder, and 1/4 teaspoon salt. Stir just until combined. A few streaks of flour are better than overmixing, because overmixing can make the brownies tough.
3-Step 3: Bake and cool the brownies. Pour the batter into the prepared pan and spread it evenly. Bake for 20 to 25 minutes at 350°F. The brownies should look set, with a slightly soft center that will finish firming as they cool. Let the pan cool fully before handling the base, because warm brownies can tear when you cut them.
4-Step 4: Cut the brownie disks. Once the brownies are cool, cut them into 6 disks. If your cutter is sticking, wipe it clean between cuts. Then make baking paper collars for each brownie disk. These collars act like little molds and help the mousse layers stay neat and tall. Use the baking paper collars like tiny cake rings. They are simple, cheap, and they make the finished cakes look much more polished.
5-Step 5: Whip the cream for the mousse. Whip 1 2/3 cups chilled heavy whipping cream until soft peaks form. Do not overwhip it, or the mousse can become grainy. Keep the whipped cream cold while you work with the chocolate mixtures.
6-Step 6: Make the dark chocolate mousse layer. For the first layer, sprinkle 3/4 teaspoon unflavored gelatin powder over 1 tablespoon cool water. Let it sit briefly to bloom. Add 1/4 cup heavy cream and heat gently until the gelatin dissolves. Stir in 5.5 oz chopped small dark chocolate until melted and smooth. Let the mixture cool slightly, then fold it into a portion of the whipped cream. Pipe or spoon this mousse over the brownie disks inside the paper collars. Smooth the tops lightly.
7-Step 7: Make the milk chocolate mousse layer. Repeat the same process with another 3/4 teaspoon unflavored gelatin powder, 1 tablespoon cool water, 1/4 cup heavy cream, and 5.5 oz chopped small milk chocolate. Fold into the whipped cream and pipe carefully over the dark chocolate layer. Chill briefly if needed so the layers stay distinct.
8-Step 8: Make the white chocolate mousse layer. Repeat once more with the final 3/4 teaspoon unflavored gelatin powder, 1 tablespoon cool water, 1/4 cup heavy cream, and 5.5 oz chopped small white chocolate. Fold into the whipped cream and add the final mousse layer on top. This gives the cakes their signature triple chocolate look.
9-Step 9: Chill until set. Place the cakes in the refrigerator for 4 to 5 hours. This chilling time is important because it helps each layer set properly and gives you clean slices later. If you are making these for guests, you can chill them overnight for even firmer results.
10-Step 10: Finish with ganache and curls. To make the ganache, heat 1/4 cup heavy cream until steaming, then pour it over 4 oz chopped milk chocolate. Let it sit for a moment, then stir until smooth. Remove the collars from the cakes, spoon or drizzle the ganache on top, and finish with semisweet chocolate curls made from the block of semisweet baking chocolate. For a fruitier dessert table, these cakes pair nicely with blueberry cream cake if you want a colorful mix of flavors and textures.
Notes
📋 Use parchment collars for easy mold removal and clean edges.
🍫 Melt chocolate slowly and gently to avoid graininess or seizing.
⏳ Plan ahead as chilling takes time, but cakes can be frozen for later.
- Prep Time: 30 minutes
- Chilling Time: 4-5 hours
- Cook Time: 20-25 minutes
- Category: Dessert
- Method: Baking
- Cuisine: American
- Diet: Vegetarian
Nutrition
- Serving Size: 1 cake
- Calories: ~700 calories
- Sugar: ~45g
- Sodium: ~120mg
- Fat: ~55g
- Saturated Fat: ~32g
- Unsaturated Fat: ~18g
- Trans Fat: 0g
- Carbohydrates: ~55g
- Fiber: ~4g
- Protein: ~9g
- Cholesterol: ~160mg


