
Why You’ll Love These Mini No-Bake Lemon Cheesecake Tarts
If you want a sweet treat that feels fancy without turning your kitchen into a disaster zone, these Mini No-Bake Lemon Cheesecake Tarts are such a win. They are creamy, bright, and super easy to make, which makes them perfect for busy parents, students, working professionals, and anyone who wants dessert without a lot of fuss. I love how these tiny tarts bring all the creamy goodness without any of the hassle, perfect for whipping up on a lazy afternoon when you want something sweet but don’t feel like turning on the oven.
- Easy to make: These mini no-bake lemon cheesecake tarts come together fast with simple mixing, pressing, and chilling. No oven needed, which makes them a great choice for warm days or last-minute dessert plans.
- Bright and refreshing: The lemon cheesecake filling gives each mini cheesecake a fresh, tangy flavor that tastes light instead of heavy. If you like lemon tart recipes with a creamy twist, this one hits the spot.
- Great for different lifestyles: Because this is a no bake cheesecake recipe, it can be adapted for gluten-free crusts, lighter fillings, or smaller portions for diet-conscious eaters.
- Perfect for any occasion: These cheesecake tart bites work for birthdays, brunch tables, picnics, holidays, and easy weeknight desserts. They look polished but stay simple enough for everyday baking enthusiasts.
These mini no bake lemon cheesecake tarts are the kind of dessert that looks impressive, tastes bright, and saves you time in the kitchen.
For more citrusy inspiration, you might also enjoy this classic lemon tart recipe or a silky lemon cream treat when you are craving something sweet and sunny.
According to the Cleveland Clinic’s guide to lemon benefits, lemons add more than flavor, which makes them a lovely choice for recipes that feel fresh and satisfying.
Jump To
- 1. Why You’ll Love These Mini No-Bake Lemon Cheesecake Tarts
- 2. Essential Ingredients for Mini No-Bake Lemon Cheesecake Tarts
- 3. How to Prepare the Perfect Mini No-Bake Lemon Cheesecake Tarts: Step-by-Step Guide
- 4. Dietary Substitutions to Customize Your Mini No-Bake Lemon Cheesecake Tarts
- 5. Mastering Mini No-Bake Lemon Cheesecake Tarts: Advanced Tips and Variations
- 6. How to Store Mini No-Bake Lemon Cheesecake Tarts: Best Practices
- 7. FAQs: Frequently Asked Questions About Mini No-Bake Lemon Cheesecake Tarts
- 8. Mini No-Bake Lemon Cheesecake Tarts
Essential Ingredients for Mini No-Bake Lemon Cheesecake Tarts
These mini no bake lemon cheesecake tarts use a short list of pantry-friendly ingredients, but each one plays an important role. The crust gives you that classic graham cracker tart shell crunch, while the filling turns smooth, creamy, and tangy with just the right amount of sweetness. If you are making no bake mini lemon tarts for the first time, this ingredient list keeps things simple and stress-free.
Graham Cracker Tart Shells
- 1 cup graham cracker crumbs (5 ounces, or 10 crackers crushed) – builds the sturdy, sweet base for each cheesecake tart.
- 2 tablespoons granulated sugar – adds a little sweetness and helps the crust taste more like a proper dessert.
- 6 tablespoons unsalted butter, melted – binds the crust together so it sets neatly in the pan.
Lemon Cheesecake Filling
- 1 8-ounce package cream cheese, softened – creates the creamy cheesecake texture.
- 1/2 cup sugar – balances the tart lemon juice and keeps the filling smooth and sweet.
- 2 teaspoons lemon zest, divided – adds fresh citrus flavor throughout the filling and garnish.
- 2 tablespoons freshly squeezed lemon juice – gives these mini no bake lemon cheesecake tarts their bright lemon bite.
- 1/3 cup heavy whipping cream – lightens the filling and helps it hold its shape after chilling.
- 1/4 teaspoon vanilla extract – adds warmth and rounds out the flavor.
- Fresh fruit or fruit preserves, for garnish – adds color and a pretty finish.
Helpful Ingredient Notes
| Ingredient | What It Does | Easy Swap |
|---|---|---|
| Graham cracker crumbs | Create a crisp cheesecake tart shell | Use gluten-free graham-style crumbs |
| Cream cheese | Makes the filling rich and creamy | Use a dairy-free cream cheese alternative |
| Heavy whipping cream | Adds volume and a light texture | Use coconut cream for a dairy-free version |
| Lemon juice and zest | Bring the lemon cheesecake flavor | Use lime for a different citrus twist |
Special Dietary Options
- Vegan: Use plant-based cream cheese, dairy-free butter, and coconut cream instead of heavy whipping cream.
- Gluten-free: Swap in certified gluten-free graham crackers or gluten-free cookie crumbs.
- Low-calorie: Use light cream cheese, reduce the sugar slightly, and top with fresh berries instead of preserves.
If you love fruit-forward desserts, you may also enjoy this blueberry cream cake for another creamy and cheerful option.
For more on cream cheese nutrition, the Verywell Fit cream cheese guide is a helpful place to see how it fits into different eating styles.
How to Prepare the Perfect Mini No-Bake Lemon Cheesecake Tarts: Step-by-Step Guide
Making mini no bake lemon cheesecake tarts is easy once you break it into a few simple moves. You will mix the crust, press it into mini pans, whip the filling, and chill everything until set. That is really it. The nice part about this recipe is that it feels relaxed, so even if you are new to cheesecake tart recipes, you can still get a pretty and tasty result.
First Step: Gather and prep everything
Start by setting out all your ingredients so the process moves smoothly. Soften the cream cheese first, since cold cream cheese can leave little lumps in the filling. If you are using mini muffin pans, line them with paper liners or use mini tart pans lightly coated with a little butter or nonstick spray. This is a great place to make sure your lemon is washed and ready for zesting and juicing.
Second Step: Make the graham cracker tart shells
In a medium bowl, stir together 1 cup graham cracker crumbs, 2 tablespoons granulated sugar, and 6 tablespoons melted unsalted butter. The mixture should feel like damp sand and hold together when pressed. Spoon the crumbs into your pans, then press them down firmly with the back of a spoon, a small cup, or your fingers. Pressing well matters because it helps the cheesecake tart shells stay neat when you lift them out later.
If you want a firmer base, chill the crusts for about 10 to 15 minutes while you make the filling. This little step is especially helpful if your kitchen is warm.
Third Step: Whip the lemon cheesecake filling
In a mixing bowl, beat the softened cream cheese and 1/2 cup sugar until smooth and fluffy. Add 1 teaspoon of the lemon zest, the 2 tablespoons lemon juice, the 1/4 teaspoon vanilla extract, and mix again until everything looks creamy and well blended. In a separate bowl, whip the 1/3 cup heavy whipping cream until soft peaks form. Then gently fold the whipped cream into the lemon cheesecake mixture.
Folding instead of stirring hard keeps the filling light and airy. That texture is what makes these mini cheesecake tarts feel so lovely when you bite into them.
Fourth Step: Fill the tart shells
Spoon or pipe the filling into each prepared crust. A piping bag gives a neat bakery-style look, but a small spoon works just fine if you are making these with kids or just want to keep things simple. Fill each shell almost to the top, then smooth the surface with the back of a spoon if needed.
Try not to overfill too much, since the filling needs room to set cleanly. If you are using fruit preserves, you can swirl a tiny bit on top before chilling for a pretty marbled look.
Fifth Step: Chill until set
Place the filled tarts in the refrigerator for at least 2 to 4 hours. For the best texture, chill them overnight. This gives the cream cheese and whipped cream time to firm up so the filling stays creamy but sliceable. If you are short on time, a quick freeze for about 1 hour can help, but the fridge gives the nicest texture.
Chilling is the part that turns this from a soft filling into a true mini no bake lemon cheesecake tart.
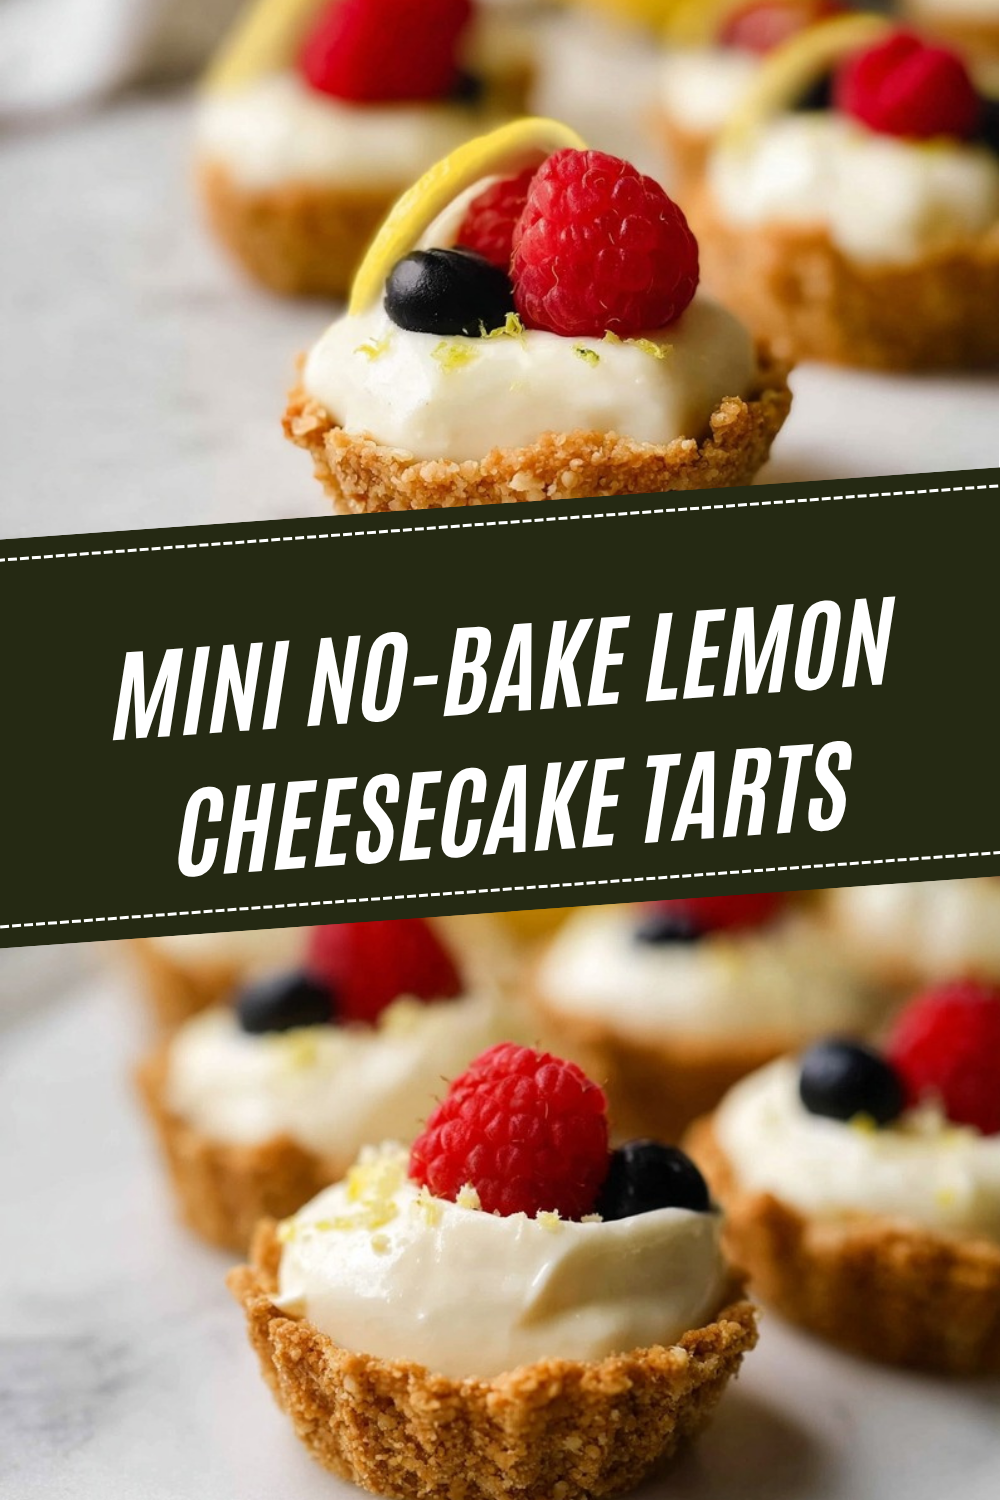
Final Step: Garnish and serve
Once the tarts are firm, remove them from the molds carefully. Top with the remaining lemon zest, fresh fruit, or fruit preserves. Berries, raspberries, blueberries, thin lemon slices, or a little whipped cream all work well. Serve chilled for the freshest flavor.
If you want a fun dessert table, you could pair these with chocolate-covered strawberries for a mix of creamy, fruity, and chocolatey bites that look beautiful together.

Dietary Substitutions to Customize Your Mini No-Bake Lemon Cheesecake Tarts
Protein and Main Component Alternatives
Even though these are mini no bake lemon cheesecake tarts, you can still adjust the main dairy ingredients to fit your needs. For a dairy-free version, swap the cream cheese for a plant-based cream cheese and use coconut cream in place of heavy whipping cream. If you want a lighter filling, choose reduced-fat cream cheese and slightly cut back the sugar.
For a gluten-free version, replace the graham cracker crumbs with certified gluten-free crumbs or gluten-free vanilla cookies. The texture stays close to the original cheesecake tart shell, so you still get that buttery crunch. If you are making these for guests, it helps to make a small batch with the swap first so you can taste the texture before serving a larger crowd.
Vegetable, Sauce, and Seasoning Modifications
This dessert does not use vegetables, but you can still play with the topping and flavoring. Try strawberry preserves, blueberry compote, or even a thin layer of mango sauce on top of each mini lemon cheesecake. For a stronger citrus flavor, add a little extra zest. If you want a softer, less tart flavor, reduce the lemon juice slightly and add a touch more vanilla.
You can also switch the garnish to match the season. Fresh berries work well in spring and summer, while a spoonful of fruit preserves feels cozy for fall and winter. If you want a brighter flavor profile, mix lemon zest into the crust as well for a subtle citrus note in every bite.
Mastering Mini No-Bake Lemon Cheesecake Tarts: Advanced Tips and Variations
Pro cooking techniques
To get the best mini cheesecake texture, make sure the cream cheese is fully softened before mixing. Cold cream cheese is the biggest reason filling turns lumpy. Beat the cream cheese and sugar until the mixture looks smooth before adding lemon juice, because this helps prevent curdling and gives you a silkier filling.
Another useful trick is to whip the cream to soft peaks, not stiff peaks. Soft peaks blend more easily into the filling and keep the tarts light. When pressing the crust, use steady pressure so the tart shells hold together without crumbling.
Flavor variations
These no bake cheesecake bites are easy to change up. Add a little lime zest for a citrus mix, or swirl in raspberry preserves for a lemon raspberry version. You can also make a sweeter topping with whipped cream and crushed vanilla cookies. If you love stronger lemon flavor, add a little extra zest on top right before serving so the aroma pops as soon as the plate hits the table.
Presentation tips
For a bakery-style look, pipe the lemon cheesecake filling into the crusts using a round or star tip. Add one small berry, a tiny mint leaf, or a small spoonful of preserves on each tart. Serving them on a white platter makes the yellow filling and colorful fruit stand out nicely. These are also adorable in mini cupcake liners for parties or lunchbox treats.
Make-ahead options
These mini no bake lemon cheesecake tarts are a dream for planning ahead. You can make the crusts a day before, then fill them later when you are ready. You can also make the full batch the night before a gathering and keep them chilled until serving time. For busy schedules, this is one of those easy mini lemon cheesecake tarts that saves time without giving up flavor or texture.
How to Store Mini No-Bake Lemon Cheesecake Tarts: Best Practices
These mini no bake lemon cheesecake tarts store well, which makes them great for parties, meal prep, or dessert through the week. Keep them in an airtight container in the refrigerator for up to 5 days. If you stack them, place parchment paper between layers so the tops stay pretty.
You can also freeze the tarts for longer storage. Freeze them on a tray until solid, then move them to a freezer-safe container. They keep well for 1 to 2 months. Thaw them in the fridge overnight for the best texture. If you plan to use fruit garnish, add it after thawing so it stays fresh.
These tarts are best served cold, so reheating is not needed. In fact, warming them can make the filling loose. If you are making them for meal prep, keep the garnish separate and add it right before serving for the prettiest result.
FAQs: Frequently Asked Questions About Mini No-Bake Lemon Cheesecake Tarts
What ingredients do I need for mini no-bake lemon cheesecake tarts?
For 24 mini tarts, you’ll need: 12 full graham cracker sheets (about 1 1/2 cups crumbs), 6 tablespoons melted unsalted butter for the crust; 16 oz (2 blocks) cream cheese softened, 1 cup powdered sugar, 1/2 cup fresh lemon juice (about 3 lemons), zest of 2 lemons, 1 cup heavy whipping cream, and 1 teaspoon vanilla extract for the filling. Optional toppings include whipped cream, lemon slices, or fresh berries. Use room-temperature ingredients for smooth mixing. Crush graham crackers in a food processor, mix with butter, and press into mini muffin tins or tart pans lined with paper liners. Beat cream cheese, sugar, lemon juice, zest, and vanilla until fluffy, then whip cream to stiff peaks and fold in. Pipe filling into crusts and chill. This simple list yields creamy, tangy tarts ready in under 30 minutes prep time. (98 words)
How do you make the crust for mini no-bake lemon cheesecake tarts?
Start with 1 1/2 cups graham cracker crumbs (pulse 12 sheets in a food processor). Mix in 6 tablespoons melted unsalted butter and 2 tablespoons granulated sugar until it resembles wet sand. Press 1-2 tablespoons firmly into each mini muffin tin cup or 2-inch tart pan using the back of a spoon or shot glass for even layers—aim for 1/4-inch thickness. Freeze crusts for 10-15 minutes to set before adding filling. This no-bake method creates a sturdy base that holds up to the creamy topping without baking. For gluten-free, swap in crushed gluten-free graham crackers or digestive biscuits. Prep takes 10 minutes and ensures tarts release easily with liners. (112 words)
How long do mini no-bake lemon cheesecake tarts need to chill?
Chill assembled tarts in the fridge for at least 2-4 hours, or overnight for best results, to allow the filling to firm up. The heavy cream and cream cheese set into a sliceable texture during this time. After chilling, pop them out of the tins using a butter knife. For quicker setting, freeze for 1 hour, but thaw in fridge before serving to avoid icy texture. Total hands-off time is 4 hours minimum. Test doneness by gently pressing the center—it should spring back slightly. This step is key for that perfect creamy bite without sogginess. Serve chilled for peak flavor. (102 words)
Can I make mini no-bake lemon cheesecake tarts ahead of time?
Yes, these tarts are ideal for make-ahead prep. Assemble and chill up to 3 days in advance, storing covered in the fridge. The lemon flavor intensifies nicely. For longer storage, freeze baked crusts separately, fill after thawing, and chill 4 hours— they keep frozen up to 2 weeks in an airtight container. Thaw overnight in fridge. Avoid freezing filled tarts longer than a month to prevent texture changes. Label with dates for easy planning. Perfect for parties; just add fresh toppings like whipped cream or berries right before serving to keep them crisp. Saves time without sacrificing taste. (108 words)
How should I store leftover mini no-bake lemon cheesecake tarts?
Store in an airtight container in the fridge for up to 5 days. Layer with parchment paper to prevent sticking. They stay fresh and firm thanks to the cream cheese base. Do not leave at room temperature over 2 hours to avoid spoilage. For freezing, place on a tray to freeze solid first (2 hours), then transfer to freezer bags—lasts 1-2 months. Thaw in fridge overnight. Re-whip any soft whipped topping before serving. If using fresh fruit garnishes, add post-thaw. Always check for off smells before eating. This keeps your tarts safe and delicious for snacking or gifting. (105 words)

Mini No-Bake Lemon Cheesecake Tarts
🍋 Zesty mini lemon cheesecake tarts offer creamy, tangy filling in buttery graham crusts – bite-sized bliss for any occasion.
🧁 Easy no-bake recipe ready in minutes plus chill time, perfect for parties, desserts, or refreshing summer treats.
- Total Time: 2 hours 20 minutes
- Yield: 12 mini tarts
Ingredients
– 1 cup graham cracker crumbs (5 ounces, or 10 crackers crushed)
– 2 tablespoons granulated sugar
– 6 tablespoons unsalted butter, melted
– 1 8-ounce package cream cheese, softened
– 1/2 cup sugar
– 2 teaspoons lemon zest, divided
– 2 tablespoons freshly squeezed lemon juice
– 1/3 cup heavy whipping cream
– 1/4 teaspoon vanilla extract
– Fresh fruit or fruit preserves, for garnish
Instructions
1-First Step: Gather and prep everything Start by setting out all your ingredients so the process moves smoothly. Soften the cream cheese first, since cold cream cheese can leave little lumps in the filling. If you are using mini muffin pans, line them with paper liners or use mini tart pans lightly coated with a little butter or nonstick spray. This is a great place to make sure your lemon is washed and ready for zesting and juicing.
2-Second Step: Make the graham cracker tart shells In a medium bowl, stir together 1 cup graham cracker crumbs, 2 tablespoons granulated sugar, and 6 tablespoons melted unsalted butter. The mixture should feel like damp sand and hold together when pressed. Spoon the crumbs into your pans, then press them down firmly with the back of a spoon, a small cup, or your fingers. Pressing well matters because it helps the cheesecake tart shells stay neat when you lift them out later. If you want a firmer base, chill the crusts for about 10 to 15 minutes while you make the filling. This little step is especially helpful if your kitchen is warm.
3-Third Step: Whip the lemon cheesecake filling In a mixing bowl, beat the softened cream cheese and 1/2 cup sugar until smooth and fluffy. Add 1 teaspoon of the lemon zest, the 2 tablespoons lemon juice, the 1/4 teaspoon vanilla extract, and mix again until everything looks creamy and well blended. In a separate bowl, whip the 1/3 cup heavy whipping cream until soft peaks form. Then gently fold the whipped cream into the lemon cheesecake mixture. Folding instead of stirring hard keeps the filling light and airy. That texture is what makes these mini cheesecake tarts feel so lovely when you bite into them.
4-Fourth Step: Fill the tart shells Spoon or pipe the filling into each prepared crust. A piping bag gives a neat bakery-style look, but a small spoon works just fine if you are making these with kids or just want to keep things simple. Fill each shell almost to the top, then smooth the surface with the back of a spoon if needed. Try not to overfill too much, since the filling needs room to set cleanly. If you are using fruit preserves, you can swirl a tiny bit on top before chilling for a pretty marbled look.
5-Fifth Step: Chill until set Place the filled tarts in the refrigerator for at least 2 to 4 hours. For the best texture, chill them overnight. This gives the cream cheese and whipped cream time to firm up so the filling stays creamy but sliceable. If you are short on time, a quick freeze for about 1 hour can help, but the fridge gives the nicest texture. Chilling is the part that turns this from a soft filling into a true mini no bake lemon cheesecake tart.
6-Final Step: Garnish and serve Once the tarts are firm, remove them from the molds carefully. Top with the remaining lemon zest, fresh fruit, or fruit preserves. Berries, raspberries, blueberries, thin lemon slices, or a little whipped cream all work well. Serve chilled for the freshest flavor. If you want a fun dessert table, you could pair these with chocolate-covered strawberries for a mix of creamy, fruity, and chocolatey bites that look beautiful together.
Notes
❄️ Chill crusts before filling to prevent sogginess and ensure clean release.
🍋 Use fresh lemon juice and zest for brightest flavor; bottled won’t compare.
⏰ For easiest removal, line muffin tins with paper liners before pressing crust.
- Prep Time: 20 minutes
- Chill: 2 hours
- Category: Dessert
- Method: No-Bake
- Cuisine: American
- Diet: Vegetarian
Nutrition
- Serving Size: 1 tart
- Calories: 220
- Sugar: 14g
- Sodium: 150mg
- Fat: 16g
- Saturated Fat: 9g
- Unsaturated Fat: 6g
- Trans Fat: 0g
- Carbohydrates: 18g
- Fiber: 0g
- Protein: 2g
- Cholesterol: 45mg


