
Why You’ll Love This Easy Guava Jelly
This Easy Guava Jelly is simple, fast, and full of bright fruit flavor. It gives you a homemade spread that works well on toast, biscuits, pancakes, and more. If you like a sweet jar of guava jelly on hand, this recipe fits busy days and plain kitchen routines.
- Easy to make: This guava jelly recipe uses prepared juice, fruit pectin, and a short cooking time, so it works well for home cooks who want a clear, step-by-step method.
- Good for everyday use: Guava brings natural fruit flavor and is a fruit many people already enjoy in drinks and snacks. For more on guava and its fruit benefits, you can read this guide on guava benefits.
- Works for many meals: Easy guava jelly can be served with breakfast, added to dessert platters, or packed as a homemade gift for friends and family.
- Distinct flavor: The sweet-tart taste stands out from standard berry spreads and gives your pantry a new fruit option.
Homemade guava jelly tastes fresh, looks bright on the table, and takes only a few basic ingredients.
Because this easy guava jelly uses simple pantry items, it suits home cooks, students, working professionals, and anyone who wants a quick project that still feels special. It also pairs well with other easy desserts like Silky Lemon Cream Treat or a slice of lemon tart.
Jump To
- 1. Why You’ll Love This Easy Guava Jelly
- 2. Essential Ingredients for Easy Guava Jelly
- 3. How to Prepare the Perfect Easy Guava Jelly: Step-by-Step Guide
- 4. Dietary Substitutions to Customize Your Easy Guava Jelly
- 5. Mastering Easy Guava Jelly: Advanced Tips and Variations
- 6. How to Store Easy Guava Jelly: Best Practices
- 7. FAQs: Frequently Asked Questions About Easy Guava Jelly
- 8. Easy Guava Jelly
Essential Ingredients for Easy Guava Jelly
Use every ingredient below as written. Measure the sugar into a separate bowl before you start cooking.
- 4 1/2 cups prepared juice, made from about 3 pounds fully ripe guavas
- 6 cups water
- 2 drops red food coloring
- 6 1/2 cups sugar, measured into a separate bowl
- 1 box fruit pectin
- 1/2 teaspoon butter or margarine
What each ingredient does
| Ingredient | Purpose |
|---|---|
| Prepared guava juice | Gives the jelly its fruit base and strong guava taste |
| Water | Helps cook the fruit and release the juice |
| Red food coloring | Adds a deeper pink color if you want a brighter look |
| Sugar | Helps the jelly set and gives it the classic sweet flavor |
| Fruit pectin | Helps the jelly thicken properly |
| Butter or margarine | Reduces foaming while the jelly boils |
Special dietary options
- Vegan: Use margarine instead of butter if needed.
- Gluten-free: This easy guava jelly recipe is naturally gluten-free if your pectin is certified gluten-free.
- Low-calorie: Use a low-sugar pectin and a tested low-sugar method if you need fewer carbs. Keep in mind that this changes the set and sweetness.
How to Prepare the Perfect Easy Guava Jelly: Step-by-Step Guide
First Step: Prepare the guava juice
Wash the guavas well. Use about 3 pounds of fully ripe guavas. Cut them and place them in a large pot with 6 cups water. Bring the pot to a boil, then reduce the heat and cook until the fruit softens and the juice comes out. This step gives you the base for your guava jelly.
Second Step: Strain the juice
Pour the cooked fruit through a jelly bag or a fine strainer. Let the juice drip through without pressing too hard. You need 4 1/2 cups prepared juice for the recipe. If you press the pulp too much, the jelly can turn cloudy.
Third Step: Measure and get ready
Measure the sugar into a separate bowl before you begin the final boil. This matters because the cooking time moves fast once the juice, pectin, and sugar come together. Set out the 1 box fruit pectin, 1/2 teaspoon butter or margarine, and 2 drops red food coloring so everything is ready.
Fourth Step: Cook the jelly base
Pour the 4 1/2 cups prepared juice into a large pot. Stir in the fruit pectin and the butter or margarine. Add the red food coloring if you want a brighter pink shade. Bring the mixture to a full rolling boil over high heat, stirring often so it does not stick.
Fifth Step: Add the sugar
Once the mixture reaches a full rolling boil, add all 6 1/2 cups sugar at once. Stir constantly. Return the mixture to a full boil and keep it boiling for 1 minute. Do not guess the time. Use a timer. This is the key step that helps your easy guava jelly set.
Sixth Step: Check the texture
Take the pot off the heat. Skim off any foam if needed. The butter or margarine helps reduce foam, but a little may still appear. Stir gently so the jelly stays smooth.
Final Step: Fill the jars and cool
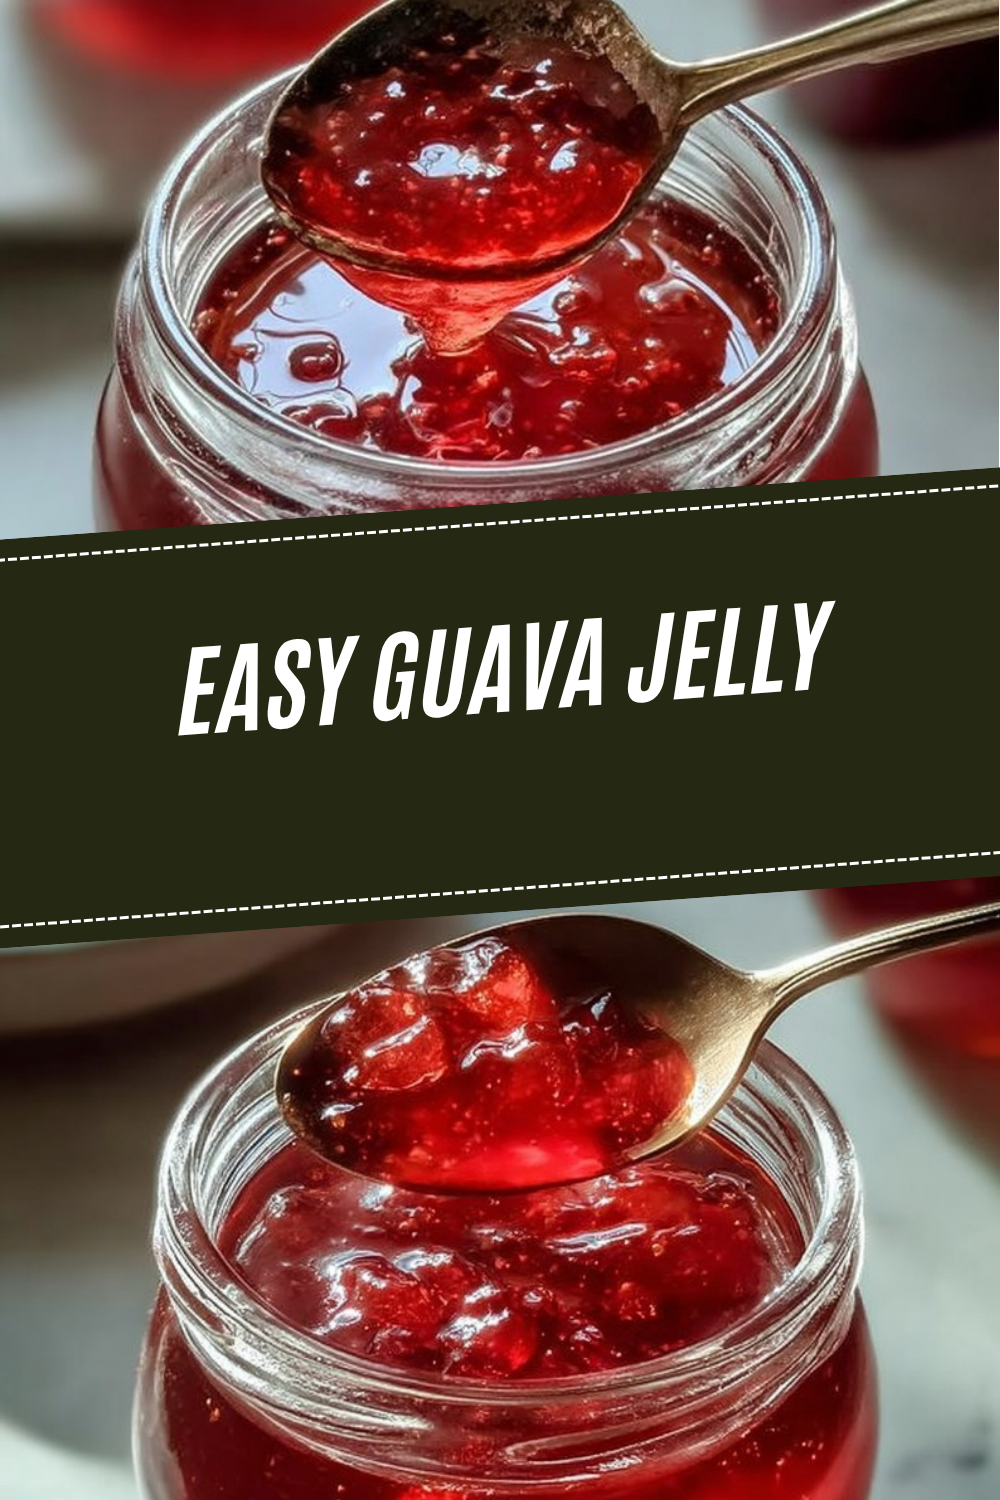
Pour the hot guava jelly into clean, hot jars, leaving the proper headspace for sealing. Wipe the rims, add lids, and let the jars cool. If you are not canning, cool the jelly and store it in the refrigerator. The finished spread should be glossy, sweet, and set enough to spoon onto toast or serve with biscuits.
If your jelly does not set right away, let it cool fully before checking again. Many jellies firm up as they rest.

Dietary Substitutions to Customize Your Easy Guava Jelly
Fruit and sweetener changes
This guava jelly recipe works best as written, but you can make small changes when needed. If you want a softer flavor, mix a little guava juice with another mild fruit juice, such as white grape juice. If you want less sugar, use a low-sugar pectin and follow the package directions for that product. Do not reduce sugar in the standard recipe unless the pectin package says it is safe.
Color and texture changes
The red food coloring is optional. Leave it out if you want a more natural look. If you do not want butter or margarine, you can skip it, but you may need to skim more foam from the top. For a smoother finish, strain the juice carefully and do not stir too hard after the jelly begins to boil.
If you want another simple sweet recipe for your menu, try homemade mango ice cream for a cool fruit treat or chocolate covered strawberries for an easy dessert board.
Mastering Easy Guava Jelly: Advanced Tips and Variations
Pro cooking techniques
Use a wide pot so the jelly boils evenly. Stir before and after the boil, but not constantly once the mixture starts boiling hard. Keep a close eye on the heat because fruit jelly can foam and bubble up fast. A candy thermometer is not required for this recipe, but careful timing matters.
Flavor variations
Try a small amount of citrus juice for a brighter edge, but keep the liquid balanced so the jelly still sets. You can also add a little vanilla to the serving dish, not the batch, if you want a softer aroma. For gift jars, tie on a simple label and pair them with a loaf of bread or a plate of scones.
Presentation tips
Serve the jelly in small glass jars so the color shows well. Put it on breakfast trays, brunch boards, or dessert tables. A bright spoonful next to biscuits, toast, or crackers makes a simple meal feel complete.
Make-ahead options
Cook the jelly on a day when you have extra time, then store the jars for later use. This helps busy parents, students, and working professionals keep a ready-made spread in the fridge or pantry.
How to Store Easy Guava Jelly: Best Practices
Store sealed jars in a cool, dark place if you followed safe canning steps. Once opened, keep the guava jelly in the refrigerator and use a clean spoon each time. If you made a small batch for quick use, refrigerate it right away in a covered container.
- Refrigeration: Keep opened jelly cold and use it within a few weeks for the best taste.
- Freezing: Freezing is not the best choice for jelly texture, but it can work in freezer-safe containers if needed.
- Reheating: Do not reheat the whole jar. Warm only the amount you plan to use.
- Meal prep: Make several jars at once so you have a quick breakfast spread ready for busy days.
FAQs: Frequently Asked Questions About Easy Guava Jelly
Print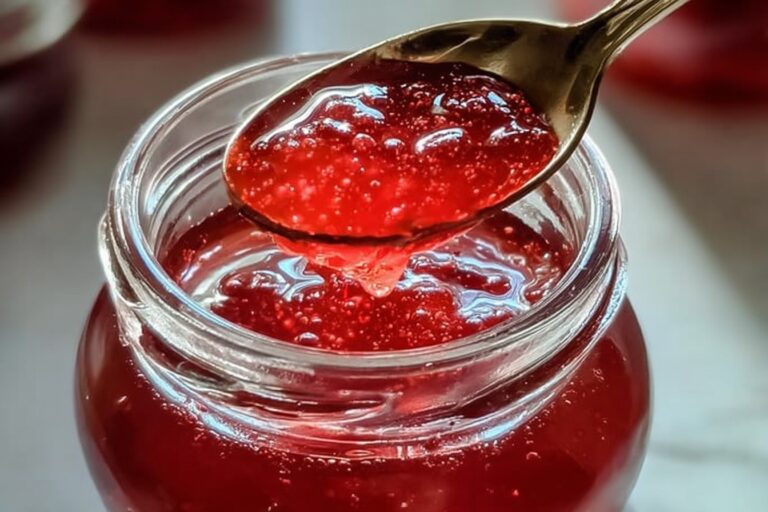
Easy Guava Jelly
🥭 Vibrant guava jelly captures tropical sweetness and tang in homemade preserves – perfect spread for toast, cheese, or PB&J upgrades.
🫙 Simple pectin method yields shelf-stable jars for gifting or year-round enjoyment with minimal effort.
- Total Time: 1 hour 10 minutes
- Yield: 8 half-pint jars
Ingredients
– 4 1/2 cups prepared juice, made from about 3 pounds fully ripe guavas for fruit base and strong guava taste
– 6 cups water for cooking the fruit and releasing the juice
– 2 drops red food coloring for deeper pink color
– 6 1/2 cups sugar, measured into a separate bowl for setting and sweet flavor
– 1 box fruit pectin for thickening
– 1/2 teaspoon butter or margarine for reducing foaming
Instructions
1-First Step: Prepare the guava juiceWash the guavas well. Use about 3 pounds of fully ripe guavas. Cut them and place them in a large pot with 6 cups water. Bring the pot to a boil, then reduce the heat and cook until the fruit softens and the juice comes out. This step gives you the base for your guava jelly.
2-Second Step: Strain the juicePour the cooked fruit through a jelly bag or a fine strainer. Let the juice drip through without pressing too hard. You need 4 1/2 cups prepared juice for the recipe. If you press the pulp too much, the jelly can turn cloudy.
3-Third Step: Measure and get readyMeasure the sugar into a separate bowl before you begin the final boil. This matters because the cooking time moves fast once the juice, pectin, and sugar come together. Set out the 1 box fruit pectin, 1/2 teaspoon butter or margarine, and 2 drops red food coloring so everything is ready.
4-Fourth Step: Cook the jelly basePour the 4 1/2 cups prepared juice into a large pot. Stir in the fruit pectin and the butter or margarine. Add the red food coloring if you want a brighter pink shade. Bring the mixture to a full rolling boil over high heat, stirring often so it does not stick.
5-Fifth Step: Add the sugarOnce the mixture reaches a full rolling boil, add all 6 1/2 cups sugar at once. Stir constantly. Return the mixture to a full boil and keep it boiling for 1 minute. Do not guess the time. Use a timer. This is the key step that helps your easy guava jelly set.
6-Sixth Step: Check the textureTake the pot off the heat. Skim off any foam if needed. The butter or margarine helps reduce foam, but a little may still appear. Stir gently so the jelly stays smooth.
7-Final Step: Fill the jars and coolPour the hot guava jelly into clean, hot jars, leaving the proper headspace for sealing. Wipe the rims, add lids, and let the jars cool. If you are not canning, cool the jelly and store it in the refrigerator. The finished spread should be glossy, sweet, and set enough to spoon onto toast or serve with biscuits.
Notes
🥭 Choose ripe but firm guavas for optimal flavor and natural pectin content.
🔥 Full rolling boil means bubbles don’t break when stirred – time precisely for perfect set.
🫙 Always test seal: lid should not flex; refrigerate unsealed jars.
- Prep Time: 45 minutes
- Processing: 5 minutes
- Cook Time: 20 minutes
- Category: Condiment
- Method: Canning
- Cuisine: Caribbean
- Diet: Vegan, Gluten-Free
Nutrition
- Serving Size: 1 tablespoon
- Calories: 50
- Sugar: 13g
- Sodium: 0mg
- Fat: 0g
- Saturated Fat: 0g
- Unsaturated Fat: 0g
- Trans Fat: 0g
- Carbohydrates: 13g
- Fiber: 0g
- Protein: 0g
- Cholesterol: 0mg


