

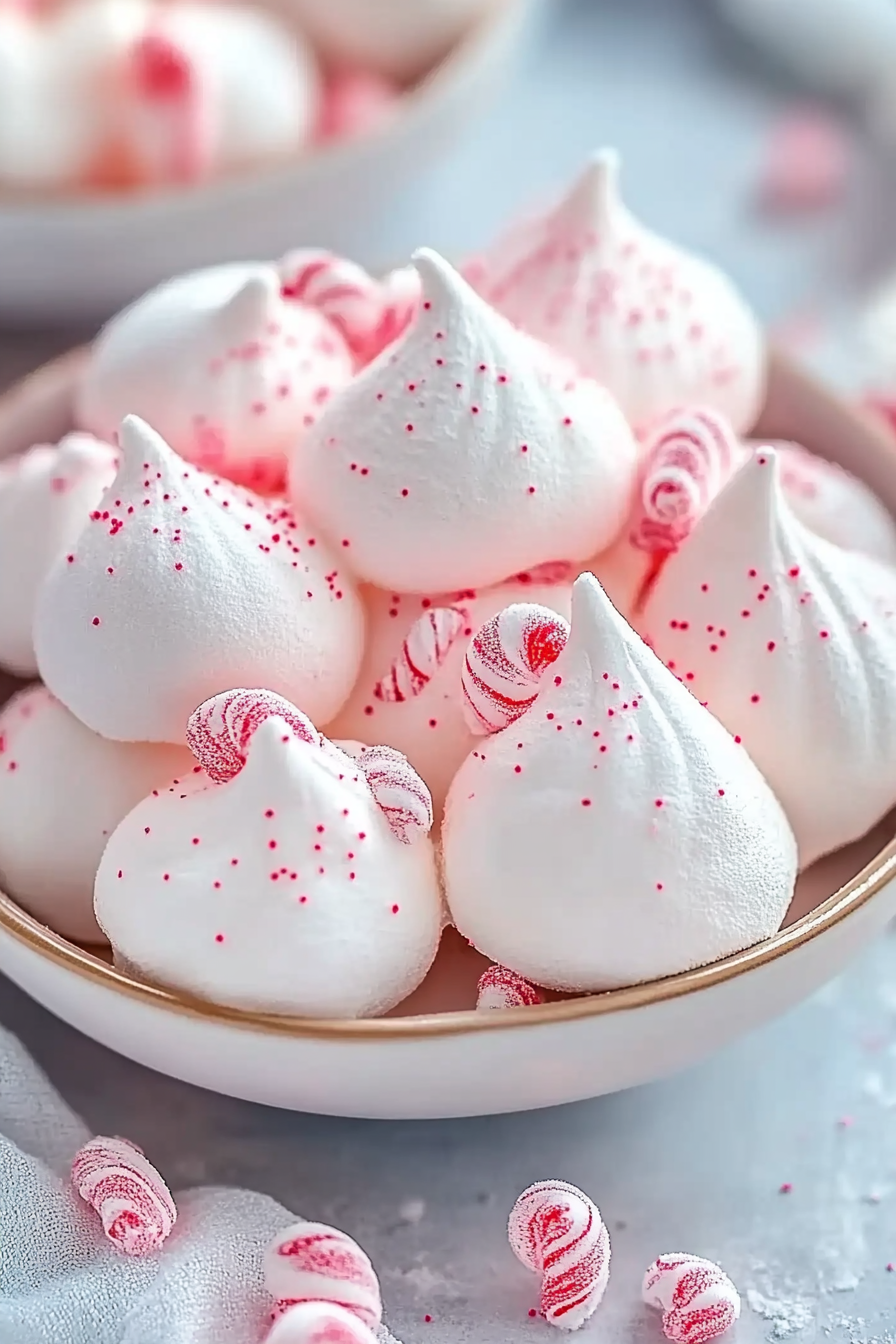
Introduction to Peppermint Meringues
Peppermint Meringues are the quintessential holiday treat, delighting the senses with their delicate texture and refreshing flavor. These light and airy desserts, made primarily with egg whites, sugar, and peppermint extract, offer a guilt-free indulgence that stands out thanks to their festive appearance and delightful taste. Perfect for sharing with family and friends, these meringues are not only gluten-free but also extremely low in fat, making them a healthy choice during the festive season. Whether you’re a seasoned baker or trying your hand at meringues for the first time, this recipe promises simplicity and joy in every bite.
Jump To
- 1. Introduction to Peppermint Meringues
- 2. Benefits and Advantages of Peppermint Meringues
- 3. Ingredients Overview
- 4. How to Prepare the Perfect Peppermint Meringues: Step-by-Step Guide
- 5. Mastering Peppermint Meringues: Advanced Tips and Variations
- 6. How to Store Peppermint Meringues: Best Practices
- 7. Nutritional Value of Peppermint Meringues
- 8. FAQs: Frequently Asked Questions About Peppermint Meringues
- 9. Peppermint Meringues: Light and Airy Holiday Treats
Benefits and Advantages of Peppermint Meringues
If you’re searching for a sweet treat that marries ease of preparation with an impressive result, look no further than Peppermint Meringues. These delicate delights are not only a breeze to make, but their health benefits make them a smart choice for any dessert table. Since they’re primarily composed of egg whites and sugar, these meringues are fat-free, allowing you to indulge without guilt. Additionally, their gluten-free nature ensures that they cater to a wide audience, including those with dietary restrictions. The peppermint flavor adds a unique holiday twist, setting these treats apart from other seasonal desserts. Overall, Peppermint Meringues are a delightful, health-conscious option that everyone can enjoy.
Ingredients Overview
Essential Ingredients for Peppermint Meringues
To craft the perfect peppermint meringues, you’ll need the following essential ingredients. With each component playing a vital role, achieving the desired light and airy texture becomes a delightful endeavor:
- Egg Whites: Use four large egg whites, ensuring they are at room temperature to achieve a fluffier meringue.
- Granulated Sugar: About 1 cup is recommended to create a smooth, glossy texture.
- Cream of Tartar: A 1/4 teaspoon stabilizes the egg whites, helping them maintain structure and volume.
- Peppermint Extract: Add 1 teaspoon for that classic, refreshing flavor.
- Crushed Candy Canes: Approximately 2 tablespoons for garnish, enhancing both flavor and aesthetics.
- Red Food Coloring: A few drops can create those iconic red stripes.
For those following specific dietary plans or preferences, options such as vegan and gluten-free adaptations exist, ensuring these treats are accessible to all. Note, however, that the classic recipe is naturally gluten-free.
Dietary Substitutions to Customize Your Peppermint Meringues
Catering to various dietary needs or ingredient availability makes peppermint meringues a versatile choice for all. Here are some effective substitutions:
- Vegan Option: Replace egg whites with aquafaba (liquid from canned chickpeas), using 3 tablespoons per egg white.
- Low-Calorie Sweeteners: Substitute granulated sugar with a low-calorie alternative like erythritol, keeping a sweet yet healthier profile.
- Naturally Derived Food Colors: Consider beet juice or pomegranate powder as suitable replacements for synthetic red coloring.
These substitutions ensure that whether you’re accommodating a specific diet or simply experimenting with new flavors, your meringues are just as scrumptious. Explore more about dietary-friendly desserts with a marvelous sticky toffee pudding cake.
How to Prepare the Perfect Peppermint Meringues: Step-by-Step Guide
Prepare to indulge in the delightful creation of peppermint meringues with this detailed, step-by-step guide. Below, you’ll find a well-structured process that makes baking these treats simple and joyous:
Step-by-Step Preparation
First Step: Begin by preheating your oven to a low 200°F (93°C). Line two baking sheets with parchment paper to prevent sticking.
Second Step: In a clean, dry mixing bowl, combine room-temperature egg whites with cream of tartar. Using an electric mixer on medium speed, whisk until soft peaks form.
Third Step: Gradually add the sugar, tablespoon by tablespoon, as you continue to beat the egg whites. Aim for stiff, glossy peaks, indicating smooth consistency.
Fourth Step: Incorporate the peppermint extract, gently folding it in to maintain the meringue’s firmness.
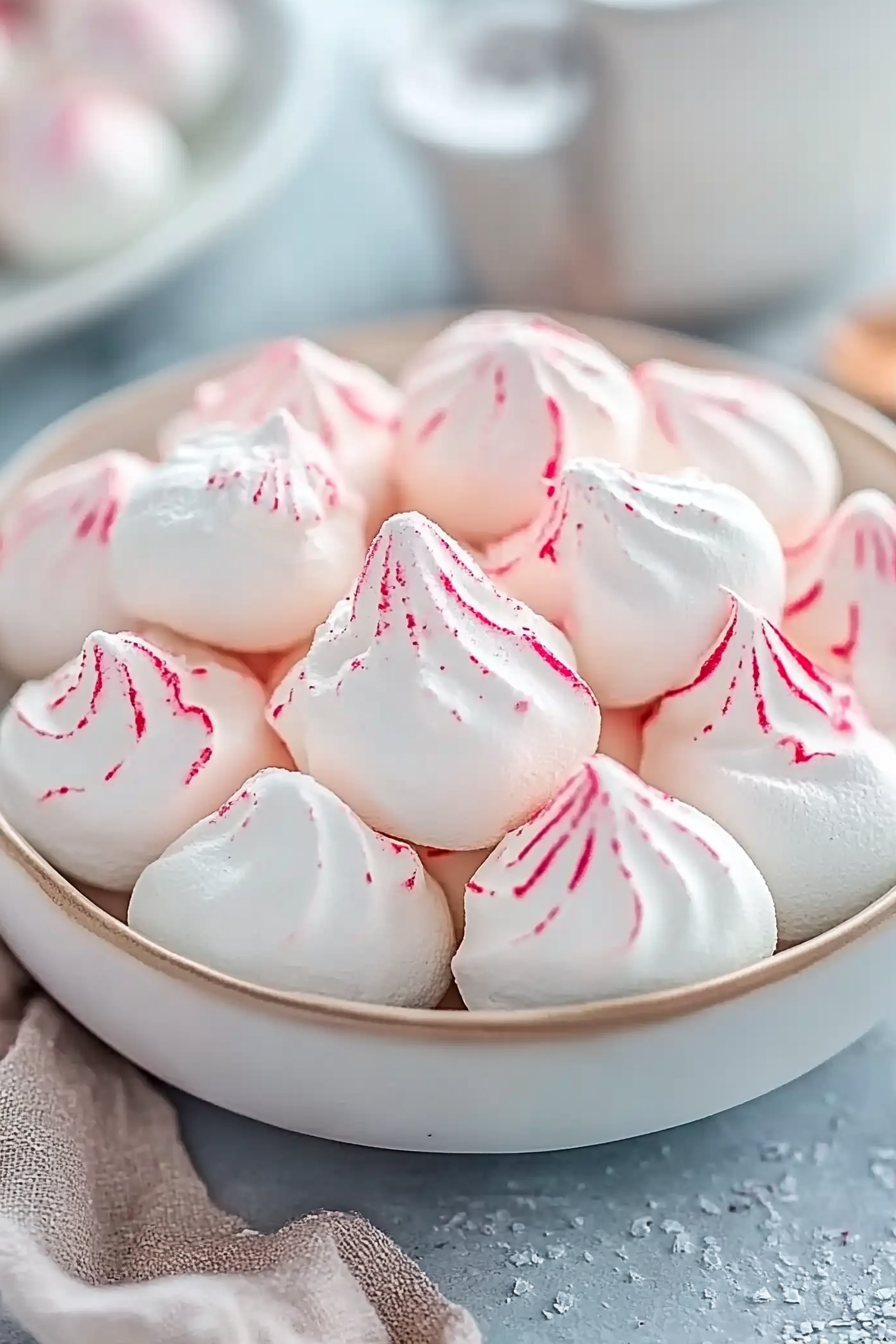
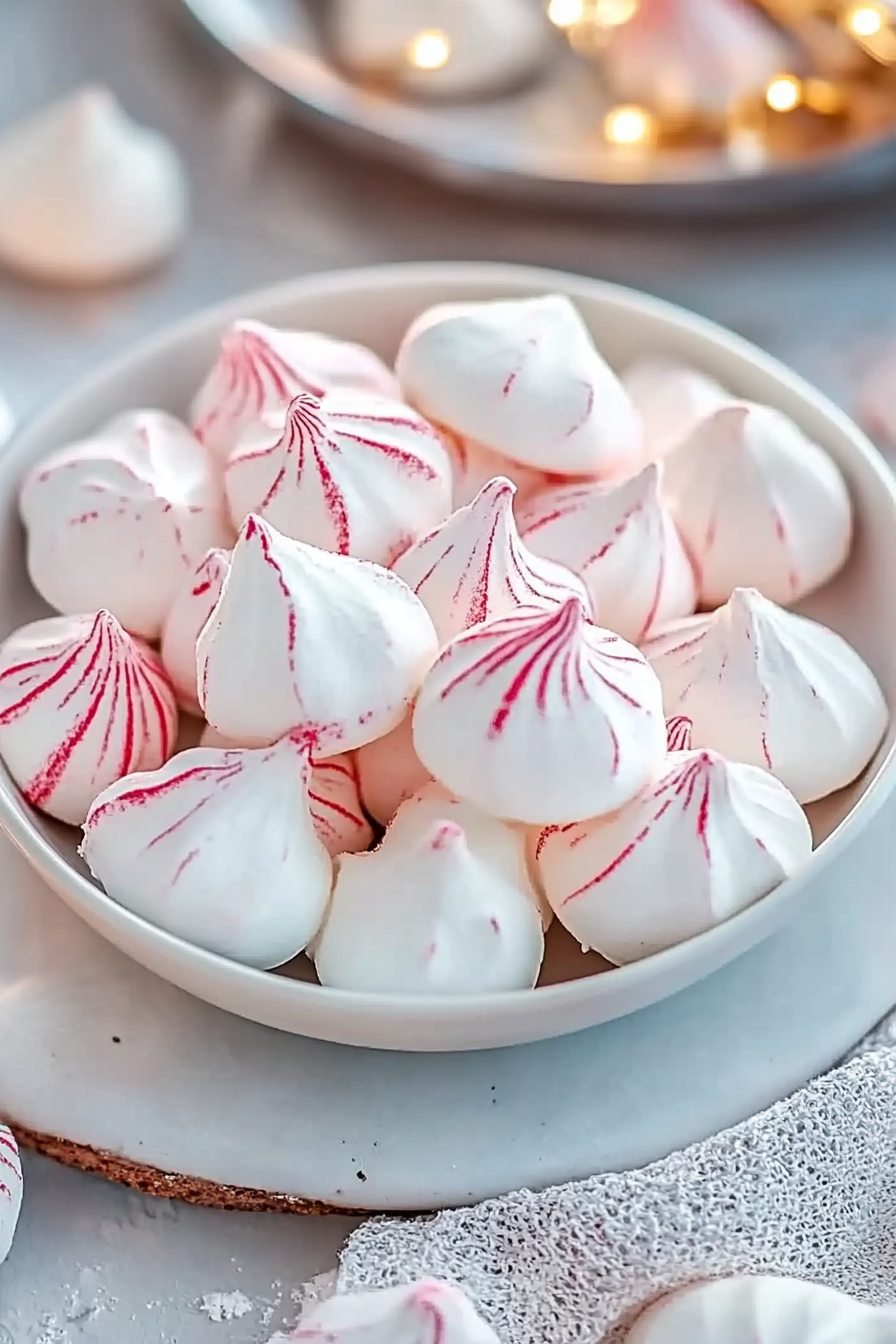
Fifth Step: Optional for color: Dip a toothpick in red food coloring and gently swirl it through the meringue for a festive stripe effect.
Sixth Step: Fit a piping bag with a large star tip and fill it with the meringue mixture. Pipe small mounds or “kisses” onto the prepared baking sheets, leaving space between each.
Seventh Step: Sprinkle the tops with crushed candy canes, adding crunch and festive flavor.
Eighth Step: Bake in the preheated oven for 1.5–2 hours. The key is a low temperature to dry the meringues without browning.
Ninth Step: Once baking is complete, turn off the oven, leaving the meringues inside to cool and dry completely without opening the door.
This method ensures that your peppermint meringues are consistently excellent, yielding a light, airy texture with a hint of chewiness in the center. For further insights into perfecting meringues, check out this informative article on the history and science of meringue.
Mastering Peppermint Meringues: Advanced Tips and Variations
To create exceptional peppermint meringues, understanding a few advanced techniques can drastically improve your results. For home cooks and baking enthusiasts ready to take their confections to the next level, following these tips is key to achieving flawlessly light and airy treats every time.
Perfecting the Technique
- Room Temperature Ingredients: Ensure your egg whites are at room temperature before you start. This helps them whip up to greater volume.
- Utensil Cleanliness: Any grease or residue on your mixing bowl and beaters can prevent your egg whites from reaching their full potential. Clean your tools thoroughly before starting.
- Gradual Sugar Addition: Add sugar gradually while beating the egg whites. This not only ensures a smoother texture but also prevents any deflation.
Creative Variations
Embrace creativity by experimenting with the peppermint meringue recipe. Consider these variations to put a unique twist on your standard meringue:
- Alternative Flavors: Besides peppermint, try adding vanilla, almond, or orange extract for different aromatic experiences.
- Color Play: Use food coloring gels to add a visual pop. Consider red and green for a Christmas-themed presentation, or pastel hues for spring festivities.
- Chocolate Dip: Once your meringues have cooled, dip the bottoms in melted dark or white chocolate for a luxurious finish.
These tips and variations not only perfect your peppermint meringue-making skills but also encourage you to engage with your creative side, providing joy and festive cheer in every bite.
How to Store Peppermint Meringues: Best Practices
Proper storage of your peppermint meringues ensures that these delightful treats remain fresh and delicious for weeks. Whether you’re saving them for a special occasion or enjoying them over time, follow these best practices to preserve their crispness and flavor.
Refrigeration and Freezing
Refrigeration: While refrigeration isn’t necessary for peppermint meringues, if you live in a particularly humid climate, storing them in the refrigerator can help maintain their crispness. Place them in an airtight container to prevent them from absorbing other odors.
Freezing: To freeze meringues, layer them between sheets of parchment paper in an airtight container. They can be frozen for up to three months. To enjoy, simply allow them to return to room temperature naturally—avoid the temptation to speed up the process in a warm oven, as it may lead to condensation and soften the meringues.
Reheating and Consuming
When ready to serve, remove the peppermint meringues from the airtight container and allow them to sit at room temperature. If they have softened due to humidity, briefly warming them at a low temperature in the oven can restore their crunchy exterior.
Ensuring that your peppermint meringues are stored correctly helps maintain their delightful texture, allowing you to enjoy these festive treats long after the holiday season has passed.
Nutritional Value of Peppermint Meringues
Peppermint meringues are not only delightful to taste but also offer a unique nutritional profile, making them a popular choice for health-conscious individuals. Let’s explore the nutritional value of these light and airy treats.
Calories and Macros
- Calories: A single peppermint meringue typically contains around 15 to 25 calories, depending on its size. This makes it an excellent low-calorie dessert option.
- Carbohydrates: Each meringue contains approximately 3 to 5 grams of carbohydrates, primarily from the sugar content.
- Protein: Although these treats are made of egg whites, each meringue only contains about 0.3 grams of protein.
- Fats: Since peppermint meringues are fat-free, they contain no fat, making them suitable for those on a low-fat diet.
Vitamins and Minerals
While peppermint meringues are not a significant source of vitamins or minerals, the inclusion of egg whites provides some nutritional benefits:
- Vitamin B2 (Riboflavin): Helps with energy production and overall health.
- Selenium: Contributes to antioxidant defense systems and supports immune function.
Gluten-Free and Dairy-Free
Peppermint meringues are naturally gluten-free and dairy-free, making them an excellent choice for individuals with dietary restrictions or those avoiding gluten or dairy products. Their simple ingredients, such as egg whites and sugar, mean they can fit easily into various dietary plans.
Low-Calorie Indulgence
Whether you’re hosting a holiday gathering or simply enjoying a treat with family, peppermint meringues offer a guilt-free indulgence. Their low-calorie nature ensures you can satisfy your sweet tooth without compromising your dietary goals. For those interested in exploring how the art and science of meringue making have evolved over time, consider visiting the sweet history of meringue.
FAQs: Frequently Asked Questions About Peppermint Meringues
1. How should I store leftover Peppermint Meringues?
To ensure your peppermint meringues remain fresh, store them in an airtight container at room temperature. They can last for up to 2-3 weeks when stored properly. Avoid humid environments, as moisture can affect their texture.
2. What causes Peppermint Meringues to be chewy in the middle?
A chewy center in meringues is often a result of undercooking or not allowing them to cool and dry completely in the oven. Ensure you follow the baking instructions closely, and let them dry in the turned-off oven for best results.
3. Can I make Peppermint Meringues on a humid day?
While it’s possible, baking meringues on humid days can affect their texture. Moisture in the air can lead to less crispy meringues. If possible, choose a dry day for baking or consider using a dehumidifier in your kitchen.
4. Are Peppermint Meringues gluten-free?
Yes, peppermint meringues are naturally gluten-free, as they contain no wheat or gluten-containing ingredients. This makes them an excellent option for those with gluten sensitivities or those following a gluten-free diet. For more on the technical and historical aspects of meringues, check out the history and science of meringue.
Print
Peppermint Meringues: Light and Airy Holiday Treats
🍬 Light, airy, and bursting with peppermint flavor, these meringues are the perfect guilt-free treat for the holidays! ❄️
🎄 Crisp on the outside, chewy on the inside, and easy to make, they add a festive touch to any dessert table! 🍥
- Total Time: 2 hours 15 minutes
Ingredients
Egg whites
Granulated sugar
Cream of tartar
Peppermint extract
Crushed candy canes
Red food coloring (optional)
Melted chocolate (optional)
Instructions
1. Preheat your oven to 200-225°F and line a baking sheet with parchment paper.
2. Ensure your mixing bowl and beaters are completely clean and free of grease.
3. Separate egg whites from yolks, making sure no yolk gets into the whites.
4. Allow egg whites to come to room temperature for better volume.
5. In a large mixing bowl, beat egg whites on medium speed until foamy.
6. Add cream of tartar and continue beating until soft peaks form.
7. Gradually add sugar, one tablespoon at a time, while beating on high speed.
8. Continue beating until stiff, glossy peaks form and the sugar is fully dissolved.
9. Mix in peppermint extract for flavoring.
10. Optionally, add red food coloring in streaks for a festive look.
11. Transfer the meringue mixture to a piping bag fitted with a round or star tip.
12. Pipe small mounds or “kisses” onto the prepared baking sheets.
13. Sprinkle crushed candy canes over the meringues for extra peppermint flavor.
14. Bake in the preheated oven for 1.5-2 hours until firm and dry to the touch.
15. Turn off the oven and let the meringues cool inside for further drying.
16. Once fully cooled, remove from the baking sheet carefully.
17. Optionally, dip the bottoms in melted chocolate and let them set.
18. Store in an airtight container at room temperature for up to 2-3 weeks.
19. Make sure to bake on a dry day to prevent excess moisture affecting texture.
20. Enjoy your light, airy, and festive peppermint meringues!
Notes
Let egg whites come to room temperature before beating to achieve maximum volume.
Gradually add sugar while whipping to create a smooth and glossy meringue.
Bake at a low temperature and let the meringues cool in the oven for the best texture.
- Prep Time: 15
- Cook Time: 120
- Category: Dessert
- Method: Baking
- Cuisine: American


