
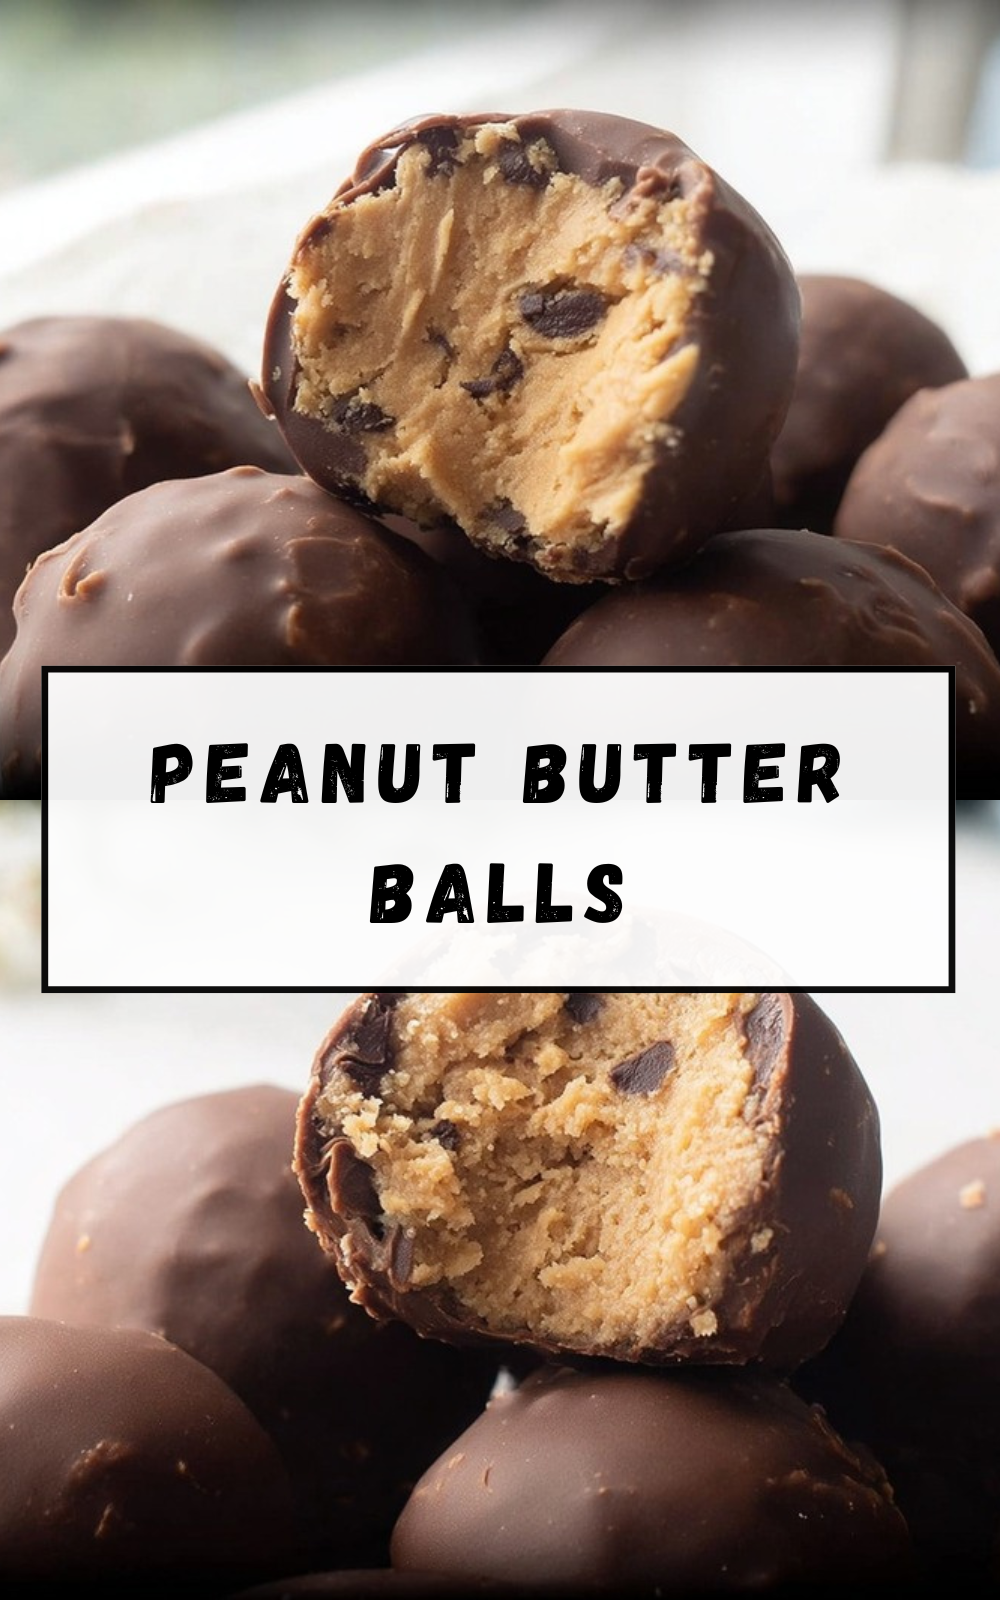
Peanut Butter Balls Recipe: A Sweet No-Bake Treat Everyone Loves
Peanut Butter Balls are one of those easy treats that feel special without asking for much time in the kitchen. With just a few simple ingredients, you can make a batch of creamy, chocolate-covered bites that work for holidays, parties, lunchbox treats, or a quick dessert after dinner. This Peanut Butter Balls recipe is especially great for busy home cooks because it comes together fast and uses pantry staples you may already have on hand.
What makes this recipe so appealing is how flexible it is. You can keep it classic with creamy peanut butter and semi-sweet chocolate chips, or switch things up with almond butter, chunky peanut butter, or even a sprinkle topping for a festive finish. If you love simple desserts like chocolate-covered strawberries, you will probably enjoy these too because they bring the same sweet-and-chocolatey feeling with less work.
These little treats are rich, creamy, and easy to make ahead, which makes them a smart choice for holidays, gift boxes, and last-minute dessert trays.
Author: Camille Hayes
Jump To
- 1. Peanut Butter Balls Recipe: A Sweet No-Bake Treat Everyone Loves
- 2. Why You’ll Love This Peanut Butter Balls Recipe
- 3. Essential Ingredients for Peanut Butter Balls
- 4. How to Prepare the Perfect Peanut Butter Balls: Step-by-Step Guide
- 5. Dietary Substitutions to Customize Your Peanut Butter Balls
- 6. Mastering Peanut Butter Balls: Advanced Tips and Variations
- 7. How to Store Peanut Butter Balls: Best Practices
- 8. Nutrition Information for Peanut Butter Balls
- 9. FAQs: Frequently Asked Questions About Peanut Butter Balls
- 10. Peanut Butter Balls
Why You’ll Love This Peanut Butter Balls Recipe
- Easy preparation: This is a no-bake recipe with just a few quick steps. You mix, chill, roll, dip, and serve. The prep time is about 30 minutes, and the cook time is only 5 minutes, mostly for melting the chocolate.
- Simple ingredients: You only need peanut butter, butter, powdered sugar, chocolate chips, and an optional little shortening or coconut oil. That makes it budget-friendly and easy to shop for.
- Versatile for many diets: You can swap in almond butter, cashew butter, or sunflower seed butter if you want a different flavor or need a nut-free option. You can also add Rice Krispies for crunch.
- Classic flavor combination: The mix of creamy peanut butter and smooth chocolate is hard to beat. It is sweet, salty, rich, and satisfying in every bite.
For families, students, and busy professionals, this recipe is a nice win because it feels homemade without being complicated. It also fits nicely beside other easy dessert ideas like brown butter oatmeal chocolate chip cookies when you want a dessert spread with variety.
Essential Ingredients for Peanut Butter Balls
Here is the full ingredients list with exact amounts. Each item plays a key role in the texture, flavor, and final finish of the Peanut Butter Balls.
- 1/2 cup creamy peanut butter: Gives the filling its rich, nutty flavor and smooth base.
- 3 tablespoons softened butter: Helps the mixture become creamy and easy to shape.
- 1 cup powdered sugar: Sweetens the filling and helps it firm up into rollable dough.
- 1 cup semi-sweet chocolate chips: Creates the chocolate shell that coats each ball.
- 1 tablespoon vegetable shortening or coconut oil, optional: Helps melt the chocolate more smoothly and gives it a glossy finish.
Special Dietary Options
- Vegan: Use a plant-based butter and dairy-free chocolate chips. Choose natural peanut butter or another nut butter that fits your needs.
- Gluten-free: This recipe is naturally gluten-free as written, but always check labels on chocolate chips and add-ins to be safe.
- Low-calorie: Use a little less chocolate on each ball, or choose a sugar-free chocolate option if you want to cut back on sugar.
| Ingredient | Amount | Purpose |
|---|---|---|
| Creamy peanut butter | 1/2 cup | Provides flavor and structure |
| Softened butter | 3 tablespoons | Adds smoothness and richness |
| Powdered sugar | 1 cup | Sweetens and firms the dough |
| Semi-sweet chocolate chips | 1 cup | Creates the outer coating |
| Vegetable shortening or coconut oil | 1 tablespoon, optional | Improves melting and shine |
How to Prepare the Perfect Peanut Butter Balls: Step-by-Step Guide
First Step: Mix the base
Start by adding the 1/2 cup creamy peanut butter and 3 tablespoons softened butter to a medium mixing bowl. Stir them together until the mixture looks smooth and well blended. This first step is important because it creates the creamy base that helps the filling hold together later.
Use a spoon or spatula, and make sure the butter is soft enough to mix easily. If it is too cold, the mixture can feel stiff and harder to combine. A smooth start makes the rest of the process much easier.
Second Step: Add the powdered sugar
Gradually stir in 1 cup powdered sugar. Add it a little at a time so it blends evenly into the peanut butter mixture. As you mix, the dough will become thicker and more like a soft playdough texture. That is exactly what you want.
If the dough seems too sticky, let it sit for a few more minutes or chill it slightly longer. If it seems too dry, a tiny spoonful of peanut butter can help bring it back together. The goal is a soft but rollable mixture.
Third Step: Chill the dough
Cover the bowl and refrigerate the mixture for about 15 minutes. This short chill time helps the dough firm up so you can shape it into balls without it sticking too much to your hands. Do not skip this part if you want neat-looking Peanut Butter Balls.
After chilling, the dough should feel firmer and easier to handle. If your kitchen is warm, you may want to chill it a few extra minutes. That little bit of patience pays off when it is time to roll.
Fourth Step: Shape into balls
Once the dough is firm enough, scoop and shape it into 1-inch balls using your hands. Try to make them roughly the same size so they chill and coat evenly. A small cookie scoop can help, but your hands work just fine.
Place the shaped balls on a baking sheet lined with parchment or wax paper. After shaping, cover the tray and refrigerate the balls for at least 20 minutes. This second chill is important because it helps them keep their shape when you dip them into warm chocolate.
Fifth Step: Melt the chocolate
Next, melt 1 cup semi-sweet chocolate chips according to the package instructions. You can do this in the microwave in 30-second intervals, stirring after each round, or use a double boiler for a slower, more controlled melt. If you want the chocolate to be smoother and shinier, stir in 1 tablespoon vegetable shortening or coconut oil.
Be careful not to overheat the chocolate. If it gets too hot, it can become thick or grainy. Stir often, and stop heating as soon as it is smooth and glossy. This is also a good moment to prep your dipping station so everything is ready.
Sixth Step: Dip and coat
Working one at a time, dip each chilled peanut butter ball into the melted chocolate using a fork. A toothpick can also work, though a fork usually gives you better control. Roll the ball gently in the chocolate until it is fully covered, then lift it out and let the excess chocolate fall back into the bowl.
This step can get a little messy, and that is completely normal. If the chocolate starts thickening while you work, warm it again very briefly. Keep the peanut butter balls cold so they stay firm during dipping.
Seventh Step: Set and serve
Place the chocolate-covered balls on wax paper. If you want, add Christmas sprinkles or another topping right away before the chocolate sets. Chopped peanuts, a pinch of sea salt, or colorful sprinkles can make them look extra pretty.
Cover the tray and refrigerate the coated balls until ready to serve. Once the chocolate has set, they are ready to enjoy. These treats are great for dessert platters, party trays, or gift boxes, and they pair nicely with other simple sweets like silky lemon cream treat when you want a mix of flavors.
For the best texture, keep the balls cold before dipping and work in small batches so the chocolate stays smooth.

Dietary Substitutions to Customize Your Peanut Butter Balls
Protein and Main Component Alternatives
If you want to change the flavor or work around an allergy, you can swap the peanut butter for almond butter, cashew butter, or sunflower seed butter. The recipe works best with creamy options because they blend smoothly and shape well. Chunky peanut butter also works if you want more texture.
Keep in mind that some nut and seed butters are softer than peanut butter, so you may need a little extra powdered sugar to help the dough firm up. Taste the filling before chilling if you want to check the sweetness. That way, you can adjust the flavor to fit your family’s taste.
Vegetable, Sauce, and Seasoning Modifications
There are plenty of easy ways to change the coating and topping style. You can stir a little coconut oil or vegetable shortening into the melted chocolate for a smoother finish. If you want extra crunch, fold Rice Krispies into the filling before chilling.
For the topping, try chopped peanuts, colorful sprinkles, or a light sprinkle of sea salt. These small changes can make the same recipe feel fresh and festive. They are especially handy during holidays or when you want to match a party theme.
Mastering Peanut Butter Balls: Advanced Tips and Variations
Pro cooking techniques
Chilling is the secret to neat, round Peanut Butter Balls. The first chill firms up the filling, and the second chill helps the balls stay firm during chocolate dipping. If you rush either step, the balls can soften and lose shape.
For dipping, a fork is usually the easiest tool, but a toothpick can work too. Expect a little mess, especially with the first few balls, and do not worry if they are not perfect. Homemade candy has a little charm, and that is part of the fun.
Flavor variations
You can keep the recipe classic or add a fun twist. A handful of Rice Krispies adds crunch, while chopped peanuts give more texture. If you are making these for the holidays, festive sprinkles can turn them into a cute dessert tray centerpiece.
If you like pairing chocolate with nutty desserts, you may also enjoy recipes such as peanut butter chocolate molten lava cake. It is a nice way to keep that same flavor theme going for guests who love peanut butter and chocolate together.
Presentation tips
Place the finished balls in paper candy cups or on a pretty platter for easy serving. A light sprinkle of sea salt on top gives a nice sweet-salty finish. If you are gifting them, line a box with parchment paper and add layers carefully so the coating stays smooth.
Make-ahead options
These treats are perfect for make-ahead planning. You can roll the balls, chill them, and dip them later in the day or the next day. They also freeze well once fully set, which makes them useful for busy weeks, holiday prep, or last-minute guests.
How to Store Peanut Butter Balls: Best Practices
Refrigeration: Store Peanut Butter Balls in an airtight container in the refrigerator for up to 2 weeks. Place parchment or wax paper between layers so they do not stick together. This keeps the chocolate firm and the centers fresh.
Freezing: For longer storage, freeze fully set Peanut Butter Balls in a container with parchment or wax paper between layers. They can stay in the freezer for up to one month. Let them thaw in the refrigerator before serving for the best texture.
Reheating: These do not need to be reheated. In fact, they taste best chilled or at cool room temperature. If the chocolate softens, pop them back in the fridge for a short time.
Meal prep considerations: Make a double batch if you want snacks or desserts ready ahead of time. They are handy for school events, potlucks, and holiday trays, and they keep well when stored properly.
Nutrition Information for Peanut Butter Balls
| Serving Size | Amount Per Serving |
|---|---|
| Calories | 107 kcal |
| Carbohydrates | 10g |
| Protein | 2g |
| Fat | 7g |
| Saturated Fat | 3g |
| Cholesterol | 4mg |
| Sodium | 38mg |
| Potassium | 77mg |
| Fiber | 1g |
| Sugar | 8g |
| Vitamin A | 48 IU |
| Calcium | 7mg |
| Iron | 1mg |
These values are based on a 24g serving and may vary depending on the exact ingredients and chocolate coating used. If you are tracking nutrition closely, smaller balls or a thinner chocolate layer can change the numbers a bit.
FAQs: Frequently Asked Questions About Peanut Butter Balls
How long do peanut butter balls last?
Peanut butter balls typically last 3-5 days at room temperature in an airtight container, but for best freshness, store them in the refrigerator for up to 2 weeks. They freeze well for 1-3 months—let them set fully, layer with parchment paper in a freezer-safe bag or container to prevent sticking, and thaw in the fridge before serving. Avoid leaving them out longer than a few hours to prevent the chocolate from melting or the filling from softening. Always check for any off smells or texture changes before eating. This storage method keeps them chewy and chocolate-coated without sogginess. (78 words)
Can you freeze peanut butter balls?
Yes, peanut butter balls freeze excellently for up to 3 months. First, ensure they’re fully chilled and set after dipping. Place them in a single layer on a baking sheet to firm up, then transfer to a freezer bag or airtight container lined with parchment or wax paper, separating layers to avoid sticking. Label with the date. To serve, thaw overnight in the fridge or at room temperature for 30-60 minutes. This preserves their texture—no icy crystals or separation. Great for holiday prep or batch making ahead. (92 words)
Can I use almond butter instead of peanut butter for peanut butter balls?
Absolutely, swap creamy peanut butter for almond, cashew, sunflower seed butter (for nut-free), or any nut/seed butter you like. Use the same 1:1 ratio in the recipe—about 1-1.5 cups for standard batches. Creamy varieties work best for smooth balls, but chunky adds crunch. Taste-test the dough for sweetness adjustments, as some butters are milder. Chill thoroughly before dipping, as softer butters may need extra powdered sugar for firmness. This tweak makes them allergy-friendly or flavor-varied without changing the no-bake process. (96 words)
What’s the best way to dip peanut butter balls in chocolate?
Chill peanut butter balls for at least 30 minutes first to firm them up. Melt chocolate chips with 1 tsp vegetable shortening or coconut oil per cup for smooth flow. Use a fork or toothpick: pierce the ball, submerge in melted chocolate, tap off excess over the bowl, and place on parchment-lined sheet. Work in small batches to keep chocolate tempered. If messy, a two-prong dipper helps. Let excess drip fully for a clean finish. Re-chill 15-20 minutes to set—no cracks or pooling. Pro tip: Leave a small PB top exposed for classic buckeye style. (102 words)
How do you melt chocolate for peanut butter balls?
Melt 10-12 oz chocolate chips two ways: Microwave in 30-second bursts on 50% power, stirring after each until smooth (total 2-3 minutes). Or use a double boiler: simmer water in a pot, place heat-safe bowl with chips on top, stir constantly until melted. Add 1 tsp shortening or coconut oil to thin it and add shine—prevents seizing. Avoid direct heat or water drops, which cause graininess. Keep melted chocolate warm over low heat while dipping. If it thickens, re-warm gently. Yields glossy, crack-free coating every time. (98 words)
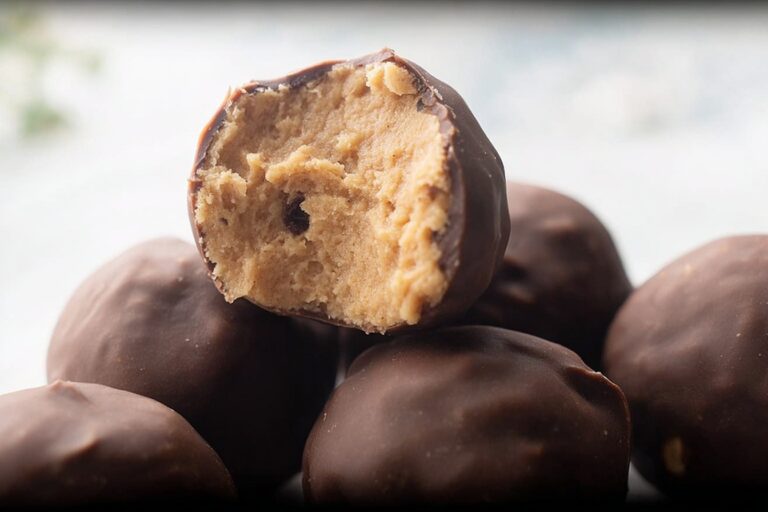
Peanut Butter Balls
🥜 Dive into these creamy, crunchy peanut butter balls for a quick, no-bake treat that’s perfect for satisfying sweet cravings anytime!
🍫 Coated in rich chocolate, they’re easy to make with just 4 main ingredients and ideal for holidays or parties!
- Total Time: 45 minutes
- Yield: 20 balls
Ingredients
– 1/2 cup creamy peanut butter for providing flavor and structure
– 3 tablespoons softened butter for adding smoothness and richness
– 1 cup powdered sugar for sweetening and firming the dough
– 1 cup semi-sweet chocolate chips for creating the outer coating
– 1 tablespoon, optional vegetable shortening or coconut oil for improving melting and shine
Instructions
1-First Step: Mix the base Start by adding the 1/2 cup creamy peanut butter and 3 tablespoons softened butter to a medium mixing bowl. Stir them together until the mixture looks smooth and well blended. This first step is important because it creates the creamy base that helps the filling hold together later. Use a spoon or spatula, and make sure the butter is soft enough to mix easily. If it is too cold, the mixture can feel stiff and harder to combine. A smooth start makes the rest of the process much easier.
2-Second Step: Add the powdered sugar Gradually stir in 1 cup powdered sugar. Add it a little at a time so it blends evenly into the peanut butter mixture. As you mix, the dough will become thicker and more like a soft playdough texture. That is exactly what you want. If the dough seems too sticky, let it sit for a few more minutes or chill it slightly longer. If it seems too dry, a tiny spoonful of peanut butter can help bring it back together. The goal is a soft but rollable mixture.
3-Third Step: Chill the dough Cover the bowl and refrigerate the mixture for about 15 minutes. This short chill time helps the dough firm up so you can shape it into balls without it sticking too much to your hands. Do not skip this part if you want neat-looking Peanut Butter Balls. After chilling, the dough should feel firmer and easier to handle. If your kitchen is warm, you may want to chill it a few extra minutes. That little bit of patience pays off when it is time to roll.
4-Fourth Step: Shape into balls Once the dough is firm enough, scoop and shape it into 1-inch balls using your hands. Try to make them roughly the same size so they chill and coat evenly. A small cookie scoop can help, but your hands work just fine. Place the shaped balls on a baking sheet lined with parchment or wax paper. After shaping, cover the tray and refrigerate the balls for at least 20 minutes. This second chill is important because it helps them keep their shape when you dip them into warm chocolate.
5-Fifth Step: Melt the chocolate Next, melt 1 cup semi-sweet chocolate chips according to the package instructions. You can do this in the microwave in 30-second intervals, stirring after each round, or use a double boiler for a slower, more controlled melt. If you want the chocolate to be smoother and shinier, stir in 1 tablespoon vegetable shortening or coconut oil. Be careful not to overheat the chocolate. If it gets too hot, it can become thick or grainy. Stir often, and stop heating as soon as it is smooth and glossy. This is also a good moment to prep your dipping station so everything is ready.
6-Sixth Step: Dip and coat Working one at a time, dip each chilled peanut butter ball into the melted chocolate using a fork. A toothpick can also work, though a fork usually gives you better control. Roll the ball gently in the chocolate until it is fully covered, then lift it out and let the excess chocolate fall back into the bowl. This step can get a little messy, and that is completely normal. If the chocolate starts thickening while you work, warm it again very briefly. Keep the peanut butter balls cold so they stay firm during dipping.
7-Seventh Step: Set and serve Place the chocolate-covered balls on wax paper. If you want, add Christmas sprinkles or another topping right away before the chocolate sets. Chopped peanuts, a pinch of sea salt, or colorful sprinkles can make them look extra pretty. Cover the tray and refrigerate the coated balls until ready to serve. Once the chocolate has set, they are ready to enjoy. These treats are great for dessert platters, party trays, or gift boxes, and they pair nicely with other simple sweets like silky lemon cream treat when you want a mix of flavors.
Notes
❄️ Chill the balls before dipping to help them maintain their shape and prevent mess.
🌰 Feel free to use almond butter or cashew butter as a substitute for peanut butter.
🧊 These treats freeze beautifully; store in an airtight container for up to one month.
- Prep Time: 30 minutes
- Chill Time: 35 minutes + until set
- Cook Time: 5 minutes
- Category: Desserts
- Method: No-Bake
- Cuisine: American
- Diet: Vegetarian
Nutrition
- Serving Size: 1 ball (24g)
- Calories: 107 kcal
- Sugar: 8g
- Sodium: 38mg
- Fat: 7g
- Saturated Fat: 3g
- Unsaturated Fat: 4g
- Trans Fat: 0g
- Carbohydrates: 10g
- Fiber: 1g
- Protein: 2g
- Cholesterol: 4mg


