Ingredients
– 1/2 cup creamy peanut butter for providing flavor and structure
– 3 tablespoons softened butter for adding smoothness and richness
– 1 cup powdered sugar for sweetening and firming the dough
– 1 cup semi-sweet chocolate chips for creating the outer coating
– 1 tablespoon, optional vegetable shortening or coconut oil for improving melting and shine
Instructions
1-First Step: Mix the base Start by adding the 1/2 cup creamy peanut butter and 3 tablespoons softened butter to a medium mixing bowl. Stir them together until the mixture looks smooth and well blended. This first step is important because it creates the creamy base that helps the filling hold together later. Use a spoon or spatula, and make sure the butter is soft enough to mix easily. If it is too cold, the mixture can feel stiff and harder to combine. A smooth start makes the rest of the process much easier.
2-Second Step: Add the powdered sugar Gradually stir in 1 cup powdered sugar. Add it a little at a time so it blends evenly into the peanut butter mixture. As you mix, the dough will become thicker and more like a soft playdough texture. That is exactly what you want. If the dough seems too sticky, let it sit for a few more minutes or chill it slightly longer. If it seems too dry, a tiny spoonful of peanut butter can help bring it back together. The goal is a soft but rollable mixture.
3-Third Step: Chill the dough Cover the bowl and refrigerate the mixture for about 15 minutes. This short chill time helps the dough firm up so you can shape it into balls without it sticking too much to your hands. Do not skip this part if you want neat-looking Peanut Butter Balls. After chilling, the dough should feel firmer and easier to handle. If your kitchen is warm, you may want to chill it a few extra minutes. That little bit of patience pays off when it is time to roll.
4-Fourth Step: Shape into balls Once the dough is firm enough, scoop and shape it into 1-inch balls using your hands. Try to make them roughly the same size so they chill and coat evenly. A small cookie scoop can help, but your hands work just fine. Place the shaped balls on a baking sheet lined with parchment or wax paper. After shaping, cover the tray and refrigerate the balls for at least 20 minutes. This second chill is important because it helps them keep their shape when you dip them into warm chocolate.
5-Fifth Step: Melt the chocolate Next, melt 1 cup semi-sweet chocolate chips according to the package instructions. You can do this in the microwave in 30-second intervals, stirring after each round, or use a double boiler for a slower, more controlled melt. If you want the chocolate to be smoother and shinier, stir in 1 tablespoon vegetable shortening or coconut oil. Be careful not to overheat the chocolate. If it gets too hot, it can become thick or grainy. Stir often, and stop heating as soon as it is smooth and glossy. This is also a good moment to prep your dipping station so everything is ready.
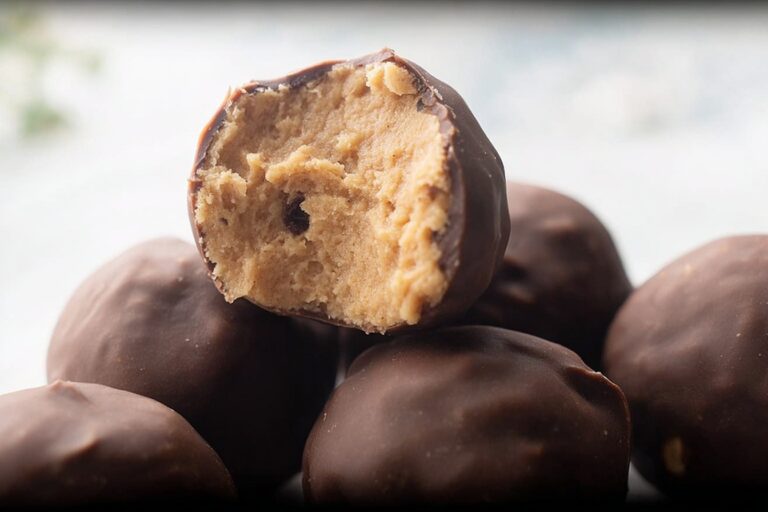
6-Sixth Step: Dip and coat Working one at a time, dip each chilled peanut butter ball into the melted chocolate using a fork. A toothpick can also work, though a fork usually gives you better control. Roll the ball gently in the chocolate until it is fully covered, then lift it out and let the excess chocolate fall back into the bowl. This step can get a little messy, and that is completely normal. If the chocolate starts thickening while you work, warm it again very briefly. Keep the peanut butter balls cold so they stay firm during dipping.
7-Seventh Step: Set and serve Place the chocolate-covered balls on wax paper. If you want, add Christmas sprinkles or another topping right away before the chocolate sets. Chopped peanuts, a pinch of sea salt, or colorful sprinkles can make them look extra pretty. Cover the tray and refrigerate the coated balls until ready to serve. Once the chocolate has set, they are ready to enjoy. These treats are great for dessert platters, party trays, or gift boxes, and they pair nicely with other simple sweets like silky lemon cream treat when you want a mix of flavors.
Notes
❄️ Chill the balls before dipping to help them maintain their shape and prevent mess.
🌰 Feel free to use almond butter or cashew butter as a substitute for peanut butter.
🧊 These treats freeze beautifully; store in an airtight container for up to one month.
- Prep Time: 30 minutes
- Chill Time: 35 minutes + until set
- Cook Time: 5 minutes
- Category: Desserts
- Method: No-Bake
- Cuisine: American
- Diet: Vegetarian
Nutrition
- Serving Size: 1 ball (24g)
- Calories: 107 kcal
- Sugar: 8g
- Sodium: 38mg
- Fat: 7g
- Saturated Fat: 3g
- Unsaturated Fat: 4g
- Trans Fat: 0g
- Carbohydrates: 10g
- Fiber: 1g
- Protein: 2g
- Cholesterol: 4mg