
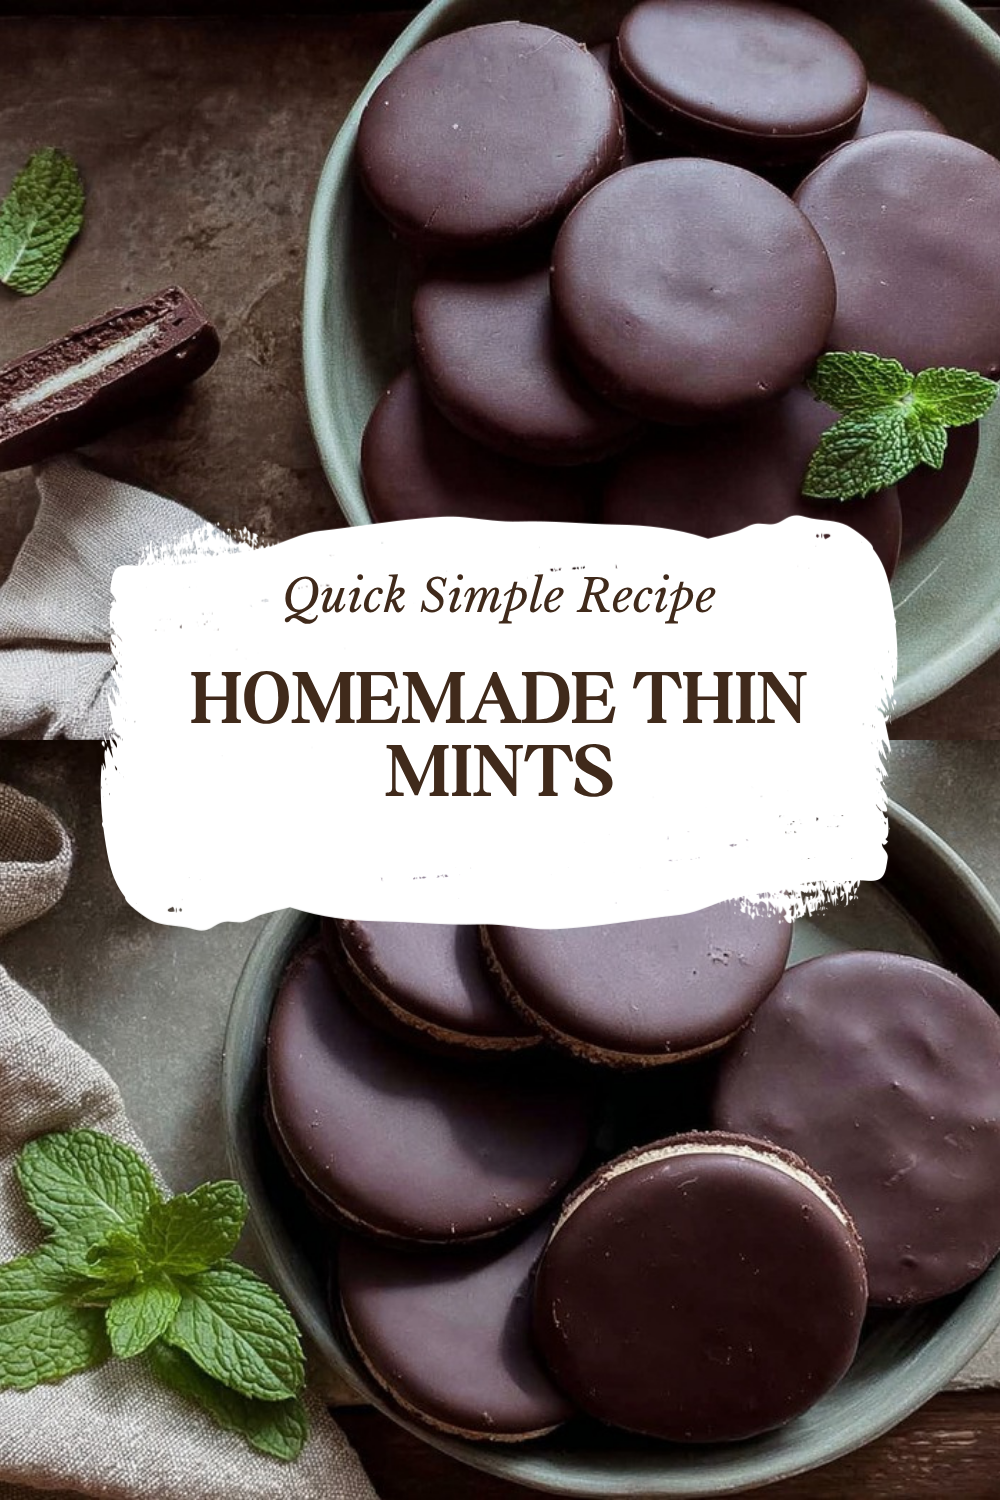
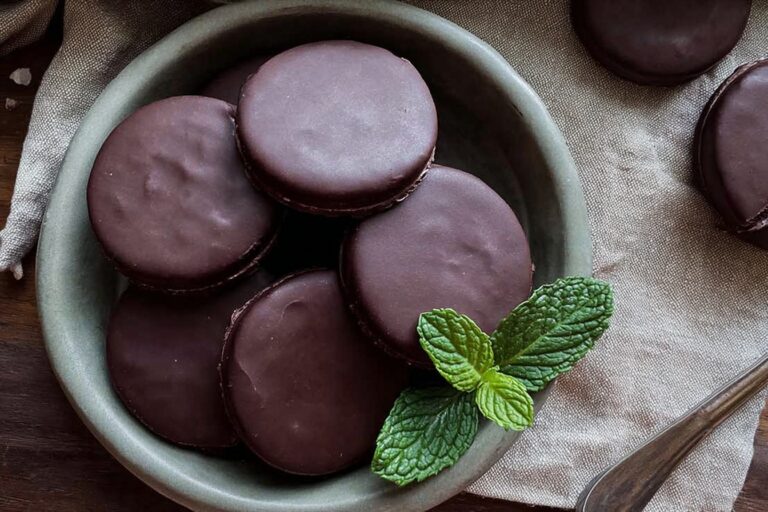
Why You’ll Love These Homemade Thin Mints
If you love crisp chocolate cookies with a cool mint finish, these Homemade Thin Mints are going to hit the spot. They bring that classic cookie-shop flavor right into your kitchen, and they’re easier to make than most people think.
- Easy to make at home: The dough comes together with simple pantry staples, and the steps are straightforward enough for busy weeknights or weekend baking sessions.
- Great make-ahead cookie: You can chill the dough, freeze it, or bake the cookies ahead of time, which makes this recipe perfect for planning ahead.
- Cool, crisp texture: Rolling the dough thin and baking until firm gives these cookies that signature snap people love in Homemade Thin Mints.
- Rich chocolate and mint flavor: Unsweetened Dutch-processed cocoa powder and peppermint extract create a bold flavor that tastes refreshing without being too sweet.
These cookies are best served cold, which makes the chocolate coating extra snappy and the mint flavor even brighter.
If you enjoy simple homemade treats, you may also like the cookie-friendly desserts on our brown butter oatmeal chocolate chip cookies recipe and these chocolate covered strawberries for another sweet chocolate fix.
Jump To
- 1. Why You’ll Love These Homemade Thin Mints
- 2. Essential Ingredients for Homemade Thin Mints
- 3. How to Prepare the Perfect Homemade Thin Mints: Step-by-Step Guide
- 4. Dietary Substitutions to Customize Your Homemade Thin Mints
- 5. Mastering Homemade Thin Mints: Advanced Tips and Variations
- 6. How to Store Homemade Thin Mints: Best Practices
- 7. FAQs: Frequently Asked Questions About Homemade Thin Mints
- 8. Homemade Thin Mints
Essential Ingredients for Homemade Thin Mints
To make this Homemade Thin Mints recipe, gather all of the ingredients below before you begin. Using exact measurements helps the cookies bake evenly and gives you that familiar thin, crisp finish.
Cookie Dough Ingredients
- 1 1/4 cups (160g) all-purpose flour: Gives the cookies structure without making them heavy.
- 1/2 cup (43g) unsweetened Dutch-processed cocoa powder: Adds deep chocolate flavor and a dark color.
- 1/4 teaspoon salt: Balances the sweetness and brings out the chocolate taste.
- 10 tablespoons (142g) unsalted softened butter: Creates a tender cookie and helps the dough hold together.
- 3/4 cup plus 2 tablespoons (175g) granulated sugar: Sweetens the cookies and helps them bake with a light crisp edge.
- 1 large egg white: Binds the dough while keeping the texture lighter.
- 1 1/2 teaspoons peppermint extract: Gives the dough its cool mint flavor.
- 1/2 teaspoon vanilla extract: Rounds out the flavor and softens the sharpness of the mint.
Chocolate Coating Ingredients
- 12 ounces (340g) dark or semisweet chocolate: Forms the glossy coating that makes the cookies taste just like Homemade Thin Mints.
- 1/2 cup (120ml) vegetable oil: Helps thin the melted chocolate so it coats smoothly.
- 3/4 teaspoon peppermint extract: Adds a fresh mint note to the coating.
Special Dietary Options
- Vegan: Swap the butter for a plant-based baking stick and use a vegan dark chocolate. Replace the egg white with aquafaba, using about 2 tablespoons.
- Gluten-free: Use a 1 to 1 gluten-free flour blend that includes xanthan gum.
- Lower sugar: Try a sugar substitute designed for baking, but keep in mind the texture may change a little.
| Ingredient | Purpose |
|---|---|
| Flour | Builds structure and helps the cookies hold their shape |
| Cocoa powder | Delivers the deep chocolate taste |
| Peppermint extract | Creates the classic mint flavor |
| Chocolate coating | Gives the cookies their signature finish |
How to Prepare the Perfect Homemade Thin Mints: Step-by-Step Guide
Making Homemade Thin Mints is all about working in the right order and keeping the dough cold. Once you get the rhythm, the whole process feels smooth and easy. The recipe does take a little chilling time, but the active work is simple and friendly for home bakers of any skill level.
Step 1: Mix the dry ingredients
Whisk together 1 1/4 cups all-purpose flour, 1/2 cup unsweetened Dutch-processed cocoa powder, and 1/4 teaspoon salt in a medium bowl. This quick step helps spread the cocoa and salt evenly through the dough, so every cookie has a balanced flavor.
Step 2: Cream the butter and sugar
In a separate large bowl, beat 10 tablespoons softened unsalted butter with 3/4 cup plus 2 tablespoons granulated sugar. Mix for about 2 minutes, until the mixture looks smooth and fluffy. This creates a lighter cookie base and helps the dough blend well.
Step 3: Add the flavoring ingredients
Mix in 1 large egg white, 1 1/2 teaspoons peppermint extract, and 1/2 teaspoon vanilla extract. The dough may look curdled at this stage, but that is completely normal. It will come together once you add the dry ingredients.
If the dough looks a little odd at this point, do not worry. That curdled look is part of the process and the cookies will still bake up beautifully.
Step 4: Form the dough
Gradually add the dry ingredients to the butter mixture and stir until a dough forms. Try not to overmix, since that can make the cookies less crisp. The dough should be soft but easy to handle.
Step 5: Roll and chill
Divide the dough in half. Place each half between sheets of parchment paper and roll to 1/4-inch thickness. Stack the dough slabs with parchment between them, then refrigerate or freeze for 15 to 30 minutes. Chilling makes the dough easier to cut and helps the cookies keep their shape in the oven.
Step 6: Preheat the oven and cut the cookies
Preheat your oven to 350°F (175°C). Line baking sheets with parchment paper. Cut the chilled dough into 2-inch rounds and place them on the prepared sheets with a little space between each cookie.
Step 7: Bake until firm
Bake the cookies for 15 to 18 minutes, or until the tops are firm and dry. The cookies should look set, but they do not need to brown much. That pale, dry finish helps create the classic crisp bite.
Step 8: Cool completely
Let the cookies cool on the baking sheet for a few minutes, then transfer them to wire racks. They need to be fully cool before dipping, or the chocolate coating will melt and slide off.
Step 9: Melt the coating
For the chocolate coating, melt 12 ounces dark or semisweet chocolate with 1/2 cup vegetable oil and 3/4 teaspoon peppermint extract in a double boiler over simmering water. Stir until smooth. The double boiler method helps the chocolate melt evenly and gives you a thinner coating that sets neatly.
Step 10: Dip and set
Dip each cooled cookie fully into the melted chocolate. Let the excess drip off, then place the cookies on a parchment-lined tray. Refrigerate for about 30 minutes, or until the coating is set. Serve the cookies cold for the best texture and flavor.
For another chocolate dessert idea, you might enjoy this peanut butter chocolate molten lava cake, which is another crowd-pleaser for chocolate lovers.

Dietary Substitutions to Customize Your Homemade Thin Mints
One of the best things about Homemade Thin Mints is how easy they are to adapt. Whether you need a different ingredient for dietary reasons or simply want to work with what you have, there are a few smart swaps you can try.
Protein and Main Component Alternatives
If you need to skip the egg white, aquafaba is the best swap. Use about 2 tablespoons in place of 1 large egg white. It helps bind the dough and keeps the texture close to the original.
For the butter, use a plant-based baking stick if you want a dairy-free version. Choose one with a firm texture, since softer tub-style spreads can make the dough too loose.
Vegetable, Sauce, and Seasoning Modifications
Even though this is a cookie recipe, you can still adjust the flavor in helpful ways. If peppermint extract is too strong for your taste, use a little less in the dough and keep the coating minty for a softer finish. If you want a deeper chocolate note, choose a darker semisweet chocolate for the coating.
For a gluten-free version, use a 1 to 1 gluten-free flour blend. If the dough feels dry, add a tiny splash of milk or plant milk, just enough to help it come together.
- Vegan option: Plant-based butter, aquafaba, and vegan dark chocolate
- Gluten-free option: 1 to 1 gluten-free flour blend
- Lower sugar option: Baking-friendly sugar substitute
Mastering Homemade Thin Mints: Advanced Tips and Variations
Once you have the basic recipe down, a few small tricks can make your Homemade Thin Mints even better. These ideas are especially helpful if you bake often or want a more polished final result.
Pro cooking techniques
Roll the dough as evenly as possible so the cookies bake at the same speed. If one area is thicker than another, it may stay soft while the rest crisps up. A lightly floured rolling pin can help, but parchment paper often gives you the easiest control.
Use a double boiler for the chocolate coating instead of the microwave. This keeps the chocolate smooth and helps prevent burning. It also gives the cookies a thinner, cleaner coating that hardens nicely in the fridge.
Flavor variations
If you like a stronger mint flavor, add a little extra peppermint extract to the coating. You can also mix in a tiny pinch of espresso powder to the dough for a richer chocolate taste. For a softer mint profile, keep the dough minty but use a slightly darker chocolate on the outside.
Presentation tips
Place the dipped cookies on parchment and let them set without touching. For a neat look, use a fork or dipping tool and tap off the extra chocolate before setting them down. If you want a bakery-style finish, give each cookie a quick second dip for a thicker shell.
Make-ahead options
The dough can be refrigerated up to 3 days or frozen up to 2 months. Baked cookies also keep well in the refrigerator for up to 7 days or in the freezer for up to 2 months. That makes this a great recipe for holiday trays, school snacks, or weekend meal prep.
Make a double batch if you can. These cookies disappear fast, especially when you keep them cold and crisp in the fridge.
If you like easy sweet treats for gatherings, you may also want to check out this salted caramel popcorn recipe for a simple snack that travels well.
How to Store Homemade Thin Mints: Best Practices
Storing Homemade Thin Mints the right way keeps the texture crisp and the chocolate coating in great shape. Since these cookies are meant to be served cold, the refrigerator is your best friend.
Refrigeration
Keep the coated cookies in an airtight container in the refrigerator for up to 7 days. Place parchment paper between layers to stop the chocolate from sticking together.
Freezing
For longer storage, freeze the cookies in a single layer first, then transfer them to a freezer-safe bag or container. They will keep for up to 2 months. Let them sit at room temperature for about 30 minutes before serving.
Reheating
These cookies do not need reheating. In fact, they taste best cold. If they soften a little while sitting out, a short stay in the fridge will bring back the crisp texture.
Meal prep considerations
You can bake the cookies ahead of time and coat them later, or make the full batch and freeze the finished cookies for quick treats. This is a smart choice for busy parents, students, and working professionals who want a ready-to-grab dessert.
| Storage Method | How Long It Keeps | Best Tip |
|---|---|---|
| Refrigerator | Up to 7 days | Layer with parchment paper |
| Freezer | Up to 2 months | Freeze flat first, then bag |
| Room temperature | Not recommended | Chocolate softens quickly |
FAQs: Frequently Asked Questions About Homemade Thin Mints
How do homemade Thin Mints taste like the original Girl Scout cookies?
Homemade Thin Mints capture the authentic crisp texture and mint-chocolate balance of Girl Scout cookies by using unsweetened Dutch-processed cocoa powder in the dough for a deep chocolate flavor. Add 1/2 teaspoon peppermint extract to the dough and another 1/4 teaspoon to the melted chocolate coating. This dual infusion delivers that signature refreshing mint punch without overpowering the chocolate. Roll the dough thin (about 1/8-inch) and bake until firm for the classic snap. Dip fully in semi-sweet chocolate mixed with a teaspoon of vegetable oil for a smooth, shiny finish that sets quickly. Store in the fridge to maintain crispness. This method yields about 40 cookies that taste remarkably close to the originals, perfect for satisfying cravings year-round. (92 words)
Can you make Thin Mint cookie dough ahead and freeze it?
Yes, Thin Mint dough is ideal for make-ahead prep. After mixing, divide into two disks, wrap tightly in plastic, and refrigerate up to 3 days or freeze up to 2 months. Thaw frozen dough in the fridge overnight before rolling. For convenience, roll chilled dough to 1/8-inch thickness between parchment sheets, stack with paper between layers, and freeze flat. Cut shapes directly from frozen dough—no thawing needed—and bake straight away at 350°F for 15-18 minutes until firm. This prevents sticking and maintains even shapes. Label bags with dates for easy tracking. Freezing preserves flavor and texture, letting you bake fresh batches anytime. (98 words)
What is the best way to melt chocolate for homemade Thin Mints?
Use a double boiler for smooth melting: Simmer water in a pot, place a heatproof bowl with 12 ounces semi-sweet chocolate chips over it (no touching water), and stir constantly until fully melted. Stir in 1 teaspoon vegetable oil and 1/4 teaspoon peppermint extract for a thin, dippable consistency that hardens without cracking. Avoid microwave to prevent scorching—microwaving in bursts often leads to lumps. Keep the bowl over low heat while dipping cooled cookies one by one with a fork, tapping off excess. Place on parchment-lined trays to set in the fridge for 30 minutes. This yields a professional glossy coat on 40 cookies. Wipe fork between dips for clean results. (102 words)
How long do you bake homemade Thin Mint cookies and at what temperature?
Bake homemade Thin Mint cookies at 350°F for 15-18 minutes on parchment-lined sheets. Use a 2-inch round cutter for traditional 1-3/4 inch cookies after rolling dough to 1/8-inch thickness. They’re ready when edges are set and centers feel firm to the touch—avoid browning for crispness. Cool on the sheet 5 minutes before transferring to a rack. Freshly baked cookies are fragile, so handle gently before coating. This timing works for both chilled and frozen dough cutouts. Yield is about 40 cookies from one batch. For best results, preheat oven fully and rotate sheets halfway. Underbaking keeps them soft; overbaking dries them out. (96 words)
How should you store homemade Thin Mints after coating?
Store coated Thin Mints in an airtight container in the refrigerator for up to 7 days to keep them crisp and minty. Layer with parchment paper to prevent sticking. For longer storage, freeze in a single layer first on a tray, then transfer to freezer bags for up to 2 months—thaw at room temp for 30 minutes. Uncoated baked cookies also freeze well. Avoid room temperature storage as chocolate softens and cookies lose snap. If dough looks curdled after adding egg white, it’s normal and bakes fine. This method maintains quality; one batch serves 20 with 2 cookies each. Link to our chocolate chip cookie storage tips for more ideas. (98 words)
Homemade Thin Mints
🍪 Crave the iconic Girl Scout Thin Mints? Make these homemade copycats for crisp, minty chocolate perfection anytime!
🌿 Freshly baked with real peppermint flavor, they’re a fun, shareable treat better than store-bought!
- Total Time: 1 hour 30 minutes
- Yield: about 60 cookies
Ingredients
– 1 1/4 cups (160g) all-purpose flour
– 1/2 cup (43g) unsweetened Dutch-processed cocoa powder
– 1/4 teaspoon salt
– 10 tablespoons (142g) unsalted softened butter
– 3/4 cup plus 2 tablespoons (175g) granulated sugar
– 1 large egg white
– 1 1/2 teaspoons peppermint extract
– 1/2 teaspoon vanilla extract
– 12 ounces (340g) dark or semisweet chocolate
– 1/2 cup (120ml) vegetable oil
– 3/4 teaspoon peppermint extract
Instructions
1-Step 1: Mix the dry ingredients Whisk together 1 1/4 cups all-purpose flour, 1/2 cup unsweetened Dutch-processed cocoa powder, and 1/4 teaspoon salt in a medium bowl. This quick step helps spread the cocoa and salt evenly through the dough, so every cookie has a balanced flavor.
2-Step 2: Cream the butter and sugar In a separate large bowl, beat 10 tablespoons softened unsalted butter with 3/4 cup plus 2 tablespoons granulated sugar. Mix for about 2 minutes, until the mixture looks smooth and fluffy. This creates a lighter cookie base and helps the dough blend well.
3-Step 3: Add the flavoring ingredients Mix in 1 large egg white, 1 1/2 teaspoons peppermint extract, and 1/2 teaspoon vanilla extract. The dough may look curdled at this stage, but that is completely normal. It will come together once you add the dry ingredients. If the dough looks a little odd at this point, do not worry. That curdled look is part of the process and the cookies will still bake up beautifully.
4-Step 4: Form the dough Gradually add the dry ingredients to the butter mixture and stir until a dough forms. Try not to overmix, since that can make the cookies less crisp. The dough should be soft but easy to handle.
5-Step 5: Roll and chill Divide the dough in half. Place each half between sheets of parchment paper and roll to 1/4-inch thickness. Stack the dough slabs with parchment between them, then refrigerate or freeze for 15 to 30 minutes. Chilling makes the dough easier to cut and helps the cookies keep their shape in the oven.
6-Step 6: Preheat the oven and cut the cookies Preheat your oven to 350°F (175°C). Line baking sheets with parchment paper. Cut the chilled dough into 2-inch rounds and place them on the prepared sheets with a little space between each cookie.
7-Step 7: Bake until firm Bake the cookies for 15 to 18 minutes, or until the tops are firm and dry. The cookies should look set, but they do not need to brown much. That pale, dry finish helps create the classic crisp bite.
8-Step 8: Cool completely Let the cookies cool on the baking sheet for a few minutes, then transfer them to wire racks. They need to be fully cool before dipping, or the chocolate coating will melt and slide off.
9-Step 9: Melt the coating For the chocolate coating, melt 12 ounces dark or semisweet chocolate with 1/2 cup vegetable oil and 3/4 teaspoon peppermint extract in a double boiler over simmering water. Stir until smooth. The double boiler method helps the chocolate melt evenly and gives you a thinner coating that sets neatly.
10-Step 10: Dip and set Dip each cooled cookie fully into the melted chocolate. Let the excess drip off, then place the cookies on a parchment-lined tray. Refrigerate for about 30 minutes, or until the coating is set. Serve the cookies cold for the best texture and flavor.
Notes
❄️ Refrigerate or freeze dough up to 3 days or 2 months for easy prep ahead.
🔥 Use a double boiler for smooth, even chocolate melting and thin coating.
🧊 Store baked cookies refrigerated up to 7 days or frozen up to 2 months; serve cold.
- Prep Time: 35 minutes
- Chill Time: 15-30 minutes + 30 minutes set
- Cook Time: 22 minutes
- Category: Desserts
- Method: Baked
- Cuisine: American
- Diet: Vegetarian
Nutrition
- Serving Size: 1 cookie
- Calories: 115 kcal
- Sugar: 6g
- Sodium: 29mg
- Fat: 7g
- Saturated Fat: 4g
- Unsaturated Fat: 3g
- Trans Fat: 0g
- Carbohydrates: 12g
- Fiber: 1g
- Protein: 1g
- Cholesterol: 11mg


