
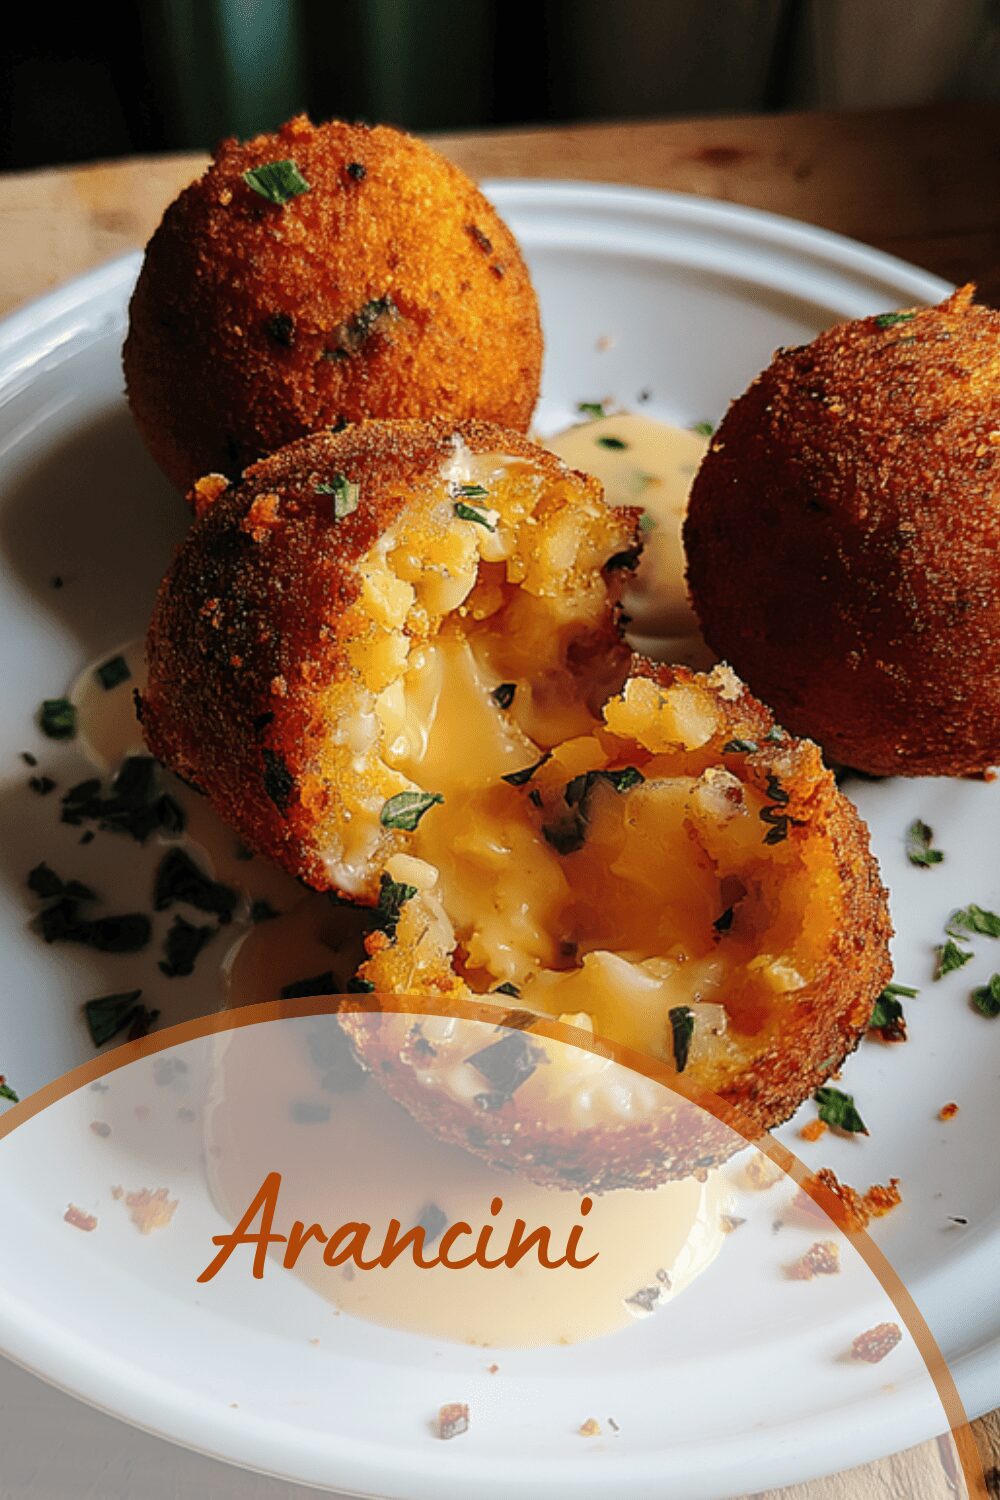
Why You’ll Love This Arancini
Honestly, these Italian rice balls, or arancini, are a game-changer for anyone craving something crispy and cheesy without a ton of fuss. Picture this: you’re juggling a busy day, but you still want to whip up a treat that’s packed with flavor and fun to make. That’s where this arancini recipe shines, making it a hit for home cooks, busy parents, and food enthusiasts alike.
This dish brings ease of preparation to the forefront, with straightforward steps that fit into your routine perfectly. You’ll love how it offers health benefits too, like a balance of carbs from the rice and proteins from the cheese, all while keeping things wholesome and satisfying. Plus, its versatility means you can tweak it for dietary needs, whether you’re going gluten-free or keeping it light.
What really sets arancini apart is that distinctive flavor savory, golden bites that feel like a warm hug from Sicily. I remember the first time I made these; my family couldn’t stop reaching for more, turning a simple snack into a memorable family moment. If you’re new to Italian appetizers, this is your easy gateway to Sicilian street food magic.
Beyond taste, arancini adapts easily to various diets, making it suitable for everyone from students to seniors. Imagine serving these at a party and watching them disappear fast it’s that crowd-pleasing vibe that keeps things exciting in the kitchen. Whether you’re a baking enthusiast or just exploring new flavors, this recipe will inspire you to cook with joy.
Key Highlights of This Recipe
- Quick prep in just 30 minutes, with total time around 1 hour 30 minutes.
- Yields about 25 golf ball-sized balls, perfect for sharing.
- Involves baking risotto first, then mixing and frying for that crave-worthy crunch.
For more ideas on tasty snacks, check out our baked broccoli cheese balls recipe for a healthier twist on similar bites.
Jump To
- 1. Why You’ll Love This Arancini
- 2. Essential Ingredients for Arancini
- 3. How to Prepare the Perfect Arancini: Step-by-Step Guide
- 4. Dietary Substitutions to Customize Your Arancini
- 5. Mastering Arancini: Advanced Tips and Variations
- 6. How to Store Arancini: Best Practices
- 7. FAQs: Frequently Asked Questions About Arancini
- 8. Arancini
Essential Ingredients for Arancini
Every great arancini starts with the right mix of ingredients, and I’ve got the full list here to make your cooking a breeze. This recipe pulls together simple items that create those irresistible Italian cheese balls we all adore. Let’s break it down so you can see exactly what you need for that perfect homemade Italian rice balls experience.
To ensure your arancini turn out just right, focus on fresh, quality components. The baked risotto base is key, followed by binders and cheese for the mixture, and a crispy coating to finish. Below, you’ll find a structured list of all ingredients with precise measurements don’t skip anything, as each one plays a role in the flavor and texture.
Baked Risotto Ingredients
- 2 tbsp butter
- 2 garlic cloves (minced)
- 1 small onion (finely diced)
- 1 ½ cups arborio risotto rice
- ½ cup white wine (or broth/stock/water)
- 3 ½ cups chicken broth or stock
- 1 cup milk
Rice Mixture Ingredients (Added After Cooling Risotto)
- 1 egg
- 1 cup grated cheddar cheese
- ¾ cup grated mozzarella cheese
- 2 ½ tbsp finely chopped fresh parsley (or 1 ½ tbsp dried parsley)
- ½ tsp salt
- Black pepper to taste
Coating Ingredients
- ½ cup plain flour
- ½ tsp salt
- Black pepper to taste
- 2 eggs (lightly beaten)
- 2 cups panko breadcrumbs
- Cooking oil (as needed for frying; vegetable oil recommended)
Remember, these measurements are spot-on for making about 25 arancini. For special twists, like gluten-free options, you can swap flour and breadcrumbs as needed. If you’re curious about other easy Italian recipes, try our Italian salad for a fresh side that pairs perfectly.
How to Prepare the Perfect Arancini: Step-by-Step Guide
Ready to dive into making your own classic Italian arancini recipe? It’s simpler than you think, and I’ll walk you through it with a fun, step-by-step approach. This how to make arancini guide turns a traditional Sicilian street food into something you can whip up at home, even on a busy weeknight.
First, start with the baked risotto base. Preheat your oven to 180°C/350°F and mix 2 tbsp butter, 2 minced garlic cloves, and 1 finely diced small onion in a baking dish. Add 1 ½ cups arborio rice, ½ cup white wine (or substitute), 3 ½ cups chicken broth, and 1 cup milk. Bake for 30 40 minutes until the liquid absorbs, then let it cool completely.
Once cooled, move to the rice mixture stage. Stir in 1 egg, 1 cup grated cheddar cheese, ¾ cup grated mozzarella cheese, 2 ½ tbsp chopped fresh parsley, ½ tsp salt, and black pepper to taste. Mix well and refrigerate for at least 3 hours to firm up this step is crucial so your balls hold their shape without falling apart.
Now, form the balls. Scoop the mixture into golf ball-sized portions and roll them gently. For the coating, set up three stations: first, mix ½ cup plain flour with ½ tsp salt and black pepper; second, have 2 lightly beaten eggs ready; and third, use 2 cups panko breadcrumbs. Roll each ball in flour, then egg, then breadcrumbs.
Heat your cooking oil in a pan to about 350°F and fry the balls in batches until they’re golden and crispy, roughly 3-4 minutes. If you prefer a lighter option, bake them at 400°F for 20 minutes instead. Once done, drain on paper towels and serve warm it’s that melty inside and crunchy outside goodness we all love!
For more tips on frying techniques, this easy arancini recipe builds on basics you might find in homemade Italian rice balls guides. And if you’re into other comforting dishes, our Italian salad can add a fresh contrast to your meal.

Dietary Substitutions to Customize Your Arancini
One of the best things about arancini with cheese is how flexible it is you can tweak it to fit all sorts of dietary needs without losing that amazing taste. Whether you’re a busy parent watching calories or a student going vegan, these swaps make this Italian appetizer accessible for everyone.
For protein and main components, try using plant-based options like crumbled tofu instead of traditional fillers for a vegan twist. If dairy is an issue, swap cheeses with nut-based alternatives to keep that creamy texture. You could even mix in cooked legumes or mushrooms for extra nutrition and a hearty bite.
When it comes to vegetables, sauces, and seasonings, get creative swap marinara for pesto or a spicy arrabbiata to change things up. Add seasonal veggies like roasted peppers or spinach for more color and health benefits. Don’t forget to play with seasonings, like adding smoked paprika or fresh herbs, to match your preferences.
Gluten-free versions are a breeze too; just use gluten-free flour and panko as noted in the variations. I once made these for a family gathering with a baked option, and it was a hit less crispy but still full of flavor. This way, arancini becomes a go-to for diet-conscious individuals and food enthusiasts alike.
Mastering Arancini: Advanced Tips and Variations
Once you’ve nailed the basics of arancini, it’s time to level up with some pro tips that make your Italian rice balls even better. Think of this as your secret weapon for turning a simple recipe into something extraordinary, perfect for impressing guests or spicing up your routine.
Start with chilling the rice mixture thoroughly before shaping; this keeps your balls from falling apart during frying. For even crispness, use a deep fryer to maintain consistent heat. Flavor variations can include mixing in herbs like basil or adding fillings such as sun-dried tomatoes for a unique twist avoid stuffing with cheese cubes to prevent burns, though.
Presentation is key too; serve your arancini on a platter with fresh garnishes like microgreens or a drizzle of sauce to make it pop. If you’re prepping ahead, shape and coat the balls then freeze them on a tray before bagging this makes for easy meals later. For gluten-free arancini, stick with the swaps we mentioned earlier.
Baked versions are great if you’re aiming for less oil, though they won’t be as crunchy bake at 400°F for 20 minutes and flip halfway. I love experimenting with these; last time, I added truffle oil for a fancy touch, and it wowed everyone at dinner. To learn more about Italian rice dishes, check out external resources like this guide to Arancini origins.
How to Store Arancini: Best Practices
Storing your arancini properly keeps them tasty and fresh, so you can enjoy this rice ball recipe anytime. Whether you’re making a big batch for meal prep or saving leftovers, these tips help maintain that delightful crunch and flavor.
For refrigeration, pop your cooked arancini in an airtight container and keep them in the fridge for up to 3 days. If you’re freezing, shape and coat them first, then freeze on a tray before transferring to a bag they last up to a month this way. When reheating, use the oven at 350°F for 10 minutes to keep that crispness intact.
Meal prep is a breeze with arancini; make extras and store portions for quick dinners. This method works wonders for working professionals or newlyweds looking to save time without sacrificing quality. No nutritional data is available here, but these practices help keep your snacks enjoyable.
FAQs: Frequently Asked Questions About Arancini
What are Arancini and where did they originate?
Arancini are Italian rice balls that are typically stuffed, coated with breadcrumbs, and fried until golden and crispy. They originated in Sicily and are a popular street food there. Traditionally, they are filled with ragù (meat sauce), mozzarella, and peas, but many variations exist. The name “Arancini” means “little oranges,” referring to their round shape and golden color after frying.
How do you make classic Arancini at home?
To make classic Arancini, start with cooked and cooled risotto or sticky rice. Shape the rice into balls around a filling of ragù, mozzarella, and peas. Dip each ball in beaten egg, roll in breadcrumbs, and deep-fry until crisp and golden. Serving them warm is best to enjoy the melty cheese inside. Using a risotto rice like Arborio and allowing the rice to fully cool helps the balls hold their shape.
Can Arancini be made ahead of time and frozen?
Yes, Arancini can be prepared in advance and frozen before frying. After shaping and breading the rice balls, place them on a baking sheet lined with parchment paper and freeze until solid. Then transfer to a freezer bag. When ready to enjoy, fry them from frozen, adding a few extra minutes to the cooking time. This method is convenient for preparing snacks or meals in advance.
What are some common variations of Arancini fillings?
While traditional Arancini often contain meat ragù, peas, and mozzarella, popular variations include fillings like ham and cheese, spinach and ricotta, mushrooms, or even seafood. Vegetarian options can include mixed vegetables or tomato sauce with cheese. Experimenting with different fillings allows you to tailor Arancini to your taste preferences or dietary needs.
Are Arancini suitable for special diets like gluten-free or vegetarian?
Arancini can be adapted for special diets. For a gluten-free version, use gluten-free breadcrumbs or crushed gluten-free crackers for coating. Vegetarian Arancini can be made by omitting meat-based fillings and opting for vegetable or cheese fillings instead. However, traditional recipes often include gluten and meat, so adjustments are necessary to meet dietary restrictions.
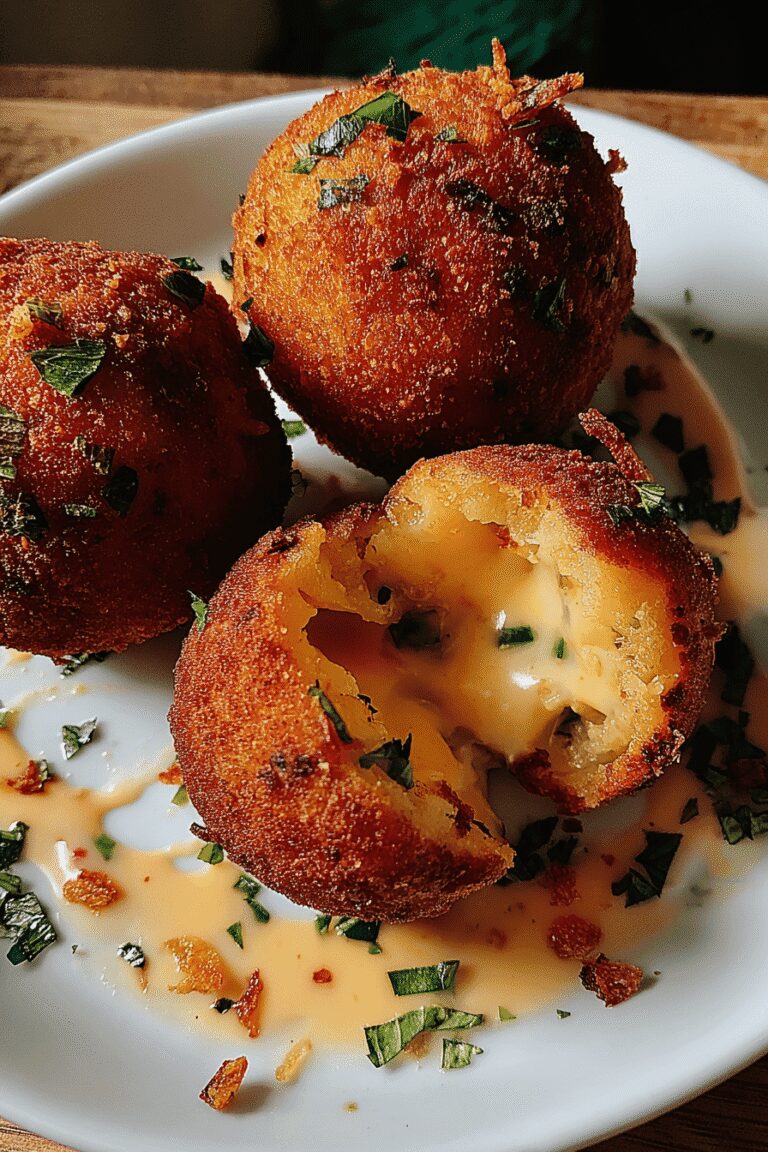
Arancini
🍚 Arancini: Classic Italian Cheesy Rice Balls Made Easy offer a comforting and satisfying appetizer perfect for gatherings or snacks.
🧀 This recipe combines creamy baked risotto with melty cheeses and a crispy golden coating for an authentic Italian treat.
- Total Time: 1 hour 30 minutes
- Yield: 25 servings
Ingredients
– 2 tbsp butter
– 2 garlic cloves (minced)
– 1 small onion (finely diced)
– 1 ½ cups arborio risotto rice
– ½ cup white wine (or broth/stock/water)
– 3 ½ cups chicken broth or stock
– 1 cup milk
– 1 egg
– 1 cup grated cheddar cheese
– ¾ cup grated mozzarella cheese
– 2 ½ tbsp finely chopped fresh parsley (or 1 ½ tbsp dried parsley)
– ½ tsp salt
– Black pepper to taste
– ½ cup plain flour
– ½ tsp salt
– Black pepper to taste
– 2 eggs (lightly beaten)
– 2 cups panko breadcrumbs
– Cooking oil (as needed for frying; vegetable oil recommended)
Instructions
1-First, start with the baked risotto base. Preheat your oven to 180°C/350°F and mix 2 tbsp butter, 2 minced garlic cloves, and 1 finely diced small onion in a baking dish. Add 1 ½ cups arborio rice, ½ cup white wine (or substitute), 3 ½ cups chicken broth, and 1 cup milk. Bake for 30 40 minutes until the liquid absorbs, then let it cool completely.
2-Once cooled, move to the rice mixture stage. Stir in 1 egg, 1 cup grated cheddar cheese, ¾ cup grated mozzarella cheese, 2 ½ tbsp chopped fresh parsley, ½ tsp salt, and black pepper to taste. Mix well and refrigerate for at least 3 hours to firm up this step is crucial so your balls hold their shape without falling apart.
3-Now, form the balls. Scoop the mixture into golf ball-sized portions and roll them gently. For the coating, set up three stations: first, mix ½ cup plain flour with ½ tsp salt and black pepper; second, have 2 lightly beaten eggs ready; and third, use 2 cups panko breadcrumbs. Roll each ball in flour, then egg, then breadcrumbs.
4-Heat your cooking oil in a pan to about 350°F and fry the balls in batches until they’re golden and crispy, roughly 3-4 minutes. If you prefer a lighter option, bake them at 400°F for 20 minutes instead. Once done, drain on paper towels and serve warm it’s that melty inside and crunchy outside goodness we all love!
Notes
🍳 Refrigerate the risotto mixture well before forming balls to help them hold their shape.
🌿 Fresh parsley adds brightness but dried can substitute if needed.
🔥 Fry in small batches to maintain oil temperature and achieve crispiness.
- Prep Time: 30 minutes
- Chill time: 3 hours
- Cook Time: 1 hour
- Category: Appetizer
- Method: Baking, Frying
- Cuisine: Italian
Nutrition
- Serving Size: 1 arancini ball


I tried this last weekend and my family couldn’t get enough!
I added a little mozzarella inside instead of the usual cheese and it turned out super gooey.
Thanks for the clear steps! 😊