
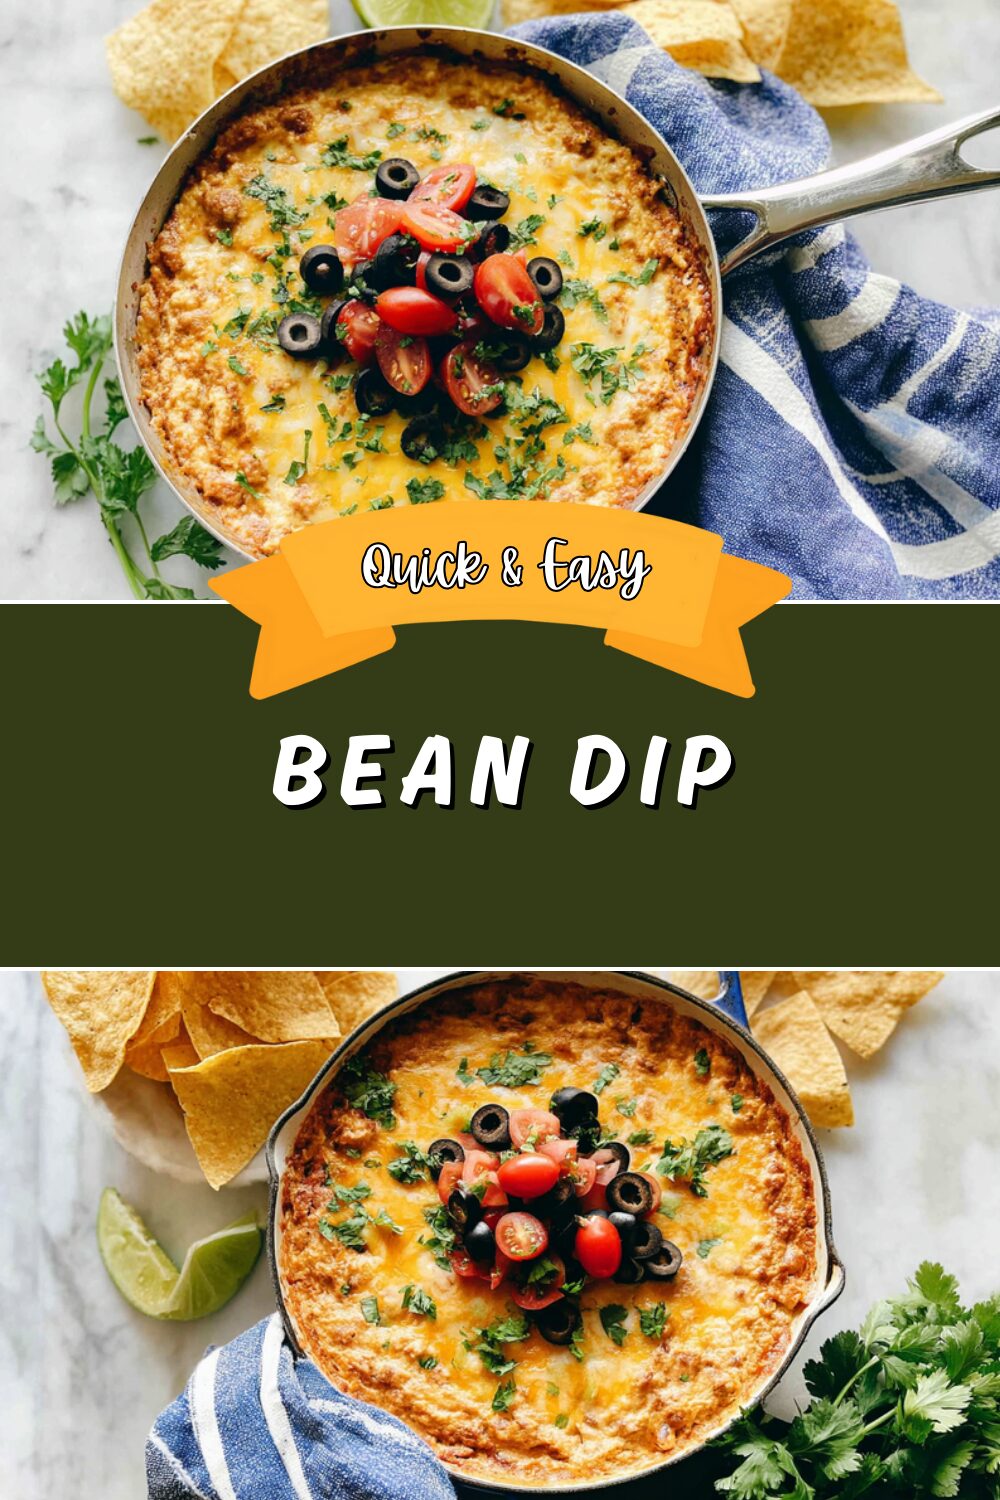
Why You’ll Love This Bean Dip
Bean dip is one of those go-to recipes that makes any gathering a hit, and this 7 layer bean dip recipe stands out for its simplicity and flavor. It’s perfect for busy parents who need something quick yet satisfying after a long day. Let me share why this bean dip appetizer will become your new favorite for parties or weeknight snacking.
- Ease of preparation: This easy bean dip recipe comes together in minutes with everyday ingredients you likely have on hand. Just layer the components and you’re done, making it ideal for home cooks who appreciate meals that don’t require fancy tools or hours in the kitchen. Whether you’re a student juggling classes or a working professional, the quick assembly means more time to enjoy with family.
- Health benefits: Packed with nutritious elements like beans and avocados, this 7 layer dip offers a boost of fiber and healthy fats that support digestion and heart health. Beans provide plant-based protein that’s great for diet-conscious individuals, helping you feel full without overindulging. Plus, the fresh veggies and spices add vitamins that make this layer dip a wholesome choice for everyone from seniors to food enthusiasts looking to eat better.
- Versatility: Adapt this bean dip to suit various dietary needs, whether you’re making it vegan or gluten-free with simple swaps. It’s customizable for picky eaters in families, like busy parents dealing with kids who have specific tastes. This crowd pleasing appetizer also travels well, making it a favorite for travelers or newlyweds hosting get-togethers.
- Distinctive flavor: The combination of spices and fresh ingredients creates a bold, layered taste that sets this 7 layer bean dip recipe apart from plain dips. Zesty chili powder and creamy avocado layers deliver a balance of heat and coolness that appeals to baking enthusiasts and food lovers alike. You’ll love how it brings people together around the table for memorable moments.
Overall, this bean dip is not just food; it’s a simple way to add joy to your meals. With its mix of convenience and taste, it’s no wonder it fits into so many lifestyles, from family dinners to casual parties. Keep reading to dive into the details of what makes this recipe so special.
Jump To
- 1. Why You’ll Love This Bean Dip
- 2. Essential Ingredients for Bean Dip
- 3. How to Prepare the Perfect Bean Dip: Step-by-Step Guide
- 4. Dietary Substitutions to Customize Your Bean Dip
- 5. Mastering Bean Dip: Advanced Tips and Variations
- 6. How to Store Bean Dip: Best Practices
- 7. FAQs: Frequently Asked Questions About Bean Dip
- 8. Bean Dip
Essential Ingredients for Bean Dip
Building the perfect bean dip starts with quality ingredients that are easy to find and pack a flavorful punch. This section outlines everything you need for a classic 7 layer bean dip, including precise measurements and why each one matters. Let’s break it down so you can whip up this easy bean dip recipe with confidence.
Main Ingredients
- 2 cans (16 oz each) refried beans (black or pinto) – These form the hearty base of your layer dip, providing creaminess and protein that make the dish filling and nutritious.
- 2 teaspoons chili powder – Adds a warm, spicy kick that enhances the overall flavor of your bean dip appetizer, making it more exciting for gatherings.
- 1 teaspoon cumin – Brings an earthy depth that complements the beans and ties the layers together for a more authentic taste.
- 1/2 teaspoon garlic powder – Infuses a subtle garlicky note without overwhelming other flavors, keeping the recipe accessible for everyday cooking.
- 3 avocados, peeled and seeded – Offer creamy texture and healthy fats; they’re key for the guacamole layer in this 7 layer bean dip recipe.
- 1 Tablespoon lime juice (or lemon juice) – Provides acidity to brighten the avocados and prevent browning, ensuring your dip stays fresh-looking.
- 8 oz sour cream – Adds a tangy, smooth element that balances the spices and makes the dip irresistible for dipping chips.
- 3/4 cup salsa – Brings moisture and a fresh, zesty flavor that elevates the layers in this crowd pleasing appetizer.
- 1 1/2 cups shredded Mexican blend cheese, cheddar or Monterrey Jack – Melts beautifully on top, adding a cheesy richness that appeals to cheese lovers.
- 6 ounces sliced black olives – Contribute a briny contrast and texture, making each bite of the bean dip more interesting.
- 2 green onions, chopped – Add a crisp, oniony freshness as a garnish, enhancing the visual appeal and flavor profile.
- 1 roma tomato, diced, for garnish (optional) – Offers a juicy, vibrant top layer that can be added for extra color and taste, perfect for customization.
- tortilla chips, for serving – Serve as the ideal crunchy companion, making this easy bean dip recipe fun and shareable.
Special Dietary Options
For those with specific needs, this 7 layer bean dip can be adjusted easily. Here are some ideas to make it fit various diets while maintaining that great bean dip taste.
- Vegan: Swap the sour cream for a plant-based alternative like cashew cream or coconut yogurt, and use vegan cheese shreds to keep the layers creamy without dairy.
- Gluten-free: This recipe is naturally gluten-free, but double-check your salsa and chips to ensure they’re free from hidden gluten sources.
- Low-calorie: Reduce cheese to 1 cup and use light sour cream to cut calories while still enjoying the flavorful layers of this bean dip.
These swaps help make the dip versatile for everyone. For more ideas on similar recipes, check out our queso dip guide for additional inspiration.
How to Prepare the Perfect Bean Dip: Step-by-Step Guide
Creating this 7 layer bean dip recipe is straightforward and fun, turning simple ingredients into a crowd pleasing appetizer. I’ll walk you through each step so you can make it just right, with tips for adapting to your preferences. This easy bean dip comes together quickly, perfect for home cooks of all levels.
Gathering and Prepping Ingredients
First Step: Start by gathering all your ingredients on the counter to make the process smooth. Open the 2 cans of refried beans and mix in 2 teaspoons of chili powder, 1 teaspoon of cumin, and 1/2 teaspoon of garlic powder in a bowl for the base layer. This step ensures the flavors blend well and adapts easily if you’re going for a milder version.
Second Step: Prepare the guacamole by mashing 3 peeled and seeded avocados in a separate bowl, then stir in 1 Tablespoon of lime juice to keep it fresh. For dietary tweaks, use lemon juice if lime isn’t available, which helps for those watching their intake.
Third Step: Layer the components in a large dish for the best presentation. Begin with the seasoned refried beans as the bottom layer, spreading them evenly to cover the base. This makes the dip sturdy and easy to serve.
Assembling and Final Touches
Fourth Step: Add the next layers one by one for that classic 7 layer look. Spread 8 oz of sour cream over the beans, followed by 3/4 cup of salsa, then sprinkle 1 1/2 cups of shredded cheese on top. If you’re making it for kids, hold back on spicy elements here.
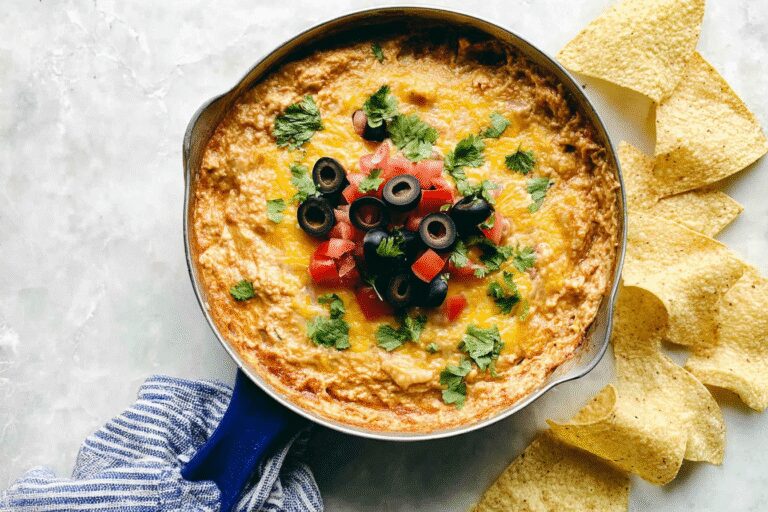
Fifth Step: Finish with the fresh toppings by scattering 6 ounces of sliced black olives, 2 chopped green onions, and 1 diced roma tomato if you’re using it. For serving, arrange tortilla chips around the dish to make it ready for dipping right away. This step highlights how versatile the bean dip is for different events.
Sixth Step: Let the dip chill in the fridge for about 30 minutes to let flavors meld, or serve it immediately if you’re in a rush. This timing works well for busy schedules, and you can heat it slightly if preferred for a warmer texture.
Final Step: Serve your bean dip with the tortilla chips and enjoy the layers of flavor. Remember, you can adjust portions based on your group’s size, making it a go-to for family meals or parties. This 7 layer bean dip recipe not only tastes great but also encourages everyone to get creative with their own twists.
To learn more about why beans make such a great base, check out this helpful resource on beans. It’s packed with info that complements recipes like this one.

Dietary Substitutions to Customize Your Bean Dip
Protein and Main Component Alternatives
Swapping ingredients in your bean dip can make it fit various tastes and needs. For the main beans, try using lentils instead of the 2 cans of refried beans to add more protein while keeping it hearty. This change works well for those seeking plant-based options in their layer dip.
Another idea is to replace refried beans with mashed chickpeas for a nuttier flavor, which is great for gluten-free diets. Always measure precisely, like using the same 16 oz equivalent, to maintain the dip’s texture.
Vegetable, Sauce, and Seasoning Modifications
Vegetable swaps can refresh your bean dip based on what’s in season. Instead of 3 avocados, use diced cucumbers for a crunchier guacamole layer that appeals to diet-conscious folks. For sauces, swap the 3/4 cup salsa with fresh pico de gallo to lighten it up.
Seasonings like the 2 teaspoons of chili powder can be replaced with smoked paprika for a deeper taste, making the dip more versatile. These adjustments ensure your 7 layer bean dip recipe stays exciting and adaptable for every occasion.
Mastering Bean Dip: Advanced Tips and Variations
Pro Cooking Techniques
To elevate your bean dip, focus on even layering for the best results. Use a spatula to spread each layer smoothly, ensuring the 2 cans of refried beans form a solid base. Blending in the spices like chili powder thoroughly prevents uneven flavors.
Flavor Variations and Presentation
Experiment with flavors by adding jalapeños to the guacamole layer for extra heat. For make-ahead options, prepare the dip up to a day in advance and store it covered in the fridge, then add fresh toppings like green onions just before serving. Presentation tips include garnishing with extra cheese for a visually appealing finish that wows your guests. For more bean-focused ideas, visit our baked beans recipe to expand your options.
How to Store Bean Dip: Best Practices
Proper storage keeps your bean dip fresh and safe. For short-term needs, follow these guidelines to enjoy it later. Let’s cover the basics so you can make the most of leftovers.
- Refrigeration: Store the dip in an airtight container for up to 3 days to maintain its flavor.
- Freezing: Freeze portions in freezer-safe bags for up to 2 months, thawing overnight in the fridge.
- Reheating: Warm in the oven at 350°F for 15 minutes, stirring to keep it even.
- Meal prep: Divide into single servings for easy grab-and-go snacks during the week.
On the benefits of avocados in storage, explore this guide for tips.
FAQs: Frequently Asked Questions About Bean Dip
What type and size of beans are best for making bean dip?
The most common beans used for bean dip are refried beans, typically in 16-ounce cans. Using two 16-ounce cans of refried beans provides enough base for a standard recipe that serves several people. You can choose either traditional refried pinto beans or black beans depending on your flavor preference. Make sure to drain any excess liquid if the beans are too watery to maintain a thick and creamy dip consistency.
Can bean dip be served warm, and how do I heat it properly?
While bean dip is often served cold or at room temperature, it can also be served warm for a softer texture. To heat, place the bean dip in an oven-safe dish and warm at 350°F (175°C) for about 15 to 20 minutes. Stir halfway through to heat evenly. Alternatively, you can microwave the dip in 30-second intervals, stirring in between, until it reaches your desired temperature.
How much guacamole can I add to bean dip, and will it change the flavor?
You can add about 1 to 1.5 cups of guacamole to your bean dip to enhance creaminess and add fresh avocado flavor. Guacamole complements the beans well and introduces a fresher, slightly tangy taste. Be sure to mix it evenly and serve the dip soon after combining to prevent the guacamole from browning, which can affect both appearance and flavor.
What are some easy toppings or mix-ins to improve the flavor of bean dip?
Popular toppings include shredded cheese, chopped tomatoes, sliced jalapeños, chopped green onions, and fresh cilantro. For added texture and flavor, you can mix in cooked ground beef, taco seasoning, or a dollop of sour cream. These additions make the dip more interesting and suitable for serving as a hearty snack or appetizer for gatherings.
How long can homemade bean dip be stored in the refrigerator?
Homemade bean dip should be stored in an airtight container in the refrigerator and consumed within 3 to 4 days. If your dip contains fresh ingredients like guacamole, it’s best eaten within 24 hours for optimal taste and freshness. Always check for any off smells or changes in texture before serving leftovers to ensure safety.
Bean Dip
🥑 7 Layer Bean Dip is a creamy, flavorful appetizer that combines diverse tastes and textures for a satisfying crowd-pleaser.
🌮 This easy layered dip offers a colorful presentation and a delightful mix of beans, guacamole, cheese, and salsa perfect for casual gatherings.
- Total Time: 45 minutes
- Yield: 8–10 servings 1x
Ingredients
2 cans (16 oz each) refried beans for the hearty base
2 teaspoons chili powder for a warm, spicy kick
1 teaspoon cumin for earthy depth
1/2 teaspoon garlic powder for a subtle garlicky note
3 avocados, peeled and seeded for creamy texture and healthy fats
1 Tablespoon lime juice for acidity to brighten the avocados and prevent browning
8 oz sour cream for a tangy, smooth element
3/4 cup salsa for moisture and a fresh, zesty flavor
1 1/2 cups shredded Mexican blend cheese, cheddar or Monterrey Jack for cheesy richness
6 ounces sliced black olives for a briny contrast and texture
2 green onions, chopped for a crisp, oniony freshness as a garnish
1 roma tomato, diced for garnish
tortilla chips for serving
Instructions
First Step: Start by gathering all your ingredients on the counter to make the process smooth. Open the 2 cans of refried beans and mix in 2 teaspoons of chili powder, 1 teaspoon of cumin, and 1/2 teaspoon of garlic powder in a bowl for the base layer. This step ensures the flavors blend well and adapts easily if you’re going for a milder version.
Second Step: Prepare the guacamole by mashing 3 peeled and seeded avocados in a separate bowl, then stir in 1 Tablespoon of lime juice to keep it fresh. For dietary tweaks, use lemon juice if lime isn’t available, which helps for those watching their intake.
Third Step: Layer the components in a large dish for the best presentation. Begin with the seasoned refried beans as the bottom layer, spreading them evenly to cover the base. This makes the dip sturdy and easy to serve.
Fourth Step: Add the next layers one by one for that classic 7 layer look. Spread 8 oz of sour cream over the beans, followed by 3/4 cup of salsa, then sprinkle 1 1/2 cups of shredded cheese on top. If you’re making it for kids, hold back on spicy elements here.
Fifth Step: Finish with the fresh toppings by scattering 6 ounces of sliced black olives, 2 chopped green onions, and 1 diced roma tomato if you’re using it. For serving, arrange tortilla chips around the dish to make it ready for dipping right away. This step highlights how versatile the bean dip is for different events.
Sixth Step: Let the dip chill in the fridge for about 30 minutes to let flavors meld, or serve it immediately if you’re in a rush. This timing works well for busy schedules, and you can heat it slightly if preferred for a warmer texture.
Final Step: Serve your bean dip with the tortilla chips and enjoy the layers of flavor. Remember, you can adjust portions based on your group’s size, making it a go-to for family meals or parties. This 7 layer bean dip recipe not only tastes great but also encourages everyone to get creative with their own twists.
Notes
🌶️ Adjust chili powder and cumin to your preferred spice level.
🥑 Use ripe avocados for creamy and flavorful guacamole.
🧀 For even melting, shred your own cheese instead of pre-shredded varieties.
- Prep Time: 15 minutes
- Chilling Time: 30 minutes
- Category: Appetizer
- Method: Layering
- Cuisine: Mexican
- Diet: Vegetarian
Nutrition
- Serving Size: 1/2 cup


