
Why You’ll Love This Brown Butter Rice Krispie Treats
If you think classic rice crispy treats are good, wait until you try this brown butter version. The simple technique of browning the butter transforms an already beloved treat into something truly special with minimal extra effort. These brown butter rice krispie treats offer a depth of flavor that will have everyone asking for your secret ingredient.
Ease of Preparation
One of the biggest advantages of this recipe is how quickly it comes together. With just 10 minutes of prep time and 10 minutes of cooking, you can have these treats ready in under 20 minutes of active work. The cooling time of about 1 hour means you can prepare them in the morning and have them ready for an afternoon snack or dessert. There’s no need for fancy equipment or techniques beyond a bit of patience while the butter browns.
Distinctive Flavor
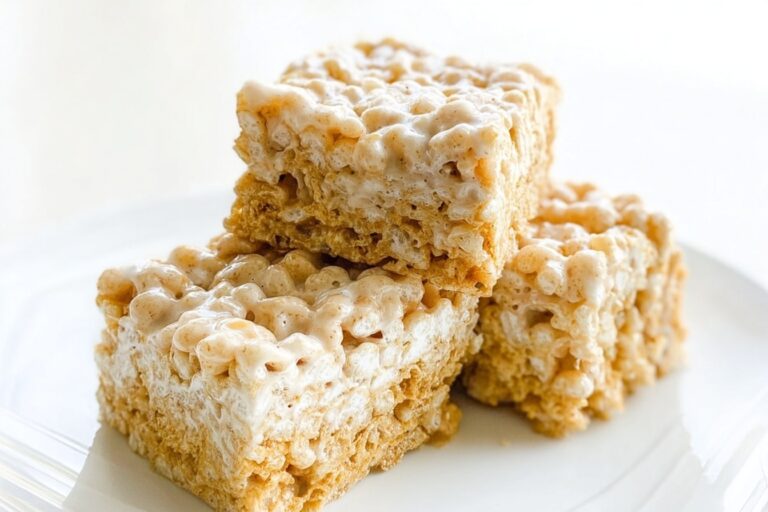
The brown butter is what sets these treats apart from the standard version. As the butter cooks, the milk solids toast and create rich, nutty, caramel-like notes that pair beautifully with the sweetness of the marshmallows. This extra layer of flavor makes these brown butter rice krispie treats taste gourmet without any additional ingredients or complicated steps.
Versatility
These treats work for nearly any occasion, from after-school snacks to potluck desserts to holiday cookie platters. They’re also easily customizable. You can add chocolate chips, sprinkles, or even a drizzle of melted chocolate on top. The base recipe is simple enough for beginners but can be dressed up for more sophisticated palates.
Family-Friendly Appeal
Both kids and adults love these treats. The familiar crispy texture brings back childhood memories for many, while the sophisticated brown butter flavor appeals to grown-up taste buds. They’re also easy to pack in lunchboxes or take on the go for a sweet pick-me-up during busy days. For more crowd-pleasing desserts, check out our brown butter oatmeal chocolate chip cookies that share that same irresistible nutty flavor profile.
Jump To
- 1. Why You’ll Love This Brown Butter Rice Krispie Treats
- 2. Essential Ingredients for Brown Butter Rice Krispie Treats
- 3. How to Prepare the Perfect Brown Butter Rice Krispie Treats: Step-by-Step Guide
- 4. Dietary Substitutions to Customize Your Brown Butter Rice Krispie Treats
- 5. Mastering Brown Butter Rice Krispie Treats: Advanced Tips and Variations
- 6. How to Store Brown Butter Rice Krispie Treats: Best Practices
- 7. FAQs: Frequently Asked Questions About Brown Butter Rice Krispie Treats
- 8. Brown Butter Rice Krispie Treats
Essential Ingredients for Brown Butter Rice Krispie Treats
Quality ingredients make all the difference in this simple recipe. Since there are so few components, each one plays an important role in the final result. Here is everything you will need to make these delicious treats.
Main Ingredients
- 2 sticks (226 grams) unsalted butter – The star of this recipe. Unsalted butter allows you to control the salt level, and browning it creates that signature nutty flavor. According to Healthline, butter contains important fat-soluble vitamins and adds richness to baked goods.
- 2 10-ounce bags of mini marshmallows, fresh – Fresh marshmallows melt more smoothly and create a better texture. Mini marshmallows melt faster than large ones, making the process quicker and easier.
- 1 teaspoon vanilla extract – Adds warmth and depth to the flavor profile. The vanilla complements the nutty brown butter beautifully.
- 1/2 teaspoon kosher salt – Balances the sweetness and brings out the flavors. The small amount makes a big difference in the overall taste.
- 9 cups (225 grams) crispy rice cereal, fresh – The foundation of the treats. Fresh cereal ensures the best texture and maximum crispiness. Stale cereal will result in less satisfying treats.
Special Dietary Options
While this recipe contains gluten and dairy, there are ways to adapt it for various dietary needs. For a gluten-free version, look for certified gluten-free crispy rice cereal, which is available at most grocery stores. For a dairy-free or vegan option, use plant-based butter alternatives and vegan marshmallows. Keep in mind that browning vegan butter may not produce the same brown bits since plant-based butters have different compositions, but you can still cook it until it takes on a golden color and nutty aroma.
Why Fresh Ingredients Matter
Fresh marshmallows and cereal are particularly important for this recipe. Marshmallows that have been sitting in your pantry for months tend to be drier and may not melt as smoothly, potentially resulting in grainy treats. Similarly, fresh cereal has more air in it and creates that perfect light and crispy texture. If your cereal has gone stale, you can try crisping it in a low oven for a few minutes, but starting fresh is always best.
How to Prepare the Perfect Brown Butter Rice Krispie Treats: Step-by-Step Guide
Making brown butter rice krispie treats requires a bit more attention than the standard version, but the extra effort is well worth it. Follow these detailed steps for perfect results every time.
Step 1: Prepare Your Pan
Spray a 9×13-inch baking pan with nonstick cooking spray or grease with butter. This prevents the treats from sticking and makes removal easy. You can also line the pan with parchment paper, leaving an overhang on the sides, which allows you to lift the entire block out for cleaner cutting. Set this aside while you work on the butter.
Step 2: Begin Browning the Butter
In a large stainless steel pan over medium-low heat, melt the butter until foamy and crackling stops. A stainless steel or light-colored pan is essential because it allows you to see the color change clearly. Dark nonstick pans make it difficult to monitor the browning process, and you might end up with burned butter.
Let the butter melt completely, then continue cooking. You will notice it starts to foam and make crackling or popping sounds. This is the water content evaporating from the butter. Do not stir constantly during this phase, as stirring can prevent the milk solids from evenly browning on the bottom of the pan. Instead, swirl the pan occasionally to distribute the heat evenly.
Step 3: Watch for the Brown Bits
Continue swirling the pan until brown bits form and the butter smells nutty, about 2 to 3 minutes after crackling stops. This is the critical moment that requires your full attention. The milk solids at the bottom of the pan will start to turn golden brown, and you will notice a distinct nutty, caramel-like aroma wafting from the pan.
Important: Watch carefully during this stage. The difference between perfectly browned butter and burned butter can be just 30 seconds. The butter should be golden brown with visible brown specks, not dark brown or black.
Step 4: Add Marshmallows and Seasonings
Immediately add marshmallows, vanilla, and salt to the browned butter. Reduce heat to low and stir constantly until completely melted and smooth. Working quickly at this stage is important because the residual heat from the butter can continue cooking, and you want to lower the temperature to prevent scorching the marshmallows.
Stir gently but consistently, making sure all the marshmallows are coated with the brown butter. The mixture should come together into a smooth, glossy mass. If you notice any lumps, continue stirring over low heat until everything melts evenly. This usually takes about 3 to 4 minutes.
Step 5: Incorporate the Cereal
Remove from heat and add the crispy rice cereal. Stir until evenly coated. Working quickly but gently is key here. You want every piece of cereal to be coated with the marshmallow mixture, but you don’t want to crush the cereal by stirring too aggressively.
Use a large spoon or silicone spatula and fold the mixture over itself rather than stirring in circles. This technique helps coat the cereal evenly while maintaining its structure. The mixture will be quite thick and sticky, which is exactly what you want.
Step 6: Transfer and Press
Transfer the mixture to your prepared pan and press gently into an even layer without packing too tightly. This step significantly affects the final texture of your brown butter rice krispie treats. Pressing too firmly compacts the cereal and creates dense, hard treats rather than light and chewy ones.
A great technique is to spray your hands or a piece of wax paper with cooking spray and use that to press the mixture down. The oil prevents sticking and allows you to get an even layer. Work from the center outward to distribute the mixture evenly in the corners of the pan.
Step 7: Cool and Cut
Allow the treats to cool at room temperature for about 1 hour before cutting into 12 squares. Resist the temptation to speed up this process by putting the pan in the refrigerator. Cooling at room temperature allows the treats to set properly while maintaining that perfect chewy texture. Refrigeration can make them hard and less pleasant to eat.
Once cooled, use a sharp knife to cut the treats. You can cut them into 12 large squares or smaller rectangles if you prefer. Some people like to cut them into 24 smaller pieces, which works well for parties or when serving a crowd. For another fun treat to share at gatherings, try our salted caramel popcorn recipe that pairs wonderfully with these crispy bars.
Timing Overview
| Step | Time Required |
|---|---|
| Preparation (gathering ingredients, prepping pan) | 10 minutes |
| Cooking (browning butter, melting marshmallows) | 10 minutes |
| Cooling | 1 hour |
| Total Time | 1 hour 20 minutes |

Dietary Substitutions to Customize Your Brown Butter Rice Krispie Treats
While the classic version of these treats is hard to beat, there are several ways to adapt the recipe for different dietary needs and preferences. Here are some thoughtful substitutions that maintain the delicious flavor and texture.
Gluten-Free Options
For those avoiding gluten, the main substitution needed is the crispy rice cereal. Many brands of crispy rice cereal contain malt flavoring, which includes gluten. Look for certified gluten-free crispy rice cereal at your grocery store. Brands like One Degree Organics and Nature’s Path make excellent gluten-free versions that taste just like the original. The rest of the ingredients, including butter and marshmallows, are naturally gluten-free, but always check labels to be certain.
Dairy-Free and Vegan Alternatives
Creating a vegan version of brown butter rice krispie treats requires a few changes. Use a high-quality vegan butter substitute for the butter. While it won’t brown exactly like dairy butter, you can still cook it until it develops some color and a toasted flavor. For the marshmallows, look for vegan marshmallows made without gelatin. Dandies and Trader Joe’s both offer vegan marshmallows that melt and set similarly to traditional ones. The texture might be slightly different, but the result is still delicious.
Lower Sugar Modifications
If you are looking to reduce sugar, you have a few options. Some brands make marshmallows with reduced sugar or alternative sweeteners. You could also try using a combination of regular marshmallows and sugar-free ones, though the texture may vary slightly. Another approach is to simply cut the finished treats into smaller pieces, which helps with portion control while still allowing you to enjoy the full flavor.
Flavor Variations
Once you have mastered the basic technique, consider adding mix-ins for variety. A half cup of mini chocolate chips stirred in at the end adds a nice contrast. A quarter cup of rainbow sprinkles makes these treats festive for birthday parties. You could also add a teaspoon of cinnamon to the marshmallow mixture for a warm, spiced version that is perfect for fall.
Mastering Brown Butter Rice Krispie Treats: Advanced Tips and Variations
Once you understand the basics, these advanced tips will help you achieve bakery-quality results and create unique variations that will impress everyone who tries them.
Pro Cooking Techniques
The most critical skill in this recipe is browning the butter properly. Using a stainless steel pan allows you to clearly see the butter browning, which is essential for timing it correctly. Have all your other ingredients measured and ready before you start, as the butter can go from perfectly browned to burned very quickly.
Another professional tip is to avoid constant stirring of the butter while it browns. Letting the butter sit allows the milk solids to settle and brown evenly on the bottom of the pan. Swirling occasionally is enough to prevent hot spots and ensure even browning. The brown bits that form are packed with flavor, so do not strain them out unless you want a completely smooth appearance.
Texture Secrets
The secret to perfectly chewy brown butter rice krispie treats lies in how you handle the marshmallows and the pressing step. Always melt marshmallows over low heat to avoid scorching them. Scorched marshmallows create hard, unpleasant treats rather than soft and chewy ones. Fresh marshmallows also make a significant difference in texture.
When pressing the mixture into the pan, use a gentle hand. Overpacking compacts the cereal and creates dense bars. Think of it as settling the mixture into place rather than pressing down hard. Some bakers even use a second pan of the same size to press down lightly, creating an even surface without too much compression.
Creative Variations
For a chocolate lover’s version, stir in a cup of mini chocolate chips after the cereal is coated. The residual heat will slightly melt some chips, creating ribbons of chocolate throughout. You could also drizzle melted chocolate over the cooled treats for an elegant finish.
A peanut butter variation is another crowd favorite. Add a half cup of creamy peanut butter along with the marshmallows for a rich, nutty flavor that complements the brown butter beautifully. Top with chopped peanuts for added crunch and visual appeal.
Presentation Tips
For gift-giving or parties, cut the treats into neat squares and wrap individually in clear cellophane tied with a ribbon. You could also use cookie cutters to create fun shapes, though you will have some scraps to snack on. A light sprinkle of flaky sea salt on top before the treats set adds sophistication and helps balance the sweetness.
How to Store Brown Butter Rice Krispie Treats: Best Practices
Proper storage ensures your brown butter rice krispie treats stay fresh and maintain their ideal texture. Here is everything you need to know about storing these delicious treats.
Room Temperature Storage
The best way to store these treats is in an airtight container at room temperature for up to 2 days. Layer them with wax paper or parchment paper between the layers to prevent sticking. Keep them away from direct sunlight and heat sources, which can cause the marshmallows to soften and the treats to become sticky.
Do not refrigerate finished treats, as this makes them hard and less enjoyable. The cool temperature causes the butter and marshmallows to firm up too much, resulting in a crunchy rather than chewy texture. Room temperature storage preserves that perfect softness that makes these treats so appealing.
Freezing Considerations
Freezing is not generally recommended for these treats, as the texture can change upon thawing. However, if you need to freeze them, wrap individual squares tightly in plastic wrap, then place in a freezer-safe container with layers separated by wax paper. Thaw overnight in the refrigerator, then bring to room temperature before serving.
Make-Ahead Tips
These treats are best enjoyed within the first day or two of making them, but you can prepare them a day ahead for events. If you are making them for a party or gathering, prepare them the morning of the event for the freshest taste and best texture. They hold up well for transport and can sit out at room temperature during parties without any issues.
FAQs: Frequently Asked Questions About Brown Butter Rice Krispie Treats
How do you brown butter for rice krispie treats?
To brown butter for rice krispie treats, start with 8 tablespoons of unsalted butter in a light-colored saucepan over medium heat. Stir occasionally as it melts and foams, about 5-7 minutes. Watch for golden-brown flecks and a nutty aroma—remove from heat immediately to avoid burning. Pour into a large bowl to stop cooking. This adds rich, caramelized flavor far beyond regular melted butter. Use it warm when mixing with 10 cups mini marshmallows (8 oz bag) over low heat. Pro tip: Strain if bits form for smoother texture. Total time: 10 minutes. Results in chewier, more flavorful treats everyone loves.
How do you keep brown butter rice krispie treats soft and chewy?
Keep brown butter rice krispie treats soft by using fresh marshmallows and cereal, melting marshmallows over low heat to avoid toughness, and pressing the mixture gently into a greased 9×13 pan with wet hands or spatula—no firm packing. Let cool at room temperature for 1 hour before cutting. Avoid refrigerating, as it hardens them; store in an airtight container at room temp for up to 3 days. For extra chew, add 2 tablespoons light corn syrup to the marshmallow mix. Browning the butter enhances flavor without sacrificing texture if heated properly. Yields 24 soft squares perfect for snacking.
Can I use salted butter to make brown butter rice krispie treats?
Yes, use salted butter for brown butter rice krispie treats—just reduce or skip added salt in the recipe. Start with 8 tablespoons salted butter; as it browns over medium heat (5-7 minutes), the salt concentrates, adding savory depth to the nutty taste. Taste the browned butter and adjust: eliminate salt entirely or use half. Mix with 10 cups Rice Krispies and melted marshmallows as usual. This works great for a quick version without extra seasoning. Store in airtight container; stays fresh 3 days. Experiment with flaky sea salt on top post-cutting for crunch. Simple swap yields gourmet results.
Can I make a half batch of brown butter rice krispie treats?
Yes, halve everything for a smaller batch: 4 tablespoons butter (browned over medium heat 4-5 minutes), 5 cups mini marshmallows, 5 cups Rice Krispies, and half the salt/vanilla. Use an 8×8-inch pan greased with butter. Brown butter same way for full flavor, melt marshmallows low and slow, mix gently, press lightly. Cools in 45 minutes. Perfect for small families or testing. Cuts into 12 pieces, stores airtight up to 3 days at room temp. Double-wrap extras for freezing up to 1 month—thaw overnight. Saves ingredients without skimping on chewy, nutty goodness.
How long do brown butter rice krispie treats last and how should I store them?
Brown butter rice krispie treats stay fresh 3-5 days at room temperature in an airtight container or wrapped tightly in plastic. Layer with parchment to prevent sticking. For longer storage, freeze in single layers (up to 2 months)—thaw at room temp 1-2 hours. Avoid fridge, as it dries them out. The browned butter’s richness keeps them moist longer than standard versions. If they firm up, microwave a square 5-10 seconds. Pro storage tip: Add vanilla extract to boost flavor over time. Always check for staleness before eating. Makes snacking easy all week.
Brown Butter Rice Krispie Treats
🍬 Upgrade classic Rice Krispies treats with nutty brown butter for deeper flavor and chewier texture – ready with minimal effort in just 20 minutes active time.
🥄 Irresistible, gooey homemade bars using fresh ingredients, perfect for parties, snacks, or gifting without the store-bought staleness.
- Total Time: 1 hour 20 minutes
- Yield: 12 squares
Ingredients
– 2 sticks (226 grams) unsalted butter
– 2 10-ounce bags of mini marshmallows, fresh
– 1 teaspoon vanilla extract
– 1/2 teaspoon kosher salt
– 9 cups (225 grams) crispy rice cereal, fresh
Instructions
1-Step 1: Prepare Your Pan Spray a 9×13-inch baking pan with nonstick cooking spray or grease with butter. This prevents the treats from sticking and makes removal easy. You can also line the pan with parchment paper, leaving an overhang on the sides, which allows you to lift the entire block out for cleaner cutting. Set this aside while you work on the butter.
2-Step 2: Begin Browning the Butter In a large stainless steel pan over medium-low heat, melt the butter until foamy and crackling stops. A stainless steel or light-colored pan is essential because it allows you to see the color change clearly. Dark nonstick pans make it difficult to monitor the browning process, and you might end up with burned butter. Let the butter melt completely, then continue cooking. You will notice it starts to foam and make crackling or popping sounds. This is the water content evaporating from the butter. Do not stir constantly during this phase, as stirring can prevent the milk solids from evenly browning on the bottom of the pan. Instead, swirl the pan occasionally to distribute the heat evenly.
3-Step 3: Watch for the Brown Bits Continue swirling the pan until brown bits form and the butter smells nutty, about 2 to 3 minutes after crackling stops. This is the critical moment that requires your full attention. The milk solids at the bottom of the pan will start to turn golden brown, and you will notice a distinct nutty, caramel-like aroma wafting from the pan. Important: Watch carefully during this stage. The difference between perfectly browned butter and burned butter can be just 30 seconds. The butter should be golden brown with visible brown specks, not dark brown or black.
4-Step 4: Add Marshmallows and Seasonings Immediately add marshmallows, vanilla, and salt to the browned butter. Reduce heat to low and stir constantly until completely melted and smooth. Working quickly at this stage is important because the residual heat from the butter can continue cooking, and you want to lower the temperature to prevent scorching the marshmallows. Stir gently but consistently, making sure all the marshmallows are coated with the brown butter. The mixture should come together into a smooth, glossy mass. If you notice any lumps, continue stirring over low heat until everything melts evenly. This usually takes about 3 to 4 minutes.
5-Step 5: Incorporate the Cereal Remove from heat and add the crispy rice cereal. Stir until evenly coated. Working quickly but gently is key here. You want every piece of cereal to be coated with the marshmallow mixture, but you don’t want to crush the cereal by stirring too aggressively. Use a large spoon or silicone spatula and fold the mixture over itself rather than stirring in circles. This technique helps coat the cereal evenly while maintaining its structure. The mixture will be quite thick and sticky, which is exactly what you want.
6-Step 6: Transfer and Press Transfer the mixture to your prepared pan and press gently into an even layer without packing too tightly. This step significantly affects the final texture of your brown butter rice krispie treats. Pressing too firmly compacts the cereal and creates dense, hard treats rather than light and chewy ones. A great technique is to spray your hands or a piece of wax paper with cooking spray and use that to press the mixture down. The oil prevents sticking and allows you to get an even layer. Work from the center outward to distribute the mixture evenly in the corners of the pan.
7-Step 7: Cool and Cut Allow the treats to cool at room temperature for about 1 hour before cutting into 12 squares. Resist the temptation to speed up this process by putting the pan in the refrigerator. Cooling at room temperature allows the treats to set properly while maintaining that perfect chewy texture. Refrigeration can make them hard and less pleasant to eat. Once cooled, use a sharp knife to cut the treats. You can cut them into 12 large squares or smaller rectangles if you prefer. Some people like to cut them into 24 smaller pieces, which works well for parties or when serving a crowd. For another fun treat to share at gatherings, try our salted caramel popcorn recipe that pairs wonderfully with these crispy bars.
Notes
🔥 Use a stainless steel pan to monitor butter browning clearly for perfect results.
🫘 Use fresh marshmallows and cereal for superior chewiness and texture.
🤲 Gently press mixture into pan to keep treats soft and chewy; avoid overpacking.
- Prep Time: 10 minutes
- Cooling: 1 hour
- Cook Time: 10 minutes
- Category: Dessert
- Method: No-Bake
- Cuisine: American
- Diet: Vegetarian
Nutrition
- Serving Size: 1 square
- Calories: 350 kcal
- Sugar: 30g
- Sodium: 200mg
- Fat: 15g
- Saturated Fat: 9g
- Unsaturated Fat: 6g
- Trans Fat: 0g
- Carbohydrates: 55g
- Fiber: 0g
- Protein: 3g
- Cholesterol: 40mg


