
Why You’ll Love These Brownie Cookies
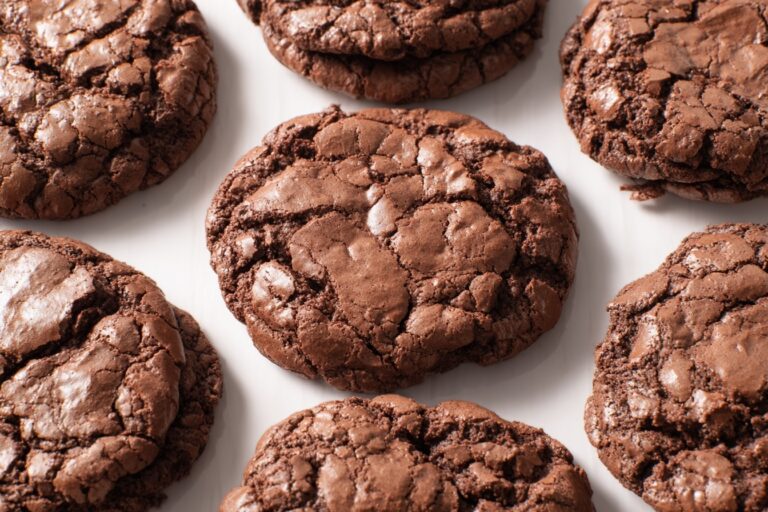
If you love the rich taste of brownies but want the grab-and-go ease of cookies, these Brownie Cookies are a perfect fit. They bake up with crackly tops, chewy edges, and a soft, fudgy center that feels like the best parts of a chocolate dessert in one bite. This recipe is friendly for busy days, special treats, and last-minute baking plans.
- Easy to make: The batter comes together in one bowl style steps with simple pantry ingredients, so you do not need any fancy equipment or advanced baking skills.
- Great for sharing: These cookies are easy to portion, pack, and serve at school events, work lunches, family gatherings, or weekend dessert tables.
- Rich chocolate flavor: Melted bittersweet chocolate, cocoa powder, and semisweet chocolate chips create a deep chocolate taste that feels bold and satisfying.
- Flexible for different needs: You can adjust the recipe with gluten-free flour, dairy-free swaps, or lighter serving ideas depending on your goals.
For readers who enjoy chocolate treats, these cookies fit right in with other simple desserts on Smart Family Recipes chocolate desserts. They are also a nice match for an afternoon coffee break or a lunchbox surprise.
Tip: If you want the best texture, chill the dough before baking. That one step helps the cookies stay thick, soft, and fudgy.
Chocolate lovers often compare this style of cookie to a small brownie with a cookie edge, and that is exactly why this recipe stands out. It gives you a bakery-style result without a long ingredient list or complicated process.
Jump To
- 1. Why You’ll Love These Brownie Cookies
- 2. Essential Ingredients for Brownie Cookies
- 3. How to Prepare the Perfect Brownie Cookies: Step-by-Step Guide
- 4. Dietary Substitutions to Customize Your Brownie Cookies
- 5. Mastering Brownie Cookies: Advanced Tips and Variations
- 6. How to Store Brownie Cookies: Best Practices
- 7. FAQs: Frequently Asked Questions About Brownie Cookies
- 8. Brownie Cookies
Essential Ingredients for Brownie Cookies
Every ingredient in these Brownie Cookies has a job to do. The chocolate gives the deep flavor, the sugars help with chewiness, and the eggs build structure while keeping the centers soft. Below is the full ingredient list with exact measurements, followed by a few simple substitution ideas.
Main ingredients
- 4 ounces (112g) chopped bittersweet chocolate – This is the main source of rich brownie flavor and helps create a fudgy texture.
- ¼ cup (56g) unsalted butter – Adds moisture and helps the chocolate melt smoothly.
- ½ cup (100g) granulated sugar – Helps the cookies spread a little and supports crackly tops.
- ½ cup (110g) packed light brown sugar – Adds moisture, softness, and a light caramel note.
- 2 large room-temperature eggs – Give the cookies structure and help create a chewy center.
- 1 tablespoon vanilla extract – Brings warmth and rounds out the chocolate flavor.
- ⅔ cup (80g) all-purpose flour – Provides just enough structure without making the cookies cakey.
- ¼ cup (25g) unsweetened cocoa powder – Deepens the chocolate taste and keeps the flavor bold.
- ½ teaspoon salt – Balances sweetness and sharpens the chocolate notes.
- ½ teaspoon baking powder – Gives a little lift so the cookies do not bake up too flat.
- ½ cup (90g) semisweet chocolate chips – Add pockets of melted chocolate in every bite.
Special dietary options
- Vegan: Use plant-based butter, dairy-free chocolate, and two flax eggs in place of the large eggs.
- Gluten-free: Swap the all-purpose flour for a 1:1 gluten-free baking blend with xanthan gum.
- Low-calorie: Use a smaller cookie scoop and reduce the chocolate chips slightly for lighter portions.
For more dessert inspiration, you may also like the rich texture of brown butter oatmeal chocolate chip cookies, which offer another cozy cookie option.
How to Prepare the Perfect Brownie Cookies: Step-by-Step Guide
First step: Prep your baking tools and ingredients
Start by lining two baking sheets with parchment paper and preheating your oven to 350°F. If your kitchen runs warm, keep the butter and eggs at room temperature but not overly soft. Measure out every ingredient before you begin so the batter comes together quickly and smoothly. This makes the process easier and helps prevent overmixing later.
Second step: Melt the chocolate and butter
Place the chopped bittersweet chocolate and unsalted butter in a heatproof bowl. Melt them together using a double boiler or in short microwave bursts, stirring after each burst until smooth. Let the mixture cool for a few minutes so it does not scramble the eggs in the next step. The goal is silky, glossy chocolate with no lumps.
Third step: Whip the sugars, eggs, and vanilla
In a separate large bowl, combine the granulated sugar, light brown sugar, eggs, and vanilla extract. Whisk for 1 to 2 minutes until the mixture looks smooth and slightly thickened. This helps create the shiny, crackly tops that make Brownie Cookies so irresistible. If you want that bakery-style look, give this step your full attention.
Fourth step: Combine the chocolate mixture
Slowly pour the melted chocolate mixture into the egg mixture while whisking constantly. Keep whisking until everything is fully blended and glossy. The batter will look rich and dark, almost like brownie batter. At this point, the smell alone will make you want to sneak a spoonful.
Fifth step: Add the dry ingredients
In a smaller bowl, stir together the flour, cocoa powder, salt, and baking powder. Add the dry mixture to the wet ingredients and fold gently with a spatula. Stop mixing as soon as the flour disappears. Overmixing can make the cookies tough instead of soft and chewy.
Sixth step: Fold in the chocolate chips
Add the semisweet chocolate chips and fold them through the dough until evenly distributed. The chips add little bursts of melted chocolate and make each cookie feel extra indulgent. If the dough feels soft or sticky, that is normal. Because this dough is rich, it benefits from chilling before baking.
Seventh step: Chill the dough
Cover the bowl and chill the dough for at least 1 to 2 hours. You can also chill it overnight for even better flavor and texture. Chilling helps the cookies stay thick in the oven and gives them that fudgy center people love. If you are in a hurry, a shorter chill is better than none, but longer is best.
Eighth step: Portion and bake
Scoop the chilled dough into balls about 1.5 to 2 inches wide and place them on the prepared baking sheets with space between each one. Bake for 9 to 11 minutes, or until the tops look set but still soft in the middle. The cookies should look slightly underbaked when you remove them, since they continue to firm up as they cool. This is the secret to a chewy center.
Ninth step: Cool before moving
Let the cookies rest on the baking sheet for 5 minutes before transferring them to a wire rack. This resting time helps them finish setting without breaking apart. The cookies will look delicate at first, but they become perfectly chewy as they cool. If you move them too soon, they may fall apart.
Final step: Serve and enjoy
Once cooled, enjoy your Brownie Cookies with a glass of milk, a cup of coffee, or a scoop of vanilla ice cream. For a simple dessert platter, serve them with other sweets like vanilla custard cream squares for a lovely mix of textures. These cookies taste amazing on the day they are baked, but they stay soft for several days when stored well.
| Step | Time | What to look for |
|---|---|---|
| Melt chocolate and butter | 3 to 5 minutes | Smooth, glossy mixture |
| Mix wet ingredients | 2 minutes | Slightly thick and shiny |
| Fold in dry ingredients | 1 minute | No dry flour visible |
| Chill dough | 1 to 2 hours | Firm enough to scoop |
| Bake | 9 to 11 minutes | Set edges, soft center |

Dietary Substitutions to Customize Your Brownie Cookies
Protein and main component alternatives
If you need to adjust the eggs or dairy, there are a few easy swaps that still give you a rich cookie. For a dairy-free version, use a plant-based butter that bakes well and choose dairy-free chocolate for both the chopped chocolate and the chips. For egg-free baking, flax eggs can work, though the texture will be a little less airy and a bit denser. If you want a lighter cookie, you can also use fewer chocolate chips and make smaller portions.
For a gluten-free batch, a good 1:1 baking flour blend is the best choice because it keeps the cookies tender without changing the method much. If you are making dessert for mixed dietary needs, try baking one tray with the original recipe and another tray with a simple gluten-free swap so everyone gets a version they enjoy.
Vegetable, sauce, and seasoning modifications
Even though these cookies are all about chocolate, you can still play with flavor. A small pinch of cinnamon can add warmth, while espresso powder can deepen the chocolate taste without making the cookies taste like coffee. If you want a slightly salty-sweet finish, sprinkle a little flaky salt on top right after baking.
For serving, a drizzle of caramel or a spoonful of berry sauce adds a fun twist. You can also pair these cookies with fruit for a fresher plate. If you enjoy dessert recipes with bright flavors, you might also like silky lemon cream treat on another day when you want something a little lighter.
Mastering Brownie Cookies: Advanced Tips and Variations
Pro cooking techniques
For the best texture, whisk the eggs and sugars until the mixture looks lighter in color and slightly thick. That extra air helps create the crackly top people love in Brownie Cookies. Also, do not skip the cooling step after melting the chocolate and butter, since hot chocolate can change the texture of the batter.
Another helpful tip is to use a cookie scoop so all the cookies are the same size. Even portions bake more evenly, which means fewer overdone edges and more soft centers. If you want a deeper chocolate flavor, use a high-quality bittersweet chocolate and fresh cocoa powder.
Flavor variations
Try folding in chopped walnuts for a nutty crunch, or use white chocolate chips for a sweeter twist. Orange zest can add a bright note, and a little espresso powder can make the chocolate flavor stand out even more. You can also make a holiday version by adding peppermint pieces on top after baking.
Presentation tips
For a bakery-style look, press a few extra chocolate chips into the tops right after scooping the dough. Once baked, serve the cookies on a simple platter with a dusting of cocoa powder or powdered sugar. A few fresh berries on the side can make the plate look more finished without much effort.
Make-ahead options
These cookies work well for planning ahead. Chill the dough balls and keep them in the fridge for a day or freeze them for later baking. This is especially helpful for busy parents, students, and working professionals who want a fresh dessert without much prep time on the day of serving.
How to Store Brownie Cookies: Best Practices
These cookies stay soft for days when stored the right way. After they cool completely, place them in an airtight container at room temperature for up to 3 days. If you stack them, add parchment paper between layers so they do not stick together.
For longer storage, freeze the cookies in a freezer-safe container or bag for up to 2 months. You can also freeze the dough balls before baking, which makes fresh cookies easy anytime. When you want to serve them again, thaw at room temperature or warm them gently in a low oven for a few minutes.
Reheating tip: A short 300°F oven warm-up for 2 to 3 minutes brings back the soft center and melty chocolate feel. If you are packing them for meal prep, keep them in a cool, dry place and avoid sealing them while still warm.

FAQs: Frequently Asked Questions About Brownie Cookies
Why are my brownie cookies flat?
Flat brownie cookies often result from skipping the chilling step for the dough. Without chilling, the dough spreads too much during baking, leading to thin, crispy cookies instead of thick, chewy ones with a good rise. To fix this, chill the dough for at least 1-2 hours (or overnight) in the fridge after mixing. This firms up the butter and helps the cookies hold their shape. Other causes include using warm ingredients or baking at too high a temperature. Always start with room-temperature butter and eggs, but chill the full dough. For best results, portion into balls before chilling. This simple step makes a big difference in texture—your cookies will bake up domed and fudgy. (87 words)
Can I make brownie cookie dough ahead of time?
Yes, brownie cookie dough freezes beautifully for make-ahead prep. Portion the dough into 1.5-2 inch balls right after mixing, then chill them on a baking sheet in the fridge for 1 hour to firm up. Transfer to a freezer-safe bag or container, squeezing out air to prevent freezer burn. It keeps well for up to 3 months. When ready to bake, thaw the balls in the fridge overnight or let them sit at room temperature for 30 minutes. Bake straight from chilled or slightly thawed—no need to adjust time much, just add 1-2 minutes if frozen solid. Label with date for easy tracking. This method lets you bake fresh cookies anytime. (102 words)
How do I store leftover brownie cookies?
Store leftover brownie cookies in an airtight container at room temperature for up to 3 days to keep them soft and chewy. Layer with parchment paper if stacking to avoid sticking. For longer freshness, add a slice of bread to the container—it absorbs moisture and prevents drying out. Avoid plastic bags, as they trap humidity and make cookies soggy. In humid climates, refrigerate in a single layer, but bring to room temp before eating to restore texture. Properly stored, they stay fudgy without getting stale. If they harden, pop in a 300°F oven for 2-3 minutes to refresh. Always check for off smells before eating. (98 words)
Can I freeze baked brownie cookies?
Yes, freeze baked brownie cookies for up to 2 months. Cool completely first, then layer in a freezer-safe airtight container or bag with parchment between layers to prevent sticking. Remove as much air as possible. To thaw, place at room temperature for 1-2 hours or overnight in the fridge—they’ll soften nicely without condensation. For quicker thawing, microwave in 10-second bursts, but watch closely to avoid melting chocolate. Freezing preserves the chewy center and crinkly tops. Great for portion control or unexpected guests. Once thawed, store as usual and enjoy within a few days for peak flavor. (92 words)
How do I get crinkly tops on brownie cookies?
Crinkly tops on brownie cookies come from a few key techniques. Use Dutch-processed cocoa for better structure, and whip room-temperature eggs with sugar until pale and thick—this builds air for the signature crackle. Bake at a slightly higher temp (375°F) for the first 5 minutes to set the tops quickly, then lower to 350°F. Don’t overmix the flour, and chill dough well to control spread. Melted chocolate chips add fudginess without weighing down the surface. Fresh baking soda helps with lift. Expect cracks as they cool—resist peeking in the oven. These steps deliver that bakery-style look and shine. (96 words)
Brownie Cookies
🍫 Indulge in fudgy centers and chewy edges that deliver pure chocolate bliss in cookie form, perfect for satisfying deep cravings.
😋 These brownie cookies combine the best of brownies and cookies, easy to make and impossible to resist.
- Total Time: 62 minutes
- Yield: 24 cookies
Ingredients
– 4 ounces (112g) chopped bittersweet chocolate for rich brownie flavor and fudgy texture
– ¼ cup (56g) unsalted butter for moisture and smooth chocolate melting
– ½ cup (100g) granulated sugar for spreading and crackly tops
– ½ cup (110g) packed light brown sugar for moisture, softness, and caramel note
– 2 large room-temperature eggs for structure and chewy center
– 1 tablespoon vanilla extract for warmth and rounding out chocolate flavor
– ⅔ cup (80g) all-purpose flour for structure
– ¼ cup (25g) unsweetened cocoa powder for deepening chocolate taste
– ½ teaspoon salt for balancing sweetness and sharpening chocolate notes
– ½ teaspoon baking powder for lift
– ½ cup (90g) semisweet chocolate chips for pockets of melted chocolate
Instructions
1-First step: Prep your baking tools and ingredients Start by lining two baking sheets with parchment paper and preheating your oven to 350°F. If your kitchen runs warm, keep the butter and eggs at room temperature but not overly soft. Measure out every ingredient before you begin so the batter comes together quickly and smoothly. This makes the process easier and helps prevent overmixing later.
2-Second step: Melt the chocolate and butter Place the chopped bittersweet chocolate and unsalted butter in a heatproof bowl. Melt them together using a double boiler or in short microwave bursts, stirring after each burst until smooth. Let the mixture cool for a few minutes so it does not scramble the eggs in the next step. The goal is silky, glossy chocolate with no lumps.
3-Third step: Whip the sugars, eggs, and vanilla In a separate large bowl, combine the granulated sugar, light brown sugar, eggs, and vanilla extract. Whisk for 1 to 2 minutes until the mixture looks smooth and slightly thickened. This helps create the shiny, crackly tops that make Brownie Cookies so irresistible. If you want that bakery-style look, give this step your full attention.
4-Fourth step: Combine the chocolate mixture Slowly pour the melted chocolate mixture into the egg mixture while whisking constantly. Keep whisking until everything is fully blended and glossy. The batter will look rich and dark, almost like brownie batter. At this point, the smell alone will make you want to sneak a spoonful.
5-Fifth step: Add the dry ingredients In a smaller bowl, stir together the flour, cocoa powder, salt, and baking powder. Add the dry mixture to the wet ingredients and fold gently with a spatula. Stop mixing as soon as the flour disappears. Overmixing can make the cookies tough instead of soft and chewy.
6-Sixth step: Fold in the chocolate chips Add the semisweet chocolate chips and fold them through the dough until evenly distributed. The chips add little bursts of melted chocolate and make each cookie feel extra indulgent. If the dough feels soft or sticky, that is normal. Because this dough is rich, it benefits from chilling before baking.
7-Seventh step: Chill the dough Cover the bowl and chill the dough for at least 1 to 2 hours. You can also chill it overnight for even better flavor and texture. Chilling helps the cookies stay thick in the oven and gives them that fudgy center people love. If you are in a hurry, a shorter chill is better than none, but longer is best.
8-Eighth step: Portion and bake Scoop the chilled dough into balls about 1.5 to 2 inches wide and place them on the prepared baking sheets with space between each one. Bake for 9 to 11 minutes, or until the tops look set but still soft in the middle. The cookies should look slightly underbaked when you remove them, since they continue to firm up as they cool. This is the secret to a chewy center.
9-Ninth step: Cool before moving Let the cookies rest on the baking sheet for 5 minutes before transferring them to a wire rack. This resting time helps them finish setting without breaking apart. The cookies will look delicate at first, but they become perfectly chewy as they cool. If you move them too soon, they may fall apart.
10-Final step: Serve and enjoy Once cooled, enjoy your Brownie Cookies with a glass of milk, a cup of coffee, or a scoop of vanilla ice cream. For a simple dessert platter, serve them with other sweets like vanilla custard cream squares for a lovely mix of textures. These cookies taste amazing on the day they are baked, but they stay soft for several days when stored well.
Notes
💡 Room-temperature eggs whip up better for that signature shiny, cracked top.
❄️ Chilling prevents spreading and ensures chewy texture.
🔥 Remove from oven early for fudgy centers; they firm up as they cool.
- Prep Time: 20 minutes
- Chill Time: 30 minutes
- Cook Time: 12 minutes
- Category: Dessert
- Method: Baking
- Cuisine: American
- Diet: Vegetarian
Nutrition
- Serving Size: 1 cookie
- Calories: 180
- Sugar: 16g
- Sodium: 65mg
- Fat: 10g
- Saturated Fat: 6g
- Unsaturated Fat: 3g
- Trans Fat: 0g
- Carbohydrates: 22g
- Fiber: 2g
- Protein: 3g
- Cholesterol: 28mg


