
Why You’ll Love This Caramel Apple Dream Cake
There’s something truly magical about the combination of tender apple cake and rich, buttery caramel frosting. This Caramel Apple Dream Cake brings together the best of autumn flavors in a dessert that feels indulgent yet surprisingly simple to make. Whether you’re baking for a special occasion or simply craving something sweet, this recipe delivers on every front.
Apples bring natural sweetness and moisture to this cake, creating a tender crumb that stays fresh for days. According to health experts at Mayo Clinic Health System, apples pack a nutritional punch with fiber and antioxidants, making this treat a bit more wholesome than your average dessert.
- Ease of preparation: This Caramel Apple Dream Cake comes together with straightforward techniques that even novice bakers can master. With just 15 minutes of prep time and basic kitchen tools, you’ll have three beautiful cake layers baking in the oven before you know it. The steps are simple cream butter and sugar, add eggs and wet ingredients, fold in dry ingredients and apples, and you’re ready to bake.
- Moist, tender texture: Thanks to a clever combination of sour cream, applesauce, and shredded fresh apples, this cake stays incredibly moist without feeling heavy. The apple pie spice infuses every bite with warm, cozy flavors that pair beautifully with the caramel frosting.
- Versatility for occasions: From birthday celebrations to holiday gatherings, this caramel apple cake recipe adapts to any event. Dress it up with caramel drips and decorative apple wedges, or keep it rustic with a naked cake style and chopped pecans.
- Make-ahead friendly: Busy schedules are no match for this recipe. The cake layers freeze beautifully for up to three months, meaning you can bake ahead and simply thaw, frost, and serve when the time comes.
Quick Overview: Prep Time: 15 minutes | Cook Time: 25 minutes (plus 15-40 minutes bake time) | Total Time: 1 hour 40 minutes | Yields: 3-layer 8-inch cake (12-16 servings)
Jump To
- 1. Why You’ll Love This Caramel Apple Dream Cake
- 2. Essential Ingredients for Caramel Apple Dream Cake
- 3. How to Prepare the Perfect Caramel Apple Dream Cake: Step-by-Step Guide
- 4. Dietary Substitutions to Customize Your Caramel Apple Dream Cake
- 5. Mastering Caramel Apple Dream Cake: Advanced Tips and Variations
- 6. How to Store Caramel Apple Dream Cake: Best Practices
- 7. FAQs: Frequently Asked Questions About Caramel Apple Dream Cake
- 8. Caramel Apple Dream Cake
Essential Ingredients for Caramel Apple Dream Cake
Creating the perfect Caramel Apple Dream Cake starts with quality ingredients and precise measurements. Each component plays a vital role in achieving that tender crumb and luscious frosting. Here’s everything you’ll need:
For the Cake
- 3 cups all-purpose flour Provides structure and creates a sturdy yet tender cake base
- 1 tablespoon apple pie spice Infuses the cake with warm cinnamon, nutmeg, and allspice notes
- 1 ½ teaspoons baking soda Acts as the leavening agent for a light, fluffy texture
- ¼ teaspoon kosher salt Balances sweetness and enhances overall flavor
- ¾ cup unsalted butter (room temperature) Creates richness and helps achieve a tender crumb
- 2 ⅛ cups granulated sugar Sweetens the cake and helps retain moisture
- 3 large eggs (room temperature) Bind ingredients together and add structure
- 2 teaspoons pure vanilla extract Adds depth and warmth to the flavor profile
- ½ cup sour cream Contributes tanginess and extra moisture for tenderness
- 4 oz applesauce Keeps the cake moist while reinforcing the apple flavor
- 1 cup whole milk Provides liquid for the batter and creates a soft texture
- 1 cup peeled and shredded apples Fresh apples add texture, moisture, and authentic apple taste
For the Caramel Frosting
- 1 cup unsalted butter Forms the rich, creamy base of the frosting
- 1 ½ cups packed light brown sugar Creates the signature caramel flavor and golden color
- ⅓ cup heavy cream Adds richness and helps achieve spreadable consistency
- 1 teaspoon vanilla extract Enhances the caramel notes with warm undertones
- ¼ teaspoon kosher salt Balances the sweetness and brings out caramel complexity
- 4 to 5 cups powdered sugar Sweetens and thickens the frosting to pipeable consistency
Optional Toppings
- Caramel apples Decorative garnish for special occasions
- Chopped pecans Adds crunch and nutty flavor contrast
Special Dietary Options
For those with dietary restrictions, here are some modifications you can try:
- Gluten-free: Substitute the all-purpose flour with a 1:1 gluten-free flour blend. Look for brands that contain xanthan gum for best results.
- Dairy-free: Replace butter with vegan butter sticks, use coconut milk instead of whole milk, and opt for coconut cream in place of heavy cream for the frosting.
- Lower calorie: Reduce granulated sugar to 1 ½ cups and use sugar-free applesauce. For the frosting, try a cream cheese base with caramel extract instead of full caramel.
How to Prepare the Perfect Caramel Apple Dream Cake: Step-by-Step Guide
Making this Caramel Apple Cake recipe is a rewarding experience that yields impressive results. Follow these detailed steps to create a bakery-worthy dessert in your own kitchen.
Step 1: Prepare Your Equipment and Ingredients
Start by preheating your oven to 300°F (135°C). While it heats, grease and flour three 8-inch round cake pans. If you want foolproof release, line the bottoms with parchment paper circles. Using non-stick pans makes this process even easier and helps your layers release cleanly.
Before you begin mixing, measure all your ingredients. Room temperature ingredients are crucial cold butter won’t cream properly, and cold eggs can cause the batter to curdle. If your butter is cold from the fridge, soften it using 5-second microwave bursts, flipping it between each burst until pliable but not melted.
Step 2: Mix the Dry Ingredients
In a medium bowl, whisk together the 3 cups all-purpose flour, 1 tablespoon apple pie spice, 1 ½ teaspoons baking soda, and ¼ teaspoon kosher salt. This step ensures even distribution of the leavening agent and spices throughout the flour. Set this bowl aside while you prepare the wet ingredients.
Step 3: Cream Butter and Sugar
In a large mixing bowl or stand mixer, combine ¾ cup unsalted butter (room temperature) with 2 ⅛ cups granulated sugar. Beat on medium-high speed until the mixture becomes light and fluffy about 3 to 5 minutes. This aeration creates pockets of air that help the cake rise properly. Whip the butter until it turns pale for the best texture.
Step 4: Add Eggs and Wet Ingredients
With the mixer on medium speed, beat in the 3 large eggs one at a time, allowing each to incorporate fully before adding the next. This gradual addition prevents the batter from separating. Next, stir in 2 teaspoons pure vanilla extract, ½ cup sour cream, and 4 oz applesauce. Mix until smooth and homogeneous.
Step 5: Combine Wet and Dry Ingredients
Now comes the crucial step that determines your cake’s texture. Alternate adding the dry ingredient mixture and 1 cup whole milk to your batter. Start and end with the dry ingredients add about one-third of the flour mixture, then half the milk, then another third of flour, the remaining milk, and finally the last of the flour. Mix on low speed just until combined. Overmixing develops gluten and creates a tough, dense cake.
Gently fold in 1 cup peeled and shredded apples using a spatula. Distribute them evenly throughout the batter without overworking it. The shredded apples add moisture and create those lovely pockets of apple flavor in every slice.
Step 6: Bake the Cake Layers
Divide the batter evenly among your three prepared pans. Use a kitchen scale for precision, or simply eyeball equal portions if you prefer. Smooth the tops with an offset spatula for even layers.
Bake at 300°F (135°C) for 35-40 minutes. The lower temperature ensures even baking without over-browning the edges. Your cake is done when a toothpick inserted into the center comes out clean or with just a few moist crumbs attached.
Let the cakes cool in their pans for about 10 minutes, then invert them onto wire racks to cool completely. Patience is key here frosting a warm cake will cause the buttercream to melt and slide right off.
Step 7: Make the Caramel Frosting
While the cakes cool, prepare your showstopping caramel frosting. This recipe creates a rich, buttery frosting with deep caramel flavor. According to nutritional data on caramel, brown sugar caramel provides a distinctive flavor profile that pairs wonderfully with spiced cakes.
Melt 1 cup unsalted butter in a medium saucepan over medium heat. Add 1 ½ cups packed light brown sugar and ⅓ cup heavy cream, whisking constantly until the sugar dissolves completely. Add ¼ teaspoon kosher salt to balance the sweetness.
Bring the mixture to a gentle bubble and continue whisking for 2 minutes. The caramel should thicken slightly and take on a deeper golden color. Remove from heat and stir in 1 teaspoon vanilla extract. Let this caramel base cool completely rushing this step will melt your powdered sugar and create a runny frosting.
Once cooled, transfer the caramel to a mixing bowl. With your mixer on low speed, gradually add 3 cups powdered sugar. Once incorporated, increase speed to medium and beat until creamy. If the frosting is too thick, add more powdered sugar. If it’s too stiff, thin with small amounts of heavy cream. The goal is a spreadable, pipeable consistency that holds its shape.
Step 8: Assemble and Decorate
Place your first completely cooled cake layer on a serving plate or cake board. Spread a generous layer of caramel frosting over the top. Repeat with the second and third layers. Apply a thin crumb coat to the entire cake and refrigerate for 15 minutes to set. Then add your final layer of frosting for a clean, professional finish.
For decorating options, consider these beautiful presentations:
- Classic layer cake: Smooth frosting between layers and on top and sides
- Naked style: Minimal frosting on sides, showing the cake layers, topped with chopped pecans
- Caramel drip: Let caramel sauce drip down the sides before adding piped frosting details
- Party perfect: Pipe swirls on top and garnish with caramel apple wedges

Dietary Substitutions to Customize Your Caramel Apple Dream Cake
Protein and Main Component Alternatives
If you need to modify this Caramel Apple Dream Cake for dietary reasons, several substitutions work well while maintaining delicious results.
For egg-free baking, replace each large egg with one of these options: ¼ cup unsweetened applesauce (this complements the apple flavor), 1 tablespoon ground flaxseed mixed with 3 tablespoons water (let sit 5 minutes), or a commercial egg replacer following package directions. These substitutions maintain structure while keeping the cake tender.
For gluten-free needs, use a high-quality gluten-free flour blend designed for baking. Brands that include xanthan gum work best. The texture may be slightly denser, but the flavor remains excellent. Measure by weight rather than volume for accuracy 300g of gluten-free flour replaces the 3 cups all-purpose flour.
For reduced sugar, cut the granulated sugar to 1 ⅝ cups without significantly affecting texture. You can also use a sugar substitute designed for baking, but note that caramel flavor develops best with real brown sugar. For a lighter version of our butter pecan layer cake, similar adjustments work beautifully.
Vegetable, Sauce, and Seasoning Modifications
While this recipe uses shredded apples, you can experiment with the preparation for different textures. Finely diced apples (about ½-inch pieces) create more pronounced apple chunks throughout the cake. Grated apples distribute more evenly but release more moisture, so squeeze excess liquid before adding.
For the apple variety, choose firm apples that hold their shape during baking:
| Apple Variety | Flavor Profile | Best For |
|---|---|---|
| Royal Gala | Sweet and mild | Balanced sweetness |
| Granny Smith | Tart and crisp | Contrast to caramel |
| Honeycrisp | Sweet-tart balance | Complex flavor |
| Fuji | Sweet and juicy | Moist cake |
The apple pie spice can be homemade if you don’t have store-bought. Mix 1 teaspoon cinnamon with ¼ teaspoon each of nutmeg, allspice, and ginger. This creates a warm spice blend that’s perfect for autumn baking.
Mastering Caramel Apple Dream Cake: Advanced Tips and Variations
Ready to take your Caramel Apple Dream Cake to the next level? These professional tips and creative variations will help you achieve bakery-quality results every time.
Pro Cooking Techniques
Room temperature matters: Every ingredient should be room temperature before mixing. Cold eggs can cause the batter to curdle, while cold butter won’t cream properly with sugar. Plan ahead remove ingredients from the refrigerator at least 1 hour before baking.
The reverse creaming method: For an even more tender crumb, try reverse creaming. Mix the flour, sugar, baking soda, salt, and spices together first. Then add softened butter and mix until it resembles wet sand. This coats the flour proteins with fat, limiting gluten development. Add wet ingredients afterward for a finer, more tender texture.
Proper pan preparation: Grease pans with butter and dust with flour, or use a baking spray that contains flour. For guaranteed release, line the bottoms with parchment paper circles. Never skip this step even the best cake recipe will break if it sticks to the pan.
Flavor Variations
While the classic recipe is delicious, try these variations for something different:
- Spiced rum caramel: Add 1 tablespoon dark rum to the caramel frosting for adult sophistication
- Maple twist: Replace ¼ cup brown sugar with pure maple syrup in the frosting
- Nutty addition: Add ½ cup chopped toasted pecans to the cake batter for texture
- Apple cider cake: Replace milk with apple cider for intensified apple flavor
Presentation Tips
A beautifully decorated cake tastes even better. Consider these presentation ideas:
- Drizzle warm caramel sauce over frosted cake and let it drip down the sides
- Press chopped pecans into the sides of the frosted cake for a rustic, crunchy border
- Top with caramel-dipped apple slices arranged in a decorative pattern
- Pipe rosettes around the top edge using a star tip for an elegant finish
Make-Ahead Options
Busy bakers will appreciate these time-saving strategies:
- Bake and freeze layers: Wrap cooled, unfrosted cake layers in plastic wrap, then foil. Freeze for up to 3 months. Thaw at room temperature before frosting.
- Make caramel base ahead: The cooked caramel (before adding powdered sugar) keeps in the refrigerator for up to 2 weeks. Bring to room temperature before finishing the frosting.
- Frosting storage: Finished caramel frosting can be refrigerated for up to 2 weeks or frozen for 3 months. Bring to room temperature and re-whip before using.
How to Store Caramel Apple Dream Cake: Best Practices
Proper storage keeps your Caramel Apple Dream Cake tasting fresh and delicious for days. Follow these guidelines for the best results.
Refrigeration Guidelines
For short-term storage, place your cake under a cake dome or cover with an overturned bowl. At room temperature in low-humidity conditions, the cake stays fresh for up to 2 days. The caramel frosting creates a protective barrier that helps maintain moisture.
For longer storage, refrigerate your cake in an airtight container. Place a piece of wax paper between the container and the cake to prevent condensation from making the frosting weep. Properly stored, refrigerated cake lasts up to 7 days. Always bring refrigerated cake to room temperature before serving cold cake has muted flavors and a firmer, less pleasant texture.
Freezing Instructions
Freezing is perfect for make-ahead convenience. For unfrosted layers, wrap each cooled layer in plastic wrap, then place in a freezer bag. Remove as much air as possible before sealing. Frozen layers keep for up to 3 months.
For frosted cake, freeze slices individually: wrap each slice in plastic wrap, then foil. Place in a freezer bag for extra protection. Thaw overnight in the refrigerator, then bring to room temperature before enjoying. A slice thawed this way tastes nearly identical to freshly baked cake.
Reheating Tips
While this cake is delicious at room temperature, you can warm individual slices for 10-15 seconds in the microwave. This softens the frosting slightly and makes the cake feel freshly baked. Be careful not to overheat too much time makes the frosting melt and the cake rubbery.
FAQs: Frequently Asked Questions About Caramel Apple Dream Cake
What apples work best in caramel apple dream cake?
For the best texture and flavor in caramel apple dream cake, choose firm apples that hold up during baking without turning mushy. Royal Gala and Fuji apples offer sweetness and tenderness, while Honey Gold provides a balanced tart-sweet profile. Granny Smith adds a crisp tartness that cuts through the caramel richness. Peel and dice them into 1/2-inch pieces for even distribution in the batter. Avoid soft varieties like Red Delicious, as they break down too much. Using 2-3 medium apples (about 2 cups diced) ensures moist results. Prep tip: Toss diced apples in a teaspoon of lemon juice to prevent browning before folding into the batter. This combination mimics classic caramel apple treats perfectly. (92 words)
How do you store caramel apple dream cake?
Store your caramel apple dream cake properly to maintain its moist texture and fresh taste. At room temperature, cover it with a cake dome or inverted bowl for up to 2 days in low-humidity conditions. For longer storage, place slices in an airtight container in the fridge, where it lasts up to 7 days—let it come to room temperature before serving to restore softness. To freeze, wrap individual slices tightly in plastic wrap, then foil or a freezer bag; it keeps for up to 3 months. Thaw overnight in the fridge and bring to room temp. Avoid direct fridge storage without wrapping to prevent drying out. Always check for spoilage before eating. (108 words)
Can you make caramel apple dream cake as cupcakes?
Yes, caramel apple dream cake batter adapts perfectly to cupcakes for easy portioning. Line a standard 12-cup muffin tin with paper liners. Fill each cup about 3/4 full with batter to allow room for rising. Bake at 350°F (175°C) for 15-20 minutes, or until a toothpick inserted in the center comes out clean or with a few moist crumbs. Cool completely in the tin for 10 minutes, then on a wire rack before frosting. This yields 24 cupcakes. The apple chunks and caramel swirl distribute evenly, creating bite-sized treats ideal for parties. Top with the same frosting and caramel-dipped apple slices for a mini dream effect. (104 words)
What’s a good substitute for applesauce in caramel apple dream cake?
If you lack applesauce, use sugar-free applesauce for the same moisture without added sugar, or make a quick homemade version: peel, core, and blend 1 large apple with 1/4 cup water until smooth—yields about 1/2 cup, perfect for the recipe. Other options include mashed ripe banana (1/2 cup for 1/2 cup applesauce) for subtle sweetness, or plain Greek yogurt for tang and creaminess. Avoid oil alone, as it alters the fruity apple flavor central to this cake. These swaps keep the batter tender and dream-like. Measure precisely and mix well to ensure even consistency. Test bake a small batch if substituting multiple times. (102 words)
What pans should I use to bake caramel apple dream cake?
Opt for 2 non-stick 9-inch round cake pans for even baking and easy release of your caramel apple dream cake. Lightly grease and flour them, or line bottoms with parchment for foolproof results. Avoid glass pans, as they heat slowly and unevenly, often leading to raw centers or burnt edges. Metal pans conduct heat better for a golden crust and moist crumb. If stacking layers, ensure pans are the same size and brand for level cakes. Bake at 350°F for 25-30 minutes, rotating halfway. Cool in pans 10 minutes before inverting onto racks. This setup guarantees professional results every time. (98 words)

Caramel Apple Dream Cake
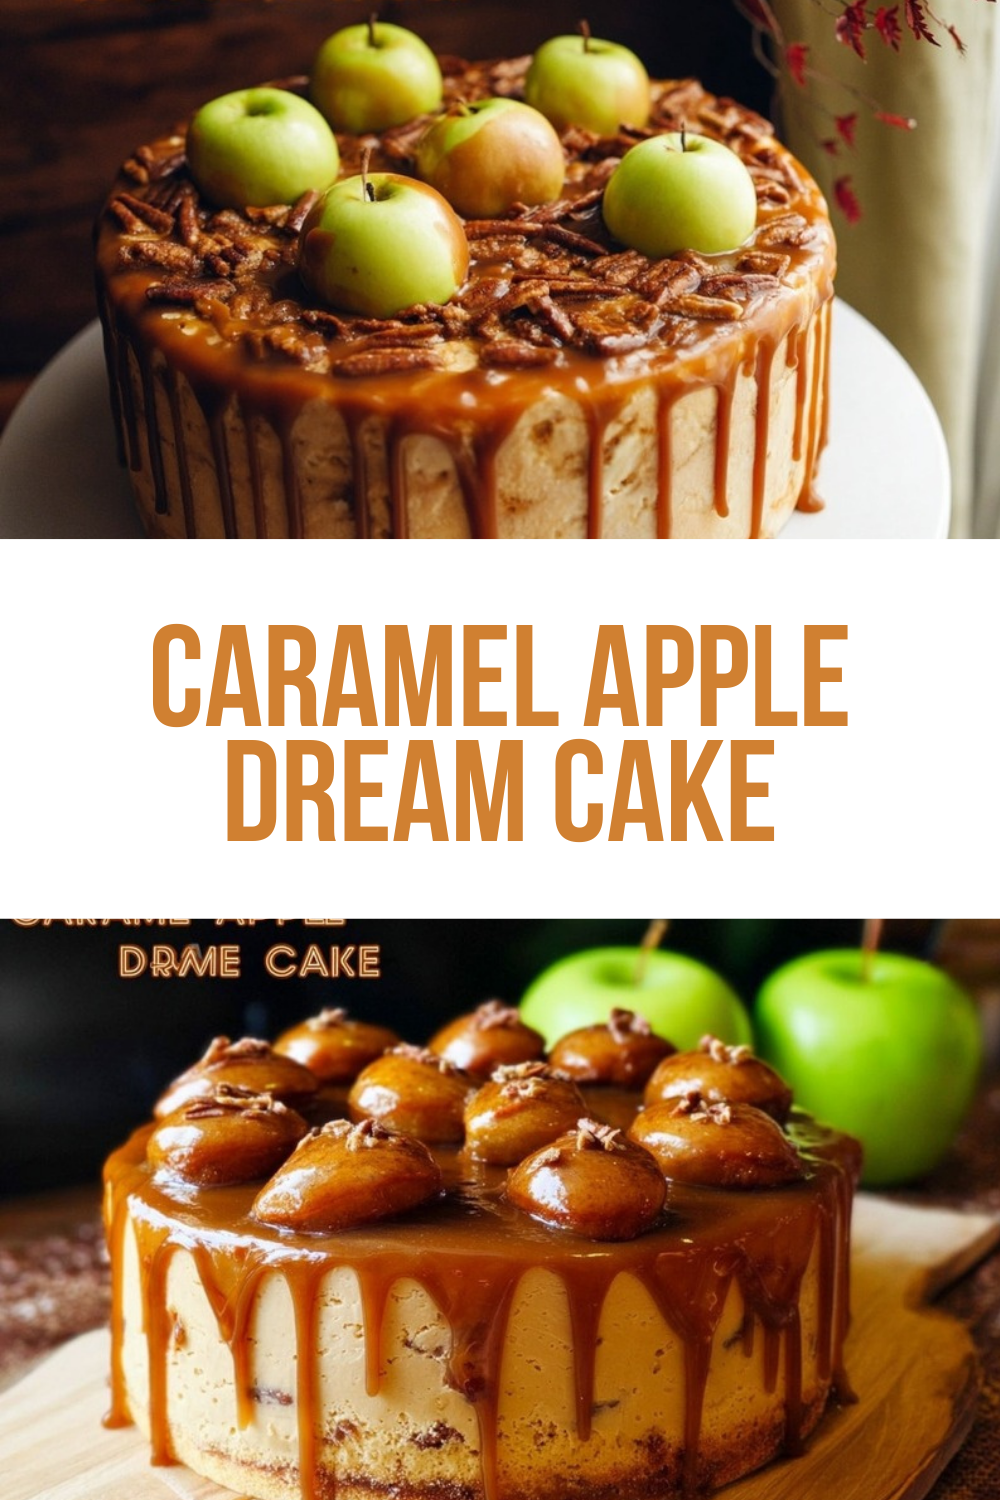
🍎 Revel in moist, spiced apple cake layers crowned with luscious homemade caramel frosting – pure fall indulgence in every bite.
🥮 Make-ahead, freezer-friendly layers make this stunning dessert a breeze for holidays or gatherings!
- Total Time: 1 hour 40 minutes
- Yield: 12 servings
Ingredients
– 3 cups all-purpose flour Provides structure and creates a sturdy yet tender cake base
– 1 tablespoon apple pie spice Infuses the cake with warm cinnamon, nutmeg, and allspice notes
– 1 ½ teaspoons baking soda Acts as the leavening agent for a light, fluffy texture
– ¼ teaspoon kosher salt Balances sweetness and enhances overall flavor
– ¾ cup unsalted butter (room temperature) Creates richness and helps achieve a tender crumb
– 2 ⅛ cups granulated sugar Sweetens the cake and helps retain moisture
– 3 large eggs (room temperature) Bind ingredients together and add structure
– 2 teaspoons pure vanilla extract Adds depth and warmth to the flavor profile
– ½ cup sour cream Contributes tanginess and extra moisture for tenderness
– 4 oz applesauce Keeps the cake moist while reinforcing the apple flavor
– 1 cup whole milk Provides liquid for the batter and creates a soft texture
– 1 cup peeled and shredded apples Fresh apples add texture, moisture, and authentic apple taste
– 1 cup unsalted butter Forms the rich, creamy base of the frosting
– 1 ½ cups packed light brown sugar Creates the signature caramel flavor and golden color
– ⅓ cup heavy cream Adds richness and helps achieve spreadable consistency
– 1 teaspoon vanilla extract Enhances the caramel notes with warm undertones
– ¼ teaspoon kosher salt Balances the sweetness and brings out caramel complexity
– 4 to 5 cups powdered sugar Sweetens and thickens the frosting to pipeable consistency
– Caramel apples Decorative garnish for special occasions
– Chopped pecans Adds crunch and nutty flavor contrast
Instructions
1-Step 1: Prepare Your Equipment and Ingredients Start by preheating your oven to 300°F (135°C). While it heats, grease and flour three 8-inch round cake pans. If you want foolproof release, line the bottoms with parchment paper circles. Using non-stick pans makes this process even easier and helps your layers release cleanly. Before you begin mixing, measure all your ingredients. Room temperature ingredients are crucial cold butter won’t cream properly, and cold eggs can cause the batter to curdle. If your butter is cold from the fridge, soften it using 5-second microwave bursts, flipping it between each burst until pliable but not melted.
2-Step 2: Mix the Dry Ingredients In a medium bowl, whisk together the 3 cups all-purpose flour, 1 tablespoon apple pie spice, 1 ½ teaspoons baking soda, and ¼ teaspoon kosher salt. This step ensures even distribution of the leavening agent and spices throughout the flour. Set this bowl aside while you prepare the wet ingredients.
3-Step 3: Cream Butter and Sugar In a large mixing bowl or stand mixer, combine ¾ cup unsalted butter (room temperature) with 2 ⅛ cups granulated sugar. Beat on medium-high speed until the mixture becomes light and fluffy about 3 to 5 minutes. This aeration creates pockets of air that help the cake rise properly. Whip the butter until it turns pale for the best texture.
4-Step 4: Add Eggs and Wet Ingredients With the mixer on medium speed, beat in the 3 large eggs one at a time, allowing each to incorporate fully before adding the next. This gradual addition prevents the batter from separating. Next, stir in 2 teaspoons pure vanilla extract, ½ cup sour cream, and 4 oz applesauce. Mix until smooth and homogeneous.
5-Step 5: Combine Wet and Dry Ingredients Now comes the crucial step that determines your cake’s texture. Alternate adding the dry ingredient mixture and 1 cup whole milk to your batter. Start and end with the dry ingredients add about one-third of the flour mixture, then half the milk, then another third of flour, the remaining milk, and finally the last of the flour. Mix on low speed just until combined. Overmixing develops gluten and creates a tough, dense cake. Gently fold in 1 cup peeled and shredded apples using a spatula. Distribute them evenly throughout the batter without overworking it. The shredded apples add moisture and create those lovely pockets of apple flavor in every slice.
6-Step 6: Bake the Cake Layers Divide the batter evenly among your three prepared pans. Use a kitchen scale for precision, or simply eyeball equal portions if you prefer. Smooth the tops with an offset spatula for even layers. Bake at 300°F (135°C) for 35-40 minutes. The lower temperature ensures even baking without over-browning the edges. Your cake is done when a toothpick inserted into the center comes out clean or with just a few moist crumbs attached. Let the cakes cool in their pans for about 10 minutes, then invert them onto wire racks to cool completely. Patience is key here frosting a warm cake will cause the buttercream to melt and slide right off.
7-Step 7: Make the Caramel Frosting While the cakes cool, prepare your showstopping caramel frosting. This recipe creates a rich, buttery frosting with deep caramel flavor. According to nutritional data on caramel, brown sugar caramel provides a distinctive flavor profile that pairs wonderfully with spiced cakes. Melt 1 cup unsalted butter in a medium saucepan over medium heat. Add 1 ½ cups packed light brown sugar and ⅓ cup heavy cream, whisking constantly until the sugar dissolves completely. Add ¼ teaspoon kosher salt to balance the sweetness. Bring the mixture to a gentle bubble and continue whisking for 2 minutes. The caramel should thicken slightly and take on a deeper golden color. Remove from heat and stir in 1 teaspoon vanilla extract. Let this caramel base cool completely rushing this step will melt your powdered sugar and create a runny frosting. Once cooled, transfer the caramel to a mixing bowl. With your mixer on low speed, gradually add 3 cups powdered sugar. Once incorporated, increase speed to medium and beat until creamy. If the frosting is too thick, add more powdered sugar. If it’s too stiff, thin with small amounts of heavy cream. The goal is a spreadable, pipeable consistency that holds its shape.
8-Step 8: Assemble and Decorate Place your first completely cooled cake layer on a serving plate or cake board. Spread a generous layer of caramel frosting over the top. Repeat with the second and third layers. Apply a thin crumb coat to the entire cake and refrigerate for 15 minutes to set. Then add your final layer of frosting for a clean, professional finish. For decorating options, consider these beautiful presentations:* Classic layer cake: Smooth frosting between layers and on top and sides* Naked style: Minimal frosting on sides, showing the cake layers, topped with chopped pecans* Caramel drip: Let caramel sauce drip down the sides before adding piped frosting details* Party perfect: Pipe swirls on top and garnish with caramel apple wedges
Notes
🍎 Shred apples finely and pat dry to avoid excess moisture in the batter.
🧈 Whip butter and sugar pale and fluffy for the lightest cake texture.
❄️ Bake and freeze unfrosted layers up to 3 months ahead for easy assembly.
- Prep Time: 15 minutes
- Cooling: 1 hour
- Cook Time: 35-40 minutes
- Category: Dessert
- Method: Baking
- Cuisine: American
- Diet: Vegetarian
Nutrition
- Serving Size: 1 slice
- Calories: 843
- Sugar: 105g
- Sodium: 278mg
- Fat: 35g
- Saturated Fat: 21g
- Unsaturated Fat: 11g
- Trans Fat: 1g
- Carbohydrates: 131g
- Fiber: 1g
- Protein: 6g
- Cholesterol: 136mg


