
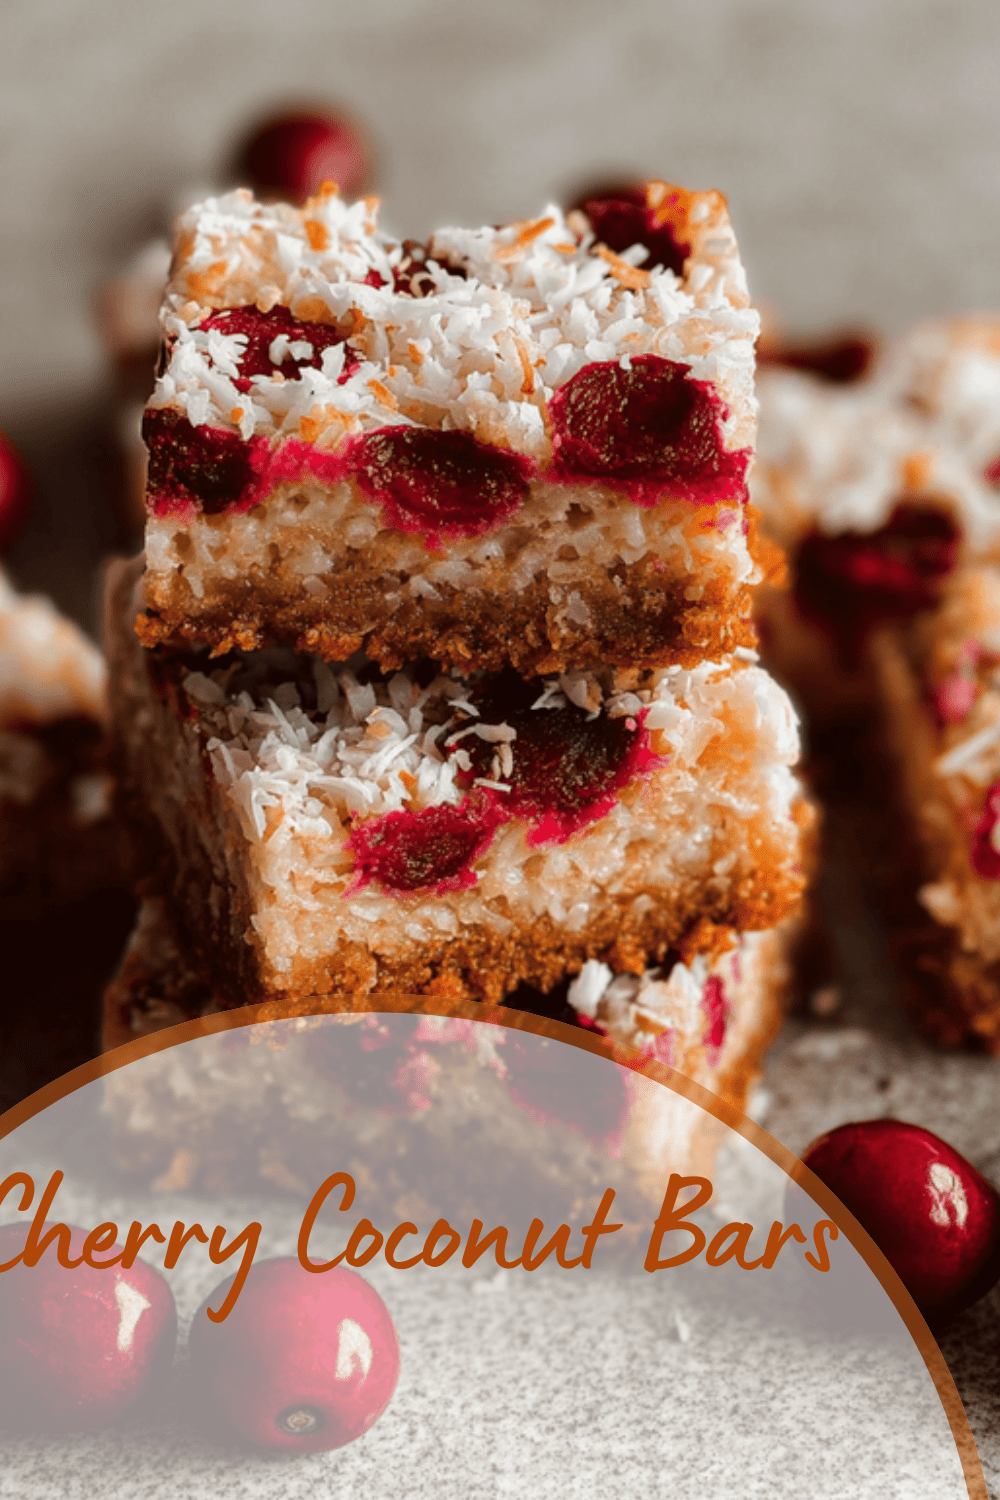
Why You’ll Love This Cherry Coconut Bars
Imagine baking something that brings back warm family gatherings and simple joys of the kitchen these Cherry Coconut Bars do just that. They’re a breeze to whip up on a weekday evening, using everyday ingredients that turn into a treat everyone reaches for. Whether you’re a busy parent needing a quick dessert or a baking enthusiast craving something nostalgic, this recipe fits right in.
One big plus is how packed with goodness these bars are, thanks to cherries and coconut that add vitamins and healthy fats. You can tweak them for different diets, making them a hit for all kinds of folks from students to seniors. Plus, the mix of tart cherries and sweet coconut creates a flavor that’ll make you come back for more, turning any day into a special occasion.
To get started, consider how these bars offer a fun twist on classic desserts. They’re not just tasty they’re also flexible for adding your own touches, which we’ll cover later. If you enjoy other easy bakes, check out our carrot cake cheesecake bars recipe for more ideas that mix flavors just as well.
Key Benefits and Ease
These cherry coconut bars come together in no time, making them ideal for busy schedules. The simple steps mean even newcomers to baking can succeed without stress. They provide a nutritious snack option that supports daily wellness through natural ingredients.
Beyond taste, the bars adapt to various needs, like vegan or gluten-free options, so everyone at the table feels included. This recipe holds a special place for its ability to create memorable moments, much like sharing stories over coffee.
Jump To
- 1. Why You’ll Love This Cherry Coconut Bars
- 2. Essential Ingredients for Cherry Coconut Bars
- 3. How to Prepare the Perfect Cherry Coconut Bars: Step-by-Step Guide
- 4. Dietary Substitutions to Customize Your Cherry Coconut Bars
- 5. Mastering Cherry Coconut Bars: Advanced Tips and Variations
- 6. How to Store Cherry Coconut Bars: Best Practices
- 7. FAQs: Frequently Asked Questions About Cherry Coconut Bars
- 8. Cherry Coconut Bars
Essential Ingredients for Cherry Coconut Bars
Gathering the right ingredients is the first step to making these delightful Cherry Coconut Bars. Below is a complete list based on the traditional recipe, ensuring you have everything needed for both the base and the topping. I’ll break it down clearly so you can follow along easily.
Shortbread Base Ingredients
- 1 cup sifted flour
- 1/2 cup butter, room temperature
- 3 tbsp icing sugar
Topping Ingredients
- 2 eggs, slightly beaten
- 1 cup granulated cane sugar
- 1/4 cup flour
- 1/4 tsp salt
- 1/2 tsp baking powder
- 1 tsp pure vanilla extract
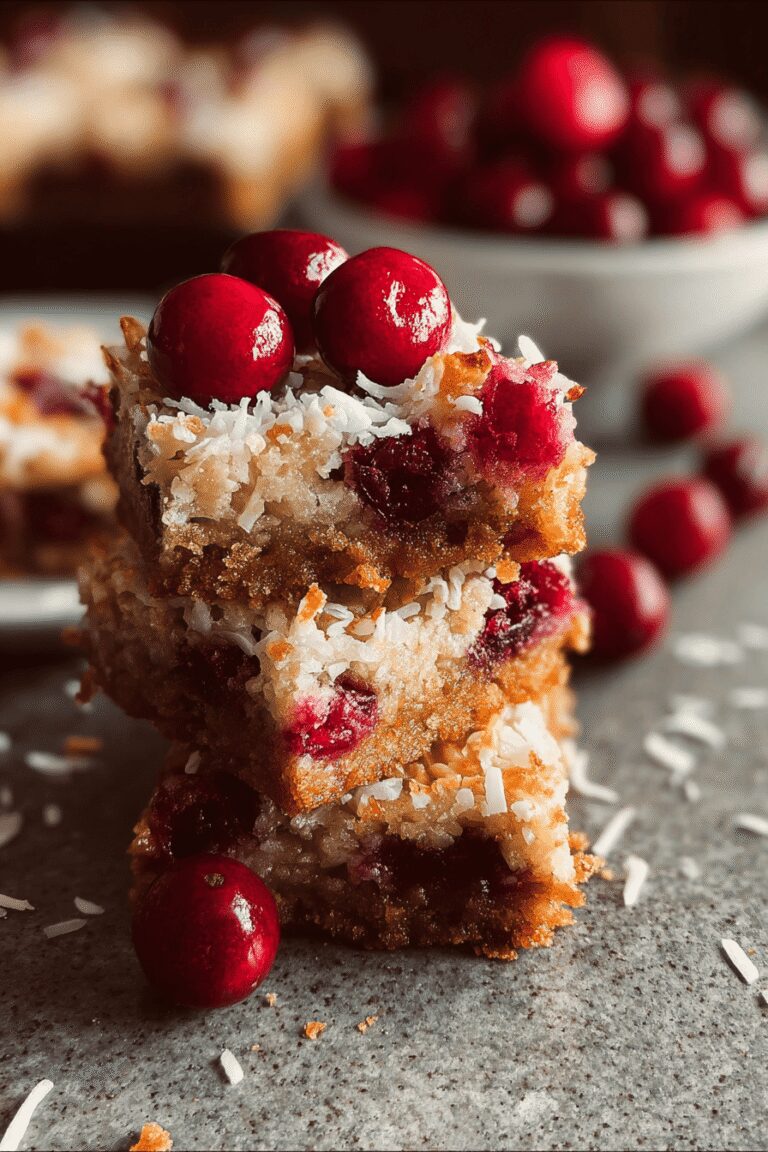
- 1 cup shredded unsweetened coconut
- 1/2 cup chopped maraschino cherries
- 3/4 cup chopped walnuts
This list covers all the essentials for a full batch. Using unsweetened coconut helps balance the sweetness, as noted in the recipe tips. For more on how coconut adds nutrition, visit coconut nutrition facts to see why it’s a smart choice.
How to Prepare the Perfect Cherry Coconut Bars: Step-by-Step Guide
Let’s dive into the fun part making these Cherry Coconut Bars from scratch. Start by setting up your kitchen, and you’ll have fresh bars ready in under an hour. This guide uses the exact directions from the recipe, so follow along for the best results.
Preheat and Prepare the Pan
First, heat your oven to 350º F and grease a 9” x 9” pan. You can also line it with parchment paper and grease it again for easy cleanup. This step ensures your bars come out without sticking.
Next, for the base, mix 1 cup sifted flour, 1/2 cup butter (room temperature), and 3 tbsp icing sugar until it forms a smooth dough. Press this mixture evenly into the pan and bake it for about 15 minutes, until it’s set and lightly golden.
Mix and Bake the Topping
Now, for the topping, stir 2 eggs (slightly beaten) with 1 cup granulated cane sugar, 1/4 cup flour, 1/4 tsp salt, 1/2 tsp baking powder, 1 tsp pure vanilla extract, 1 cup shredded unsweetened coconut, 1/2 cup chopped maraschino cherries, and 3/4 cup chopped walnuts. Spread this over the baked base.
Bake for another 22 to 25 minutes, or until the top turns lightly browned. Let the bars cool completely in the pan before cutting them into squares. This simple process, with a total prep time of about 20 minutes and baking time of around 40 minutes, makes it perfect for any day.
To enhance your baking skills, try our Biscoff millionaires traybake recipe, which offers similar layered treats with a sweet twist.

Dietary Substitutions to Customize Your Cherry Coconut Bars
One of the best things about Cherry Coconut Bars is how easy they are to adapt. Whether you’re watching your diet or trying new flavors, these tweaks keep the bars delicious. Let’s look at some simple changes based on the recipe’s tips.
Options for Different Needs
- Replace almond flour with sunflower seed flour for a nut-free version, keeping the base gluten-free.
- Use chia seeds soaked in water as an egg substitute to make it vegan-friendly.
- Swap coconut oil with avocado oil to lower saturated fats while maintaining moisture.
For added veggies, mix in grated zucchini or carrot to boost fiber. You can also try cinnamon or nutmeg for a warm spice, or switch sweeteners like agave nectar for a different taste.
| Original Ingredient | Substitution Option | Why It Works |
|---|---|---|
| Granulated cane sugar | Three-quarters of a cup for less sweetness | Reduces overall sugar while keeping the bars tasty |
| Shredded unsweetened coconut | Toasted coconut flakes | Enhances flavor without extra sweetness |
| Maraschino cherries | Liquor-soaked cherries | Avoids artificial dyes and adds a festive touch |
These changes make the bars versatile for everyone, from working professionals to food enthusiasts.
Mastering Cherry Coconut Bars: Advanced Tips and Variations
Once you’re comfortable with the basics, take your Cherry Coconut Bars to the next level with these pro tips. This recipe, passed down through generations, offers plenty of room for creativity and fun tweaks.
Enhance Flavor and Texture
Toast the shredded coconut lightly before mixing it in to bring out a deeper, nuttier taste that makes each bite more enjoyable. For variations, add orange zest or chopped nuts like pistachios to mix things up.
Serve your bars chilled with a light dusting of powdered sugar or a drizzle of dark chocolate for an elegant presentation. If you’re planning ahead, prepare the dough the night before and refrigerate it to let flavors meld this is great for busy days.
This recipe reminds me of holiday trays from my childhood, where simple bakes brought the family together for laughter and stories.
Experiment with different cherries or cut the sugar for your preferences, just as shared in the tips. It’s all about making it your own while keeping that nostalgic charm.
How to Store Cherry Coconut Bars: Best Practices
Keeping your Cherry Coconut Bars fresh is key to enjoying them longer. With the right storage, these treats stay moist and flavorful for days. Let’s break down the best ways to handle them based on the recipe advice.
Simple Storage Methods
- Keep bars in an airtight container in the fridge for up to one week to maintain their chewy texture.
- Wrap them individually and freeze for up to three months in a freezer-safe bag for easy grab-and-go snacks.
- Thaw frozen bars at room temperature and warm them slightly in the oven if you want that fresh-baked feel.
This approach works well for meal prep, helping busy parents or professionals have healthy options ready. For more on crust techniques, check out shortbread cookie crust ideas that pair nicely with this recipe.
FAQs: Frequently Asked Questions About Cherry Coconut Bars
What ingredients do I need to make Cherry Coconut Bars?
To make Cherry Coconut Bars, you will typically need dried cherries, shredded coconut, all-purpose flour, sugar, butter, eggs, baking powder, and vanilla extract. Some recipes also call for almond flour or chopped nuts for added texture. Using quality dried cherries and unsweetened shredded coconut will deliver the best flavor. Butter should be softened to blend smoothly with the dry ingredients. These basic components combine to create a chewy and flavorful bar perfect for snacks or desserts.
How do I store Cherry Coconut Bars to keep them fresh?
Store Cherry Coconut Bars in an airtight container at room temperature for up to 3 days. To extend freshness, keep them refrigerated for up to one week or freeze them for up to 3 months. When freezing, wrap each bar individually in plastic wrap and place them in a freezer-safe bag to prevent freezer burn. Before serving, let frozen bars thaw at room temperature for about 30 minutes. Proper storage helps maintain their chewy texture and flavor.
Can Cherry Coconut Bars be made gluten-free?
Yes, Cherry Coconut Bars can be made gluten-free by substituting regular flour with a gluten-free all-purpose flour blend. Ensure that all ingredients, including baking powder and dried cherries, are certified gluten-free. Almond flour or oat flour are good alternatives that add extra moisture and flavor. Adjust baking time slightly as gluten-free flours sometimes bake faster or slower, checking for a golden crust on top.
How long does it take to make Cherry Coconut Bars from start to finish?
Making Cherry Coconut Bars usually takes about 10 to 15 minutes for preparation and 25 to 30 minutes for baking. Cooling time after baking is typically 20 to 30 minutes before slicing and serving. Overall, you should expect around 45 to 60 minutes from start to finish. Using a food processor to mix ingredients can speed up preparation. The bars are a quick and easy recipe ideal for last-minute treats or meal prep.
What are some ways to customize Cherry Coconut Bars?
You can customize Cherry Coconut Bars by adding chocolate chips, chopped nuts like walnuts or pecans, or swapping dried cherries with dried cranberries or blueberries. For a tropical twist, replace shredded coconut with toasted coconut flakes. Adding a sprinkle of sea salt or a drizzle of melted dark chocolate on top adds flavor contrast. These simple changes let you tailor the bars to your taste preferences while keeping the basic chewy texture intact.
Cherry Coconut Bars
🍒 Cherry Coconut Bars combine sweet and tangy flavors with a crunchy, buttery shortbread base for a delightful treat.
🥥 These bars are easy to prepare, perfect for holiday trays or everyday indulgence, with nostalgic and customizable appeal.
- Total Time: 60 minutes
- Yield: 16 bars
Ingredients
– 1 cup sifted flour
– 1/2 cup butter, room temperature
– 3 tbsp icing sugar
– 2 eggs, slightly beaten
– 1 cup granulated cane sugar
– 1/4 cup flour
– 1/4 tsp salt
– 1/2 tsp baking powder
– 1 tsp pure vanilla extract
– 1 cup shredded unsweetened coconut
– 1/2 cup chopped maraschino cherries
– 3/4 cup chopped walnuts
Instructions
1-Preheat and Prepare the Pan: First, heat your oven to 350º F and grease a 9” x 9” pan. You can also line it with parchment paper and grease it again for easy cleanup. This step ensures your bars come out without sticking.
2-Preheat and Prepare the Pan: Next, for the base, mix 1 cup sifted flour, 1/2 cup butter (room temperature), and 3 tbsp icing sugar until it forms a smooth dough. Press this mixture evenly into the pan and bake it for about 15 minutes, until it’s set and lightly golden.
3-Mix and Bake the Topping: Now, for the topping, stir 2 eggs (slightly beaten) with 1 cup granulated cane sugar, 1/4 cup flour, 1/4 tsp salt, 1/2 tsp baking powder, 1 tsp pure vanilla extract, 1 cup shredded unsweetened coconut, 1/2 cup chopped maraschino cherries, and 3/4 cup chopped walnuts. Spread this over the baked base.
4-Mix and Bake the Topping: Bake for another 22 to 25 minutes, or until the top turns lightly browned. Let the bars cool completely in the pan before cutting them into squares. This simple process, with a total prep time of about 20 minutes and baking time of around 40 minutes, makes it perfect for any day.
Notes
🍬 Using unsweetened coconut helps control overall sweetness.
🍒 Maraschino cherries add festive color; consider liquor-soaked cherries as a natural alternative.
📜 Lining the pan with parchment paper and greasing makes it easier to remove bars cleanly.
- Prep Time: 20 minutes
- Cook Time: 40 minutes
- Category: Dessert
- Method: Baking
- Cuisine: American
Nutrition
- Serving Size: 1 bar


