
Why You’ll Love This Chocolate Hedgehog Slice
If you need a Chocolate Hedgehog Slice that is quick, no bake, and always a crowd-pleaser, this recipe is a great one to keep on repeat. It has the kind of simple ingredients most home cooks already know and love, plus it comes together with very little fuss. Since it sets in the fridge, it is a smart choice for busy days, lunch boxes, bake sales, and last-minute dessert cravings.
- Easy to make: This Hedgehog Slice comes together in about 15 minutes of hands-on prep, then the fridge does the rest. No oven needed, which makes it perfect for warm days or packed schedules.
- Great texture and flavor: The mix of crunchy biscuits, walnuts, coconut, and smooth chocolate gives every bite a satisfying balance of soft, crisp, and creamy.
- Flexible for different diets: You can swap in graham crackers, choose unsweetened coconut, or make a nut-free version with raisins or extra coconut.
- Good for sharing: This No Bake Chocolate Biscuit Treat cuts into neat squares and travels well, which makes it ideal for potlucks, picnics, and after-school snacks.
When you want a treat that feels homemade without taking over your whole day, this Easy Chocolate Hedgehog Slice is a reliable win.
With a rich chocolate topping and a fudgy biscuit base, this Chocolate Biscuit Slice has classic comfort dessert energy. It is the sort of recipe that works for home cooks, students, working professionals, and anyone who wants a sweet treat without complicated steps.
If you enjoy easy no bake sweets, you may also like this salted caramel popcorn recipe for another simple snack idea.
Jump To
- 1. Why You’ll Love This Chocolate Hedgehog Slice
- 2. Essential Ingredients for Chocolate Hedgehog Slice
- 3. How to Prepare the Perfect Chocolate Hedgehog Slice: Step-by-Step Guide
- 4. Dietary Substitutions to Customize Your Chocolate Hedgehog Slice
- 5. Mastering Chocolate Hedgehog Slice: Advanced Tips and Variations
- 6. How to Store Chocolate Hedgehog Slice: Best Practices
- 7. FAQs: Frequently Asked Questions About Chocolate Hedgehog Slice
- 8. Chocolate Hedgehog Slice
Essential Ingredients for Chocolate Hedgehog Slice
Here is everything you need for this Chocolate Hedgehog Slice Recipe. The ingredients are listed clearly so you can prep quickly and avoid missing anything.
Main Ingredients
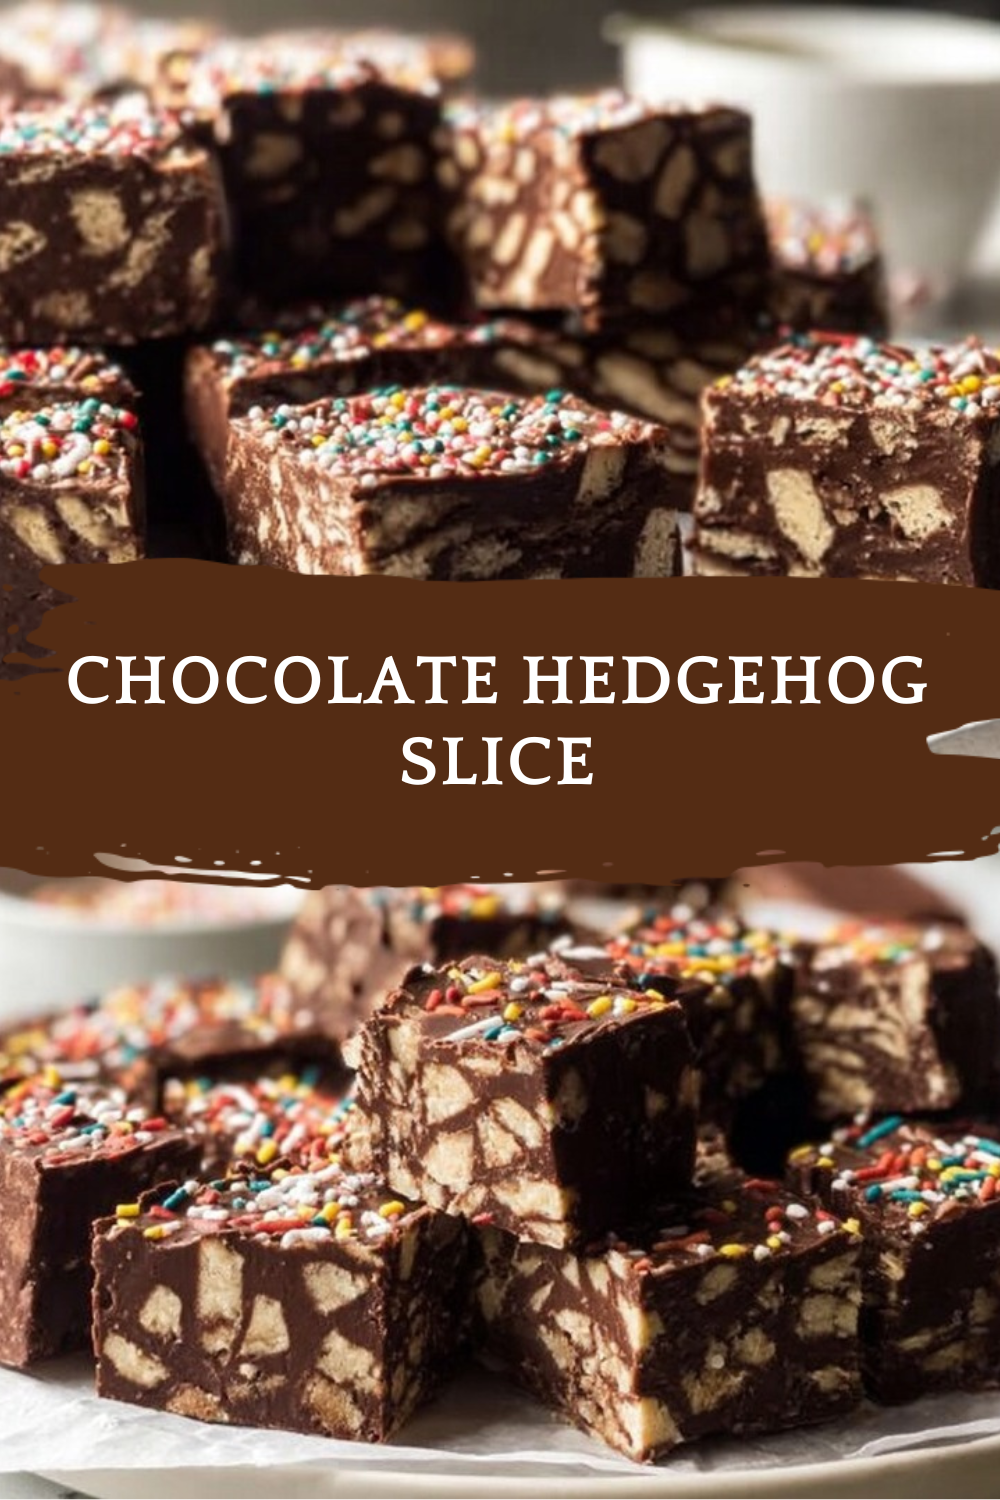
- 250 grams digestive biscuits (about 17 biscuits or 9 ounces) – These form the crunchy base and give the slice its classic texture.
- 1/2 cup chopped walnuts (65 grams) – Walnuts add crunch and a mild nutty flavor.
- 1/2 cup desiccated coconut (50 grams) – Coconut adds sweetness, texture, and helps bind the slice.
- 85 grams unsalted butter (6 tablespoons) – Butter creates richness and helps the base come together smoothly.
- 3 tablespoons cocoa powder – Cocoa deepens the chocolate flavor in the base.
- 1 x 395 gram tin sweetened condensed milk (14 ounces can) – This is the sweet, sticky binder that holds everything together.
- 250 grams dark chocolate (9 ounces) – Dark chocolate adds a rich, bold layer to the base mixture.
- 150 grams milk chocolate (5.3 ounces) – Milk chocolate makes the topping smooth, sweet, and easy to slice.
- 2 teaspoons vegetable oil – Oil helps the topping spread well and reduces cracking when cutting.
Special Dietary Options
- Vegan: Use vegan butter, dairy-free condensed milk, and dairy-free chocolate. Check the biscuits too, since some brands contain milk ingredients.
- Gluten-free: Swap the digestive biscuits for gluten-free biscuits or gluten-free graham-style crackers.
- Low-calorie: Use a lighter chocolate topping, reduce the amount of topping slightly, or cut smaller squares for portion control.
If you love creamy chilled desserts, you might also enjoy this silky lemon cream treat for a bright, refreshing finish after dinner.
How to Prepare the Perfect Chocolate Hedgehog Slice: Step-by-Step Guide
First Step: Prepare the pan and ingredients
Line a slice pan measuring 18×28 cm, 20×20 cm, or 8×8 inch with parchment paper, leaving an overhang on the sides. The overhang makes it much easier to lift the slice out later. Then gather all ingredients so everything is ready before you start melting.
Second Step: Break the biscuits and mix the dry ingredients
Break the 250 grams digestive biscuits by hand into a mix of pieces and crumbs. Do not crush them too finely, since a few larger bits give the slice more crunch. Place the biscuits in a large bowl, then add the chopped walnuts and desiccated coconut. Stir gently so the dry ingredients are evenly combined.
Third Step: Melt the chocolate base
Set a saucepan over low heat and add the butter, cocoa powder, sweetened condensed milk, and dark chocolate. Stir slowly and keep the heat low so the mixture melts without scorching. Once everything is smooth and glossy, remove it from the heat.
Low heat matters here. A gentle melt keeps the chocolate smooth and helps the final slice taste rich instead of grainy.
Fourth Step: Combine the wet and dry mixtures
Pour the melted chocolate mixture over the biscuit, walnut, and coconut mixture. Stir well until every piece is coated. Work quickly but carefully, since the mixture will start thickening as it cools.
Fifth Step: Press into the pan and chill
Spoon the mixture into the prepared pan and press it down firmly with the back of a spoon or spatula. A compact base helps the slice hold together when cut. Place the pan in the fridge for 30 minutes so the base can firm up before the topping goes on.
Sixth Step: Melt the milk chocolate topping
Put the milk chocolate in a microwave-safe bowl and heat it in 30-second intervals on medium power. Stir between bursts so it melts evenly. When the chocolate is just melted, stir in the 2 teaspoons vegetable oil until smooth and shiny.
Seventh Step: Spread the topping and chill again
Pour the melted milk chocolate over the chilled base and spread it evenly to the edges. Return the pan to the fridge for 1 to 2 hours, or until the topping is set. If you want cleaner slices, score the top with a knife when the chocolate is about 75 percent hardened.
Final Step: Slice and serve
Once the slice is firm, lift it out using the parchment overhang. Cut it into 16 pieces with a sharp knife. For the cleanest cuts, avoid slicing while the chocolate is very cold, since cold chocolate can crack. Let it sit for a few minutes at room temperature if needed.
| Recipe Detail | Amount |
|---|---|
| Prep time | 15 minutes |
| Chilling time | 2 hours |
| Total time | 2 hours 15 minutes |
| Servings | 16 pieces |
| Calories per serving | 293 kcal |

Dietary Substitutions to Customize Your Chocolate Hedgehog Slice
Protein and Main Component Alternatives
Even though this is a dessert, there are plenty of simple ways to adjust the main mix to fit your pantry or dietary needs. If you do not have digestive biscuits, graham crackers work well and give a similar crumbly texture. You can also swap walnuts for pecans or hazelnuts if that is what you have on hand.
For a nut-free version, replace the nuts with 1/2 cup raisins. Another option is to increase the coconut to 3/4 cup and the digestive biscuits to 300 grams. That gives you a fuller slice without relying on nuts at all.
Vegetable, Sauce, and Seasoning Modifications
There are also a few easy swaps for the coating and flavor balance. Use unsweetened desiccated coconut if you want less sweetness, or use sweetened coconut for a softer dessert-style finish. If you want a sweeter variation, white chocolate works nicely in place of milk chocolate on top.
A small amount of oil in the melted topping helps keep the surface smooth and easier to cut. If you want extra crunch, leave some biscuit pieces larger instead of crushing everything too fine. That simple trick gives the slice more character and a better bite.
Mastering Chocolate Hedgehog Slice: Advanced Tips and Variations
Pro cooking techniques
The best Easy No Bake Hedgehog Slice starts with texture. Keep some biscuit pieces bigger so the slice is not too dense. When melting the chocolate, stay patient and use low heat or short microwave bursts, since overheated chocolate can seize or turn dull.
Another smart tip is to line the pan well and leave extra parchment hanging over the sides. This makes lifting the chilled slab out much easier. When the topping is about 75 percent set, score it lightly with a knife. That little step helps you get neat squares without cracking the chocolate layer later.
Flavor variations
If you want to change things up, there are a few easy paths to take. Use dark chocolate on top for a more intense flavor, or white chocolate for a sweeter, creamier result. You can also add a handful of dried cherries, cranberries, or chopped dried apricots for a fruity twist.
For a deeper nut flavor, try toasted hazelnuts or pecans. If you like a more tropical feel, use unsweetened coconut and a little extra biscuit crunch. These small changes keep the recipe familiar while giving it a fresh angle.
Presentation tips
For a tidy look, wipe your knife between cuts and slice when the chocolate is set but not rock hard. You can also line the pieces on a serving plate with a light dusting of cocoa powder around the edges for a bakery-style finish. If you are serving guests, place each square in a paper candy liner for a neat presentation.
This slice also pairs nicely with coffee, tea, or a glass of cold milk. If you are planning a dessert table, serve it beside fresh fruit or a lighter option like chocolate-covered strawberries for a pretty mix of textures.
Make-ahead options
This is one of the easiest desserts to make ahead because it holds well in the fridge. You can prepare it a day in advance and slice it before serving, or keep the slab whole and cut it when needed. That makes it especially useful for parties, lunch boxes, and holiday trays.
How to Store Chocolate Hedgehog Slice: Best Practices
Refrigeration
Store the slice in an airtight container in the fridge for up to one week. If stacking pieces, place parchment paper between the layers to stop them from sticking together. The chilled texture is part of what makes this No Bake Slice so satisfying.
Freezing
You can freeze individual pieces or a whole slab for longer storage. Wrap the pieces well in parchment and place them in a freezer-safe container. Frozen slices keep well for about one month. Thaw them in the fridge before serving for the best texture.
Reheating
This recipe does not need reheating, since it is meant to be served chilled or at cool room temperature. If the slice is very firm straight from the fridge, let it sit out for 5 to 10 minutes before cutting and serving. That helps prevent the chocolate top from cracking.
Meal prep considerations
If you like to prep snacks for the week, this recipe is a great fit. Cut the slice into 16 pieces and store them in small containers for grab-and-go treats. It is an easy way to keep dessert portions manageable while still having something sweet on hand.
FAQs: Frequently Asked Questions About Chocolate Hedgehog Slice
Print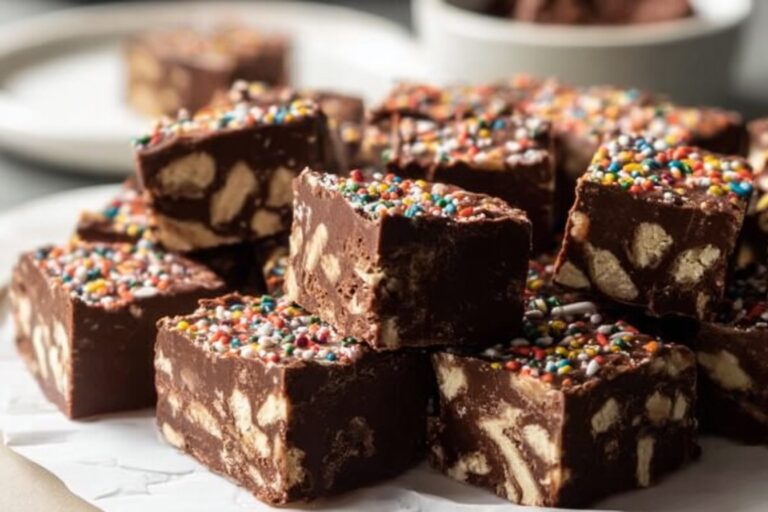
Chocolate Hedgehog Slice
🍫🦔 No-bake hedgehog slice packs crunchy biscuits, walnuts, coconut into fudgy chocolate bliss – effortless sweet treat kids/adults devour.
🍪 15-min prep chills into 16 shareable squares; nut-free adaptable, stores weeks for parties or lunchbox wins.
- Total Time: 2 hours 15 minutes
- Yield: 16 pieces
Ingredients
– 250 grams digestive biscuits
– 1/2 cup chopped walnuts
– 1/2 cup desiccated coconut
– 85 grams unsalted butter
– 3 tablespoons cocoa powder
– 1 x 395 gram tin sweetened condensed milk
– 250 grams dark chocolate
– 150 grams milk chocolate
– 2 teaspoons vegetable oil
Instructions
1-First Step: Prepare the pan and ingredients Line a slice pan measuring 18×28 cm, 20×20 cm, or 8×8 inch with parchment paper, leaving an overhang on the sides. The overhang makes it much easier to lift the slice out later. Then gather all ingredients so everything is ready before you start melting.
2-Second Step: Break the biscuits and mix the dry ingredients Break the 250 grams digestive biscuits by hand into a mix of pieces and crumbs. Do not crush them too finely, since a few larger bits give the slice more crunch. Place the biscuits in a large bowl, then add the chopped walnuts and desiccated coconut. Stir gently so the dry ingredients are evenly combined.
3-Third Step: Melt the chocolate base Set a saucepan over low heat and add the butter, cocoa powder, sweetened condensed milk, and dark chocolate. Stir slowly and keep the heat low so the mixture melts without scorching. Once everything is smooth and glossy, remove it from the heat.
4-Fourth Step: Combine the wet and dry mixtures Pour the melted chocolate mixture over the biscuit, walnut, and coconut mixture. Stir well until every piece is coated. Work quickly but carefully, since the mixture will start thickening as it cools.
5-Fifth Step: Press into the pan and chill Spoon the mixture into the prepared pan and press it down firmly with the back of a spoon or spatula. A compact base helps the slice hold together when cut. Place the pan in the fridge for 30 minutes so the base can firm up before the topping goes on.
6-Sixth Step: Melt the milk chocolate topping Put the milk chocolate in a microwave-safe bowl and heat it in 30-second intervals on medium power. Stir between bursts so it melts evenly. When the chocolate is just melted, stir in the 2 teaspoons vegetable oil until smooth and shiny.
7-Seventh Step: Spread the topping and chill again Pour the melted milk chocolate over the chilled base and spread it evenly to the edges. Return the pan to the fridge for 1 to 2 hours, or until the topping is set. If you want cleaner slices, score the top with a knife when the chocolate is about 75 percent hardened.
8-Final Step: Slice and serve Once the slice is firm, lift it out using the parchment overhang. Cut it into 16 pieces with a sharp knife. For the cleanest cuts, avoid slicing while the chocolate is very cold, since cold chocolate can crack. Let it sit for a few minutes at room temperature if needed.
Notes
🔪 Keep larger biscuit chunks for texture; hand-break for variety.
🛢️ Oil in topping chocolate prevents cracking on cut.
❄️ Score semi-set chocolate; cut at room temp to avoid snaps.
- Prep Time: 15 minutes
- Chill: 2 hours
- Category: Dessert
- Method: No-Bake
- Cuisine: Australian
- Diet: Vegetarian
Nutrition
- Serving Size: 1 piece
- Calories: 293
- Sugar: 14g
- Sodium: 81mg
- Fat: 20g
- Saturated Fat: 11g
- Unsaturated Fat: 9g
- Trans Fat: 0g
- Carbohydrates: 27g
- Fiber: 4g
- Protein: 4g
- Cholesterol: 12mg


