
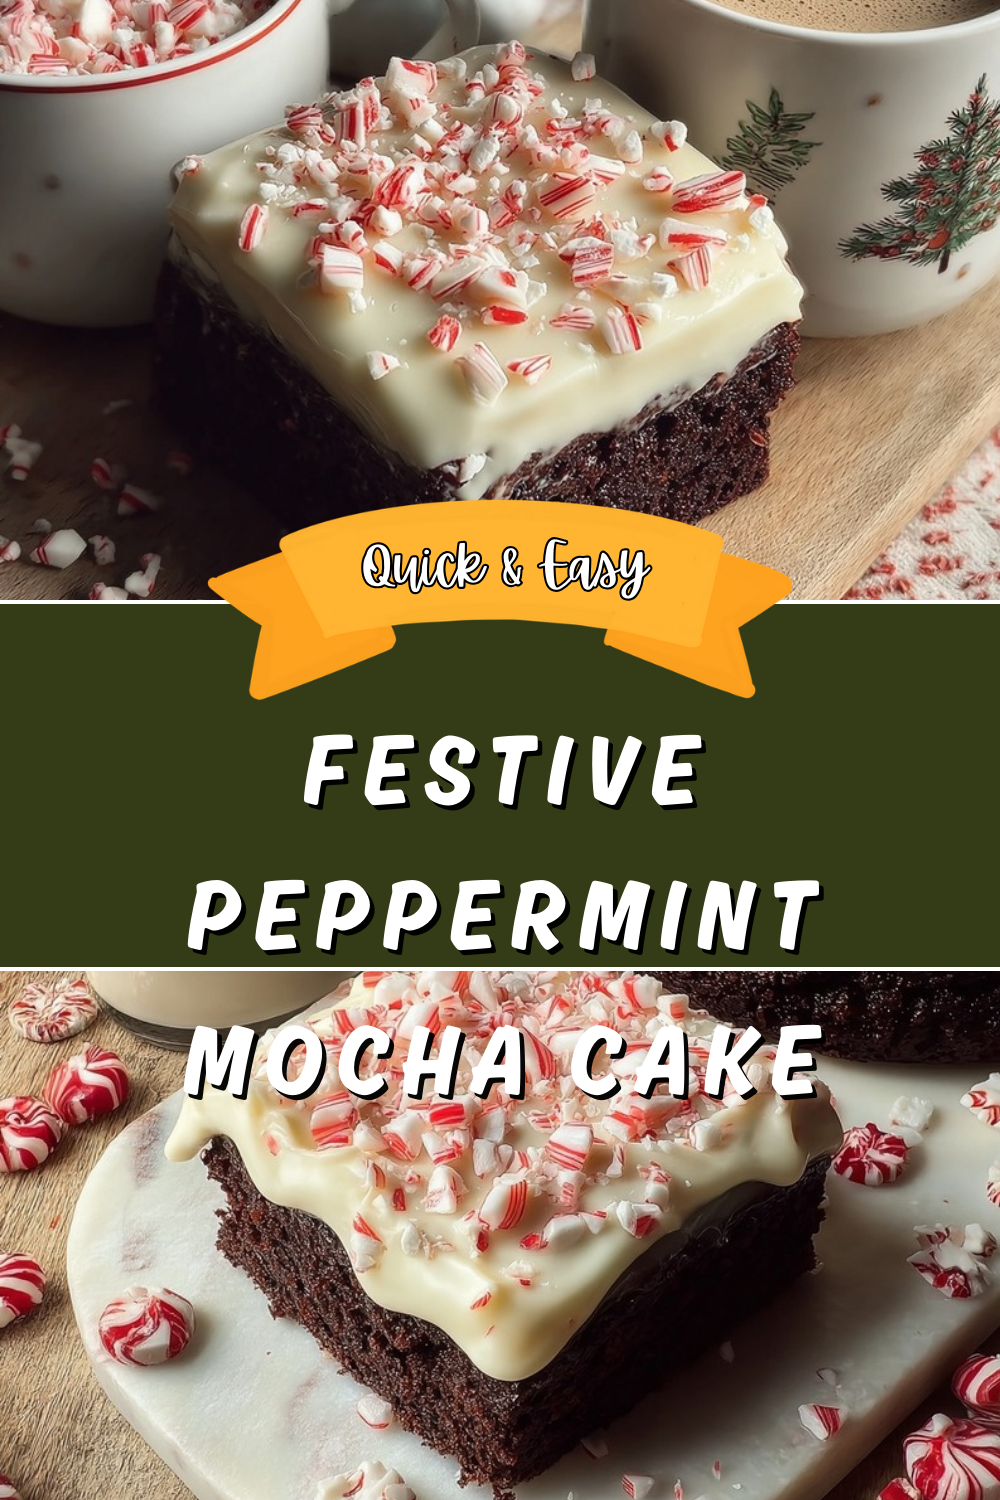
Why You’ll Love This Festive Peppermint Mocha Cake
There’s something magical about the combination of rich chocolate, bold coffee, and cool peppermint that makes this festive peppermint mocha cake a standout holiday dessert. Whether you’re hosting a family gathering or bringing a treat to a holiday party, this cake delivers on every level. The deep mocha flavor paired with a hint of mint creates the perfect balance that will have everyone asking for your recipe.
Key Benefits of This Holiday Dessert
- Ease of Preparation: This peppermint mocha cake recipe comes together with simple pantry ingredients and straightforward mixing methods. The batter requires no fancy techniques just whisk, pour, and bake. Even beginner bakers can achieve professional-looking results with the step-by-step instructions provided. Total prep time is only about 45 minutes before the oven does the work.
- Incredible Flavor Profile: The distinctive taste comes from the marriage of three classic flavors. Unsweetened cocoa powder and hot coffee create a rich chocolate base, while peppermint extract adds a refreshing finish. The coffee buttercream frosting brings everything together with an aromatic mocha note that complements rather than overpowers. According to health experts, peppermint also offers digestive benefits, making this dessert both delicious and soothing.
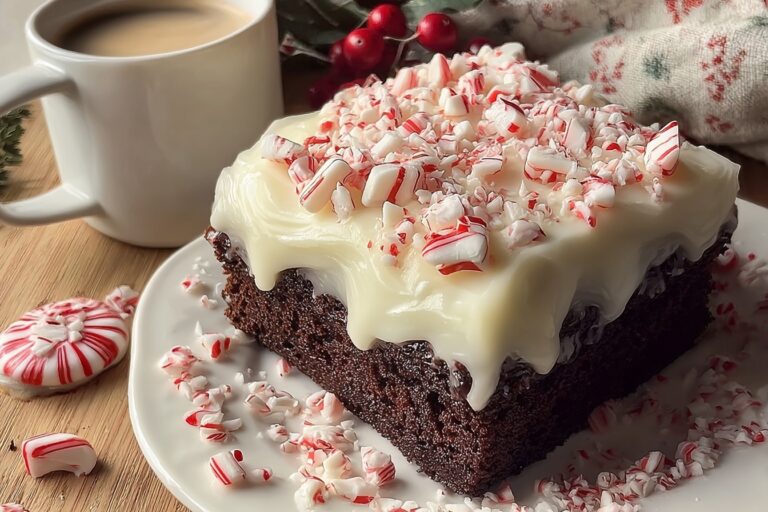
- Visual Appeal: The chocolate ganache drip topped with crushed candy canes creates a stunning presentation that looks like it came from a bakery. This festive cake makes a beautiful centerpiece for any holiday table.
- Versatility for Different Needs: This recipe adapts easily to gluten-free diets by swapping the flour for a gluten-free blend. You can also make cupcakes instead of a layer cake for portable party treats.
Jump To
- 1. Why You’ll Love This Festive Peppermint Mocha Cake
- 2. Essential Ingredients for Festive Peppermint Mocha Cake
- 3. How to Prepare the Perfect Festive Peppermint Mocha Cake: Step-by-Step Guide
- 4. Dietary Substitutions to Customize Your Festive Peppermint Mocha Cake
- 5. Mastering Festive Peppermint Mocha Cake: Advanced Tips and Variations
- 6. How to Store Festive Peppermint Mocha Cake: Best Practices
- 7. FAQs: Frequently Asked Questions About Festive Peppermint Mocha Cake
- 8. Festive Peppermint Mocha Cake
Essential Ingredients for Festive Peppermint Mocha Cake
Creating the perfect peppermint mocha cake starts with understanding what each ingredient brings to the recipe. Here’s a complete breakdown of everything you’ll need, organized by component:
Peppermint Mocha Cake Ingredients
- 2 cups all-purpose flour – provides structure and tender crumb
- 1 2/3 cups granulated white sugar – adds sweetness and moisture retention
- 2/3 cup unsweetened natural cocoa powder – delivers rich chocolate flavor and deep color
- 2 tsp baking soda – creates lift and airy texture
- 1 tsp baking powder – additional leavening for proper rise
- 2 tsp instant espresso powder – intensifies chocolate flavor and adds coffee notes
- 1/2 tsp salt – balances sweetness and enhances all flavors
- 1/2 cup vegetable oil – keeps the cake moist for days
- 2 whole eggs, room temperature – binds ingredients and adds richness
- 1 tsp pure vanilla extract – warm background flavor
- 1/2 tsp pure peppermint extract – signature mint flavor (use peppermint, not mint)
- 1 cup buttermilk, room temperature – adds tanginess and tenderizes the crumb
- 1 cup hot coffee – blooms the cocoa and adds depth
Coffee Buttercream Ingredients
- 2 tsp instant coffee or instant espresso powder – concentrated coffee flavor
- 3 Tbsp whole milk, room temperature – dissolves the coffee and adjusts consistency
- 1 1/2 cups unsalted butter, room temperature – creates fluffy, spreadable frosting
- 5 cups powdered sugar – provides sweetness and structure
- 1 Tbsp vanilla extract – rounds out the buttercream flavor
- Pinch of salt to taste – cuts through the sweetness
Chocolate Ganache Drip Ingredients
- 1/2 cup semi-sweet chocolate chips – creates a glossy, rich topping
- 1/2 cup heavy whipping cream – thins the ganache to perfect drip consistency
Additional Garnish
- 1/4 cup crushed candy canes – festive color and minty crunch
Special Dietary Options
| Dietary Need | Substitution | Notes |
|---|---|---|
| Gluten-Free | Replace flour with 1:1 gluten-free blend | Add xanthan gum if blend doesn’t include it |
| Dairy-Free Buttermilk | 1 Tbsp vinegar + 1 cup non-dairy milk | Let sit 15 minutes before using |
| Lower Sugar | Reduce sugar by 1/4 cup | May affect texture slightly |
For more chocolate dessert inspiration, check out our chocolate covered strawberries recipe that pairs beautifully with this cake for a dessert spread.
How to Prepare the Perfect Festive Peppermint Mocha Cake: Step-by-Step Guide
Follow these detailed instructions to create a stunning peppermint mocha holiday dessert that will impress everyone at your gathering. Each step is designed to ensure success, even for first-time cake bakers.
Step 1: Prepare Your Equipment and Oven
Start by preheating your oven to 350°F (177°C). This temperature ensures even baking without drying out the cake. While the oven heats, prepare your cake pans. You can use either three 6-inch pans or two 8-inch/9-inch pans, depending on how tall you want your layers. Spray each pan generously with baking spray, then line the bottom with parchment circles. The parchment ensures your cake releases cleanly without sticking.
Pro Tip: Always measure your pans before filling them. Three 6-inch pans will give you taller, more dramatic layers, while two 9-inch pans create a more traditional layer cake height.
Step 2: Mix the Dry Ingredients
In a large mixing bowl, whisk together all your dry ingredients. Combine 2 cups flour, 1 2/3 cups sugar, 2/3 cup cocoa powder, 2 tsp baking soda, 1 tsp baking powder, 2 tsp espresso powder, and 1/2 tsp salt. Whisking these ingredients together ensures even distribution of the leavening agents and cocoa. The espresso powder might seem like a small amount, but it makes a significant difference in intensifying the chocolate flavor. Quality cocoa powder matters here unsweetened natural cocoa provides the authentic chocolate taste that forms the base of this mocha cake.
Step 3: Add Wet Ingredients and Create the Batter
Add the wet ingredients to your dry mixture: 1/2 cup vegetable oil, 2 eggs, 1 tsp vanilla extract, 1/2 tsp peppermint extract, and 1 cup buttermilk. Whisk until just combined the batter will still look a bit lumpy at this stage. Now comes the secret ingredient: slowly stream in 1 cup of hot coffee while whisking continuously. The hot coffee blooms the cocoa powder, releasing its full flavor potential and creating that signature mocha taste. Whisk until the batter is smooth.
Don’t be alarmed when you see how thin the batter is this is completely normal and expected. The hot coffee makes it much more liquid than typical cake batters, but this consistency is what keeps the cake incredibly moist.
Step 4: Bake the Cake Layers
Divide your batter evenly among the prepared pans. If using three 6-inch pans, each should hold approximately 1 1/3 cups of batter. For two 9-inch pans, split the batter evenly. Place the pans in the center of your preheated oven and bake for 32-36 minutes. The cake is done when a toothpick inserted into the center comes out clean or with just a few moist crumbs attached.
Rotate the pans halfway through baking if your oven has hot spots. Once baked, remove the pans from the oven and let them cool on a wire rack for about 10 minutes before turning out the cakes. Cool completely before frosting warm cakes will melt your buttercream.
Step 5: Prepare the Coffee Buttercream
While the cakes cool, make your coffee buttercream. Start by dissolving 2 tsp instant coffee or espresso powder in 3 Tbsp room temperature milk. Set this aside to cool completely warm liquid will melt your butter and ruin the frosting consistency.
In the bowl of a stand mixer fitted with the paddle attachment, cream 1 1/2 cups of unsalted butter on medium-high speed. Beat for about 5 minutes until the butter becomes pale and fluffy, scraping down the bowl several times during this process. The extended beating incorporates air and creates a lighter texture.
Gradually add 5 cups of powdered sugar, about one cup at a time, mixing on low speed after each addition. Once all the sugar is incorporated, add 1 Tbsp vanilla extract, the coffee-milk mixture, and a pinch of salt. Mix on low until everything comes together, then increase to medium-high for 2-3 minutes to achieve a silky, spreadable consistency.
Step 6: Make the Chocolate Ganache Drip
Place 1/2 cup semi-sweet chocolate chips in a heat-resistant bowl. In a small saucepan or microwave-safe container, heat 1/2 cup heavy cream until it reaches a soft simmer don’t let it boil over. Pour the hot cream over the chocolate chips and let it sit for 30 seconds without stirring.
After 30 seconds, begin whisking from the center outward. The mixture will start coming together into a glossy, smooth ganache. If any lumps remain, you can microwave for 10-second intervals, stirring between each. Let the ganache cool at room temperature for 10-20 minutes. It should be pourable but not hot test it on the side of a glass to see how it drips before using it on your cake.
Step 7: Assemble the Festive Peppermint Mocha Cake
Now for the most rewarding part assembling your beautiful creation. Place your first cake layer on a serving plate or cake board. Spread a generous layer of coffee buttercream over the top, about 1/4 inch thick. Add the second cake layer and repeat until all layers are stacked.
Apply a thin crumb coat of buttercream over the entire cake and refrigerate for 30 minutes minimum. This step is crucial the cold cake will help your ganache set properly instead of sliding right off. After chilling, pour the cooled ganache over the center of the cake and gently encourage it to drip down the sides using an offset spatula or the back of a spoon.
Refrigerate the cake for 5 minutes to set the ganache, then press 1/4 cup crushed candy canes onto the bottom edge of the drip just before serving. For an extra decorative touch, pipe additional buttercream rosettes on top and sprinkle with more crushed candy canes.
Looking for another show-stopping layer cake? Our butter pecan layer cake offers another delicious option for special occasions.

Dietary Substitutions to Customize Your Festive Peppermint Mocha Cake
This peppermint mocha cake recipe is wonderfully adaptable. Whether you’re accommodating dietary restrictions or simply want to experiment with different flavors, here are some helpful substitutions.
Flour and Gluten Alternatives
The most common dietary modification is making this cake gluten-free. Swap the all-purpose flour cup-for-cup with a quality gluten-free flour blend. Brands like King Arthur or Bob’s Red Mill offer 1:1 substitutes that work beautifully. If your blend doesn’t contain xanthan gum, add 1/4 teaspoon per cup of flour to help with structure and texture. The result will be just as moist and flavorful as the original.
For those avoiding refined grains, you can experiment with alternative flours, though this requires more adjustment. Almond flour creates a denser, more fudgy cake, while oat flour adds a subtle nuttiness. Keep in mind that these substitutions may change the baking time and texture significantly.
Dairy Modifications
The buttermilk in this recipe can be easily made dairy-free. Mix 1 tablespoon of white vinegar with 1 cup of your preferred non-dairy milk oat milk and soy milk work particularly well for baking. Let it sit for 15 minutes to curdle before using. For the buttercream, vegan butter substitutes can replace regular butter, though you may need to adjust the amount of powdered sugar to achieve the right consistency.
Heavy cream in the ganache can be replaced with full-fat coconut cream for a dairy-free version. The chocolate flavor remains prominent, and the texture is nearly identical to traditional ganache.
Sugar and Sweetener Options
While reducing sugar in cakes can be tricky, you can decrease the granulated sugar by up to 1/4 cup without significantly affecting the texture. For the buttercream, some bakers successfully use alternative sweeteners, though this may impact the smooth, creamy texture that makes buttercream so appealing.
Those monitoring their chocolate intake can learn more about baking chocolate nutrition to make informed choices about portion sizes and ingredients.
Flavor Variations
Not a fan of peppermint? Substitute with almond extract for a nutty twist, or increase the vanilla for a classic mocha cake. The coffee buttercream pairs beautifully with many flavors. For a mint mocha variation, add 1/4 cup plus 2 tablespoons of cocoa powder to the buttercream along with the powdered sugar for a chocolate-coffee-mint combination that’s equally delicious.
Mastering Festive Peppermint Mocha Cake: Advanced Tips and Variations
Ready to take your holiday dessert to the next level? These professional tips and creative variations will help you master this recipe and adapt it for any occasion.
Professional Baking Techniques
- Room Temperature Ingredients: Always use room temperature eggs and buttermilk. Cold ingredients don’t emulsify properly, leading to dense or uneven texture. Take ingredients out of the refrigerator at least 30 minutes before baking.
- Proper Pan Preparation: Don’t skip the parchment circles. Even with nonstick pans, cakes can stick. Trace your pan bottom on parchment paper, cut it out, and place it in the bottom of each prepared pan.
- The Hot Coffee Secret: Adding hot coffee to the batter is what makes this cake extraordinary. The heat blooms the cocoa powder, releasing compounds that intensify the chocolate flavor and create the mocha character.
- Better Buttercream: Beat your butter longer than you think necessary. Five full minutes of creaming creates air pockets that make frosting light and spreadable. Cold butter will never whip properly.
Flavor Variations to Try
| Variation | Modification | Best For |
|---|---|---|
| Mocha Dream | Replace peppermint extract with additional vanilla | Coffee lovers who want pure mocha flavor |
| Double Chocolate | Add cocoa powder to buttercream | Maximum chocolate intensity |
| Peppermint Chocolate | Swap coffee buttercream for peppermint buttercream | Mint chocolate fans |
| Salted Mocha | Add flaky sea salt on ganache | Sophisticated flavor contrast |
Presentation Tips
A beautiful presentation elevates this festive cake from homemade to bakery-quality. Use a turntable for smooth frosting application. Pipe buttercream borders around the base for a finished look. Create texture in your buttercream using an offset spatula or bench scraper before adding the ganache drip.
The timing of candy cane application matters significantly. Add crushed candy canes only on the day you plan to serve the cake. The moisture from the cake and ganache will eventually cause the candy to melt and lose its crunch. For the freshest presentation and best texture, press the candy canes onto the ganache drip just before serving.
Make-Ahead Strategies
Busy during the holidays? This recipe breaks down beautifully for advance preparation:
- Cake layers: Bake up to 2 days ahead and store at room temperature wrapped in plastic. For longer storage, freeze wrapped layers for up to 2 months.
- Buttercream: Make up to 2 weeks ahead and refrigerate in an airtight container. Bring to room temperature and re-whip before using.
- Ganache: Prepare up to 2 weeks ahead and refrigerate. Warm gently in the microwave in 10-second intervals before using.
- Assembly: Complete the cake through the buttercream stage up to 1 day ahead. Add ganache and candy canes on serving day.
Cupcake Version
This recipe makes excellent cupcakes. Fill muffin tins 2/3 full and bake at 350°F for 14-18 minutes. The recipe yields approximately 35-40 cupcakes perfect for large gatherings or school events. Cupcakes freeze beautifully unfrosted for up to 3 months.
How to Store Festive Peppermint Mocha Cake: Best Practices
Proper storage keeps your peppermint cake fresh and delicious for days after baking. Here’s everything you need to know about preserving your creation.
Refrigeration Guidelines
Because this cake contains buttercream made with butter and milk, refrigeration is recommended for storage longer than 2 hours. Cover the cake with a cake dome or place it in an airtight container. Properly stored, the assembled cake keeps in the refrigerator for 4-5 days. The flavors actually develop and improve after the first day as the coffee and peppermint notes meld together.
Before serving refrigerated cake, let it sit at room temperature for 30-60 minutes. Cold cake has a firmer texture and muted flavors. Bringing it to room temperature restores the soft, moist crumb and allows the full mocha-peppermint flavor to shine.
Freezing for Long-Term Storage
For longer storage, freeze individual cake layers before assembly. Wrap each cooled layer tightly in plastic wrap, then aluminum foil. Label with the date and freeze for up to 2 months. Thaw wrapped layers at room temperature for several hours before unwrapping and assembling.
You can also freeze the assembled cake (without candy canes) for up to 1 month. Place the fully decorated cake in the freezer unwrapped for 1 hour to harden the buttercream, then wrap carefully in plastic and foil. Thaw overnight in the refrigerator before bringing to room temperature.
Reviving Leftover Buttercream
Stored buttercream can be revived easily. Refrigerated buttercream needs 1-2 hours at room temperature to soften, then 2-3 minutes of whipping on medium speed to restore its fluffy texture. If it seems too thick, add 1-2 tablespoons of heavy cream and whip again.
FAQs: Frequently Asked Questions About Festive Peppermint Mocha Cake
Can I use instant espresso instead of espresso powder in peppermint mocha cake recipe?
Yes, instant espresso coffee works perfectly as a substitute for espresso powder in your peppermint mocha cake. Use the same amount called for in the recipe—typically 1-2 tablespoons—dissolved in a small amount of hot water to make a strong concentrate before adding to the batter or buttercream. This keeps the bold coffee flavor that pairs with the peppermint and chocolate notes without altering texture. Stir it into the wet ingredients after blooming with hot water for even distribution. Test a small batch if unsure, as instant varieties like Medaglia d’Oro provide similar intensity. This swap is ideal for home bakers without specialty powders, ensuring the cake stays moist and flavorful. (87 words)
How do I make peppermint mocha cake gluten-free?
You can easily adapt the peppermint mocha cake recipe to be gluten-free by swapping all-purpose flour with a 1:1 gluten-free flour blend like King Arthur or Bob’s Red Mill. Use the exact same measurements to maintain structure and moisture. Add 1/4 teaspoon xanthan gum per cup of flour if your blend doesn’t include it, for better rise and tenderness. The result is a moist, flavorful cake with the same festive peppermint-chocolate-coffee taste. Bake as directed, checking doneness 5 minutes early since gluten-free batters can dry out faster. Cool completely before frosting. This substitution works without other changes, perfect for holiday gatherings with dietary needs. (102 words)
How long to bake peppermint mocha cake in a 6-inch pan?
For a single 6-inch pan about 2 inches tall, bake the peppermint mocha cake batter at 350°F (175°C) for 40-45 minutes, or until a toothpick inserted in the center comes out clean or with moist crumbs. If your pan is deeper (3+ inches), extend to 45-50 minutes and cover loosely with foil after 35 minutes to prevent over-browning. Divide batter evenly if using multiple pans, but for one, fill 3/4 full. Factors like oven calibration affect timing—start checking at 35 minutes. This yields a tender crumb with rich mocha flavor. Let cool in pan 10 minutes before transferring to a rack. (98 words)
Can I add caramel filling to peppermint mocha cake layers?
Absolutely, caramel or salted caramel filling pairs wonderfully with peppermint mocha cake layers for extra richness. Spread 1/2 cup between each layer after cooling completely to avoid sogginess. For salted caramel, mix store-bought or homemade with 1/4 teaspoon sea salt and skip added vanilla for balance against the sweet peppermint buttercream. It complements the coffee-chocolate base without overpowering. Chill assembled layers 30 minutes before final frosting to set. This twist adds a festive salted-sweet note, ideal for holiday parties. Use room-temperature caramel for smooth spreading. Store frosted cake in fridge up to 3 days. (96 words)
How do I store and revive coffee buttercream for peppermint mocha cake?
Store leftover coffee buttercream in an airtight container in the fridge for up to 1 week or freeze for 2 months. To revive after refrigeration, let it sit at room temperature for 1-2 hours until soft, then re-whip with a stand mixer on medium speed for 2-3 minutes, scraping sides as needed. Add 1-2 tablespoons heavy cream if too thick for smooth piping or spreading on your peppermint mocha cake. This restores the light, fluffy texture essential for drips and decorations. Avoid microwaving to prevent separation. Freshly whipped, it holds peppermint flavor perfectly for up to 24 hours at room temp. (104 words)
Festive Peppermint Mocha Cake
🎂 Savor layers of rich chocolate peppermint mocha cake with silky coffee buttercream and glossy ganache – a stunning holiday centerpiece.
☕ This festive dessert combines bold coffee, minty freshness, and make-ahead ease for stress-free celebrations!
- Total Time: 4 hours 25 minutes
- Yield: 12 servings
Ingredients
– 2 cups all-purpose flour – provides structure and tender crumb
– 1 2/3 cups granulated white sugar – adds sweetness and moisture retention
– 2/3 cup unsweetened natural cocoa powder – delivers rich chocolate flavor and deep color
– 2 tsp baking soda – creates lift and airy texture
– 1 tsp baking powder – additional leavening for proper rise
– 2 tsp instant espresso powder – intensifies chocolate flavor and adds coffee notes
– 1/2 tsp salt – balances sweetness and enhances all flavors
– 1/2 cup vegetable oil – keeps the cake moist for days
– 2 whole eggs, room temperature – binds ingredients and adds richness
– 1 tsp pure vanilla extract – warm background flavor
– 1/2 tsp pure peppermint extract – signature mint flavor (use peppermint, not mint)
– 1 cup buttermilk, room temperature – adds tanginess and tenderizes the crumb
– 1 cup hot coffee – blooms the cocoa and adds depth
– 2 tsp instant coffee or instant espresso powder – concentrated coffee flavor
– 3 Tbsp whole milk, room temperature – dissolves the coffee and adjusts consistency
– 1 1/2 cups unsalted butter, room temperature – creates fluffy, spreadable frosting
– 5 cups powdered sugar – provides sweetness and structure
– 1 Tbsp vanilla extract – rounds out the buttercream flavor
– Pinch of salt to taste – cuts through the sweetness
– 1/2 cup semi-sweet chocolate chips – creates a glossy, rich topping
– 1/2 cup heavy whipping cream – thins the ganache to perfect drip consistency
– 1/4 cup crushed candy canes – festive color and minty crunch
Instructions
1-Step 1: Prepare Your Equipment and Oven Start by preheating your oven to 350°F (177°C). This temperature ensures even baking without drying out the cake. While the oven heats, prepare your cake pans. You can use either three 6-inch pans or two 8-inch/9-inch pans, depending on how tall you want your layers. Spray each pan generously with baking spray, then line the bottom with parchment circles. The parchment ensures your cake releases cleanly without sticking.
2-Step 2: Mix the Dry Ingredients In a large mixing bowl, whisk together all your dry ingredients. Combine 2 cups flour, 1 2/3 cups sugar, 2/3 cup cocoa powder, 2 tsp baking soda, 1 tsp baking powder, 2 tsp espresso powder, and 1/2 tsp salt. Whisking these ingredients together ensures even distribution of the leavening agents and cocoa. The espresso powder might seem like a small amount, but it makes a significant difference in intensifying the chocolate flavor. Quality cocoa powder matters here unsweetened natural cocoa provides the authentic chocolate taste that forms the base of this mocha cake.
3-Step 3: Add Wet Ingredients and Create the Batter Add the wet ingredients to your dry mixture: 1/2 cup vegetable oil, 2 eggs, 1 tsp vanilla extract, 1/2 tsp peppermint extract, and 1 cup buttermilk. Whisk until just combined the batter will still look a bit lumpy at this stage. Now comes the secret ingredient: slowly stream in 1 cup of hot coffee while whisking continuously. The hot coffee blooms the cocoa powder, releasing its full flavor potential and creating that signature mocha taste. Whisk until the batter is smooth. Don’t be alarmed when you see how thin the batter is this is completely normal and expected. The hot coffee makes it much more liquid than typical cake batters, but this consistency is what keeps the cake incredibly moist.
4-Step 4: Bake the Cake Layers Divide your batter evenly among the prepared pans. If using three 6-inch pans, each should hold approximately 1 1/3 cups of batter. For two 9-inch pans, split the batter evenly. Place the pans in the center of your preheated oven and bake for 32-36 minutes. The cake is done when a toothpick inserted into the center comes out clean or with just a few moist crumbs attached. Rotate the pans halfway through baking if your oven has hot spots. Once baked, remove the pans from the oven and let them cool on a wire rack for about 10 minutes before turning out the cakes. Cool completely before frosting warm cakes will melt your buttercream.
5-Step 5: Prepare the Coffee Buttercream While the cakes cool, make your coffee buttercream. Start by dissolving 2 tsp instant coffee or espresso powder in 3 Tbsp room temperature milk. Set this aside to cool completely warm liquid will melt your butter and ruin the frosting consistency. In the bowl of a stand mixer fitted with the paddle attachment, cream 1 1/2 cups of unsalted butter on medium-high speed. Beat for about 5 minutes until the butter becomes pale and fluffy, scraping down the bowl several times during this process. The extended beating incorporates air and creates a lighter texture. Gradually add 5 cups of powdered sugar, about one cup at a time, mixing on low speed after each addition. Once all the sugar is incorporated, add 1 Tbsp vanilla extract, the coffee-milk mixture, and a pinch of salt. Mix on low until everything comes together, then increase to medium-high for 2-3 minutes to achieve a silky, spreadable consistency.
6-Step 6: Make the Chocolate Ganache Drip Place 1/2 cup semi-sweet chocolate chips in a heat-resistant bowl. In a small saucepan or microwave-safe container, heat 1/2 cup heavy cream until it reaches a soft simmer don’t let it boil over. Pour the hot cream over the chocolate chips and let it sit for 30 seconds without stirring. After 30 seconds, begin whisking from the center outward. The mixture will start coming together into a glossy, smooth ganache. If any lumps remain, you can microwave for 10-second intervals, stirring between each. Let the ganache cool at room temperature for 10-20 minutes. It should be pourable but not hot test it on the side of a glass to see how it drips before using it on your cake.
7-Step 7: Assemble the Festive Peppermint Mocha Cake Now for the most rewarding part assembling your beautiful creation. Place your first cake layer on a serving plate or cake board. Spread a generous layer of coffee buttercream over the top, about 1/4 inch thick. Add the second cake layer and repeat until all layers are stacked. Apply a thin crumb coat of buttercream over the entire cake and refrigerate for 30 minutes minimum. This step is crucial the cold cake will help your ganache set properly instead of sliding right off. After chilling, pour the cooled ganache over the center of the cake and gently encourage it to drip down the sides using an offset spatula or the back of a spoon. Refrigerate the cake for 5 minutes to set the ganache, then press 1/4 cup crushed candy canes onto the bottom edge of the drip just before serving. For an extra decorative touch, pipe additional buttercream rosettes on top and sprinkle with more crushed candy canes.
Notes
🌿 Use pure peppermint extract, not mint, for authentic festive flavor.
☕ Dissolve coffee powder fully in milk for smooth buttercream texture.
🍭 Add crushed candy canes right before serving to keep them crisp.
- Prep Time: 45 minutes
- Cooling: 3 hours
- Cook Time: 40 minutes
- Category: Dessert
- Method: Baking
- Cuisine: American
- Diet: Vegetarian
Nutrition
- Serving Size: 1 slice
- Calories: 600
- Sugar: 60g
- Sodium: 400mg
- Fat: 30g
- Saturated Fat: 15g
- Unsaturated Fat: 15g
- Trans Fat: 0g
- Carbohydrates: 80g
- Fiber: 2g
- Protein: 5g
- Cholesterol: 100mg


