
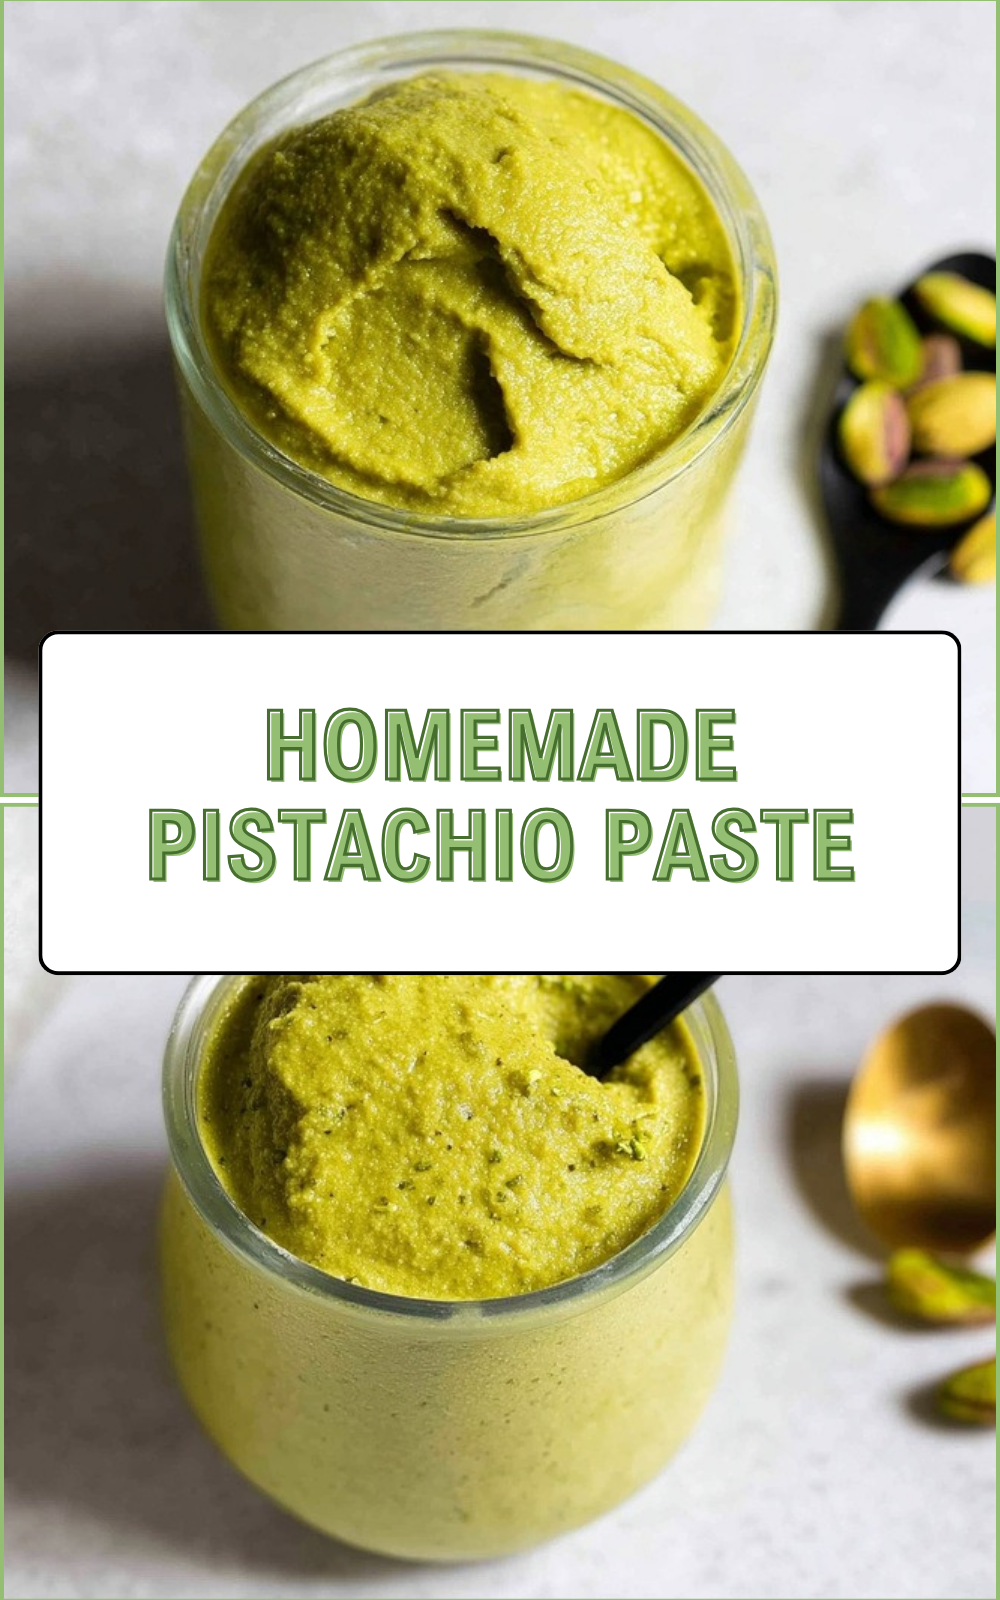
Why You’ll Love This Homemade Pistachio Paste
Author: Camille Hayes
My blog shares my passion for cooking by offering a variety of recipes that are simple and accessible to everyone. My ambition is to inspire readers to try new flavors, cook with joy, and create memorable moments around the table.
- Ease of preparation: Homemade Pistachio Paste is quick to make with just a food processor and a handful of ingredients. With the primary ingredient on hand, you can go from raw nuts to a spreadable paste in under 15 minutes of active processing time. This simple recipe fits busy schedules perfect for home cooks, students, and working parents.
- Health benefits: Making your own pistachio paste gives you control over added fats and salt. Pistachios are a source of healthy fats, plant protein, fiber, vitamins, and minerals. Using raw, unsalted nuts results in a cleaner nut paste without unwanted additives. For a quick look at the health perks of pistachios, read this Cleveland Clinic: Benefits of Pistachios.
- Versatility: Homemade Pistachio Paste works as a spread, a baking ingredient, a mix-in for yogurt, or a base for sauces. It adapts well to vegan, gluten-free, and low-sugar diets, so it suits a wide range of eating preferences and uses.
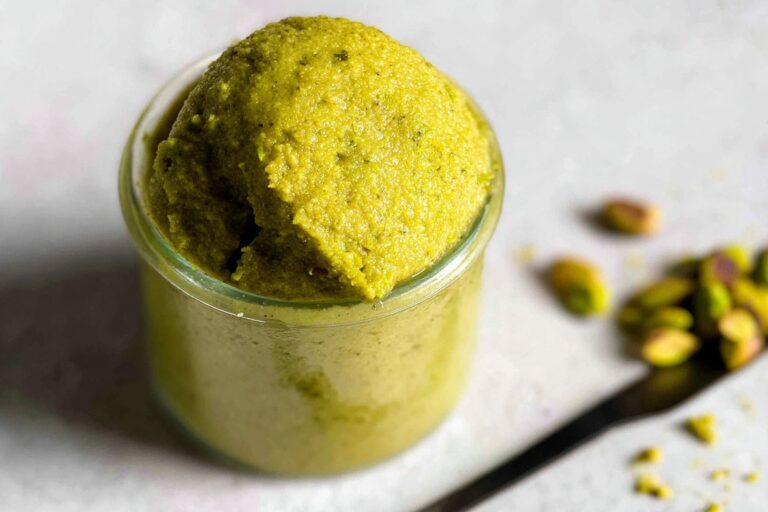
- Distinctive flavor: The flavor is bright, nutty, and slightly sweet with a creamy texture that is different from almond or peanut pastes. Using peeled or slivered pistachios keeps the color vivid and the taste pure, which is handy when you want a visually attractive ingredient for desserts or frostings.
Jump To
- 1. Why You’ll Love This Homemade Pistachio Paste
- 2. Essential Ingredients for Homemade Pistachio Paste
- 3. How to Prepare the Perfect Homemade Pistachio Paste: Step-by-Step Guide
- 4. Dietary Substitutions to Customize Your Homemade Pistachio Paste
- 5. Mastering Homemade Pistachio Paste: Advanced Tips and Variations
- 6. How to Store Homemade Pistachio Paste: Best Practices
- 7. FAQs: Frequently Asked Questions About Homemade Pistachio Paste
- 8. Homemade Pistachio Paste
Essential Ingredients for Homemade Pistachio Paste
Below is a clear, structured list of the exact ingredients used in this Pistachio Butter Recipe. Each ingredient is shown with its precise measurement and a short note on purpose or benefit.
- 1 cup (120 g) raw, unsalted pistachios (preferably peeled or slivered for vibrant green color) – the main ingredient; raw nuts yield the freshest flavor and a bright green paste when skins are removed.
- 1 teaspoon neutral oil – helps the nuts come together into a smoother paste and prevents the food processor from overheating; use grapeseed, avocado, or light olive oil.
Special Dietary Options
- Vegan: This recipe is naturally vegan when using a plant-based neutral oil.
- Gluten-free: Pistachio paste is gluten-free by nature; watch cross-contamination if processing in shared equipment.
- Low-calorie: For a lighter option, reduce the oil to 1/2 teaspoon or skip it and use tiny amounts of water while blending for immediate use; the texture may be less silky but still tasty.
How to Prepare the Perfect Homemade Pistachio Paste: Step-by-Step Guide
This step-by-step guide walks you through making Homemade Pistachio Paste that is creamy, flavorful, and ready for many uses. The format follows the requested step names so you can follow each phase clearly. Tips for adapting the recipe to dietary needs are included throughout.
First Step: Gather and prep
Measure 1 cup (120 g) raw, unsalted pistachios. If you want the brightest green paste, use peeled or slivered pistachios. If your pistachios still have skins, you can blanch and peel them (see the FAQ section for details) or accept a slightly darker color.
Second Step: Toasting (optional)
To deepen the flavor without turning the nuts brown, spread the pistachios on a baking sheet and toast in an oven at 300°F (150°C) for 4 to 6 minutes. Let cool completely before processing. Toasting is optional: raw nuts give a fresher, greener paste while light toasting adds nuttier depth.
Third Step: Prep your equipment
Use a food processor with a strong motor (at least 600 to 700 watts recommended). A high-speed blender can also work but may heat the nuts. Make sure the bowl and blade are dry and the processor is stable on the counter. Keep a spatula handy for scraping.
Fourth Step: Pulse to crumbs
Place the pistachios in the food processor and pulse 8 to 12 times until the nuts form coarse crumbs. This step prevents the motor from stalling and helps the nuts break down evenly. Scrape down the sides after pulsing to keep everything moving.
Fifth Step: Process to a smooth paste
Process continuously in 30 to 45 second bursts. The nuts will move through these stages: fine meal, clumping into a dough, then loosening into a paste. This can take 6 to 12 minutes depending on your machine. Pause to scrape the bowl as needed to get a uniform texture and to prevent overheating. If the mixture looks dry or the processor is struggling, add 1 teaspoon of neutral oil and continue processing. The 1 teaspoon oil listed in the ingredients is usually enough for 1 cup of nuts and helps achieve a silky finish.
Sixth Step: Adjust texture
If you want a thinner, more spreadable paste, add tiny amounts of neutral oil, one teaspoon at a time, until you reach the desired consistency. For a slightly chunkier nut butter, stop when small pieces remain. If you do not want to add oil, add a splash of room-temperature water instead, but note this may shorten fridge life and change texture slightly.
Seventh Step: Season and flavor (optional)
This recipe keeps the flavor pure, but you can add a pinch of salt if you prefer a savory note, a teaspoon of honey for a sweet touch, or a small splash of lemon juice to brighten. For baking uses, a teaspoon of almond extract or vanilla can pair well with the pistachio taste.
Final Step: Store and serve
Transfer your Homemade Pistachio Paste to an airtight jar. Tap the jar on the counter to remove air pockets and level the surface. Let it cool to room temperature before sealing. Store in the refrigerator for best quality. Use the paste for spreading on toast, folding into frostings, mixing into smoothies, or as a filling for pastries.
Tip: If your processor overheats, stop and let it cool for 5 to 10 minutes. Working in short pulses keeps the machine safe and the paste smooth.
How this method adapts to dietary needs
- Vegan: No changes needed; this recipe is plant-based.
- Low oil: Skip or halve the oil and rely on nut oils released during processing; expect a denser paste.
- Quick batch for single use: Add 1 teaspoon water instead of oil for spreads you will use right away.

Dietary Substitutions to Customize Your Homemade Pistachio Paste
Protein and Main Component Alternatives
If you cannot find pistachios or want a different nut profile, substitute with similar nuts. Each swap will change the flavor and color but follows the same technique.
- Almonds: Use raw, blanched almonds for a neutral flavor. Texture is similar but color is pale instead of green.
- Hazelnuts: Give a rich, toasty flavor. Lightly toast before processing for best taste.
- Macadamia or cashews: Produce an ultra-creamy paste because of their high natural oil content.
- Seed options: Sunflower seeds or pumpkin seeds can be used for nut-free pastes; these are great for those with tree nut allergies.
Vegetable, Sauce, and Seasoning Modifications
Adjust the flavor profile with small additions that pair well with pistachio taste.
- Spices: Try a pinch of cardamom, cinnamon, or orange zest for a dessert-like paste.
- Savory twists: Add a pinch of smoked paprika or a small clove of roasted garlic to make a savory spread for crackers or sandwiches.
- Sweet options: Mix in a small amount of maple syrup or honey after processing to sweeten for desserts.
Mastering Homemade Pistachio Paste: Advanced Tips and Variations
Once you have the basic method down, these ideas help you get more from each batch and try new uses.
Pro cooking techniques
- Low and slow to avoid browning: If you want toasted flavor without a dark color, roast at a low oven temperature (300°F/150°C) for a short time and cool completely before blending.
- Double processing: For an ultra-smooth paste, process once, refrigerate for 10 minutes, then process again. The cool nuts release oil more evenly and create a silkier texture.
- Use a chilled bowl: A slightly chilled processing bowl can reduce friction heat and keep texture stable in high-speed blenders.
Flavor variations
- Pistachio-chocolate paste: Stir in 1 to 2 tablespoons of melted dark chocolate after processing for a spreadable chocolate-nut paste.
- Citrus pistachio: Add finely grated lemon or orange zest for a bright finish that pairs well with yogurt or ricotta.
- Herb-infused: Blend in basil or mint for a fresh, savory spread perfect for grilled vegetables or crostini.
Presentation tips
For gifts or special uses, transfer paste into small glass jars, top with a few whole pistachios, and drizzle a light ribbon of oil. Use a piping bag to fill pastries cleanly with pistachio paste as a filling.
Make-ahead options
- Refrigerate in small jars for up to two weeks and label with the date.
- Freeze portions in tablespoon-sized scoops on parchment, then bag and store for up to three months. Thaw at room temperature for a few minutes before use.
How to Store Homemade Pistachio Paste: Best Practices
Proper storage keeps the flavor fresh and helps maintain texture. Use these short-term and long-term methods depending on how you plan to use the paste.
Refrigeration
Store Homemade Pistachio Paste in a clean, airtight glass jar. Keep in the fridge for 1 to 2 weeks. Natural oil separation can occur; stir before using. To slow oxidation, press a thin layer of neutral oil on top and then seal the jar.
Freezing
For longer keeping, freeze portions. Scoop 1 tablespoon mounds onto parchment paper and freeze until solid, about 1 to 2 hours. Transfer frozen portions to a labeled zip-top bag and store up to 3 months. Frozen portions thaw quickly at room temperature or can be used directly in baking.
Reheating and thawing
Thaw in the refrigerator for a few hours or at room temperature for 10 to 20 minutes. If the paste thickens after refrigeration, bring to room temperature and stir to regain spreadable consistency. Avoid using direct heat to melt the paste, as high heat can change the flavor.
| Storage Method | Time | Notes |
|---|---|---|
| Refrigerator | 1-2 weeks | Stir before use; press a thin oil layer to protect surface |
| Freezer | Up to 3 months | Freeze in portions for easy thawing; great for baking |
FAQs: Frequently Asked Questions About Homemade Pistachio Paste
What ingredients do I need for homemade pistachio paste?
Homemade pistachio paste requires just one main ingredient: high-quality pistachios. Use 2-3 cups of raw, unsalted pistachios with skins removed for the best results. No added sugars, salts, or fillers are needed for a pure paste. If blending is tough, add 1-2 tablespoons of neutral oil like grapeseed or avocado oil to help achieve a smooth texture, or use water for a dairy-free option. Start by pulsing the pistachios in a food processor until they break down into a fine meal, then blend continuously for 5-10 minutes, scraping sides as needed. This simple recipe yields about 1-1.5 cups of creamy paste perfect for spreading, baking, or desserts. Store extras in the fridge right away to maintain freshness. (98 words)
What type of pistachios are best for homemade pistachio paste?
For vibrant homemade pistachio paste, choose raw, unsalted pistachios that are peeled or slivered without brown skins. These deliver the brightest green color and pure nutty flavor. Avoid roasted or salted varieties, as roasting dulls the hue to brown and adds unwanted taste. If buying in-shell, opt for Iranian or Sicilian pistachios for superior quality. Pre-peeled slivered pistachios save time but check for freshness. About 500g of shelled nuts makes a standard batch. Test a small amount first: raw nuts blend smoother without excess oils from roasting. This choice ensures your paste looks and tastes professional for uses like macarons, gelato, or toast. (112 words)
How do I peel pistachios for green homemade pistachio paste?
To get that eye-catching green in homemade pistachio paste, blanch and peel the skins off raw pistachios. Boil 2 cups of pistachios in water for 30-45 seconds, then drain and plunge into ice water for 1 minute. Drain again, spread on a clean kitchen towel, and rub gently to remove the thin brown skins—they slip off easily. Pat dry thoroughly before blending to avoid watery paste. This step takes 10-15 minutes but prevents a muddy color. For 1 cup of paste, start with 1.5 cups unshelled nuts accounting for skins. Dry-roast peeled nuts briefly at 300°F for 5 minutes if desired for deeper flavor without browning. Your result: smooth, vivid green paste ready for recipes. (118 words)
Do I need oil to blend homemade pistachio paste?
Oil isn’t strictly required for homemade pistachio paste, but 1-2 teaspoons of neutral oil like grapeseed, avocado, or pistachio oil per cup of nuts makes blending easier and creates a silkier texture. Pistachios release natural oils during processing, but a powerful food processor (at least 700W) handles 2 cups best without overheating—blend in 1-minute bursts, scraping down sides. If skipping oil, add 1 teaspoon water at a time for immediate-use paste, but it may separate in storage. Pulse to crumbs first (2-3 minutes), then to paste (8-12 minutes total). A large-capacity processor prevents clumping. This method yields 1 cup of versatile paste for frostings, smoothies, or savory dips without artificial additives. (124 words)
How long does homemade pistachio paste last and how do I store it?
Homemade pistachio paste stays fresh in an airtight glass jar in the fridge for 1-2 weeks, or freeze for up to 3 months. Portion into 1-tablespoon mounds on parchment paper, freeze solid for 2 hours, then transfer to a zip-top bag for easy thawing—one portion per use thaws in minutes at room temp. Always label with dates. Natural separation may occur in the fridge; stir before using. Keep away from strong odors. For longer fridge life, top with a thin oil layer. Frozen paste works great in baking straight from the freezer. One 2-cup batch provides multiple servings—use in energy balls, cakes, or as a nut butter swap for 200 calories per 2 tablespoons with healthy fats. (128 words)
Homemade Pistachio Paste
🌰 Create your own vibrant green pistachio paste perfect for baking, desserts, or spreading on toast
💚 Rich, nutty flavor with smooth texture that’s much more affordable than store-bought versions
- Total Time: 22 minutes
- Yield: 1 cup
Ingredients
– 1 cup (120 g) raw, unsalted pistachios the main ingredient; raw nuts yield the freshest flavor and a bright green paste when skins are removed
– 1 teaspoon neutral oil helps the nuts come together into a smoother paste and prevents the food processor from overheating; use grapeseed, avocado, or light olive oil
Instructions
1-First Step: Gather and prep Measure 1 cup (120 g) raw, unsalted pistachios. If you want the brightest green paste, use peeled or slivered pistachios. If your pistachios still have skins, you can blanch and peel them (see the FAQ section for details) or accept a slightly darker color.
2-Second Step: Toasting (optional) To deepen the flavor without turning the nuts brown, spread the pistachios on a baking sheet and toast in an oven at 300°F (150°C) for 4 to 6 minutes. Let cool completely before processing. Toasting is optional: raw nuts give a fresher, greener paste while light toasting adds nuttier depth.
3-Third Step: Prep your equipment Use a food processor with a strong motor (at least 600 to 700 watts recommended). A high-speed blender can also work but may heat the nuts. Make sure the bowl and blade are dry and the processor is stable on the counter. Keep a spatula handy for scraping.
4-Fourth Step: Pulse to crumbs Place the pistachios in the food processor and pulse 8 to 12 times until the nuts form coarse crumbs. This step prevents the motor from stalling and helps the nuts break down evenly. Scrape down the sides after pulsing to keep everything moving.
5-Fifth Step: Process to a smooth paste Process continuously in 30 to 45 second bursts. The nuts will move through these stages: fine meal, clumping into a dough, then loosening into a paste. This can take 6 to 12 minutes depending on your machine. Pause to scrape the bowl as needed to get a uniform texture and to prevent overheating. If the mixture looks dry or the processor is struggling, add 1 teaspoon of neutral oil and continue processing. The 1 teaspoon oil listed in the ingredients is usually enough for 1 cup of nuts and helps achieve a silky finish.
6-Sixth Step: Adjust texture If you want a thinner, more spreadable paste, add tiny amounts of neutral oil, one teaspoon at a time, until you reach the desired consistency. For a slightly chunkier nut butter, stop when small pieces remain. If you do not want to add oil, add a splash of room-temperature water instead, but note this may shorten fridge life and change texture slightly.
7-Seventh Step: Season and flavor (optional) This recipe keeps the flavor pure, but you can add a pinch of salt if you prefer a savory note, a teaspoon of honey for a sweet touch, or a small splash of lemon juice to brighten. For baking uses, a teaspoon of almond extract or vanilla can pair well with the pistachio taste.
8-Final Step: Store and serve Transfer your Homemade Pistachio Paste to an airtight jar. Tap the jar on the counter to remove air pockets and level the surface. Let it cool to room temperature before sealing. Store in the refrigerator for best quality. Use the paste for spreading on toast, folding into frostings, mixing into smoothies, or as a filling for pastries.
Notes
🔥 Toasting pistachios brings out their natural oils and deepens the flavor, but watch carefully to prevent burning
💧 Adding warm water gradually helps achieve the perfect smooth consistency without making the paste greasy
🌡️ Let the paste cool completely before storing, and bring to room temperature before using for best results in recipes
- Prep Time: 15 minutes
- Cook Time: 7 minutes
- Category: Condiment
- Method: Food Processing
- Cuisine: Middle Eastern
- Diet: Vegan
Nutrition
- Serving Size: 1 tablespoon
- Calories: 120
- Sugar: 2g
- Sodium: 45mg
- Fat: 10g
- Saturated Fat: 1.5g
- Unsaturated Fat: 8g
- Trans Fat: 0g
- Carbohydrates: 4g
- Fiber: 2g
- Protein: 4g
- Cholesterol: 0mg


