

Why You’ll Love This Homemade Stuffing
Homemade stuffing brings warmth and comfort to any table, and this easy recipe delivers exceptional flavor with minimal effort. Whether you’re preparing for a holiday feast or a simple weeknight dinner, this dish offers the perfect balance of buttery richness and herbaceous aroma that makes every bite memorable.
- Ease of preparation: With just 15 minutes of prep time and straightforward steps, this homemade stuffing comes together quickly. The recipe uses basic ingredients and simple techniques that even beginner cooks can master with confidence.
- Health benefits: Each serving contains only 185 calories while providing essential nutrients like Vitamin A, calcium, and iron. Using fresh herbs adds antioxidants, and you can control sodium levels by adjusting salt to taste.
- Versatility: This recipe adapts easily to different dietary needs and preferences. Use gluten-free bread for celiac guests, vegetable broth for vegetarians, or add proteins like sausage for heartier appetites.
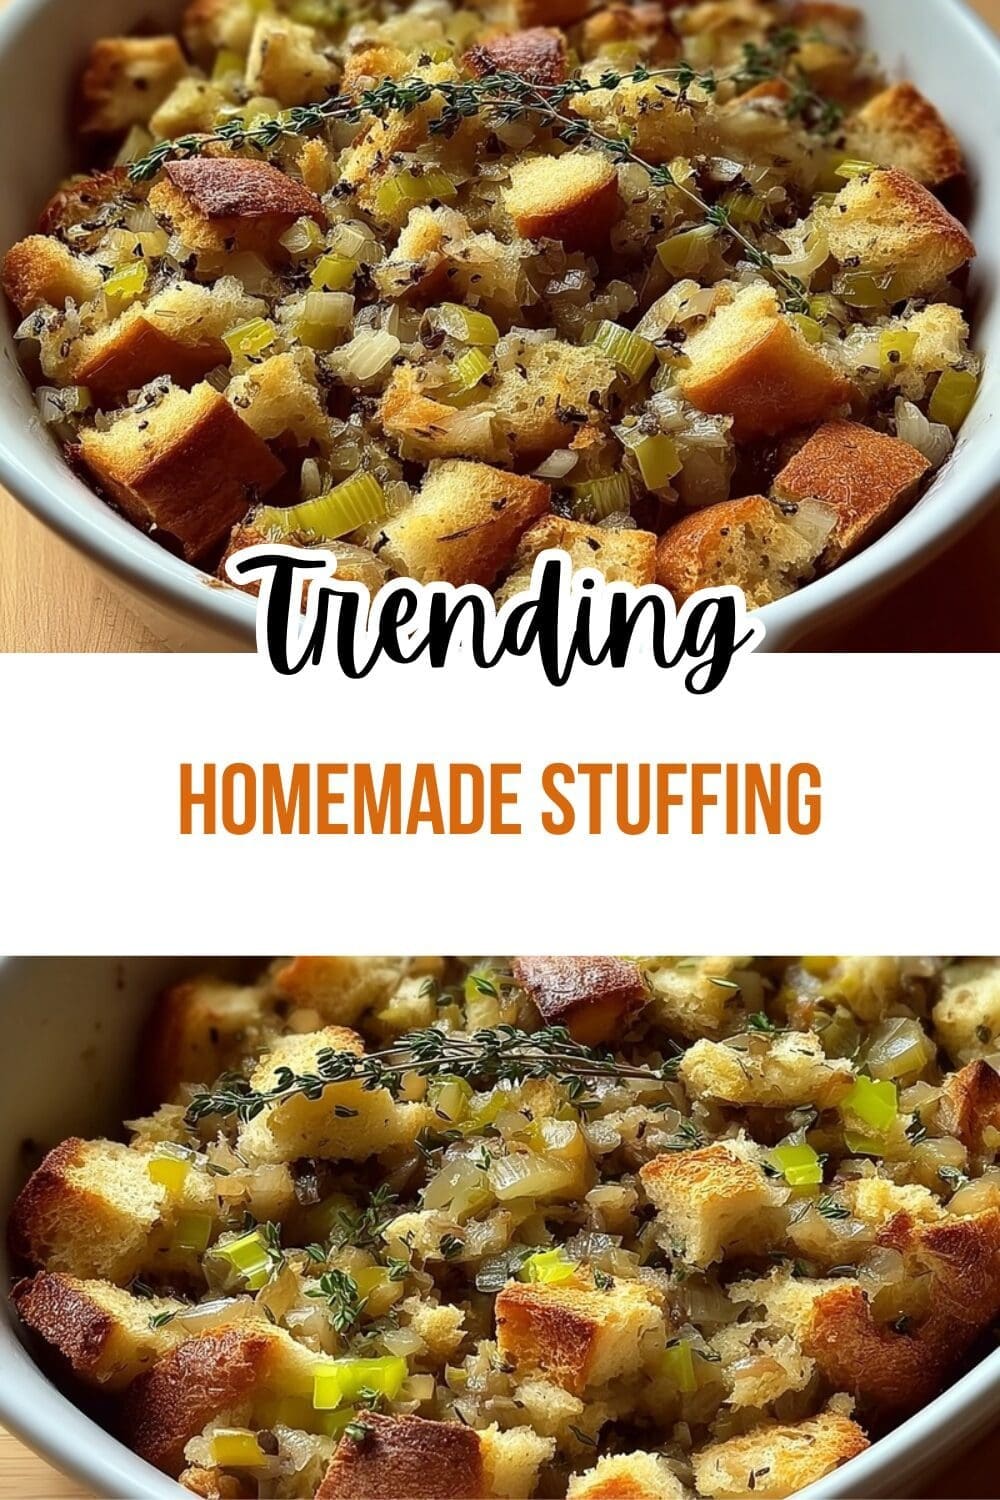
- Distinctive flavor: The combination of buttery-sage taste with fresh herbs creates a depth of flavor that store-bought versions simply cannot match. Those golden, crisp edges paired with a tender, moist center make this stuffing truly outstanding.
Serving about 12 people, this homemade stuffing makes an ideal companion for roasted chicken dishes or your Thanksgiving turkey. The recipe yields consistent results every time, giving you confidence when cooking for family gatherings or dinner parties.
Jump To
- 1. Why You’ll Love This Homemade Stuffing
- 2. Essential Ingredients for Homemade Stuffing
- 3. How to Prepare the Perfect Homemade Stuffing: Step-by-Step Guide
- 4. Dietary Substitutions to Customize Your Homemade Stuffing
- 5. Mastering Homemade Stuffing: Advanced Tips and Variations
- 6. How to Store Homemade Stuffing: Best Practices
- 7. FAQs: Frequently Asked Questions About Homemade Stuffing
- 8. Homemade Stuffing
Essential Ingredients for Homemade Stuffing
Creating the perfect homemade stuffing starts with understanding each ingredient’s role. Below is a complete list of everything you need with precise measurements:
Main Ingredients List
- 2 small yellow onions, diced – Provides sweetness and depth as the aromatic foundation
- 4 ribs celery, diced – Adds crunch and a savory, herbal note that balances the rich flavors
- ⅔ cup butter – Creates richness and helps achieve those coveted golden, crispy edges
- 1 ½ teaspoons poultry seasoning or ½ teaspoon ground sage – Delivers the classic herb flavor that defines stuffing
- Black pepper to taste – Adds mild heat and enhances other flavors
- Salt to taste – Essential for bringing out all the flavors in the dish
- 12 cups dry bread cubes (mix of white and wheat or any dry bread like sourdough or cornbread) – The base that absorbs flavors and creates texture
- 2 to 4 cups chicken or turkey broth – Moistens the bread and infuses savory depth throughout
- 2 tablespoons chopped fresh parsley or 2 teaspoons dried parsley – Adds fresh flavor and visual appeal
- 1 tablespoon fresh herbs (sage, thyme, rosemary) or 1 teaspoon dried herbs – Creates the signature herb profile
Special Dietary Options
For those with dietary restrictions, this homemade stuffing adapts beautifully:
- Vegan option: Replace butter with vegan butter or olive oil, and use vegetable broth instead of chicken broth. The herbs and aromatics remain the same for full flavor.
- Gluten-free option: Use gluten-free bread cubes made from rice, corn, or other gluten-free grains. Ensure the broth is certified gluten-free as well.
- Lower calorie option: Reduce butter to ⅓ cup and use low-sodium broth. You can also increase the vegetable content by adding extra celery, onions, or incorporating shredded carrots.
According to Healthline, sage contains over 160 distinct polyphenols and provides impressive health benefits, making it more than just a flavorful herb in your homemade stuffing.
How to Prepare the Perfect Homemade Stuffing: Step-by-Step Guide
Follow these detailed instructions to create homemade stuffing with perfectly crisp edges and a tender, flavorful center. The process is straightforward but attention to detail makes all the difference.
Step One: Prepare Your Bread Cubes
Start by ensuring your bread is properly dried. Fresh bread creates soggy stuffing, so dryness is crucial. You have two options: leave bread cubes out for 2-3 days at room temperature, or bake cut cubes at 300°F for 10 minutes without browning. A mix of white and wheat bread provides excellent texture and flavor contrast, though sourdough or cornbread work wonderfully too. Measure after drying since bread loses about 20% of its volume during this process. You need 12 cups of dried cubes for this recipe.
Step Two: Preheat and Prepare Aromatics
Preheat your oven to 350°F. This temperature allows the stuffing to heat through evenly while developing that beautiful golden crust. While the oven heats, dice 2 small yellow onions and 4 ribs of celery into small, even pieces. Uniform cuts ensure everything cooks at the same rate. Keep your prep organized by having all ingredients measured and ready before you start cooking.
Step Three: Cook the Aromatic Base
Melt ⅔ cup butter in a large skillet over medium heat. Add the diced onions, celery, poultry seasoning (or ground sage), and rosemary if using fresh herbs. Cook this mixture on medium-low heat until tender, approximately 10-12 minutes. The vegetables should be soft and translucent, not browned. This slow cooking process allows the flavors to meld together and the herbs to release their essential oils. Cool the mixture slightly before moving to the next step.
Pro tip: The aromatic base can be made a day ahead and refrigerated. This saves time on busy cooking days and actually improves flavor as the herbs continue to infuse.
Step Four: Combine Bread and Flavorings
In a large bowl, combine the 12 cups of dry bread cubes with the cooled onion mixture. Add 2 tablespoons of chopped fresh parsley and 1 tablespoon of fresh herbs (sage, thyme, rosemary) or use the dried herb equivalents. Toss everything gently to distribute the flavors evenly throughout the bread. Take care not to crush the bread cubes while mixing.
Step Five: Add Broth Gradually
This step requires patience and attention. Pour the broth gradually over the mixture, starting with just 1 cup. Toss gently to moisten the bread cubes, being careful to avoid creating a soggy texture. Add more broth as needed, testing by squeezing a handful of the mixture. It should hold together lightly without being wet or having pooling liquid at the bottom of the bowl. Fresh homemade dried cubes typically need 2-3 cups of broth, while store-bought dried cubes may require 3-4 cups due to their denser texture.
Step Six: Season and Transfer
Season with salt and pepper to taste. Remember to taste before adding salt, especially if using store-bought seasoned bread cubes, which already contain sodium. Transfer the mixture to a baking dish. A 3-3.5 quart casserole dish works perfectly for this quantity. Dot the top with extra butter if desired for additional golden color and rich flavor.
Step Seven: Bake to Perfection
Cover the baking dish and bake at 350°F for 35 minutes. The covering traps steam and ensures the center heats through completely. Then uncover and continue baking for an additional 10 minutes until the top is golden and the edges are crisp. This two-stage baking process creates the perfect contrast between a moist, fluffy interior and crunchy edges that everyone loves in homemade stuffing.
| Baking Stage | Temperature | Time | Purpose |
|---|---|---|---|
| Covered baking | 350°F | 35 minutes | Heat through evenly |
| Uncovered baking | 350°F | 10 minutes | Golden, crisp edges |
| Total bake time | 45 minutes | Perfect texture |

Dietary Substitutions to Customize Your Homemade Stuffing
Protein and Main Component Alternatives
Homemade stuffing welcomes customization to suit different tastes and dietary requirements. For those wanting additional protein, cooked sausage makes an excellent addition. Brown 1 pound of breakfast sausage and mix it in with the bread cubes before adding broth. The rendered fat adds extra savory depth to the dish.
Vegetarians can substitute vegetable broth for chicken or turkey broth without sacrificing flavor. For a complete plant-based version, use vegan butter and consider adding chopped nuts like pecans or walnuts for texture and protein. These additions provide satisfying richness that meat-eaters and vegetarians alike will appreciate.
Gluten-sensitive guests need not miss out. Gluten-free bread cubes work perfectly in this recipe. Many stores now carry pre-made gluten-free stuffing mixes, or you can cube your favorite gluten-free bread and dry it using the same oven method. Rice-based or corn-based breads tend to hold up well and maintain pleasing texture.
Vegetable, Sauce, and Seasoning Modifications
Enhance your homemade stuffing with additional vegetables for extra nutrition and flavor. Shredded carrots add subtle sweetness and color, while diced bell peppers contribute crunch and freshness. Dried cranberries or raisins introduce pleasant bursts of sweetness that complement the savory herbs beautifully.
For seasoning variations, consider regional twists. Southern-style stuffing might incorporate cornbread and add a pinch of Cajun seasoning. Northeast versions often include oysters for a luxurious holiday touch. Mediterranean interpretations can feature sun-dried tomatoes, olives, and oregano instead of traditional sage.
The herb blend offers flexibility based on what you have available. Fresh herbs provide brighter flavor, but dried herbs work perfectly well and are more convenient. If using dried herbs, remember the ratio: 1 teaspoon dried equals 1 tablespoon fresh. Sage remains the star, but thyme and rosemary support it beautifully with their earthy notes.
Mastering Homemade Stuffing: Advanced Tips and Variations
Taking your homemade stuffing from good to great requires understanding a few professional techniques. These tips ensure consistent, delicious results every time you prepare this classic dish.
Pro Cooking Techniques
- Bread dryness test: Squeeze a handful of dried bread cubes. They should feel light and firm, not soft or yielding. Properly dried bread absorbs broth without becoming mushy.
- Temperature management: If using a fan-forced convection oven, reduce the temperature by 25°F or keep the same temperature and reduce cooking time by 10 minutes to prevent over-browning.
- Even distribution: Use your hands to toss the bread with the broth mixture. This ensures every cube gets coated evenly and helps you feel the texture to judge moisture levels accurately.
Flavor Variations
Create signature versions of homemade stuffing with these creative additions:
- Apple and sausage: Add diced apples and cooked breakfast sausage for a sweet and savory combination that pairs wonderfully with pork or poultry.
- Mushroom and herb: Sauté sliced mushrooms with the onions for an earthy depth. This variation complements mushroom stuffing recipes beautifully.
- Cornbread and bacon: Use crumbled cornbread as your base and add crispy bacon pieces for a Southern-inspired twist.
Presentation Tips
For an attractive presentation, bake in a pretty casserole dish that goes from oven to table. Garnish with fresh parsley sprigs or sage leaves just before serving. For individual servings, bake portions in ramekins for an elegant presentation at dinner parties.
Make-Ahead Options
Homemade stuffing works excellently for meal prep. Prepare the entire recipe up to the baking step, cover tightly, and refrigerate for 1-2 days. When ready to bake, let it sit at room temperature for 30 minutes, then bake as directed, adding 10-15 extra minutes to account for the chill. This strategy reduces holiday cooking stress significantly.
How to Store Homemade Stuffing: Best Practices
Refrigeration Guidelines
Store leftover homemade stuffing in an airtight container in the refrigerator for up to 4 days. Allow the stuffing to cool completely before storing to prevent condensation, which can make the bread soggy. Divide large portions into smaller containers for quicker cooling and easier reheating of individual servings.
Freezing for Long-Term Storage
Homemade stuffing freezes exceptionally well for up to 4 months. Portion into serving-size containers or freeze the entire batch in a large freezer-safe dish. Wrap tightly with plastic wrap and foil, or use airtight freezer containers. Label with the date and contents for easy identification later.
To thaw frozen stuffing, transfer it to the refrigerator overnight. This slow thawing preserves texture and flavor. Alternatively, you can thaw in the microwave using the defrost setting, though oven thawing produces better results for large quantities.
Reheating for Best Results
Reheat refrigerated or thawed stuffing in the oven at 325°F for 20-25 minutes until heated through to 165°F internally. Cover with foil for the first 15 minutes to prevent drying, then uncover for the last 5-10 minutes to restore the crisp edges. Microwave reheating works for small portions but may result in softer texture. Add a splash of broth before reheating if the stuffing seems dry.
Nutritional information per serving shows this homemade stuffing provides balanced nutrition, as detailed by MyFoodData: 185 calories, 16g carbohydrates, 3g protein, and 11g fat per serving.
FAQs: Frequently Asked Questions About Homemade Stuffing
What bread works best for homemade stuffing?
Dry bread cubes form the base of great homemade stuffing, and a mix of white and wheat bread adds nice texture and flavor. Use homemade cubes dried in the oven or store-bought unseasoned ones for full control over seasonings. If opting for seasoned store-bought cubes, cut back on added salt by half but keep the herbs like sage and thyme for balance. Aim for about 10-12 cups of 1/2-inch cubes per recipe to serve 8-10 people. Stale bread absorbs broth better, preventing sogginess. Test dryness by squeezing a handful—it should hold together lightly without crumbling wetly. This setup yields fluffy, flavorful results every time. (78 words)
How do you dry fresh bread for stuffing quickly?
To dry fresh bread cubes fast for stuffing, preheat your oven to 300°F. Cut bread into 1/2-inch pieces, spread in a single layer on baking sheets, and bake for 10-15 minutes until dry and firm but not browned or toasted. Stir halfway through for even drying. Cool completely on the sheets before mixing with other ingredients—this prevents steam from making the stuffing mushy. This method works for any bread type and takes under 30 minutes total, saving time compared to air-drying overnight. Yields about 10 cups from a standard loaf. Perfect for last-minute prep. (92 words)
Can you cook stuffing inside the turkey or should it be separate?
Stuffing can go inside the turkey for infused flavor, but cool it fully in the fridge for 45 minutes first, then stuff loosely just before roasting. Check the stuffing center reaches 165°F internally for safety. For easier cooking and better texture, bake separately in a 3-3.5 quart casserole at 350°F for 30-40 minutes until edges crisp and center is hot. Separate baking avoids overcooking the bird and ensures even temperatures. Both ways work—inside for tradition, outside for crunchy tops. Use a food thermometer always. (89 words)
Can homemade stuffing be made ahead of time?
Yes, prepare homemade stuffing up to the baking step, cover tightly, and refrigerate for 1-2 days. Let it sit out 30 minutes before baking to remove chill, then bake at 350°F, adding 5-15 extra minutes if needed until 165°F inside. For freezing, portion into dishes, wrap well, and freeze up to 4 months. Thaw overnight in the fridge, then reheat covered at 325°F for 20-25 minutes, uncovering last 5 for crisp edges. This makes holiday meals stress-free while keeping flavors fresh. Avoid refreezing after thawing. (94 words)
How much broth do you add to bread cubes for stuffing?
Start with 2 cups of broth for 10-12 cups dry bread cubes, adding slowly while tossing gently with a fork or hands. Pause to let bread absorb, then add more up to 4 cups total—cubes should be moist and hold together when squeezed but not soggy or pooling liquid. Turkey or vegetable broth works best; low-sodium prevents over-salting. Factors like bread dryness affect amount—test by grabbing a handful. This technique ensures light, flavorful stuffing. Bake immediately or chill for later. Pairs perfectly with roasted turkey. (92 words)

Homemade Stuffing
🥧 Savor this easy stuffing with buttery-sage flavor and crisp golden edges, versatile for holidays or any meal to elevate your table effortlessly.
🍞 Make-ahead friendly and freezer-safe, it’s the perfect side that saves time while delivering comfort and crowd-pleasing taste!
- Total Time: 1 hour 10 minutes
- Yield: 12 servings
Ingredients
– 2 small yellow onions, diced for sweetness and depth as the aromatic foundation
– 4 ribs celery, diced for crunch and a savory, herbal note that balances the rich flavors
– ⅔ cup butter for richness and helping achieve those coveted golden, crispy edges
– 1 ½ teaspoons poultry seasoning or ½ teaspoon ground sage for the classic herb flavor that defines stuffing
– Black pepper to taste for mild heat and enhancing other flavors
– Salt to taste for bringing out all the flavors in the dish
– 12 cups dry bread cubes (mix of white and wheat or any dry bread like sourdough or cornbread) for absorbing flavors and creating texture
– 2 to 4 cups chicken or turkey broth for moistening the bread and infusing savory depth throughout
– 2 tablespoons chopped fresh parsley or 2 teaspoons dried parsley for fresh flavor and visual appeal
– 1 tablespoon fresh herbs (sage, thyme, rosemary) or 1 teaspoon dried herbs for the signature herb profile
Instructions
1-Step One: Prepare Your Bread Cubes Start by ensuring your bread is properly dried. Fresh bread creates soggy stuffing, so dryness is crucial. You have two options: leave bread cubes out for 2-3 days at room temperature, or bake cut cubes at 300°F for 10 minutes without browning. A mix of white and wheat bread provides excellent texture and flavor contrast, though sourdough or cornbread work wonderfully too. Measure after drying since bread loses about 20% of its volume during this process. You need 12 cups of dried cubes for this recipe.
2-Step Two: Preheat and Prepare Aromatics Preheat your oven to 350°F. This temperature allows the stuffing to heat through evenly while developing that beautiful golden crust. While the oven heats, dice 2 small yellow onions and 4 ribs of celery into small, even pieces. Uniform cuts ensure everything cooks at the same rate. Keep your prep organized by having all ingredients measured and ready before you start cooking.
3-Step Three: Cook the Aromatic Base Melt ⅔ cup butter in a large skillet over medium heat. Add the diced onions, celery, poultry seasoning (or ground sage), and rosemary if using fresh herbs. Cook this mixture on medium-low heat until tender, approximately 10-12 minutes. The vegetables should be soft and translucent, not browned. This slow cooking process allows the flavors to meld together and the herbs to release their essential oils. Cool the mixture slightly before moving to the next step.
4-Step Four: Combine Bread and Flavorings In a large bowl, combine the 12 cups of dry bread cubes with the cooled onion mixture. Add 2 tablespoons of chopped fresh parsley and 1 tablespoon of fresh herbs (sage, thyme, rosemary) or use the dried herb equivalents. Toss everything gently to distribute the flavors evenly throughout the bread. Take care not to crush the bread cubes while mixing.
5-Step Five: Add Broth Gradually This step requires patience and attention. Pour the broth gradually over the mixture, starting with just 1 cup. Toss gently to moisten the bread cubes, being careful to avoid creating a soggy texture. Add more broth as needed, testing by squeezing a handful of the mixture. It should hold together lightly without being wet or having pooling liquid at the bottom of the bowl. Fresh homemade dried cubes typically need 2-3 cups of broth, while store-bought dried cubes may require 3-4 cups due to their denser texture.
6-Step Six: Season and Transfer Season with salt and pepper to taste. Remember to taste before adding salt, especially if using store-bought seasoned bread cubes, which already contain sodium. Transfer the mixture to a baking dish. A 3-3.5 quart casserole dish works perfectly for this quantity. Dot the top with extra butter if desired for additional golden color and rich flavor.
7-Step Seven: Bake to Perfection Cover the baking dish and bake at 350°F for 35 minutes. The covering traps steam and ensures the center heats through completely. Then uncover and continue baking for an additional 10 minutes until the top is golden and the edges are crisp. This two-stage baking process creates the perfect contrast between a moist, fluffy interior and crunchy edges that everyone loves in homemade stuffing.
Notes
🍞 Dry bread thoroughly by leaving out or baking at low heat to prevent sogginess.
💧 Add broth slowly, allowing absorption between additions for perfect texture.
🔥 Bake covered first, then uncovered for soft center with crunchy edges.
- Prep Time: 15 minutes
- Cook Time: 55 minutes
- Category: Side Dish
- Method: Baking
- Cuisine: American
- Diet: Omnivore
Nutrition
- Serving Size: 1 serving
- Calories: 185
- Sugar: 2g
- Sodium: 462mg
- Fat: 11g
- Saturated Fat: 6g
- Unsaturated Fat: 5g
- Trans Fat: 0g
- Carbohydrates: 16g
- Fiber: 1g
- Protein: 3g
- Cholesterol: 27mg


