
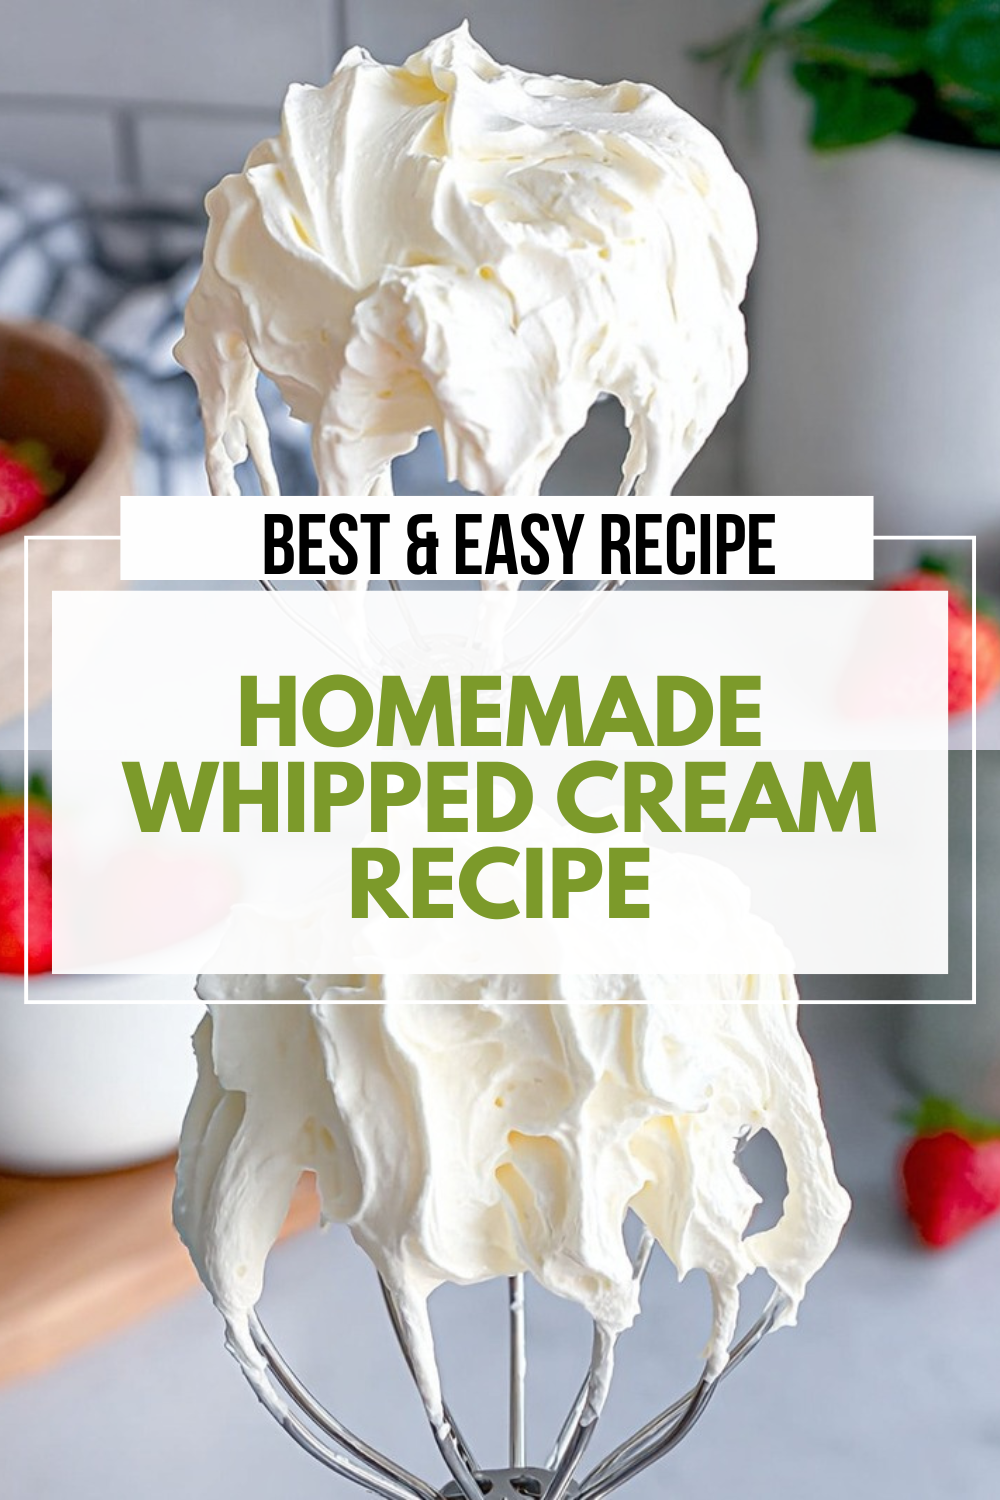
Why You’ll Love This Homemade Whipped Cream Recipe
Author: Camille Hayes
Blog: My blog shares my passion for cooking by offering a variety of recipes that are simple and accessible to everyone. My ambition is to inspire readers to explore new flavors, cook with joy, and create memorable moments around the table.
Making a homemade whipped cream recipe is one of those small wins that tastes like a celebration. Below are the main reasons this simple recipe is worth keeping in your kitchen rotation.
- Ease of preparation: This Homemade Whipped Cream Recipe comes together in about 5 minutes with only three main ingredients. Cold heavy cream, sugar, and vanilla are all you need. With a chilled bowl and a whisk attachment, you can turn plain cream into fluffy topping in under five minutes, making it perfect for busy evenings or last-minute desserts.
- Health benefits: Compared with many aerosol or stabilized store-bought toppings, made-from-scratch whipped cream has no preservatives or hidden additives. You control the sugar and can use confectioners’ sugar to avoid graininess. For readers interested in nutrition basics, heavy cream provides calories and fat that give a satisfying mouthfeel; for more on cream and nutrition, see this Health benefits of heavy whipping cream.
- Versatility: This Homemade Whipped Cream Recipe adapts easily to many dietary choices and flavor ideas. Use powdered sugar for a smoother finish, swap in extracts like almond or espresso for a twist, or make a vegan version using chilled coconut cream. It doubles as a topping, a filling, or a light frosting substitute in a 1:1 swap for many store-bought options.
- Distinctive flavor: Fresh whipped cream tastes brighter and creamier than canned alternatives. The simple combo of cold heavy cream and vanilla lets the dairy notes shine, so desserts feel fresher and more homemade. You can also add cocoa or reduced fruit puré for flavored versions that bring character to pies, cakes, and beverages.
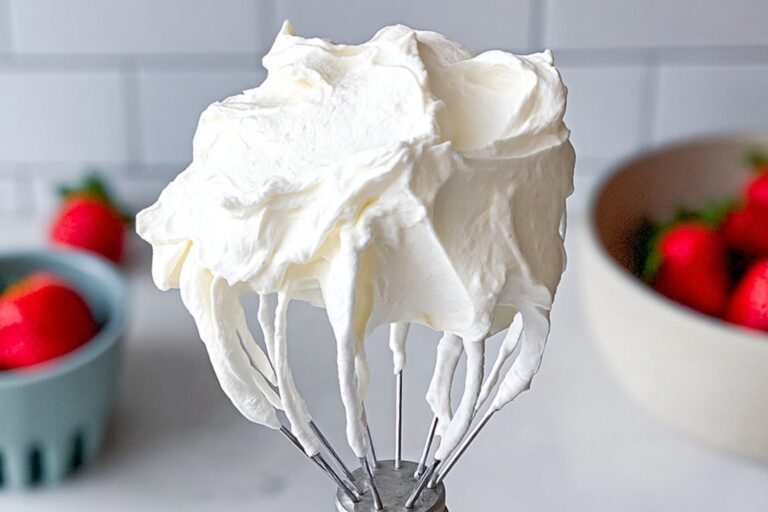
Getting your whipped cream just right is simple: keep your cream cold and whip on medium speed until you see medium peaks forming, soft and billowy but holding their shape.
Jump To
- 1. Why You’ll Love This Homemade Whipped Cream Recipe
- 2. Essential Ingredients for Homemade Whipped Cream Recipe
- 3. How to Prepare the Perfect Homemade Whipped Cream Recipe: Step-by-Step Guide
- 4. Dietary Substitutions to Customize Your Homemade Whipped Cream Recipe
- 5. Mastering Homemade Whipped Cream Recipe: Advanced Tips and Variations
- 6. How to Store Homemade Whipped Cream Recipe: Best Practices
- 7. FAQs: Frequently Asked Questions About Homemade Whipped Cream Recipe
- 8. Homemade Whipped Cream Recipe
Essential Ingredients for Homemade Whipped Cream Recipe
This ingredients list is clear and ready to follow. Each line shows the exact measurement first, then the ingredient name, followed by a short note explaining purpose or benefit.
- 1 cup (240g/ml) cold heavy cream or heavy whipping cream – Provides the fat needed to whip into stable peaks; choose 36% milk fat heavy cream for best results.
- 2 tablespoons granulated sugar or confectioners’ sugar – Sweetens and stabilizes; confectioners’ sugar can reduce graininess in larger batches.
- 1/2 teaspoon pure vanilla extract – Adds sweet, warm flavor; vanilla bean paste can be substituted 1:1 for extra visual flecks and flavor.
Special Dietary Options:
- Vegan: Use 1 cup chilled full-fat coconut cream or a commercial plant-based whipping cream substitute; results vary by brand and may need a stabilizer like a small amount of powdered sugar or agar-agar for longer hold.
- Gluten-free: The basic recipe is naturally gluten-free. Check sugar and extract labels if you have severe sensitivities.
- Low-calorie: Try a light stabilized version using whipped aquafaba for a lower-calorie topping; texture will be different from dairy whipped cream.
| Prep time | Approximately 5 minutes |
|---|---|
| Cook time | 0 minutes |
| Total time | About 5 minutes |
| Yield | About 2 cups whipped cream from 1 cup heavy cream |
How to Prepare the Perfect Homemade Whipped Cream Recipe: Step-by-Step Guide
This step-by-step section follows the easy format requested. Each step is practical and includes timing, technique, and small variations you can use for dietary needs or flavor changes.
First Step: Chill your equipment and ingredients
Chill the heavy cream, mixing bowl, and whisk attachment if possible for best results. Cold cream whips better because the fat stays firmer while it traps air. Place the metal mixing bowl and whisk in the refrigerator for 20 minutes or the freezer for 10 to 15 minutes. Keep your heavy cream in the coldest part of the fridge until just before whipping.
Second Step: Measure and combine
Measure 1 cup (240g/ml) cold heavy cream into the chilled bowl. Add 2 tablespoons granulated sugar or confectioners’ sugar and 1/2 teaspoon pure vanilla extract. If you prefer a different sweetness level, taste a tiny spoonful of the unwhipped mix and adjust sugar by 1/2 teaspoon increments. For powdered sugar, note it will help avoid grainy texture in larger batches.
Third Step: Begin whipping on medium
Using an electric mixer with a whisk attachment, start whipping on medium speed to incorporate the sugar and begin aeration. This first minute sets the structure; whip for roughly 60 seconds and watch for the mixture to thicken slightly. If hand-whisking, use a large, cold bowl and a balloon whisk and expect 10 to 15 minutes of steady work.
Fourth Step: Increase speed to medium-high
After the first minute, switch to medium-high speed and continue whipping until medium peaks form, about 3 to 4 minutes total. Medium peaks mean the cream forms semi-sturdy peaks that slightly droop but hold shape. To test, lift the whisk: the peak should curl over at the top but not collapse immediately. Stop frequently to check consistency because whipping can go from perfect to overdone quickly.
Fifth Step: Avoid over-whipping and fix separation
Avoid over-whipping as it causes a curdled, grainy texture. If you see the texture becoming lumpy or watery, stop. If the cream does over-whip, gently fold in a small amount of cold heavy cream by hand to smooth it out. Add 2 to 4 tablespoons of chilled heavy cream and use a spatula or whisk to fold until the mixture regains a silky texture. Do not re-whip on high, or it may continue toward butter formation.
Final Step: Serve or store
Use whipped cream immediately or cover and store tightly in the refrigerator for up to 24 hours. For piping, transfer to a piping bag fitted with a large star tip. Whipped cream holds shape for about 24 hours refrigerated but may begin to weep or soften after that time. If you plan to serve later in the day, make the cream within a few hours of serving for the best texture.
Timing and practical tips inside the method
- Keep the bowl and whisk cold to speed whipping and improve volume.
- Do not fill the mixing bowl more than halfway to allow room for the cream to expand as it doubles in volume.
- For flavored versions, add extracts like almond or a small amount of espresso powder at the same time as the vanilla.
- If you want thicker, more stable peaks for piping, add a tablespoon of cooled mascarpone or a teaspoon of cornstarch sifted with the sugar, but note the texture will change slightly.

Dietary Substitutions to Customize Your Homemade Whipped Cream Recipe
This section gives practical swaps so the recipe works for different diets, allergies, or ingredient availability.
Protein and Main Component Alternatives
When heavy cream is not available or you need a dairy-free option, here are the best substitutes and what to expect from each.
- Chilled coconut cream: Use 1 cup of thick, chilled coconut cream for a vegan version. Chill a can of full-fat coconut milk overnight, scoop the solid cream, and whip as you would dairy cream. Flavor will be coconut-forward and hold best with a bit of powdered sugar.
- Commercial plant whipping creams: Brands labeled as plant-based heavy cream substitutes can whip similarly, but results vary. Follow package instructions and chill thoroughly.
- Aquafaba: The liquid from canned chickpeas can be whipped into a light foam and sweetened; texture is airy but less rich than dairy cream. It works best for low-calorie toppings or meringue-style decorations.
- Lower-fat dairy: Regular whipping cream with 30-35% fat will whip but produce softer peaks that deflate sooner. Use immediately for drinks or quick toppings.
Vegetable, Sauce, and Seasoning Modifications
These adjustments change flavor or stability and help match the topping to the dessert you are serving.
- Flavoring options: Swap some or all of the vanilla for almond extract, a pinch of espresso powder for mocha whipped cream, or 1 tablespoon of unsweetened cocoa for chocolate whipped cream.
- Fruit flavors: Gently fold in a spoonful of thick fruit puré or jam after whipping for a quick fruit-flavored cream. For best results, reduce the puré to thicken it slightly so you do not add too much liquid.
- Sweeteners: Granulated or confectioners’ sugar are the simplest options. Sugar substitutes like Stevia or Truvia have not been tested widely and may change whipping behavior and taste.
Mastering Homemade Whipped Cream Recipe: Advanced Tips and Variations
Ready to move beyond the basics? Here are pro tips and fun variations to make your whipped cream special and reliable.
Pro cooking techniques
- Stabilizing without gelatin: For longer hold without gelatin, fold in 1 to 2 tablespoons of mascarpone or cream cheese that has been softened, or sift 1 teaspoon cornstarch with the sugar before whipping.
- Using cold metal implements: Metal bowls and whisks hold cold longer than plastic, so they help speed whipping and improve final volume.
- Small batches for best texture: Whip no more than 1 to 2 cups worth of cream at a time. Larger batches can be harder to gauge and may whip unevenly.
Flavor variations
- Vanilla bean paste substitute: use the same quantity of vanilla bean paste instead of extract for flecks and intense flavor.
- Chocolate: add 1 to 2 tablespoons unsweetened cocoa powder with the sugar, or fold in melted and cooled dark chocolate for chocolate whipped cream.
- Adult twists: stir in a teaspoon of tequila and a bit of lime zest for a pared-down boozy topping for certain desserts; use lightly and keep guests informed.
- Fruit and spice: cinnamon, nutmeg, or citrus zest can brighten the cream for seasonal desserts.
Presentation tips
- Pipe whipped cream using large star tips for rosettes and swirls on cakes and cupcakes.
- For hot chocolate, spoon a generous dollop on top and sprinkle with cocoa or cinnamon.
- Pairings: Fresh berries, pies, tarts like lemon tart, or a bowl of warm fruit all benefit from a cloud of fresh whipped cream. See this recipe for pairing ideas like Blueberry Cream Cake and try it on warm fruit or chilled custards.
Make-ahead options
- Make whipped cream up to 24 hours ahead and store in a tightly covered container in the refrigerator. Re-whip gently for a few seconds if it softens slightly.
- For longer storage, freeze dollops on a parchment-lined tray until solid, then transfer to a freezer bag. Thaw in the fridge and re-whip if needed, though texture may change slightly.
How to Store Homemade Whipped Cream Recipe: Best Practices
Proper storage keeps your whipped cream fresh and safe. Here are short-term and longer-term options plus meal-prep tips.
Refrigeration
Use whipped cream immediately for best volume and texture. For short-term storage, place in a tightly covered container such as a glass or plastic food storage container and keep refrigerated at 40 F or below. Whipped cream holds shape for about 24 hours refrigerated but may start to weep after that. Press plastic wrap to the surface before sealing the lid to reduce skin formation and drying.
Freezing
Freezing works for dollops used later on hot drinks or fruit. Pipe or spoon small portions onto parchment and freeze until firm, then transfer to a freezer bag for up to 1 month. Thaw in the refrigerator and re-whip gently if needed. Note that freezing may affect the creamy texture.
Reheating and meal prep considerations
Do not heat whipped cream. For meal prep, make and store components separately: whip cream shortly before serving, or use frozen dollops placed on hot dishes at serving time so they melt attractively. Label containers with the date and use within recommended times for safety and best quality.
FAQs: Frequently Asked Questions About Homemade Whipped Cream Recipe
What ingredients do I need for homemade whipped cream?
To make homemade whipped cream, gather these essentials: 1 cup cold heavy whipping cream (at least 36% milk fat), 2 tablespoons granulated sugar or confectioners’ sugar, and 1 teaspoon pure vanilla extract or vanilla bean paste. Chill your mixing bowl and whisk attachment in the freezer for 10-15 minutes beforehand for best results. Heavy cream is key because its high fat content allows it to whip into stable peaks—avoid lower-fat options like whole milk. For variations, add a pinch of salt for balance or cocoa powder for chocolate whipped cream. This simple combo yields about 2 cups of cream, perfect for topping pies, cakes, or hot chocolate. Measure ingredients precisely and keep everything cold to prevent a runny texture. Prep time is just 5 minutes, making it faster than store-bought alternatives. (98 words)
How do you make whipped cream from scratch?
Start with very cold heavy whipping cream straight from the fridge. Pour 1 cup into a chilled bowl fitted with a whisk attachment on an electric mixer. Add 2 tablespoons sugar and 1 teaspoon vanilla extract. Beat on medium speed for 1 minute to incorporate, then increase to medium-high. Whip for 2-4 minutes until medium peaks form—lift the whisk and the peak should hold shape but slightly curl. Stop immediately to avoid butter-like curds. Total time is under 5 minutes. For best volume, don’t overfill the bowl (halfway max). Use for sundaes, cheesecakes, or fruit. If hand-whisking, it takes 10-15 minutes of vigorous effort. Always taste and adjust sweetness midway. This method beats canned versions in freshness and fluffiness every time. (112 words)
What’s the difference between heavy cream and whipping cream for recipes?
Heavy cream (or heavy whipping cream) has 36-40% milk fat, creating thicker, more stable whipped cream that holds peaks longer—ideal for piping or toppings that last up to 24 hours in the fridge. Regular whipping cream has 30-35% fat, resulting in lighter, softer peaks that deflate faster, better for immediate use like hot drinks. Always check labels; in the US, “heavy” guarantees higher fat. Lower-fat options like half-and-half (10-12%) won’t whip properly. For stability, stick to heavy cream chilled below 40°F. Test by whipping small batches: heavy holds shape on beaters, while whipping cream slumps quicker. This fat difference affects recipes—use heavy for cakes, lighter for berries. Pro tip: skim milk won’t work due to insufficient fat for aeration. (118 words)
How do you fix overwhipped or separated whipped cream?
If your whipped cream turns grainy or curdled (like butter), it’s overwhipped—fat has separated from liquid. Don’t toss it: add 2-4 tablespoons of fresh cold heavy cream to the bowl. Gently fold by hand with a whisk or spatula for 30-60 seconds until smooth and fluffy again. Avoid remixing on high speed, as it worsens separation. Chill the bowl for 5 minutes midway if needed. Prevention: watch closely after soft peaks, stopping at medium-stiff. Common causes include warm cream or high mixer speed. Once fixed, use within hours. For butter stage, strain liquid and whip solids with more cream. This salvage trick saves batches, keeping your desserts topped perfectly without waste. Practice builds timing skills for foolproof results. (114 words)
How long does homemade whipped cream last in the fridge?
Fresh homemade whipped cream stays good for 24-48 hours in an airtight container in the fridge at 40°F or below—cover tightly with plastic wrap pressed to the surface to prevent drying or absorbing odors. Beyond 24 hours, it may weep liquid or deflate, especially if piped. For longer storage, dollop onto parchment-lined trays, freeze solid (2 hours), then transfer to freezer bags; thaw in fridge for up to 1 month, though texture softens slightly. Don’t leave at room temp over 2 hours to avoid bacterial growth. Label with dates. Revive day-old cream by re-whipping gently with a splash of cold milk. Always use fresh for best taste and safety on cakes or pies. Freezing works for berries but not ultra-stable frostings. (108 words)
Homemade Whipped Cream Recipe
🍰 Create light, fluffy homemade whipped cream in minutes with just three simple ingredients for the perfect dessert topping
🥛 Rich and creamy with pure vanilla flavor, this quick recipe elevates any dessert from ordinary to extraordinary
- Total Time: 5 minutes
- Yield: About 2 cups 1x
Ingredients
1 cup (240g/ml) cold heavy cream or heavy whipping cream Provides the fat needed to whip into stable peaks
2 tablespoons granulated sugar or confectioners’ sugar Sweetens and stabilizes
1/2 teaspoon pure vanilla extract Adds sweet, warm flavor
Instructions
1-First Step: Chill your equipment and ingredients Chill the heavy cream, mixing bowl, and whisk attachment if possible for best results. Cold cream whips better because the fat stays firmer while it traps air. Place the metal mixing bowl and whisk in the refrigerator for 20 minutes or the freezer for 10 to 15 minutes. Keep your heavy cream in the coldest part of the fridge until just before whipping.
2-Second Step: Measure and combine Measure 1 cup (240g/ml) cold heavy cream into the chilled bowl. Add 2 tablespoons granulated sugar or confectioners’ sugar and 1/2 teaspoon pure vanilla extract. If you prefer a different sweetness level, taste a tiny spoonful of the unwhipped mix and adjust sugar by 1/2 teaspoon increments. For powdered sugar, note it will help avoid grainy texture in larger batches.
3-Third Step: Begin whipping on medium Using an electric mixer with a whisk attachment, start whipping on medium speed to incorporate the sugar and begin aeration. This first minute sets the structure; whip for roughly 60 seconds and watch for the mixture to thicken slightly. If hand-whisking, use a large, cold bowl and a balloon whisk and expect 10 to 15 minutes of steady work.
4-Fourth Step: Increase speed to medium-high After the first minute, switch to medium-high speed and continue whipping until medium peaks form, about 3 to 4 minutes total. Medium peaks mean the cream forms semi-sturdy peaks that slightly droop but hold shape. To test, lift the whisk: the peak should curl over at the top but not collapse immediately. Stop frequently to check consistency because whipping can go from perfect to overdone quickly.
5-Fifth Step: Avoid over-whipping and fix separation Avoid over-whipping as it causes a curdled, grainy texture. If you see the texture becoming lumpy or watery, stop. If the cream does over-whip, gently fold in a small amount of cold heavy cream by hand to smooth it out. Add 2 to 4 tablespoons of chilled heavy cream and use a spatula or whisk to fold until the mixture regains a silky texture. Do not re-whip on high, or it may continue toward butter formation.
6-Final Step: Serve or store Use whipped cream immediately or cover and store tightly in the refrigerator for up to 24 hours. For piping, transfer to a piping bag fitted with a large star tip. Whipped cream holds shape for about 24 hours refrigerated but may begin to weep or soften after that time. If you plan to serve later in the day, make the cream within a few hours of serving for the best texture.
Notes
🥛 Cold cream whips better, so chilling the bowl and whisk for 10-15 minutes before starting makes a huge difference
⏰ Stop frequently to check consistency – over-whipped cream becomes grainy and curdled, ruining the texture
🎉 The volume doubles when whipping – 1 cup of heavy cream yields about 2 cups of whipped cream for plenty of servings
- Prep Time: 5 minutes
- Cook Time: 0 minutes
- Category: Dessert Topping
- Method: Whipping
- Cuisine: International
- Diet: Vegetarian
Nutrition
- Serving Size: 2 tablespoons
- Calories: 52
- Sugar: 2.5g
- Sodium: 5mg
- Fat: 5g
- Saturated Fat: 3.5g
- Unsaturated Fat: 1.5g
- Trans Fat: 0g
- Carbohydrates: 3g
- Fiber: 0g
- Protein: 0.3g
- Cholesterol: 15mg


