
Why You’ll Love This Instant Pot Hard Boiled Eggs
If you’ve ever struggled with stovetop boiled eggs that crack, overcook, or refuse to peel cleanly, you’re in for a treat. Instant Pot hard boiled eggs have completely transformed how I prepare this kitchen staple, and I’m excited to share this foolproof method with you.
Benefits That Make This Recipe a Game-Changer
- Ease of preparation: The pressure cooker method requires no monitoring, no timing from boiling point, and practically zero babysitting. Simply set it, walk away, and return to perfectly cooked eggs every single time. The hands-off approach means you can focus on other breakfast prep while your eggs cook to perfection.
- Health benefits: Eggs are nutritional powerhouses packed with high-quality protein, essential vitamins, and minerals. Each egg contains just 62 calories while delivering 5 grams of protein, making them an excellent choice for anyone watching their weight or building muscle. According to health experts, eggs support brain health, eye health, and provide sustained energy throughout the morning.
- Versatility: Hard boiled eggs work beautifully in countless dishes from classic egg salad and deviled eggs to salad toppings, grain bowl additions, and protein-packed snacks. They’re naturally gluten-free, keto-friendly, and fit virtually any dietary plan including Whole30 and paleo.
- Effortless peeling: The high-pressure steam creates a natural separation between the egg white and shell membrane, resulting in shells that slip right off. Say goodbye to those frustrating moments of picking off tiny shell fragments!
Jump To
- 1. Why You’ll Love This Instant Pot Hard Boiled Eggs
- 2. Essential Ingredients for Instant Pot Hard Boiled Eggs
- 3. How to Prepare the Perfect Instant Pot Hard Boiled Eggs: Step-by-Step Guide
- 4. Protein and Main Component Alternatives
- 5. Vegetable, Sauce, and Seasoning Modifications
- 6. Mastering Instant Pot Hard Boiled Eggs: Advanced Tips and Variations
- 7. How to Store Instant Pot Hard Boiled Eggs: Best Practices
- 8. FAQs: Frequently Asked Questions About Instant Pot Hard Boiled Eggs
- 9. Instant Pot Hard Boiled Eggs
Essential Ingredients for Instant Pot Hard Boiled Eggs
The beauty of pressure cooker hard boiled eggs lies in their simplicity. You need minimal ingredients and equipment to achieve restaurant-quality results at home.
Main Ingredients
- 1 to 12 large eggs, at room temperature – The star of the show! Room temperature eggs cook more evenly and are less prone to cracking during the pressure cooking process. If your eggs are cold from the refrigerator, simply soak them in lukewarm water for 10-15 minutes before cooking.
- 1 cup cold tap water (for 3- or 6-quart pressure cooker) – This precise amount creates the perfect steam environment for cooking eggs in smaller Instant Pot models. Always use cold water, not hot or warm, for consistent timing.
- 1.5 cups cold tap water (for 8-quart model) – Larger pressure cookers require slightly more water to generate adequate steam pressure for even cooking.
Equipment You’ll Need
- Egg rack or trivet (keeps eggs elevated above water and centers yolks)
- Instant Pot or pressure cooker
- Ice cubes and cold water for the ice bath
- Tongs or potholder for safe egg transfer
Special Dietary Notes
| Dietary Need | Notes |
|---|---|
| Gluten-free | Eggs are naturally gluten-free |
| Keto/Low-carb | Perfect choice at under 1 gram carbs per egg |
| Dairy-free | Contains no dairy ingredients |
| Paleo/Whole30 | Compatible with both diets |
How to Prepare the Perfect Instant Pot Hard Boiled Eggs: Step-by-Step Guide
Mastering instant pot eggs is easier than you might think. This method, often called the 5-5-5 method, produces consistent results that work for over 90% of home cooks.
Step 1: Prepare Your Pressure Cooker
Start by pouring cold tap water into the inner pot of your Instant Pot. The amount matters for proper pressure building:
- Use 1 cup for 3-quart or 6-quart models
- Use 1.5 cups for 8-quart models
Cold water is essential for accurate cooking times. Hot water can affect how quickly the pot reaches pressure, throwing off your carefully calibrated timing.
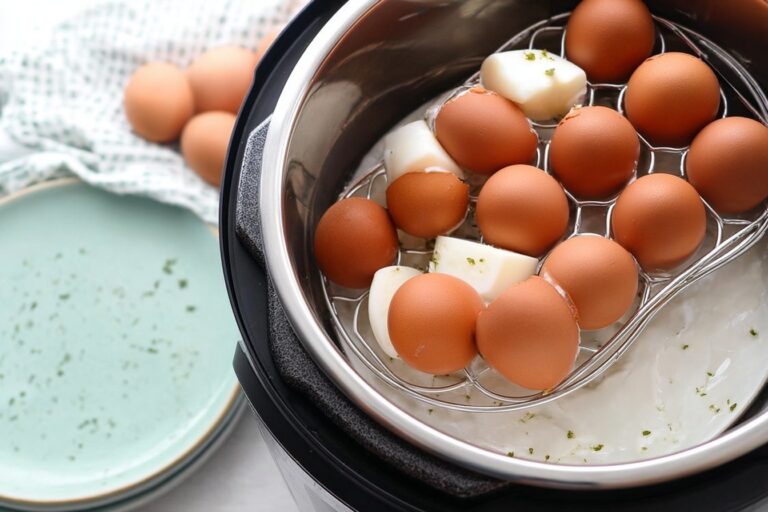
Step 2: Position the Eggs
Place your egg rack or trivet inside the pot. This keeps the eggs elevated above the water, allowing them to cook through steam rather than direct contact with boiling water. Arrange your room temperature eggs on the rack you can safely stack them if cooking more than a single layer. Most standard trivets that come with Instant Pots can hold 6-8 eggs comfortably on a single layer, with stacking allowing up to 12 eggs total.
Step 3: Set the Pressure Cooker
Secure the lid on your Instant Pot, making sure the sealing ring is properly in place. Double-check that the vent is set to the sealing position this is crucial for building pressure. Select the pressure cook function (manual on some models) and set it to high pressure for exactly 5 minutes.
Pro tip: The 5-5-5 method refers to 5 minutes pressure cook, 5 minutes natural release, and 5 minutes ice bath. This timing produces firm whites and creamy, fully-set yolks without the dreaded green ring.
Step 4: Prepare the Ice Bath
While the eggs are cooking, take a few minutes to prepare your ice bath. Fill a large bowl with cold water and plenty of ice cubes you want it ready the moment your eggs finish cooking. The ice bath serves two critical functions: it stops the cooking process immediately and creates temperature shock that helps separate the shell from the egg white.
Step 5: Natural Pressure Release
After the 5-minute cooking cycle completes, allow the pressure to release naturally for exactly 5 minutes. This gradual pressure reduction helps the eggs finish cooking gently and prevents the yolks from developing a chalky texture. You’ll see the float valve drop slowly during this time.
Step 6: Quick Pressure Release
Once the 5-minute natural release is complete, carefully move the vent knob to the venting position. Stand back slightly as steam will release quickly. This quick release releases any remaining pressure so you can safely open the pot. Wait until the float valve drops completely before opening the lid.
Step 7: Transfer to Ice Bath
Using tongs or a potholder, carefully transfer each egg from the pressure cooker to your prepared ice bath. Work efficiently but carefully the eggs will be hot! Submerge all eggs completely in the ice water and let them soak for at least 5 minutes. For best peeling results, you can leave them in the ice bath for up to 15 minutes.
Step 8: Peel and Enjoy
Remove eggs from the ice bath and gently crack the shells by rolling each egg on the counter. Start peeling from the wider end where the air pocket is located this is usually the easiest entry point. The shell should come off in large pieces, leaving you with smooth, beautiful eggs ready for whatever dish you have planned.
For a complete breakfast spread, consider pairing your perfectly cooked eggs with fluffy cheese chive biscuits or adding them to a hearty vegetable frittata.
Protein and Main Component Alternatives
While this recipe focuses on classic chicken eggs, you might wonder about alternatives or have questions about egg selection. Here’s what you need to know about different options.
Egg Size Variations
The cooking times in this recipe are calibrated for large eggs. If you’re using different sizes, here are adjustments to consider:
- Medium eggs: Reduce cooking time to 4 minutes on high pressure
- Extra-large eggs: Keep at 5 minutes for standard results
- Jumbo eggs: Increase to 6 minutes for fully set yolks
Farm-Fresh vs. Store-Bought Eggs
Farm-fresh eggs work perfectly fine in the pressure cooker, though they may present slightly more peeling challenges than older eggs. The pressure cooking method helps, but if you’re using very fresh eggs from a local farm, consider letting them sit in the refrigerator for a week before hard boiling the slightly older shells separate more easily.
Organic and Free-Range Options
Organic, free-range, and pasture-raised eggs cook exactly the same way as conventional eggs. The nutritional profile may differ slightly, with pasture-raised eggs often containing higher levels of omega-3 fatty acids and vitamins. Choose whichever type fits your budget and values cooking times remain constant.
Brown vs. White Eggs
Shell color has absolutely no effect on cooking time or peeling ease. Brown and white eggs cook identically in the pressure cooker, so use whichever is available or affordable.
What About Duck Eggs?
Duck eggs are larger and have thicker shells than chicken eggs. If you’re lucky enough to have access to duck eggs, increase cooking time to 6-7 minutes on high pressure. The extra minute accounts for their larger size and higher yolk-to-white ratio.
Vegetable, Sauce, and Seasoning Modifications
Once you’ve mastered the basic technique, you can get creative with flavor additions. While traditional hard boiled eggs don’t require seasoning during cooking, there are plenty of ways to add flavor afterward.
Classic Seasoning Ideas
The simplest approach is often the best. A sprinkle of flaky sea salt and fresh cracked pepper transforms a plain egg into a satisfying snack or breakfast component.
- Everything bagel seasoning: Garlic, onion, poppy seeds, and sesame seeds add savory complexity
- Smoked paprika: Adds a subtle smokiness and beautiful color
- Fresh herbs: Chopped chives, dill, or parsley bring freshness
- Hot sauce: A dash of sriracha or your favorite hot sauce adds kick
Egg Salad Variations
Transform your hard boiled eggs into creamy egg salad with endless customization options:
| Style | Key Ingredients |
|---|---|
| Classic | Mayonnaise, mustard, celery, onion |
| Avocado | Mashed avocado, lime juice, cilantro |
| Greek | Greek yogurt, dill, cucumber, feta |
| Curried | Mayo, curry powder, raisins, cashews |
Deviled Egg Flavor Ideas
Deviled eggs are a classic way to showcase your perfectly cooked hard boiled eggs. The standard filling combines egg yolks with mayonnaise, mustard, and seasonings, but variations are endless:
- Bacon and cheddar: Add crispy bacon bits and sharp cheddar to the yolk mixture
- Smoked salmon: Mix in finely chopped smoked salmon and dill
- Spicy jalapeño: Include diced pickled jalapeños and pepper jack cheese
- Mediterranean: Blend in sun-dried tomatoes, olives, and feta cheese
Serving Suggestions
Hard boiled eggs shine in many dishes beyond the obvious. Slice them over avocado toast for extra protein, chop them into grain bowls for substance, or serve them alongside crispy cheesy sausage hash browns for a hearty weekend breakfast.
Mastering Instant Pot Hard Boiled Eggs: Advanced Tips and Variations
Once you’ve mastered the basic instant pot hard boiled eggs recipe, these advanced tips will help you achieve perfect results every time and troubleshoot any issues that arise.
Pro Cooking Techniques
The One-Egg Test
Every pressure cooker operates slightly differently due to variations in altitude, model accuracy, and seal condition. Before cooking a full batch, test with a single egg to dial in your perfect timing. If the yolk is too runny, add 30-60 seconds. If you see a green ring, reduce by the same amount.
Room Temperature Eggs
Cold eggs straight from the refrigerator are more likely to crack under pressure. Take eggs out 20-30 minutes before cooking, or soak cold eggs in lukewarm water for 10-15 minutes. This simple step dramatically reduces cracking and ensures even cooking.
Altitude Adjustments
At higher altitudes, water boils at lower temperatures, which affects pressure cooking. If you live above 3,000 feet, consider adding 1-2 minutes to your cooking time or increasing natural release time by 1-2 minutes.
Creative Variations
Soft Boiled Eggs
For jammy, spreadable yolks perfect for toast: reduce pressure cook time to 3 minutes, keep the 5-minute natural release, and ice bath immediately. These are incredible sliced over ramen or buttered toast.
Medium Boiled Eggs
For custardy yolks that aren’t quite firm: cook for 4 minutes on high pressure with the standard 5-minute natural release and ice bath. This yields a yolk that’s set but still has some creaminess.
Presentation Tips
For deviled eggs or when appearance matters, use an egg rack to keep yolks centered during cooking. Off-center yolks are perfectly fine for eating but can make deviled eggs look uneven.
Make-Ahead Options
Hard boiled eggs are perfect for meal prep. Cook a dozen on Sunday and you’ll have protein-ready snacks and meal components all week. Store unpeeled eggs in the refrigerator for up to 7 days, marking them clearly so family members don’t confuse them with raw eggs.
How to Store Instant Pot Hard Boiled Eggs: Best Practices
Proper storage extends the life of your hard boiled eggs pressure cooker creation and maintains food safety.
Refrigeration Guidelines
- Unpeeled eggs: Store in the refrigerator for up to 7 days. Keep them in their original carton or a clearly marked container to avoid confusion with raw eggs.
- Peeled eggs: Place in an airtight container and refrigerate for up to 3 days. For longer storage, submerge peeled eggs in water (changed every other day) for up to 7 days.
- Egg salad or deviled eggs: Consume within 3-4 days when stored properly in the refrigerator.
Freezing Considerations
Freezing whole hard boiled eggs is not recommended the whites become rubbery and watery when thawed. However, you can freeze chopped egg yolks for later use in salads or as garnish. For best results, freeze only the yolks and use within 3 months.
Reheating Tips
Hard boiled eggs are typically eaten cold, but if you prefer them warm, avoid the microwave which can cause explosive results. Instead, place peeled eggs in a bowl of warm water for 5-10 minutes, or steam them gently for 2-3 minutes.
Meal Prep Strategies
For efficient meal prep, cook a full batch of eggs on Sunday. Keep half unpeeled for later in the week and peel the rest for immediate snacks and recipes. Store peeled eggs in water in a sealed container, changing the water daily for maximum freshness.

FAQs: Frequently Asked Questions About Instant Pot Hard Boiled Eggs
How long to cook hard boiled eggs in Instant Pot?
For perfect Instant Pot hard boiled eggs, add 1 cup of water to the pot, place a trivet inside, and arrange 6-12 large eggs on top. Secure the lid, set the valve to sealing, and cook on high pressure for 5 minutes. Follow with a 5-minute natural pressure release, then quick release any remaining pressure. Transfer eggs immediately to an ice bath for 5 minutes. This timing yields firm whites, creamy yolks, and shells that slip right off. Adjust to 4 minutes for softer yolks or 6 minutes for firmer ones based on egg size and altitude. Always use room temperature eggs for best results. Total time from start to peel-ready is about 25 minutes. (92 words)
Why do my Instant Pot hard boiled eggs have a green ring around the yolk?
A green ring around the yolk in Instant Pot hard boiled eggs comes from overcooking, which causes sulfur in the white to react with iron in the yolk. To fix it, reduce cook time to 4 minutes on high pressure followed by 4 minutes of natural pressure release, then quick release and ice bath. Use fresh eggs and avoid high heat after cooking. This keeps yolks bright yellow and sulfur-free. If you prefer standard timing, stick to 5 minutes high pressure with 5 minutes NPR for most Instant Pots. Test with one batch and adjust slightly for your model. Proper timing prevents this issue entirely. (98 words)
How do you peel hard boiled eggs from Instant Pot easily?
Instant Pot hard boiled eggs peel effortlessly thanks to high-pressure steam that separates the membrane from the shell. After cooking (5 minutes high pressure, 5 minutes NPR), plunge eggs into an ice water bath for at least 5 minutes—the colder, the better. Start peeling under cool running water or tap the egg on a hard surface to crack the shell all over, then roll gently to loosen. Peel from the wider end where the air pocket is. Room temperature eggs before cooking reduce cracking and aid peeling. This method works 95% of the time compared to stovetop boiling. Store peeled eggs in water in the fridge for up to a week. (102 words)
What if Instant Pot hard boiled egg yolks are still soft?
Soft or runny yolks in Instant Pot hard boiled eggs usually mean undercooking or cold starting water/eggs. Use room temperature eggs and 1 cup cold water. Increase to 6 minutes high pressure with 5 minutes natural pressure release, then quick release and ice bath. Ensure the pot reaches full pressure (about 10 minutes preheat). For jumbo eggs, add 1 extra minute. Avoid opening early. This adjustment gives fully set yolks without green rings. Double-check your model’s pressure settings. If issues persist, your eggs might be extra fresh—older ones cook faster. Practice once for perfect results every time. (96 words)
What if an egg cracks during Instant Pot hard boiling?
Cracked eggs in the Instant Pot happen rarely, often from cold eggs or overcrowding. Room temperature eggs crack less—let them sit out 20-30 minutes first. A cracked egg is still safe to eat if the shell didn’t shatter completely; the pressure seals minor cracks. Discard if contents leak heavily or smell off. It’s fine for salads but skip for deviled eggs where appearance matters. Next time, use 8-10 eggs max per batch on the trivet. Clean the pot well after to avoid residue. This method keeps 99% of eggs intact for hassle-free peeling and eating. (94 words)
Instant Pot Hard Boiled Eggs
🥚 Instant Pot 5-5-5 method yields perfect hard boiled eggs with centered yolks and shells that slip right off – foolproof every batch!
⚡ Hands-free 20-minute cooking beats stovetop boiling, ideal for meal prep, salads, or snacks without green rings or cracks.
- Total Time: 20 minutes
- Yield: 12 eggs
Ingredients
– 1 to 12 large eggs, at room temperature
– 1 cup cold tap water for 3- or 6-quart pressure cooker
– 1.5 cups cold tap water for 8-quart model
Instructions
1-Step 1: Prepare Your Pressure Cooker Start by pouring cold tap water into the inner pot of your Instant Pot. The amount matters for proper pressure building:* Use 1 cup for 3-quart or 6-quart models* Use 1.5 cups for 8-quart models Cold water is essential for accurate cooking times. Hot water can affect how quickly the pot reaches pressure, throwing off your carefully calibrated timing.
2-Step 2: Position the Eggs Place your egg rack or trivet inside the pot. This keeps the eggs elevated above the water, allowing them to cook through steam rather than direct contact with boiling water. Arrange your room temperature eggs on the rack you can safely stack them if cooking more than a single layer. Most standard trivets that come with Instant Pots can hold 6-8 eggs comfortably on a single layer, with stacking allowing up to 12 eggs total.
3-Step 3: Set the Pressure Cooker Secure the lid on your Instant Pot, making sure the sealing ring is properly in place. Double-check that the vent is set to the sealing position this is crucial for building pressure. Select the pressure cook function (manual on some models) and set it to high pressure for exactly 5 minutes.
4-Step 4: Prepare the Ice Bath While the eggs are cooking, take a few minutes to prepare your ice bath. Fill a large bowl with cold water and plenty of ice cubes you want it ready the moment your eggs finish cooking. The ice bath serves two critical functions: it stops the cooking process immediately and creates temperature shock that helps separate the shell from the egg white.
5-Step 5: Natural Pressure Release After the 5-minute cooking cycle completes, allow the pressure to release naturally for exactly 5 minutes. This gradual pressure reduction helps the eggs finish cooking gently and prevents the yolks from developing a chalky texture. You’ll see the float valve drop slowly during this time.
6-Step 6: Quick Pressure Release Once the 5-minute natural release is complete, carefully move the vent knob to the venting position. Stand back slightly as steam will release quickly. This quick release releases any remaining pressure so you can safely open the pot. Wait until the float valve drops completely before opening the lid.
7-Step 7: Transfer to Ice Bath Using tongs or a potholder, carefully transfer each egg from the pressure cooker to your prepared ice bath. Work efficiently but carefully the eggs will be hot! Submerge all eggs completely in the ice water and let them soak for at least 5 minutes. For best peeling results, you can leave them in the ice bath for up to 15 minutes.
8-Step 8: Peel and Enjoy Remove eggs from the ice bath and gently crack the shells by rolling each egg on the counter. Start peeling from the wider end where the air pocket is located this is usually the easiest entry point. The shell should come off in large pieces, leaving you with smooth, beautiful eggs ready for whatever dish you have planned.
Notes
🧊 Ice bath minimum 5 minutes ensures effortless peeling.
🌡️ Room temperature eggs prevent cracking during pressure cooking.
⏲️ Test timing with 1 egg first for your Instant Pot model.
- Prep Time: 5 minutes
- Natural Release + Ice Bath: 10 minutes
- Cook Time: 5 minutes
- Category: Breakfast
- Method: Pressure Cooker
- Cuisine: American
- Diet: Keto
Nutrition
- Serving Size: 1 egg
- Calories: 62 kcal
- Sugar: 0g
- Sodium: 63mg
- Fat: 4g
- Saturated Fat: 1g
- Unsaturated Fat: 3g
- Trans Fat: 0g
- Carbohydrates: 1g
- Fiber: 0g
- Protein: 5g
- Cholesterol: 163mg


