
Why You’ll Love This Jeweled Biscotti Recipe
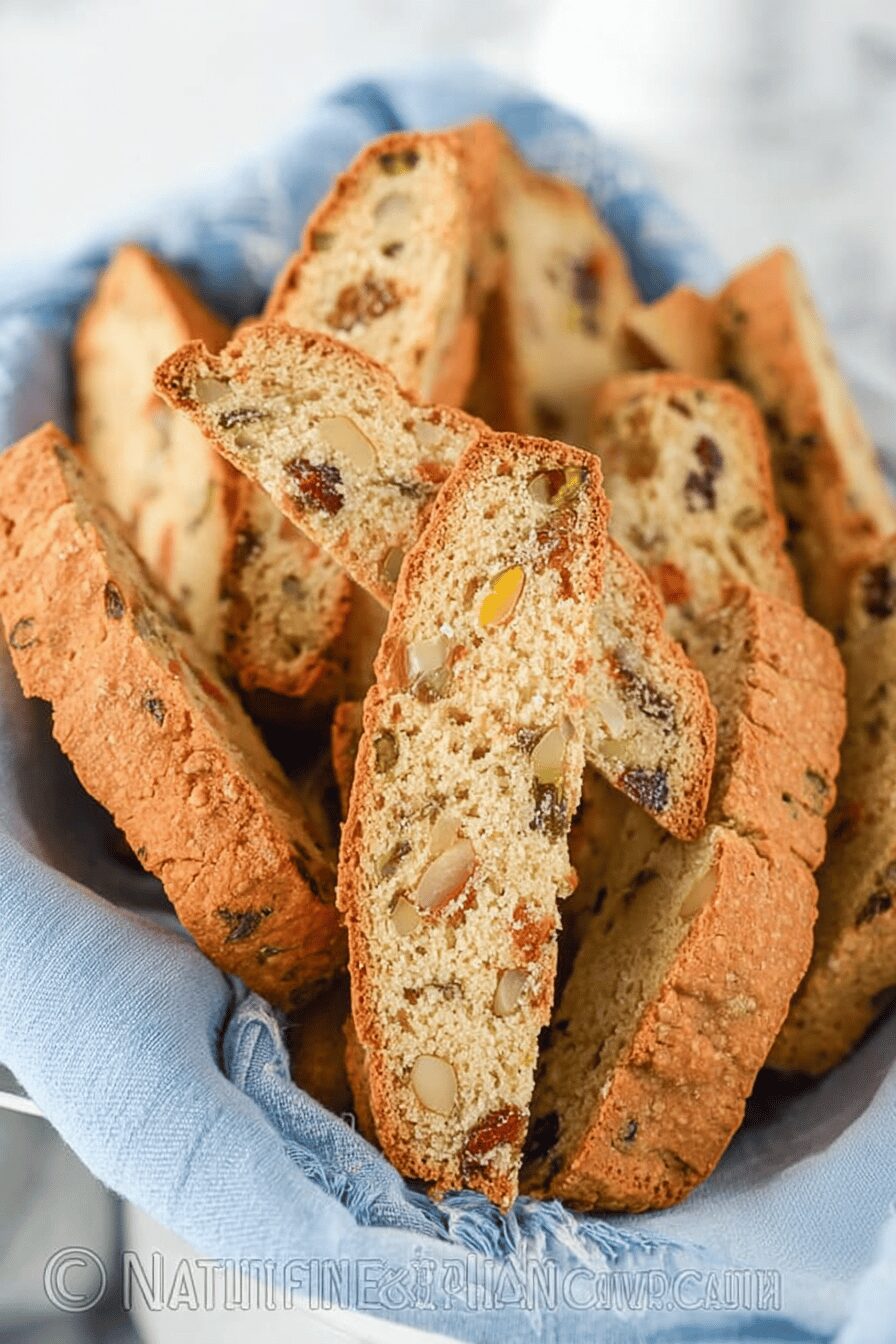
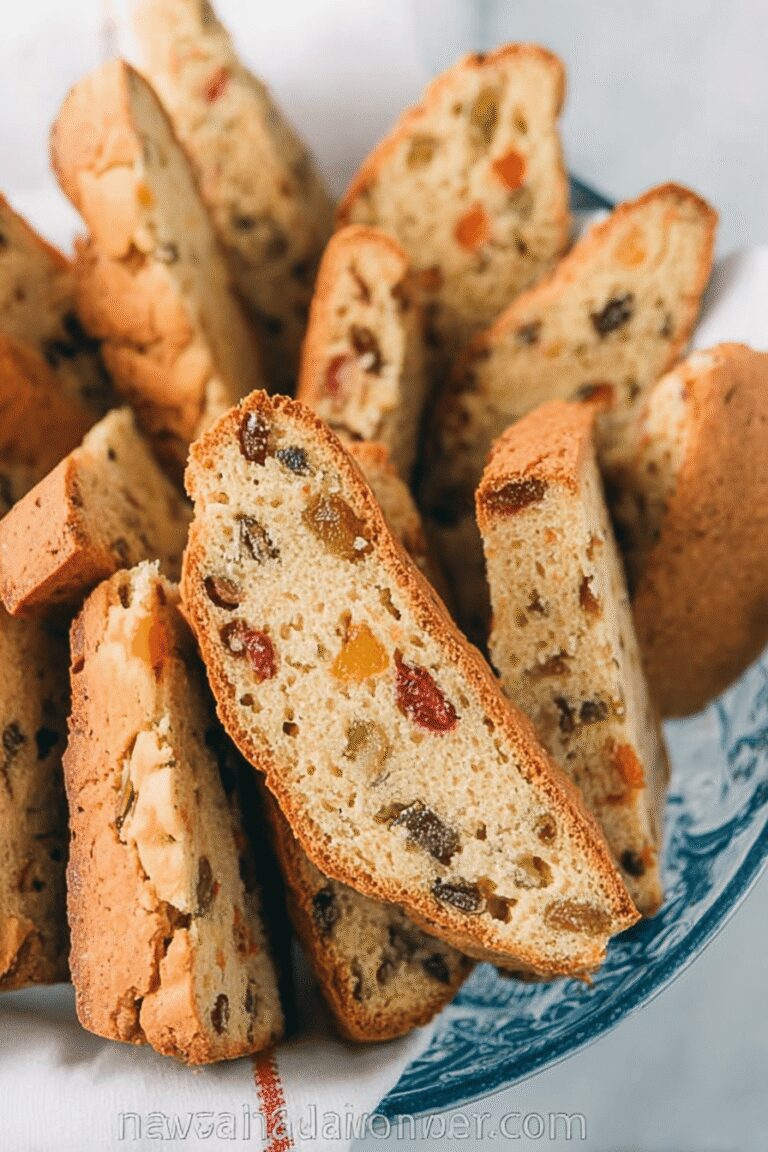
Imagine pulling warm, golden biscotti fresh from the oven, packed with colorful dried fruits and crunchy nuts that make every bite feel like a little celebration! This jeweled biscotti recipe is simple and quick to prepare, making it perfect for both beginner and experienced bakers. You’ll appreciate how straightforward the steps are, so you can enjoy a delightful treat without spending hours in the kitchen.
The health benefits are another reason this recipe shines, as it’s loaded with wholesome ingredients like nuts and dried fruits that offer fiber and natural sweetness. I often make these when I’m looking for a snack that satisfies my cravings without going overboard on sugar, and they’re great for wellness-conscious folks too. Plus, the mix of textures and flavors keeps things exciting for busy parents, students, or anyone on the go.
What really sets this jeweled biscotti apart is its versatility, allowing you to tweak it for various dietary needs while keeping that signature crunch and taste. You can easily adapt it for vegan, gluten-free, or low-calorie options, which makes it a hit with food enthusiasts and baking lovers alike. I’ve shared this recipe with friends at potlucks, and it’s always a crowd-pleaser, inspiring everyone to get creative in their own kitchens!
Beyond ease, health, and flexibility, the distinctive flavor profile is what will have you coming back for more. The blend of fragrant spices and vibrant dried fruits creates a perfect balance of sweet and savory in every bite. Trust me, once you try it, you’ll want to make a double batch because they disappear fast!
Jump To
- 1. Why You’ll Love This Jeweled Biscotti Recipe
- 2. Essential Ingredients for Jeweled Biscotti Recipe
- 3. How to Prepare the Perfect Jeweled Biscotti Recipe: Step-by-Step Guide
- 4. Dietary Substitutions to Customize Your Jeweled Biscotti Recipe
- 5. Mastering Jeweled Biscotti Recipe: Advanced Tips and Variations
- 6. How to Store Jeweled Biscotti Recipe: Best Practices
- 7. FAQs: Frequently Asked Questions About Jeweled Biscotti Recipe
- 8. Jeweled Biscotti Recipe
Essential Ingredients for Jeweled Biscotti Recipe
Every great biscotti starts with the right ingredients, and this jeweled biscotti recipe is no exception. Below, I’ve listed out all the precise measurements for each item, so you can follow along easily and get that perfect, jewel-like appearance in your treats.
- 1 cup shelled almonds
- 1 cup shelled pistachios
- 1/3 cup candied pineapple, diced
- 1/3 cup dried apricots, diced
- 1/3 cup candied cherries or dried craisins
- 1/3 cup dried papaya
- 1 stick (8 tablespoons) unsalted butter, softened
- 1 cup granulated sugar
- 2 teaspoons vanilla extract
- 3 large eggs, room temperature
- 3 1/4 cups all-purpose flour
- 2 1/4 teaspoons baking powder
- 1/4 teaspoon salt
These ingredients come together to create a dough that’s easy to work with and full of flavor. For special dietary options, you can swap eggs for flax eggs in vegan versions, or use a gluten-free flour blend to keep things inclusive. I love how flexible this list is, especially if you’re baking for a group with different preferences!
How to Prepare the Perfect Jeweled Biscotti Recipe: Step-by-Step Guide
Let’s dive into making this jeweled biscotti it’s one of my favorite weekend activities because it fills the house with that amazing baked-goods aroma! Start by preheating your oven to 350°F (175°C) and lining a baking sheet with parchment paper. In a large bowl, whisk together the flour, baking powder, and salt to get those dry ingredients combined and ready.
Next, toast the almonds and pistachios on an ungreased baking sheet for 8-10 minutes, then let them cool and coarsely chop them. Don’t skip this step it really brings out the nutty flavor and makes your biscotti extra special. In another bowl, chop the dried and candied fruits into raisin-sized pieces and mix them with the nuts.
Using an electric mixer with a whisk attachment, beat the softened butter, sugar, and vanilla on high speed for 3 minutes until it’s light and fluffy. Add the eggs one at a time, beating for 1 minute after each to ensure everything blends smoothly. Gradually add the dry ingredients to this mixture and switch to a paddle attachment to mix until just combined.
Now, stir in the nut and fruit mixture with a spatula to distribute those colorful jewels evenly. Divide the dough into three equal pieces and shape each into a log that’s about 12 inches long, 2 inches wide, and under 1 inch thick. Place the logs on a greased baking sheet, at least 1 inch apart, and bake for 25-28 minutes until they start to turn golden.
After the first bake, remove the logs and let them cool briefly until you can handle them. Use a serrated knife to slice each log diagonally into 1-inch wide biscotti. Grease the baking sheet again, arrange the slices cut-side down, and bake for another 15-18 minutes until golden and firm. Finally, cool them completely on a wire rack they’ll harden up as they sit, giving you that perfect crunch.
For dietary adaptations, like making it vegan with flax eggs or gluten-free with the right flour, add these tweaks during the mixing stage. For fun, if you’re into other Italian-inspired treats, check out our Cretan Biscuits recipe for more baking ideas that pair wonderfully with coffee!

Dietary Substitutions to Customize Your Jeweled Biscotti Recipe
One of the best things about this jeweled biscotti recipe is how easy it is to make it your own, especially for different dietary needs. For protein alternatives, swap chopped almonds with walnuts or pecans to change up the nutty flavors, or use sunflower seeds if nuts aren’t your thing. Eggs can be replaced with flax eggs for vegan baking, which I’ve done myself when hosting plant-based friends.
When it comes to fruits and seasonings, you can brighten things with citrus zest like orange or lemon for a zesty twist. If you want to vary the spices, try nutmeg instead of any other options, or use maple syrup in place of sugar for a natural sweetness. These changes keep the biscotti’s texture intact while letting you experiment based on what you have on hand.
I’ve found that playing with these substitutions not only accommodates allergies but also adds a personal touch. For example, if you’re aiming for a lower-sugar version, go slow with sweeteners to maintain that crave-worthy taste we all love!
Mastering Jeweled Biscotti Recipe: Advanced Tips and Variations
Once you’re comfortable with the basics, let’s level up your jeweled biscotti game with some pro tips and fun twists! For a perfect crunch, focus on double-baking and letting the biscotti cool fully between steps this ensures that satisfying snap without any sogginess. I always use a food processor to chop nuts and fruits finely, which helps everything mix evenly and bakes up beautifully.
Flavor variations are where the fun really begins; try adding orange zest for a citrusy kick, espresso powder for a coffee lover’s dream, or even chopped dark chocolate to make it decadent. Presentation is key too lightly dust with powdered sugar or dip one end in melted chocolate for an elegant look that wows at parties. One time, I added chocolate and it vanished from the plate in minutes!
Make-ahead options are a game-changer for busy schedules; prepare the dough ahead and chill it overnight for deeper flavors, or bake a big batch to store for weeks. If you’re exploring more dessert ideas, our Brown Butter Oatmeal Chocolate Chip Cookies are another must-try for your baking repertoire.
How to Store Jeweled Biscotti Recipe: Best Practices
Storing your jeweled biscotti the right way keeps them fresh and crunchy for longer, which is perfect for meal prep or gifting. Keep baked biscotti in an airtight container at room temperature for up to one week to maintain that ideal texture. Refrigeration isn’t usually needed and might make them soft, so stick to room temp for the best results.
For longer storage, pop them into a sealed freezer bag or container and freeze for up to three months. When you’re ready to enjoy, thaw at room temperature and warm in a 300°F oven for 5-10 minutes to bring back the crispness. Biscotti is fantastic for batch cooking, as you can portion it out for quick snacks or even share with neighbors I do this all the time!
FAQs: Frequently Asked Questions About Jeweled Biscotti Recipe
What ingredients do I need to make Jeweled Biscotti?
To make Jeweled Biscotti, you will need all-purpose flour, granulated sugar, baking powder, salt, eggs, vanilla extract, and a mix of dried fruits such as cranberries, apricots, and cherries. Chopped nuts like pistachios or almonds add a crunchy texture, while candied orange peel gives a citrusy touch. These colorful fruit and nut pieces create the “jeweled” appearance, making the biscotti both tasty and visually appealing.
How do I shape and bake biscotti for the best texture?
After mixing the dough, shape it into a log approximately 12 inches long and 3 inches wide on a baking sheet lined with parchment paper. Bake it first at 350°F (175°C) for about 25-30 minutes until firm. Allow it to cool slightly, then slice the log into ½-inch thick pieces. Arrange the slices cut-side down and bake again for 10-15 minutes on each side. This double-baking process creates the biscotti’s signature crispness without crumbling.
Can I make Jeweled Biscotti ahead of time and how should I store them?
Yes, Jeweled Biscotti keep well and can be made days or even weeks in advance. Store them in an airtight container at room temperature for up to two weeks. For longer storage, place them in a sealed plastic bag or container and freeze for up to three months. When ready to eat, thaw at room temperature and, if desired, warm them briefly in the oven to restore crispness.
What drinks pair best with Jeweled Biscotti?
Jeweled Biscotti pairs well with a variety of hot beverages, especially coffee and tea. The biscotti’s crunchy texture complements espresso or cappuccino perfectly, as they can be dipped without falling apart. Black teas like Earl Grey or chai also bring out the sweetness of the dried fruits. For a festive twist, serve them alongside a glass of Vin Santo or dessert wine for dipping.
How can I customize the dried fruit and nuts in Jeweled Biscotti?
You can easily customize your Jeweled Biscotti by swapping out dried fruit and nuts based on preference or seasonal availability. Popular alternatives include dried blueberries, figs, or raisins. Nut options like walnuts, pecans, or hazelnuts work well too. Make sure to chop larger pieces evenly so biscotti slices are comfortable to bite. Experimenting with different combinations can add new flavors and colors to your biscotti batch.
Jeweled Biscotti Recipe
🌈 Enjoy the vibrant and flavorful Jeweled Biscotti packed with colorful dried fruits and crunchy nuts.
🍪 This delightful treat offers a perfect balance of sweetness and texture, ideal for gifting or enjoying with coffee or tea.
- Total Time: 1 hour 15 minutes
- Yield: About 3 dozen biscotti
Ingredients
– 1 cup shelled almonds
– 1 cup shelled pistachios
– 1/3 cup candied pineapple, diced
– 1/3 cup dried apricots, diced
– 1/3 cup candied cherries or dried craisins
– 1/3 cup dried papaya
– 1 stick (8 tablespoons) unsalted butter, softened
– 1 cup granulated sugar
– 2 teaspoons vanilla extract
– 3 large eggs, room temperature
– 3 1/4 cups all-purpose flour
– 2 1/4 teaspoons baking powder
– 1/4 teaspoon salt
Instructions
1-Let’s dive into making this jeweled biscotti it’s one of my favorite weekend activities because it fills the house with that amazing baked-goods aroma! Start by preheating your oven to 350°F (175°C) and lining a baking sheet with parchment paper. In a large bowl, whisk together the flour, baking powder, and salt to get those dry ingredients combined and ready.
2-Next, toast the almonds and pistachios on an ungreased baking sheet for 8-10 minutes, then let them cool and coarsely chop them. Don’t skip this step it really brings out the nutty flavor and makes your biscotti extra special. In another bowl, chop the dried and candied fruits into raisin-sized pieces and mix them with the nuts.
3-Using an electric mixer with a whisk attachment, beat the softened butter, sugar, and vanilla on high speed for 3 minutes until it’s light and fluffy. Add the eggs one at a time, beating for 1 minute after each to ensure everything blends smoothly. Gradually add the dry ingredients to this mixture and switch to a paddle attachment to mix until just combined.
4-Now, stir in the nut and fruit mixture with a spatula to distribute those colorful jewels evenly. Divide the dough into three equal pieces and shape each into a log that’s about 12 inches long, 2 inches wide, and under 1 inch thick. Place the logs on a greased baking sheet, at least 1 inch apart, and bake for 25-28 minutes until they start to turn golden.
5-After the first bake, remove the logs and let them cool briefly until you can handle them. Use a serrated knife to slice each log diagonally into 1-inch wide biscotti. Grease the baking sheet again, arrange the slices cut-side down, and bake for another 15-18 minutes until golden and firm. Finally, cool them completely on a wire rack they’ll harden up as they sit, giving you that perfect crunch.
Notes
🌰 Nuts can be varied or used whole instead of chopped.
🧈 Add slightly more butter or substitute some with oil to reduce crumbling.
📏 Keep log thickness under 1 inch for even baking and cut biscotti about 1 inch wide.
- Prep Time: 30 minutes
- Cook Time: 45 minutes
- Category: Dessert
- Method: Baking
- Cuisine: Italian
Nutrition
- Serving Size: 1 biscotti


