Why You’ll Love This Key Lime Pie Bars
Imagine whipping up a batch of Key Lime Pie Bars that hit the spot for dessert cravings without keeping you in the kitchen all day these treats do exactly that. They’re super simple to put together, with just a few steps that even beginners can handle, making them ideal for busy parents or students looking for quick wins in baking. Plus, the tangy lime flavor combined with a buttery graham cracker crust creates a refreshing twist on classic desserts that’s hard to resist. You’ll find yourself coming back to this recipe time and again for its ease and taste.
- Ease of preparation: This Key Lime Pie Bars recipe comes together in just 15 minutes of prep time and bakes up in 30 minutes more, leaving you with plenty of time to enjoy your day. It’s perfect for home cooks who appreciate straightforward instructions and minimal cleanup, letting you focus on family moments rather than messy counters. Whether you’re a baking enthusiast or just starting out, the simple steps make these lime pie bars a go-to choice for effortless desserts.
- Health benefits: Key Lime Pie Bars use fresh lime juice and zest, which pack vitamin C to boost your immune system and add a zesty tang that feels like a treat with a side of wellness. The graham cracker crust offers a bit of fiber from the whole grains, and by choosing full-fat ingredients in moderation, you get a balance of nutrients without overloading on sugars. For diet-conscious individuals, this means enjoying a dessert that aligns with healthier eating habits while still satisfying that sweet tooth.
- Versatility: These Key Lime Pie Bars adapt easily to various dietary needs, like swapping in gluten-free graham cracker crumbs for those with sensitivities or using plant-based butter for a vegan twist. They’re great for food enthusiasts experimenting with flavors, and busy professionals can scale the recipe for events or meal prep. That flexibility makes simple key lime recipes like this one a favorite among travelers and newlyweds setting up their kitchens.
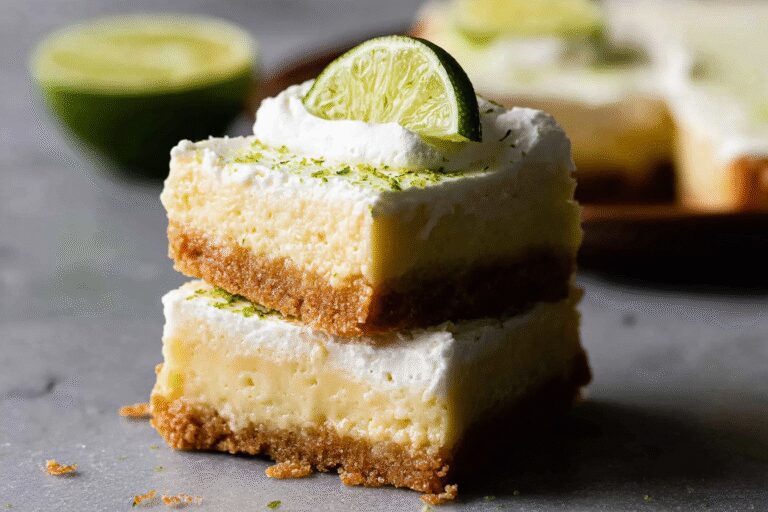
- Distinctive flavor: What sets these key lime bars apart is the bright, citrusy punch from key lime juice paired with the creamy filling that melts in your mouth, offering a perfect balance of tart and sweet. The graham cracker crust adds a crunchy base that contrasts beautifully with the smooth texture, making how to make key lime pie bars a rewarding endeavor. It’s no wonder baking enthusiasts rave about the easy key lime pie bars recipe for its unforgettable taste that elevates any gathering.
Lemon Tart, another citrus delight on our site, pairs wonderfully with this for more dessert ideas.
Jump To
- 1. Why You’ll Love This Key Lime Pie Bars
- 2. Essential Ingredients for Key Lime Pie Bars
- 3. How to Prepare the Perfect Key Lime Pie Bars: Step-by-Step Guide
- 4. Dietary Substitutions to Customize Your Key Lime Pie Bars
- 5. Mastering Key Lime Pie Bars: Advanced Tips and Variations
- 6. How to Store Key Lime Pie Bars: Best Practices
- 7. FAQs: Frequently Asked Questions About Key Lime Pie Bars
- 8. Key Lime Pie Bars
Essential Ingredients for Key Lime Pie Bars
Gathering the right ingredients is key to creating the perfect Key Lime Pie Bars, and I’ve listed them out below with exact measurements and a quick note on why each one matters. This helps ensure your simple key lime recipe turns out just right every time. Let’s break it down into the main parts: the crust, filling, and optional garnishes.
Crust Ingredients
- 1 and 1/2 cups (180g) graham cracker crumbs – This forms the base of your graham cracker crust bars, providing a sturdy and flavorful foundation that binds everything together with its crumbly texture.
- 6 Tablespoons (85g) unsalted butter, melted – Adds richness and helps the crumbs stick, creating that classic buttery taste we all love in lime pie bars.
- 1/4 cup (50g) granulated sugar – Sweetens the crust just enough to balance the tartness of the filling, making your Key Lime Pie Bars irresistibly delicious.
Filling Ingredients
- 4 ounces (113g) full-fat brick cream cheese, softened to room temperature – Gives the filling its creamy smoothness and helps thicken it for the perfect set.
- 4 large egg yolks – These bind the filling and add richness, ensuring your key lime bars with graham cracker crust have that silky texture.
- 14-ounce (397g) can sweetened condensed milk – Provides the sweet creaminess that makes the bars easy and flavorful, enhancing the overall best key lime pie bars recipe experience.
- 1/2 cup (120ml) key lime juice – Delivers the signature tartness that defines these simple dessert bars with key lime, making every bite refreshing and zesty.
- 2 teaspoons lime zest (approx. 1 lime or 2 key limes) – Adds a burst of citrus flavor and aroma, elevating the taste of your easy key lime pie bars recipe to new heights.
Optional Garnish Ingredients
- Whipped cream – Tops off your bars with a light, airy finish for added indulgence in your how to make key lime pie bars adventure.
- Lime slices – Offers a fresh, visual pop and extra tang, perfect for garnishing key lime bars to impress your guests.
Special Dietary Options
For those looking to tweak the recipe, here are some easy swaps. For vegan options, use plant-based butter in the crust and a vegan condensed milk alternative along with flax eggs for the yolks. Go gluten-free by opting for gluten-free graham cracker crumbs to keep the graham cracker crust bars intact. If you’re aiming for low-calorie tweaks, reduce the sugar or use a low-fat cream cheese to enjoy key lime bars without the extra calories.
Dietary Need Suggested Substitution Vegan Plant-based butter and vegan condensed milk Gluten-Free Gluten-free graham cracker crumbs Low-Calorie Low-fat cream cheese and reduced sugar How to Prepare the Perfect Key Lime Pie Bars: Step-by-Step Guide
Getting started with Key Lime Pie Bars is as easy as preheating your oven, and I’ll walk you through each step to make sure you nail it. Begin by gathering all your ingredients and tools, like a mixing bowl and a 9-inch square baking pan, to set yourself up for success. This way, you’ll have everything at hand without any mid-recipe scrambles.
First Step: Preheat and Prepare the Pan
Turn your oven to 350°F (177°C) and line a 9-inch square baking pan with parchment paper, letting it overhang on the sides for easy lifting later. This step ensures even baking and makes removing the bars a breeze, which is a smart move for any simple key lime recipe. If you’re adapting for dietary needs, check that your parchment is unbleached for a more natural option.
Second Step: Make the Crust
In a medium bowl, mix 1 and 1/2 cups (180g) graham cracker crumbs with 1/4 cup (50g) granulated sugar. Pour in 6 Tablespoons (85g) melted unsalted butter and stir until it looks like coarse sand. Press this mixture firmly into the bottom of your prepared pan to form a solid base for your key lime bars with graham cracker crust. For variations, you could try a gluten-free mix here if needed.
Third Step: Prebake the Crust
Slide the pan into the preheated oven and bake for 10 minutes, then let it cool slightly while you move on. This prebaking step helps the crust hold up under the filling, giving your lime pie bars that perfect crunch. It’s a great time to adapt by using alternative crusts like gingersnap if you’re feeling adventurous.
Fourth Step: Prepare the Filling
Using a mixer, beat 4 ounces (113g) of softened full-fat brick cream cheese until it’s smooth, about 1 minute. Add in 4 large egg yolks and beat again, then scrape the bowl to ensure everything mixes well. Next, beat in one 14-ounce (397g) can of sweetened condensed milk, 1/2 cup (120ml) key lime juice, and 2 teaspoons lime zest until combined, and whisk by hand to smooth out any lumps. For dietary tweaks, substitute with vegan alternatives if required to keep it inclusive.
Fifth Step: Assemble and Bake
Pour the filling evenly over the warm crust in the pan, making sure it’s spread out smoothly. Bake for 18-20 minutes until the edges are set but the center is still a bit jiggly this ensures the best texture for your best key lime pie bars recipe. Keep an eye on the time, and remember that for an 8-inch pan, you might need 5-7 minutes more for a thicker result.
Final Step: Cool and Serve
Let the bars cool at room temperature for 30 minutes, then chill in the fridge for at least 2-3 hours until they’re firm. Lift them out using the parchment overhang, cut into squares, and add whipped cream or lime slices for garnish if you like. Total time is about 3 hours and 30 minutes, including cooling, so it’s easy for how to make key lime pie bars even on a weeknight.
I always pour the filling over a warm crust for better adhesion it makes a world of difference in the final product!
Dietary Substitutions to Customize Your Key Lime Pie Bars
Protein and Main Component Alternatives
If you’re swapping out main ingredients, try using a different base for the filling to suit your needs. For instance, if egg yolks are an issue, flax eggs can step in for a vegan version, keeping your key lime bars with graham cracker crust just as creamy. Another option is to use coconut cream instead of sweetened condensed milk for a dairy-free twist that still delivers that rich flavor.
Vegetable, Sauce, and Seasoning Modifications
Feel free to play with the zing by adjusting the lime juice or zest mix in lemon for a lighter taste if key limes aren’t handy. For seasonings, you could add a hint of vanilla to the filling for extra depth, or use herbs like mint in your garnish for a fresh spin. These changes make simple dessert bars with key lime adaptable for different tastes or seasonal ingredients.
Mastering Key Lime Pie Bars: Advanced Tips and Variations
Pro Cooking Techniques
To get pro results, always whisk the filling by hand after mixing to banish any lumps, ensuring your easy key lime pie bars recipe comes out silky smooth. Press the crust firmly for an even base, and cool the bars completely before cutting they slice cleaner that way. These techniques help how to make key lime pie bars a reliable favorite.
Flavor Variations
Experiment with flavors by adding coconut flakes to the crust for a tropical vibe, turning your simple key lime recipe into something unique. Or, mix in berries for a fruity burst, adapting key lime bars to seasonal picks. These tweaks keep things exciting for food enthusiasts.
Presentation Tips
Garnish with fresh lime slices and a dollop of whipped cream to make your bars pop visually, perfect for sharing. Layer them in a tray for parties, and always wipe your knife between cuts for neat edges. These ideas enhance the appeal of lime pie bars.
Make-Ahead Options
Prep the crust ahead and store it in the fridge, then add the filling when ready these bars freeze well for up to 3 months. This makes them ideal for busy schedules, so you can enjoy key lime bars anytime. For non-US readers, use digestive biscuit crumbs as a substitute for a local twist.
For more bar recipes, check out our Carrot Cake Cheesecake Bars for another tasty option.
How to Store Key Lime Pie Bars: Best Practices
Proper storage keeps your Key Lime Pie Bars tasting fresh, starting with refrigeration for short-term needs. Keep them in an airtight container in the fridge for up to 5 days to maintain that creamy texture. This method works great for key lime bars, preserving their flavor without much fuss.
Refrigeration
Place the bars in the fridge right after cooling to lock in freshness, covering them tightly to avoid drying out. This simple step ensures your simple key lime recipe stays enjoyable for days, ideal for meal prep.
Freezing
For longer storage, wrap bars individually and freeze for up to 3 months, thawing in the fridge overnight. This technique helps with batch cooking, keeping key lime bars ready for spontaneous treats. It’s a handy option for busy parents.
Reheating and Meal Prep
If needed, bring bars to room temperature before serving to enhance flavor, but they’re best enjoyed cold. For meal prep, portion them out in advance for quick grabs, making how to make key lime pie bars even more convenient. Key lime health benefits can add to why you might stock up.

FAQs: Frequently Asked Questions About Key Lime Pie Bars
Can I use regular lime juice instead of key lime juice in Key Lime Pie Bars?
Yes, you can substitute regular lime juice for key lime juice if key limes are not available. Regular limes are larger and more tart than key limes, so some recipes recommend mixing half lime juice with half lemon juice to mimic the sweeter, more floral flavor of key limes. This substitution works well for maintaining the classic tangy taste in your Key Lime Pie Bars.
Is bottled key lime juice a good alternative to fresh key limes?
Bottled key lime juice is a convenient and reliable alternative to fresh key limes, especially when they are out of season or hard to find. Brands like Nellie & Joe’s Key West Lime Juice are widely available and provide consistent flavor, making it easier to prepare Key Lime Pie Bars year-round without the hassle of manually juicing many small fruits.
How should I adjust baking if I want to make Key Lime Pie Bars in a 9×13-inch pan?
To bake Key Lime Pie Bars in a 9×13-inch pan, double all the ingredients to maintain the right thickness and texture. Prebake the crust for about 10 minutes, then add the filling and bake for approximately 35 minutes. This ensures even cooking and prevents the bars from becoming too thin or overly dry.
How can I tell when Key Lime Pie Bars are perfectly baked?
Key Lime Pie Bars are done when the filling is mostly set but still slightly jiggly in the center. The edges will appear firm and slightly golden while the center will continue to firm up as the bars cool. Overbaking can cause cracking or a dry texture, so it’s best to remove the bars from the oven as soon as they hold their shape with a little wobble.
What is the best way to store Key Lime Pie Bars to keep them fresh?
Store Key Lime Pie Bars in an airtight container in the refrigerator to keep them fresh for up to 4-5 days. For longer storage, you can freeze the bars by wrapping them tightly in plastic wrap and placing them in a freezer-safe container. Thaw in the refrigerator before serving to maintain the best texture and flavor.

Key Lime Pie Bars
🍋 Key Lime Pie Bars: Simple Recipe with Graham Cracker Crust offer a refreshing, tangy dessert that’s easy to make and perfect for any occasion.
🥧 This recipe combines a buttery graham cracker crust with a creamy, zesty lime filling for a crowd-pleasing treat.- Total Time: 3 hours, 30 minutes
- Yield: 16 bars 1x
Ingredients
Scale1 and 1/2 cups (180g) graham cracker crumbs for base
6 Tablespoons (85g) unsalted butter, melted for richness
1/4 cup (50g) granulated sugar for sweetness
4 ounces (113g) full-fat brick cream cheese, softened to room temperature for creamy smoothness
4 large egg yolks for binding and richness
14-ounce (397g) can sweetened condensed milk for sweet creaminess
1/2 cup (120ml) key lime juice for tartness
2 teaspoons lime zest for citrus flavor and aroma
Whipped cream for topping
Lime slices for garnish
Instructions
1-First Step: Preheat and Prepare the Pan. Turn your oven to 350°F (177°C) and line a 9-inch square baking pan with parchment paper, letting it overhang on the sides for easy lifting later. This step ensures even baking and makes removing the bars a breeze, which is a smart move for any simple key lime recipe. If you’re adapting for dietary needs, check that your parchment is unbleached for a more natural option.
2-Second Step: Make the Crust. In a medium bowl, mix 1 and 1/2 cups (180g) graham cracker crumbs with 1/4 cup (50g) granulated sugar. Pour in 6 Tablespoons (85g) melted unsalted butter and stir until it looks like coarse sand. Press this mixture firmly into the bottom of your prepared pan to form a solid base for your key lime bars with graham cracker crust. For variations, you could try a gluten-free mix here if needed.
3-Third Step: Prebake the Crust. Slide the pan into the preheated oven and bake for 10 minutes, then let it cool slightly while you move on. This prebaking step helps the crust hold up under the filling, giving your lime pie bars that perfect crunch. It’s a great time to adapt by using alternative crusts like gingersnap if you’re feeling adventurous.
4-Fourth Step: Prepare the Filling. Using a mixer, beat 4 ounces (113g) of softened full-fat brick cream cheese until it’s smooth, about 1 minute. Add in 4 large egg yolks and beat again, then scrape the bowl to ensure everything mixes well. Next, beat in one 14-ounce (397g) can of sweetened condensed milk, 1/2 cup (120ml) key lime juice, and 2 teaspoons lime zest until combined, and whisk by hand to smooth out any lumps. For dietary tweaks, substitute with vegan alternatives if required to keep it inclusive.
5-Fifth Step: Assemble and Bake. Pour the filling evenly over the warm crust in the pan, making sure it’s spread out smoothly. Bake for 18-20 minutes until the edges are set but the center is still a bit jiggly this ensures the best texture for your best key lime pie bars recipe. Keep an eye on the time, and remember that for an 8-inch pan, you might need 5-7 minutes more for a thicker result.
6-Final Step: Cool and Serve. Let the bars cool at room temperature for 30 minutes, then chill in the fridge for at least 2-3 hours until they’re firm. Lift them out using the parchment overhang, cut into squares, and add whipped cream or lime slices for garnish if you like. Total time is about 3 hours and 30 minutes, including cooling, so it’s easy for how to make key lime pie bars even on a weeknight.
Notes
🍋 Substitute regular lime juice or bottled key lime juice if fresh isn’t available.
🥧 Alternative crusts like gingersnap or pretzel can add a different flavor.
❄️ Chill bars well before cutting for clean slices; wipe knife between cuts for best results.- Prep Time: 15 minutes
- Chill Time: 2-3 hours
- Cook Time: 30 minutes
- Category: Dessert
- Method: Baking
- Cuisine: American
Nutrition
- Serving Size: 1 bar