

Why You’ll Love This mini quiche
- Ease of preparation: This mini quiche recipe is incredibly simple, requiring minimal ingredients and basic kitchen skills, making it perfect for quick meals or snacks. Its relatively short cooking time lets you enjoy a delicious homemade dish without spending hours in the kitchen.
- Health benefits: Packed with nutrient-rich ingredients like eggs, fresh vegetables, and cheese, this mini quiche provides a balanced mix of protein, healthy fats, and vitamins. Choosing wholesome fillings promotes wellness and supports a nutritious diet.
- Versatility: Highly adaptable, this mini quiche can be modified to suit vegan, gluten-free, or low-calorie lifestyles. You can swap crusts, cheeses, and fillings effortlessly without compromising on flavor, making it ideal for diverse dietary needs.
- Distinctive flavor: The combination of savory fillings, fresh herbs, and a flaky, buttery crust creates a uniquely flavorful bite. Its rich yet light taste differentiates it from traditional quiches, making it a standout choice for any occasion or meal.
Jump To
- 1. Why You’ll Love This mini quiche
- 2. Essential Ingredients for mini quiche
- 3. How to Prepare the Perfect mini quiche: Step-by-Step Guide
- 4. Dietary Substitutions to Customize Your mini quiche
- 5. Mastering mini quiche: Advanced Tips and Variations
- 6. How to Store mini quiche: Best Practices
- 7. FAQs: Frequently Asked Questions About mini quiche
- 8. mini quiche
Essential Ingredients for mini quiche
Main Ingredients:
- 2 unbaked pie crusts (homemade or store-bought) or 4 thawed pie crusts (for approximately 48 mini quiches) – provides a crisp, buttery base.
- 4 large eggs – acts as the protein-rich binder holding the filling together.
- ½ cup whole milk – contributes creaminess and moisture to the custard filling.
- ½ cup heavy cream or heavy whipping cream – enhances richness and smooth texture.
- ½ teaspoon salt – seasons and balances flavors.
- ¼ teaspoon ground black pepper – adds subtle warmth and depth.
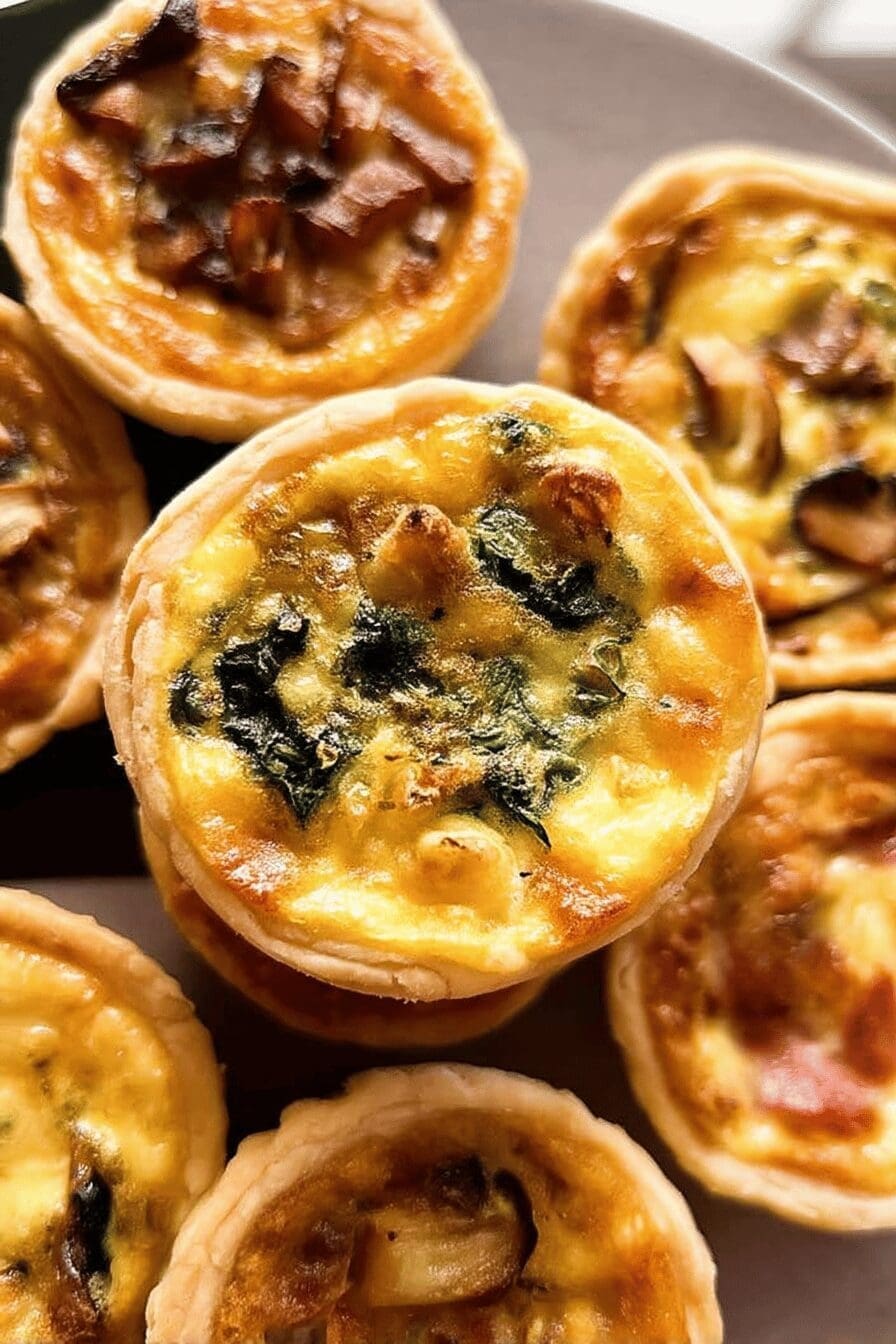
- ¾ cup add-ins such as ham, bacon, spinach, Swiss cheese, scallions, mushrooms, peppers, or other vegetables – provide texture, flavor, and nutritional boost.
- ½ cup shredded or crumbled cheese (feta, goat, white cheddar, Swiss, Gruyere, or a combination) – adds creamy, melty savory elements.
Special Dietary Options:
- Vegan: Substitute eggs and dairy with chickpea batter and plant-based cheese alternatives.
- Gluten-free: Use gluten-free pie crust or almond flour crust as the base.
- Low-calorie: Opt for reduced-fat cheese, substitute whole milk and cream with lighter versions, and increase vegetable portions to maintain volume without extra calories.
How to Prepare the Perfect mini quiche: Step-by-Step Guide
First Step: Prepare the Dough and Pan
Chill your pie dough for at least 2 hours or thaw store-bought crust as required. Preheat the oven to 375°F (190°C). Grease one or two 24- or 48-count mini muffin pans with nonstick spray to prepare for the crust placement.
Second Step: Cut and Line the Crusts
Roll out your pie dough into a 12-inch circle on a floured surface. Using a 2.5-inch round cookie cutter or biscuit cutter, cut out rounds from the dough. Press each round into the mini muffin cups, ensuring it is flat on the bottom and fits snugly up the sides without tearing.
Third Step: Whisk the Egg Mixture
In a mixing bowl, whisk together 4 large eggs, ½ cup whole milk, ½ cup heavy cream, ½ teaspoon salt, and ¼ teaspoon black pepper until fully blended. Refrigerate this custard mixture while you prepare the fillings.
Fourth Step: Add Fillings
Evenly distribute your chosen add-ins such as diced ham, cooked bacon, wilted spinach, sautéed mushrooms, chopped scallions, or diced peppers into each dough-lined cup. Sprinkle about 1 tablespoon of shredded or crumbled cheese atop the fillings. Placing ingredients on top rather than mixing into the custard helps prevent sinking during baking.
Fifth Step: Fill with Custard and Bake
Gently pour the chilled egg mixture into each cup, filling nearly to the top but leaving about ¼ inch of space to allow for slight expansion as they bake. Place the muffin pans in the oven and bake for 25 to 28 minutes, until the centers are almost set and the crust edges turn light golden brown. For larger quiches in a 12-count pan, bake for 27 to 30 minutes.
Final Step: Cool and Serve
Let the mini quiches cool for about 5 minutes in the pan to firm up. Carefully remove each quiche using a small spoon or knife to loosen the edges. Serve warm or at room temperature. Garnish with fresh herbs if desired. Adjust ingredient substitutions or baking time per dietary needs or crust variations.

Dietary Substitutions to Customize Your mini quiche
Protein and Main Component Alternatives
- Replace traditional eggs with silken tofu or chickpea flour batter for vegan-friendly custard alternatives.
- Use plant-based sausage, smoked tempeh, or mushroom varieties to enhance protein content for vegetarian versions.
Vegetable, Sauce, and Seasoning Modifications
- Swap spinach for kale, Swiss chard, or bell peppers depending on seasonal availability and personal preferences.
- Use tomato sauce, pesto, or dairy-free cream sauces for the liquid components to shift flavor profiles.
- Experiment with herbs like fresh basil, thyme, or dill to vary the aromatic notes without altering texture.
Mastering mini quiche: Advanced Tips and Variations
- Pro cooking techniques: Blind bake the pastry shells for 5–7 minutes prior to filling to avoid soggy bottoms and ensure a crisp, flaky crust. Use an instant-read thermometer to check custard set without overbaking.
- Flavor variations: Try caramelized onions, sun-dried tomatoes, or a cheese blend for layered tastes and textures.
- Presentation tips: Garnish with microgreens, edible flowers, or a drizzle of flavored oil for a touch of elegance when serving.
- Make-ahead options: Mini quiches freeze well; prepare in advance, freeze in single layers with parchment between, and reheat gently in the oven to preserve texture and flavor.
How to Store mini quiche: Best Practices
| Storage Method | Description |
|---|---|
| Refrigeration | Store mini quiches in airtight containers for up to 3-4 days to maintain freshness and prevent drying out. |
| Freezing | Wrap mini quiches individually or place in freezer-safe containers layered with parchment paper. Freeze for up to 2-3 months. Thaw in the refrigerator before reheating. |
| Reheating | Reheat in a preheated oven at 350°F (175°C) for 10-15 minutes to refresh crispness. Avoid microwaving to prevent soggy crusts. |
| Meal prep considerations | Batch prep mini quiches and store as above for quick grab-and-go meals or snacks throughout the week. |
FAQs: Frequently Asked Questions About mini quiche
Can I make mini quiches without a pie crust?
Yes, you can make crustless mini quiches by spraying a mini muffin pan with nonstick spray and pouring the egg mixture directly into the cups. The baking time will be slightly shorter—usually around 12 to 15 minutes—because there is no crust to cook through. This option is great if you want a lower-carb or gluten-free version.
How should I store and freeze mini quiches?
After baking, let the mini quiches cool completely. Layer them between sheets of parchment paper in an airtight, freezer-safe container or zip-top bag. Freeze for up to 3 months. To reheat, thaw in the refrigerator or at room temperature, then warm in a 300°F oven for 15 minutes until heated through.
What types of milk or cream work best in mini quiche filling?
A mixture of whole milk and heavy cream or half-and-half creates the best texture—creamy but not too dense. Using only milk will make the filling lighter and less rich, while only heavy cream results in a thicker, custard-like texture. You can substitute nondairy milk, but this might affect the consistency.
Do I need to pre-cook vegetables or meats before adding them to mini quiches?
Most ingredients like bacon, sausage, onions, and dense vegetables should be cooked before adding to ensure they are fully done and flavorful. However, milder vegetables such as mushrooms and bell peppers can be added raw if you prefer a firmer texture. Adding warm ingredients helps the quiches bake evenly.
Can I use a standard muffin pan instead of a mini muffin pan for mini quiches?
Yes, you can use a regular 12-count muffin pan by cutting pie dough into larger circles, about 3.5 inches. Bake for approximately 27 to 30 minutes, until the filling sets and the crust is golden brown. This will yield fewer but larger quiches, about 16 in total depending on size.

mini quiche
A creamy, savory mushroom risotto perfect for a comforting meal, showcasing the earthy flavors of mushrooms.
- Total Time: 40 minutes
- Yield: 4 servings
Ingredients
– 2 unbaked pie crusts
– 4 large eggs
– 1/2 cup whole milk
– 1/2 cup heavy cream or heavy whipping cream
– 1/2 teaspoon salt
– 1/4 teaspoon ground black pepper
– 3/4 cup add-ins such as ham, bacon, spinach, Swiss cheese, scallions, mushrooms, peppers, or other vegetables
– 1/2 cup shredded or crumbled cheese
Instructions
First Step: Prepare the Dough and Pan Chill your pie dough for at least 2 hours or thaw store-bought crust as required. Preheat the oven to 375°F (190°C). Grease one or two 24- or 48-count mini muffin pans with nonstick spray to prepare for the crust placement.
Second Step: Cut and Line the Crusts Roll out your pie dough into a 12-inch circle on a floured surface. Using a 2.5-inch round cookie cutter or biscuit cutter, cut out rounds from the dough. Press each round into the mini muffin cups, ensuring it is flat on the bottom and fits snugly up the sides without tearing.
Third Step: Whisk the Egg Mixture In a mixing bowl, whisk together 4 large eggs, ½ cup whole milk, ½ cup heavy cream, ½ teaspoon salt, and ¼ teaspoon black pepper until fully blended. Refrigerate this custard mixture while you prepare the fillings.
Fourth Step: Add Fillings Evenly distribute your chosen add-ins such as diced ham, cooked bacon, wilted spinach, sautéed mushrooms, chopped scallions, or diced peppers into each dough-lined cup. Sprinkle about 1 tablespoon of shredded or crumbled cheese atop the fillings. Placing ingredients on top rather than mixing into the custard helps prevent sinking during baking.
Fifth Step: Fill with Custard and Bake Gently pour the chilled egg mixture into each cup, filling nearly to the top but leaving about ¼ inch of space to allow for slight expansion as they bake. Place the muffin pans in the oven and bake for 25 to 28 minutes, until the centers are almost set and the crust edges turn light golden brown. For larger quiches in a 12-count pan, bake for 27 to 30 minutes.
Final Step: Cool and Serve Let the mini quiches cool for about 5 minutes in the pan to firm up. Carefully remove each quiche using a small spoon or knife to loosen the edges. Serve warm or at room temperature. Garnish with fresh herbs if desired. Adjust ingredient substitutions or baking time per dietary needs or crust variations.
Notes
Make sure to add the broth gradually and stir the risotto regularly to help release the starch from the rice, making it creamy.
- Prep Time: 10 minutes
- Cook Time: 30 minutes
- Category: Main Course
- Method: Stovetop
- Cuisine: Italian
- Diet: Vegetarian
Nutrition
- Serving Size: 1 cup
- Calories: 350
- Sugar: 2g
- Sodium: 500mg
- Fat: 18g
- Saturated Fat: 11g
- Unsaturated Fat: 5g
- Trans Fat: 0g
- Carbohydrates: 36g
- Fiber: 2g
- Protein: 10g
- Cholesterol: 45mg


These mini quiches were a hit at our brunch last weekend! 🥳 I added some diced bell peppers for a bit more crunch, and they turned out amazing. Can’t wait to make these again. Thanks for the wonderful recipe!