
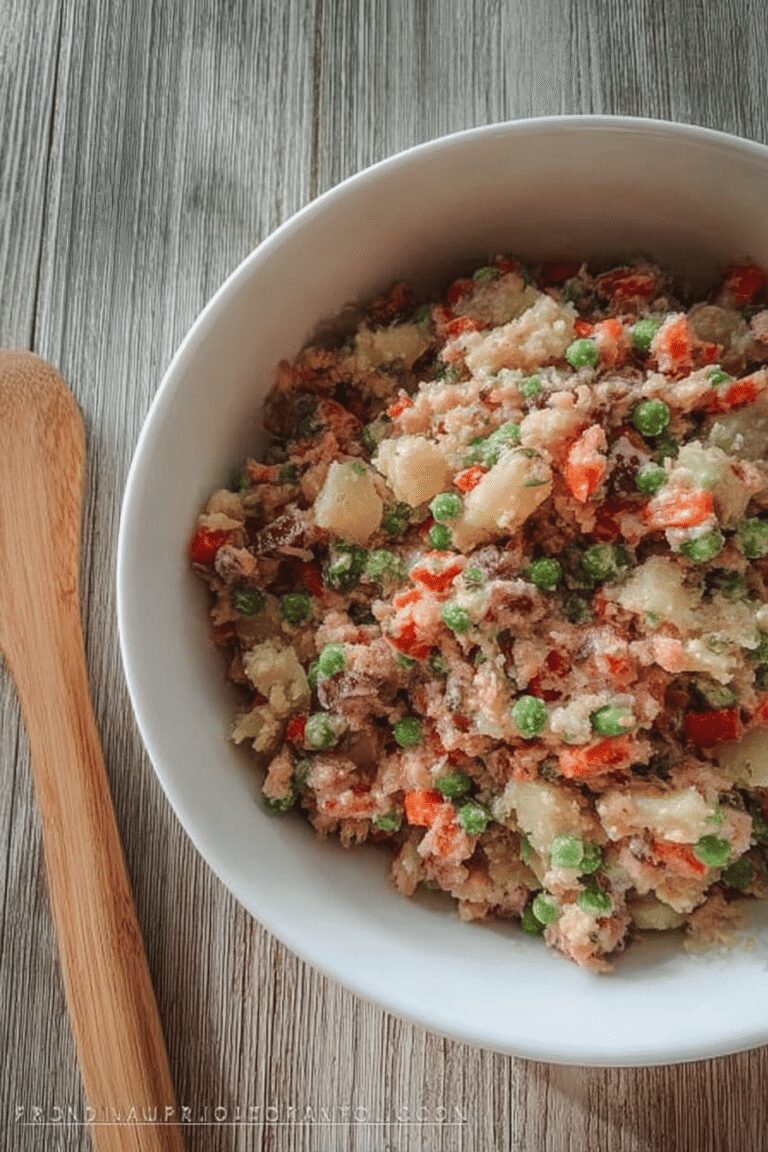
Why You’ll Love This Olivye
Olivye is a staple in many kitchens, especially for those who enjoy simple, hearty dishes that bring people together. This Ukrainian potato salad recipe stands out for its ease of preparation, making it ideal for busy parents or working professionals looking to whip up something delicious without much fuss. With fresh vegetables and satisfying flavors, it’s a go-to choice that fits right into everyday meals or festive gatherings.
Beyond its simplicity, Olivye offers real health benefits that appeal to diet-conscious individuals and seniors. Loaded with veggies like potatoes, carrots, and peas, it provides essential vitamins and fiber that support daily wellness. I love how you can tweak it for different needs, such as making it vegan or gluten-free, while keeping that signature tangy taste that food enthusiasts rave about.
The versatility of Olivye makes it perfect for travelers and newlyweds experimenting in the kitchen. You can serve it as a side dish or a full meal, adjusting ingredients to suit everyone’s tastes. Trust me, once you try this, it’ll become your new favorite for family dinners or quick lunches after a long day.
Jump To
- 1. Why You’ll Love This Olivye
- 2. Essential Ingredients for Olivye
- 3. How to Prepare the Perfect Olivye: Step-by-Step Guide
- 4. Dietary Substitutions to Customize Your Olivye
- 5. Mastering Olivye: Advanced Tips and Variations
- 6. How to Store Olivye: Best Practices
- 7. FAQs: Frequently Asked Questions About Olivye
- 8. Olivye
Essential Ingredients for Olivye
When I think about making Olivye, the ingredients are what really make it shine. They’re straightforward and easy to find, which is great for home cooks and students just starting out. Let’s break down the list so you can see exactly what you need for this Ukrainian potato salad.
Main Ingredients
- 1 pound ham
- 3 medium potatoes
- 4 medium carrots
- 1 (15 oz) can sweet peas, drained or 2 cups thawed frozen peas
- 5 boiled eggs
- 5 medium-large pickles (sour dill recommended)
- 1/3 cup chopped green onion
- 1/4 cup chopped fresh dill
- 3/4 cup to 1 cup mayonnaise (to taste)
- Salt and pepper (to taste)
This list covers everything for a classic Olivye, and it’s flexible for baking enthusiasts or those watching their diets. For special options, consider swapping in chickpeas for a vegan twist or using gluten-free mayo to keep things light.
How to Prepare the Perfect Olivye: Step-by-Step Guide
Creating the perfect Olivye is all about taking it one step at a time, and I promise it’s simpler than it seems. Start by boiling your potatoes and carrots together in one pot for about 30 minutes until they’re just right not too soft. Once they’re done, cool them off and get ready to dice everything up for that creamy texture we all love. For more ideas on handling veggies, check out our make-ahead mashed potato casserole recipe for tips on prepping potatoes ahead of time.
Next, handle the eggs by placing them in salted cold water, bringing it to a boil, then letting them sit covered for 15 minutes before cooling. This ensures they peel easily and mix in smoothly. After everything cools, peel the potatoes and carrots try making a lengthwise slit in the carrots to help with that. Then, dice the ham, potatoes, carrots, pickles, and eggs into small, pea-sized pieces for even bites.
In a large bowl, combine the diced items with green onion, dill, and mayonnaise, mixing well to blend the flavors. Add salt and pepper to taste, and gently fold in the peas at the end to keep them from getting squished. Finally, adjust any amounts like onions or mayo based on what you prefer, and let it chill for the best results. This method works great for busy parents, and you can adapt it for dietary tweaks as you go.

Dietary Substitutions to Customize Your Olivye
One of the best things about Olivye is how easy it is to make it your own, especially for folks with specific dietary needs. If you’re a vegan or just cutting back on meat, swapping the ham for something like chickpeas or tofu keeps that hearty feel without losing the fun. I always say, play around with what you have on hand to make cooking enjoyable for everyone, from students to working professionals.
- Protein swaps: Use boiled chickpeas, tofu, or tempeh instead of ham for a plant-based option.
- Other changes: Try capers or olives in place of pickles for a different tang, or go with avocado for a creamy twist on mayonnaise.
- Herb additions: Toss in fresh dill, parsley, or chives to brighten things up and add more flavor.
These tweaks help maintain the core of Olivye while fitting preferences for food enthusiasts or diet-conscious individuals. Remember, it’s all about what tastes good to you!
Mastering Olivye: Advanced Tips and Variations
Once you’re comfortable with the basics of Olivye, let’s level up with some pro tips that can take your salad from good to amazing. Dicing everything uniformly ensures every bite has the perfect mix of textures and flavors, which is key for a standout dish. If you want to add a little kick, try mixing in mustard or lemon zest to liven up the mayonnaise base it’s a simple change that makes a big difference.
For presentation, think about serving Olivye in fun ways, like in glass cups or shaped with a mold, to impress at gatherings. And if you’re prepping ahead, keep the ingredients separate until you’re ready to mix; this keeps everything fresh and crunchy. Here’s a quick table of nutritional info to help with your planning:
| Nutrient | Amount per Serving |
|---|---|
| Calories | 438 |
| Carbohydrates | 22 grams |
| Protein | 22 grams |
| Fat | 29 grams |
| Saturated Fat | 7 grams |
| Cholesterol | 161 milligrams |
| Sodium | 1234 milligrams |
| Potassium | 818 milligrams |
| Fiber | 6 grams |
| Sugar | 6 grams |
| Vitamin A | 5907 IU |
| Vitamin C | 35 milligrams |
| Calcium | 92 milligrams |
| Iron | 5 milligrams |
These tips, including the preparation time of about 1 hour and 30 minutes, make Olivye a flexible recipe for any occasion. For another protein idea, visit our chicken stir-fry recipe to see how to mix things up.
How to Store Olivye: Best Practices
Keeping your Olivye fresh is key to enjoying it at its best, and that’s something busy parents and seniors appreciate. Pop it in an airtight container in the fridge, and you’ll have tasty leftovers for 2-3 days. I find that chilling it helps the flavors settle in even more.
Avoid freezing since it can make the salad watery, which isn’t fun for anyone. If you want it at room temp, let it sit out for about 15-20 minutes before serving. For meal prep, get the ingredients ready in advance and combine them fresh it’s a game-changer for working professionals.

FAQs: Frequently Asked Questions About Olivye
What is Olivye salad, and where did it originate?
Olivye salad, often called Russian salad, is a traditional dish originally created in the 1860s by French chef Lucien Olivier in Moscow. It typically includes diced boiled potatoes, carrots, peas, pickles, eggs, and a protein like boiled chicken or bologna, all mixed with mayonnaise. The salad is especially popular during holidays and celebrations across Russia and former Soviet countries. Its recipes have evolved from a luxury dish to a widely enjoyed, affordable comfort food.
How do you make a classic Olivye salad at home?
To make a classic Olivye salad, start by boiling and dicing potatoes, carrots, and eggs. Add cooked peas, chopped pickles, and diced boiled chicken or ham. Combine all ingredients in a bowl and mix with good-quality mayonnaise. Season with salt and pepper to taste. Chill the salad in the refrigerator for at least an hour before serving to let the flavors blend. This simple method replicates the traditional Russian recipe.
Can Olivye salad be made vegetarian or vegan?
Yes, Olivye salad can be adapted for vegetarian and vegan diets by replacing the meat and eggs with plant-based alternatives. Use cooked chickpeas, firm tofu, or smoked tempeh for protein, and substitute vegan mayonnaise to keep the creamy texture. Make sure to use fresh, diced vegetables and season well to maintain the salad’s signature taste. This variation retains the essence of Olivye while fitting plant-based preferences.
What makes Olivye salad a popular dish for celebrations?
Olivye salad’s popularity during celebrations stems from its rich yet simple flavors, ease of preparation, and ability to serve large groups. It combines familiar ingredients that appeal to a wide audience and can be prepared in advance, making it ideal for parties and festive meals. In many Eastern European cultures, it symbolizes warmth and hospitality, often appearing on New Year’s and holiday tables.
How should Olivye salad be stored and how long does it last?
Olivye salad should be stored in an airtight container in the refrigerator. Because it contains mayonnaise and boiled vegetables, it is best consumed within 2 to 3 days for optimal freshness and safety. Keep it chilled to prevent spoilage. If the salad looks or smells off, discard it. Stir well before serving to redistribute the dressing. Proper storage helps maintain the salad’s texture and flavor.
Olivye
🥔 Enjoy a classic Olivye Ukrainian Potato Salad featuring a harmonious blend of potatoes, ham, and fresh herbs for a satisfying meal.
🥗 This traditional recipe offers a creamy texture and vibrant flavors, perfect as a side dish or festive centerpiece.
- Total Time: 1 hour 30 minutes
- Yield: 6 servings
Ingredients
– 1 pound ham
– 3 medium potatoes
– 4 medium carrots
– 1 (15 oz) can sweet peas drained
– 2 cups thawed frozen peas
– 5 boiled eggs
– 5 medium-large pickles sour dill recommended
– 1/3 cup chopped green onion
– 1/4 cup chopped fresh dill
– 3/4 cup to 1 cup mayonnaise to taste
– Salt and pepper to taste
Instructions
1-Start by boiling your potatoes and carrots together in one pot for about 30 minutes until they’re just right not too soft. Once they’re done, cool them off and get ready to dice everything up for that creamy texture we all love. For more ideas on handling veggies, check out our make-ahead mashed potato casserole recipe for tips on prepping potatoes ahead of time.
2-Next, handle the eggs by placing them in salted cold water, bringing it to a boil, then letting them sit covered for 15 minutes before cooling. This ensures they peel easily and mix in smoothly. After everything cools, peel the potatoes and carrots try making a lengthwise slit in the carrots to help with that. Then, dice the ham, potatoes, carrots, pickles, and eggs into small, pea-sized pieces for even bites.
3-In a large bowl, combine the diced items with green onion, dill, and mayonnaise, mixing well to blend the flavors. Add salt and pepper to taste, and gently fold in the peas at the end to keep them from getting squished. Finally, adjust any amounts like onions or mayo based on what you prefer, and let it chill for the best results. This method works great for busy parents, and you can adapt it for dietary tweaks as you go.
Notes
🥔 Dice raw potatoes and carrots, then boil about 12 minutes in unsalted water for consistent texture.
🥒 Use sour dill pickles and peel before chopping for better taste and crunch.
🔪 Dice all ingredients uniformly into small pieces for perfect salad consistency.
- Prep Time: 1 hour
- Cooling and peeling time: 30 minutes
- Cook Time: 30 minutes
- Category: Salad
- Method: Boiling and mixing
- Cuisine: Ukrainian
Nutrition
- Serving Size: 1 cup
- Calories: 438
- Sugar: 6 g
- Sodium: 1234 mg
- Fat: 29 g
- Saturated Fat: 7 g
- Carbohydrates: 22 g
- Fiber: 6 g
- Protein: 22 g
- Cholesterol: 161 mg


