Ingredients
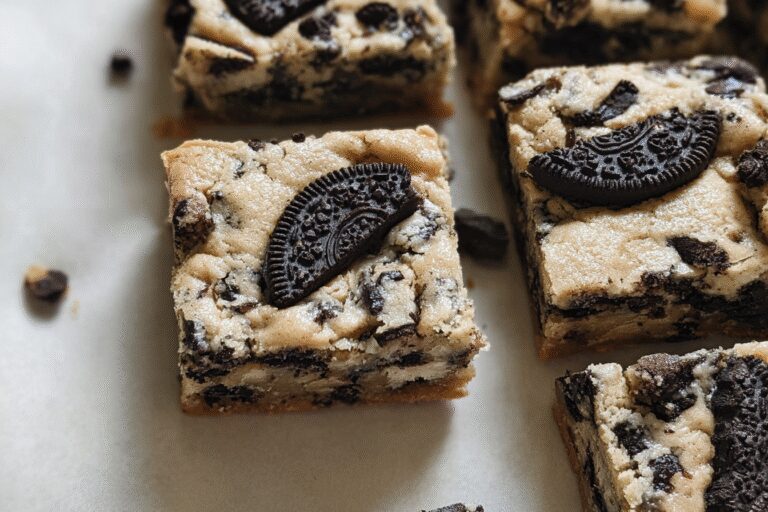
– 2 cups Crushed Oreos These provide the signature crunch and chocolate flavor that define Oreo blondies, adding a fun texture contrast to the soft base.
– 2 cups All-purpose flour Acts as the structure base, helping the batter hold together while keeping the cookie bars chewy and firm.
– 1 cup Granulated sugar Sweetens the mix and helps create that gooey center, balancing the bitterness from any chocolate elements.
– 1 cup, melted Unsalted butter Adds richness and moisture, ensuring the blondies stay fudgy and flavorful without becoming dry.
– 2 Large eggs Serve as binders to hold the ingredients together, contributing to the rise and tender crumb of the cookie bars.
– 1 teaspoon Baking powder Helps the batter rise slightly, giving the Oreo blondies a light lift while maintaining their dense texture.
– 1/2 teaspoon Salt Enhances all the flavors, making the sweetness of the chocolate cookie bars pop without overpowering them.
– 1 teaspoon Vanilla extract Brings a warm, aromatic note that ties the flavors together in these fudgy treats.
– 1/2 cup Optional mix-ins like chocolate chips Add extra gooey pockets of chocolate, customizing the blondies for more indulgence.
– 6 tablespoons Flaxseed meal mixed with water to act as a binder, maintaining the moisture and structure in your fudgy chocolate cookie bars.
– 1 cup Coconut oil instead of butter for a dairy-free richness that keeps the texture chewy and delicious.
– 2 cups Gluten-free flour blend to ensure the batter holds up without crumbling, preserving the classic blondies experience for those with dietary needs.
– equivalent to 1 cup sugar Stevia to cut calories while keeping the sweetness.
– 1/2 cup Applesauce in place of some butter to reduce fat and add natural moisture.
Instructions
1-First Step: Mise en Place Start by preheating your oven to 350°F to get that perfect bake for your Oreo blondies. Grease and line an 8×8-inch baking pan with parchment paper for easy removal, and take a few minutes to measure out all your ingredients like flour, sugar, and crushed Oreos. This prep usually takes about 10 minutes and sets you up for success, especially if you’re adapting for vegan options by preparing flaxseed mixtures in advance.
2-Second Step: Mixing Dry Ingredients Now, in a large bowl, whisk together the flour, baking powder, and salt until they’re well combined this helps avoid lumps and ensures even distribution. You might sift the mixture if your flour is clumpy, which takes just a couple of minutes and can make a big difference in texture. For gluten-free versions, use a gluten-free flour blend here to keep the batter light and airy without altering the overall flow.
3-Third Step: Cream Butter and Sugars In another bowl, mix the melted butter with the sugar until smooth, which should take about 2-3 minutes by hand or with a mixer. This step builds the base flavor and moisture, so for low-calorie swaps, incorporate applesauce gradually to maintain that creamy consistency. If you’re going vegan, use coconut oil instead and blend it carefully to mimic the richness without any dairy.
4-Fourth Step: Combine Wet and Dry, Fold in Crushed Oreos Add the eggs or their vegan substitute to the butter mixture, then stir in the vanilla before gradually folding in the dry ingredients. Once mixed, gently fold in the 2 cups of crushed Oreos to keep their texture intact, aiming for a thick batter that’s not too runny adjust with a bit more flour if needed for gluten-free adaptations. This step, taking around 5 minutes, ensures your Oreo blondies have that signature fudgy chocolate cookie bars feel.
5-Fifth Step: Transfer to Prepared Pan Pour the batter into your prepared pan, spreading it evenly with a spatula for uniform baking. If you want extra flair, sprinkle some additional crushed Oreos on top at this stage, which adds about 1-2 minutes to your prep time. For low-sugar versions, check the batter’s consistency to avoid over-sweetening, and adapt by reducing mix-ins if needed.
6-Sixth Step: Baking Bake in your preheated 350°F oven for 25-30 minutes, keeping an eye on it to prevent overcooking Oreo blondies are done when the edges are golden and a toothpick inserted in the center comes out with a few moist crumbs. In a convection oven, reduce the time by 5 minutes for even heat, and at higher altitudes, add a couple of minutes while watching closely. This ensures your chocolate cookie bars stay fudgy, with adjustments for vegan batter that might need a touch more time to set.
7-Seventh Step: Cooling Let the pan cool on a wire rack for about 10 minutes in the pan to help the blondies set without falling apart. Then, transfer them to the rack to cool completely, which takes another 20-30 minutes and allows the flavors to meld. For gluten-free versions, this cooling step is crucial to firm up the texture properly.
8-Final Step: Finishing Touches and Serving Once cooled, cut the Oreo blondies into squares using a sharp knife for clean edges, and add simple garnishes like a dusting of powdered sugar if desired. Serve them warm for the best fudgy experience, or store for later pair with ice cream for a treat that food enthusiasts will love. Reheating takes just 20 seconds in the microwave, and these adaptations make your chocolate cookie bars versatile for any gathering.
Notes
🍪 For the best fudgy texture, don’t overbake the blondies – they should still look slightly underdone in the center when you remove them from the oven
🌡️ Make sure your butter is melted but not hot when mixing with the sugar – hot butter can cook the eggs prematurely and affect the final texture
⏰ These blondies actually taste better the next day as the flavors meld together and the chocolate becomes more intense, making them perfect for making ahead
- Prep Time: 15 minutes
- Cooling Time: 2 hours
- Cook Time: 30 minutes
- Category: Dessert
- Method: Baking
- Cuisine: American
- Diet: Vegetarian
Nutrition
- Serving Size: 1 bar
- Calories: 235
- Sugar: 24g
- Sodium: 115mg
- Fat: 13g
- Saturated Fat: 7g
- Unsaturated Fat: 5g
- Trans Fat: 0g
- Carbohydrates: 31g
- Fiber: 2g
- Protein: 3g
- Cholesterol: 40mg