
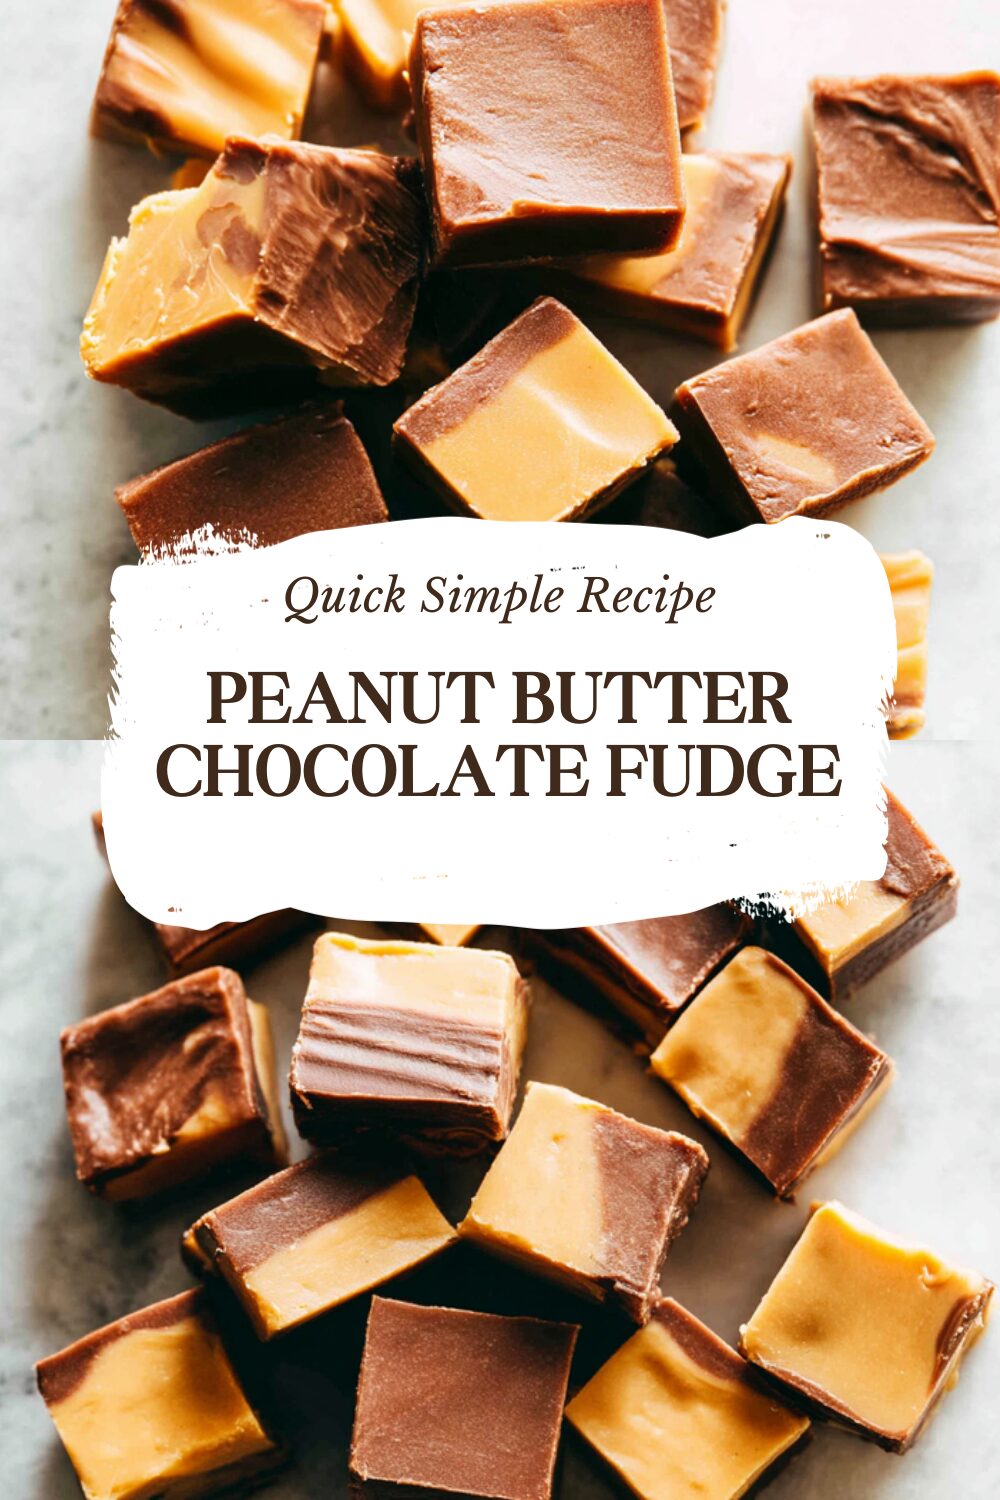
Why You’ll Love This Peanut Butter Chocolate Fudge
I know how busy life gets, especially in the kitchen, so finding a recipe that’s easy to whip up is always a win. This peanut butter chocolate fudge offers the perfect balance of simplicity and rich flavor, making it ideal for anyone wanting a quick treat. Let me share why I think it’ll become one of your go-to desserts.
- Ease of preparation: This peanut butter chocolate fudge comes together in minutes with minimal cooking, which is great for busy parents and working professionals. I love that you only need a microwave, cutting down on prep time to just 15 minutes, so you can spend more time enjoying family moments. It’s a straightforward process that uses basic pantry staples, making it accessible for home cooks of all skill levels.
- Health benefits: While it’s a sweet treat, peanut butter chocolate fudge offers some nutritional perks from ingredients like semisweet chocolate chips and peanut butter. Peanuts provide healthy fats and protein, which can support energy levels for students and active families. For more on these benefits, check out this article on the health benefits of peanuts.
- Versatility: You can tweak this chocolate fudge recipe to fit various dietary needs, like using plant-based substitutes for a vegan version. It’s flexible for food enthusiasts and diet-conscious individuals, whether you’re baking for seniors or newlyweds. Plus, it freezes well, adding convenience for meal prep.
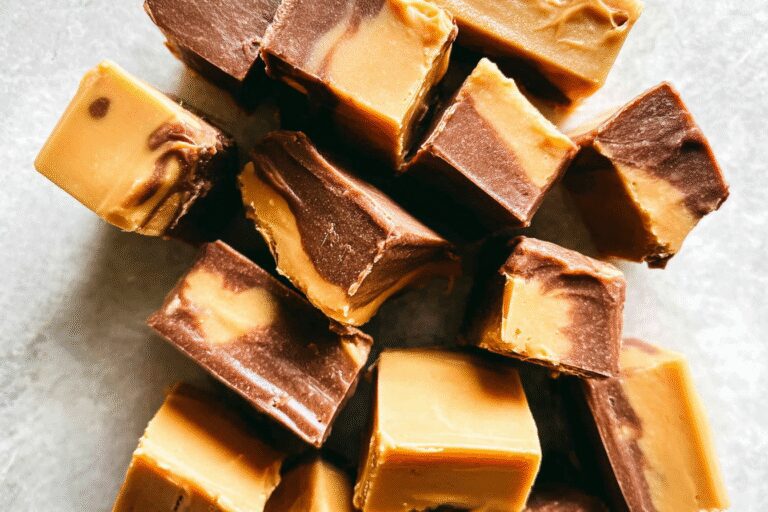
- Distinctive flavor: The swirl of peanut butter and chocolate creates a unique taste that’s creamy and satisfying, setting this homemade peanut butter fudge apart from others. I find it hits that sweet spot for baking enthusiasts who crave something indulgent yet simple. It’s perfect as an easy chocolate peanut butter dessert for any occasion.
This recipe stands out by combining ease with delicious results, making it a favorite for creating memorable family moments. With its no-bake nature, you’ll enjoy the process as much as the final product, turning everyday ingredients into a simple fudge recipe everyone will love.
Jump To
- 1. Why You’ll Love This Peanut Butter Chocolate Fudge
- 2. Essential Ingredients for Peanut Butter Chocolate Fudge
- 3. How to Prepare the Perfect Peanut Butter Chocolate Fudge: Step-by-Step Guide
- 4. Dietary Substitutions to Customize Your Peanut Butter Chocolate Fudge
- 5. Mastering Peanut Butter Chocolate Fudge: Advanced Tips and Variations
- 6. How to Store Peanut Butter Chocolate Fudge: Best Practices
- 7. FAQs: Frequently Asked Questions About Peanut Butter Chocolate Fudge
- 8. Peanut Butter Chocolate Fudge
Essential Ingredients for Peanut Butter Chocolate Fudge
Choosing the right ingredients is key to making perfect peanut butter chocolate fudge, and I always aim for quality to ensure the best taste. Below, I’ve listed everything you need with precise measurements and a quick explanation of each one’s role.
Main Ingredients
- 12 ounce bag (2 cups) semisweet chocolate chips – These provide the rich chocolate base that melts smoothly for that classic fudge texture.
- 4 tablespoons salted butter (divided) – Adds creaminess and helps bind the mixture; the salt enhances the flavors without overwhelming them.
- 1 can (14 ounces) sweetened condensed milk (divided) – Sweetens and thickens the fudge, giving it that irresistible gooey consistency.
- 1/2 cup (3.5 ounces) peanut butter baking chips – These bring in the nutty peanut butter flavor that swirls beautifully with the chocolate.
Special Dietary Options
For those looking to adapt this easy chocolate peanut butter fudge, here are some simple swaps.
- Vegan: Use plant-based sweetened condensed milk and vegan chocolate chips to keep the fudge creamy and delicious.
- Gluten-free: This recipe is naturally gluten-free, but double-check that your chocolate and peanut butter chips are certified gluten-free.
- Low-calorie: Opt for low-sugar chocolate chips and a reduced amount of sweetened condensed milk to lighten things up while maintaining flavor.
I appreciate how these ingredients make for a versatile no-bake peanut butter fudge that suits different needs. Remember, using high-quality items can elevate your homemade chocolate peanut butter fudge to the next level.
How to Prepare the Perfect Peanut Butter Chocolate Fudge: Step-by-Step Guide
I’m excited to walk you through making this peanut butter chocolate fudge, as it’s one of my favorite simple recipes. It only takes a few minutes of hands-on time, and you’ll end up with a decadent treat. Let’s break it down step by step so it’s easy to follow.
First Step: Prepare Your Pan
Start by greasing an 8x8x2-inch square baking pan with butter or shortening. Then, line it with parchment paper, letting it overhang on all sides for easy removal later. This step ensures your fudge doesn’t stick and makes cleanup a breeze, which is perfect for busy parents.
Second Step: Melt the Chocolate Mixture
In a large microwave-safe bowl, combine the 12 ounce bag (2 cups) semisweet chocolate chips, 2 tablespoons salted butter, and 1 cup sweetened condensed milk. Microwave on 100% power in 30-second increments until the mixture stirs smooth, taking about 1 minute 30 seconds total. Stir occasionally to avoid overheating, and this creates a silky base for your chocolate fudge recipe.
Third Step: Melt the Peanut Butter Mixture
In a separate bowl, mix the 1/2 cup (3.5 ounces) peanut butter baking chips with the remaining 2 tablespoons salted butter and the rest of the sweetened condensed milk. Microwave in 30-second increments until smooth, about 1 minute. For a variation, you might try stirring in extras like nuts if you’re feeling creative, keeping it adaptable for different preferences.
Fourth Step: Combine and Swirl
Pour the melted chocolate mixture into your prepared pan first. Then, add the peanut butter mixture on top. Use a butter knife to gently swirl them together for that classic peanut butter chocolate fudge look. Make sure both mixtures have a similar consistency before you do this to get even swirls.
Fifth Step: Chill and Set
Refrigerate the pan until the fudge is firm, which takes about 2 hours. Once set, lift it out using the parchment overhang and cut into 2-inch squares. This step is crucial for the texture, and it’s a great no-bake peanut butter fudge option for hot days.
Sixth Step: Package and Serve
Finally, package your fudge in airtight containers or festive bags for gifting. With a total time of just 2 hours and 18 minutes, including chill time, you can make about 32 pieces. I often link this recipe to others on my site, like the peanut butter chocolate molten lava cake for more dessert ideas. Enjoy it as a simple no-bake sweet recipe that’s perfect for sharing.
This method works whether you use a microwave or stovetop, making it versatile for all home cooks. Remember, prep time is only 15 minutes, and cook time is about 3 minutes, so it’s quick and rewarding.

Dietary Substitutions to Customize Your Peanut Butter Chocolate Fudge
Protein and Main Component Alternatives
If you want to tweak the main ingredients in this peanut butter chocolate fudge, consider swaps based on what you have on hand. For instance, you can replace peanut butter baking chips with smooth peanut butter for a different texture, though it might affect how the fudge sets. Higher quality chocolate like disks or wafers can stand in for the semisweet chocolate chips, keeping the flavor rich. These changes make it easy for baking enthusiasts to adapt the recipe to their tastes.
Vegetable, Sauce, and Seasoning Modifications
While this recipe doesn’t include vegetables, you could add a pinch of sea salt for extra flavor or experiment with seasonings like cinnamon. If you’re looking at sauces, using a different sweetened milk alternative can modify the consistency. For dietary needs, like a low-calorie version, reduce the sweetened condensed milk and opt for lighter options. This keeps your homemade peanut butter fudge flexible for various preferences.
Mastering Peanut Butter Chocolate Fudge: Advanced Tips and Variations
Pro Cooking Techniques
To get the best results with this chocolate fudge recipe, ensure both mixtures are the same consistency before swirling them. After pouring, gently drop the pan on the counter to even out the surface and avoid air bubbles. If you’re using a stovetop instead of a microwave, stir constantly to prevent scorching, which helps maintain that smooth texture.
Flavor Variations
Experiment with additions like chopped nuts or a dash of vanilla for new twists on this easy chocolate peanut butter fudge. You could also try mixing in mini chocolate chips for extra indulgence or even sea salt flakes for a sweet-salty balance. These simple changes turn your no-bake peanut butter fudge into a personalized treat.
Presentation Tips
For a polished look, cut the fudge into neat squares and package in festive bags, ideal for gifting as I mentioned earlier. For more ideas, check out the chocolate-covered strawberries recipe on my site. Make-ahead options include freezing the fudge, so you can prepare it in advance for busy schedules.
How to Store Peanut Butter Chocolate Fudge: Best Practices
Proper storage keeps your peanut butter chocolate fudge fresh and tasty, and it’s simpler than you might think. Whether you’re saving some for later or prepping in bulk, follow these guidelines. This shelf-stable treat can last a while with the right method.
Refrigeration
For short-term storage, keep your fudge in an airtight container in the fridge for up to two weeks. This helps maintain its creamy texture, especially in warmer weather.
Freezing
If you want to store it longer, wrap pieces tightly and freeze for up to three months. When you’re ready, thaw at room temperature for about 15-20 minutes.
Reheating and Meal Prep
No need to reheat; just let it sit out briefly. For meal prep, make a big batch and freeze portions for quick treats throughout the week. For more on enjoying chocolate treats, read about how to eat chocolate and lose weight.
FAQs: Frequently Asked Questions About Peanut Butter Chocolate Fudge
How do I make peanut butter chocolate fudge at home?
To make peanut butter chocolate fudge at home, combine 2 cups of sugar, ½ cup of milk, and ½ cup of unsweetened cocoa powder in a saucepan. Bring the mixture to a boil, stirring constantly for about 5 minutes. Remove from heat, then stir in 1 cup of peanut butter and 1 teaspoon of vanilla extract until smooth. Pour the mixture into a greased 8×8-inch pan and refrigerate for at least 2 hours before cutting into squares. This simple recipe requires no baking and results in rich, creamy fudge perfect for sharing.
What’s the best type of peanut butter to use for chocolate fudge?
For peanut butter chocolate fudge, creamy, natural peanut butter works best because it blends smoothly and has a fresh, nutty flavor. Avoid using peanut butter with added sugar or hydrogenated oils, as these can affect the fudge’s texture and taste. If you prefer a chunkier fudge with added texture, you can incorporate crunchy peanut butter or stir in chopped peanuts after mixing the base ingredients.
How should I store peanut butter chocolate fudge to keep it fresh?
Store peanut butter chocolate fudge in an airtight container in the refrigerator to keep it fresh for up to two weeks. For longer storage, wrap the fudge pieces tightly in plastic wrap and place them in a freezer-safe bag; frozen fudge can last up to 3 months. Before serving frozen fudge, allow it to thaw at room temperature for about 15-20 minutes to soften.
Can I make peanut butter chocolate fudge without corn syrup?
Yes, you can make peanut butter chocolate fudge without corn syrup by using sugar and milk as the base sweeteners. The key is to cook the sugar mixture to the correct temperature to achieve the right texture. Alternatively, ingredients like honey or maple syrup can be substituted but may slightly alter the flavor and consistency. Follow a recipe designed specifically without corn syrup for the best results.
How can I add variety to my peanut butter chocolate fudge?
You can add variety to peanut butter chocolate fudge by mixing in ingredients such as chopped nuts, mini chocolate chips, sea salt flakes, or dried fruit. For a richer flavor, try adding a splash of espresso or a pinch of cinnamon to the mixture. Additionally, topping the cooled fudge with crushed pretzels or toffee pieces adds a delightful crunch and contrast to the creamy base.
Peanut Butter Chocolate Fudge
🍫 Chocolate Peanut Butter Swirl Fudge is a rich and creamy no-bake treat combining the best of chocolate and peanut butter flavors.
🍬 This simple recipe requires minimal prep and yields perfectly swirled, gift-worthy fudge that’s great for any occasion.
- Total Time: 2 hours 18 minutes
- Yield: 32 pieces
Ingredients
– 12 ounce bag (2 cups) semisweet chocolate chips for the rich chocolate base that melts smoothly for that classic fudge texture
– 4 tablespoons salted butter (divided) for creaminess and binding the mixture; the salt enhances the flavors without overwhelming them
– 1 can (14 ounces) sweetened condensed milk (divided) to sweeten and thicken the fudge, giving it that irresistible gooey consistency
– 1/2 cup (3.5 ounces) peanut butter baking chips for the nutty peanut butter flavor that swirls beautifully with the chocolate
Instructions
1-First Step: Prepare Your Pan Start by greasing an 8x8x2-inch square baking pan with butter or shortening. Then, line it with parchment paper, letting it overhang on all sides for easy removal later. This step ensures your fudge doesn’t stick and makes cleanup a breeze, which is perfect for busy parents.
2-Second Step: Melt the Chocolate Mixture In a large microwave-safe bowl, combine the 12 ounce bag (2 cups) semisweet chocolate chips, 2 tablespoons salted butter, and 1 cup sweetened condensed milk. Microwave on 100% power in 30-second increments until the mixture stirs smooth, taking about 1 minute 30 seconds total. Stir occasionally to avoid overheating, and this creates a silky base for your chocolate fudge recipe.
3-Third Step: Melt the Peanut Butter Mixture In a separate bowl, mix the 1/2 cup (3.5 ounces) peanut butter baking chips with the remaining 2 tablespoons salted butter and the rest of the sweetened condensed milk. Microwave in 30-second increments until smooth, about 1 minute. For a variation, you might try stirring in extras like nuts if you’re feeling creative, keeping it adaptable for different preferences.
4-Fourth Step: Combine and Swirl Pour the melted chocolate mixture into your prepared pan first. Then, add the peanut butter mixture on top. Use a butter knife to gently swirl them together for that classic peanut butter chocolate fudge look. Make sure both mixtures have a similar consistency before you do this to get even swirls.
5-Fifth Step: Chill and Set Refrigerate the pan until the fudge is firm, which takes about 2 hours. Once set, lift it out using the parchment overhang and cut into 2-inch squares. This step is crucial for the texture, and it’s a great no-bake peanut butter fudge option for hot days.
6-Sixth Step: Package and Serve Finally, package your fudge in airtight containers or festive bags for gifting. With a total time of just 2 hours and 18 minutes, including chill time, you can make about 32 pieces. I often link this recipe to others on my site, like the peanut butter chocolate molten lava cake for more dessert ideas. Enjoy it as a simple no-bake sweet recipe that’s perfect for sharing.
Notes
🍴 Can be made using microwave or stovetop melting methods.
🍫 Use higher quality chocolate like disks, blocks, or wafers for best flavor and texture.
❄️ Fudge freezes well, making it ideal for advance preparation and gifting.
- Prep Time: 15 minutes
- Chill Time: 2 hours
- Cook Time: 3 minutes
- Category: Dessert
- Method: No-Bake
- Cuisine: American
Nutrition
- Serving Size: 1 piece


