
Why You’ll Love This Raspberry Mousse
This Raspberry Mousse is the kind of dessert that feels fancy without asking you to spend all day in the kitchen. It is light, creamy, and full of bright berry flavor, which makes it perfect for family dinners, holidays, or a quick sweet treat after a busy day. If you love a mousse recipe that looks beautiful in a glass but comes together with simple steps, this one will quickly become a favorite.
- Easy to make: This easy raspberry mousse recipe uses a short list of ingredients and only 10 minutes of prep time, so it works well for busy parents, students, and working professionals.
- Fresh and satisfying: Raspberries bring a tangy fruit flavor that balances the sweet whipped cream, making every spoonful taste bright and fresh.
- Flexible for many needs: You can make it with fresh or frozen berries, serve it as a simple dessert, or use it as a filling for cakes, eclairs, or cupcakes.
- Great make-ahead dessert: Since it chills in the fridge, this homemade mousse fits meal prep, dinner parties, and special events without last-minute stress.
Raspberries also bring useful nutrients to the table. They provide fiber, natural color, and a fruit-forward flavor that makes this raspberry dessert feel special while still being simple. For more on the nutrition profile of raspberries, you can read this guide to the health benefits of raspberries.
This is the kind of dessert that looks elegant, tastes fresh, and still feels easy enough for any home cook to make.
If you enjoy light desserts, you may also like pairing this recipe with a creamy treat such as silky lemon cream treat or serving it after a fruity bake like blueberry cream cake.
Jump To
- 1. Why You’ll Love This Raspberry Mousse
- 2. Essential Ingredients for Raspberry Mousse
- 3. How to Prepare the Perfect Raspberry Mousse: Step-by-Step Guide
- 4. Dietary Substitutions to Customize Your Raspberry Mousse
- 5. Mastering Raspberry Mousse: Advanced Tips and Variations
- 6. How to Store Raspberry Mousse: Best Practices
- 7. FAQs: Frequently Asked Questions About Raspberry Mousse
- 8. Raspberry Mousse
Essential Ingredients for Raspberry Mousse
To make this homemade raspberry mousse recipe, you only need a few basic ingredients. Each one plays an important role in the final texture and flavor, so it helps to measure everything before you begin.
Main Ingredients
- 12 oz fresh or frozen raspberries – These create the bold berry flavor and the lovely pink color. Fresh berries give a bright taste, while frozen berries are a great year-round option.
- 2/3 cup sugar – This balances the tartness of the raspberries and gives the mousse a smooth sweet finish.
- 1/4 cup water for raspberries – This helps the berries soften in the pan and makes it easier to puree them.
- 1/4 cup cold water – This is used to soften the gelatin before heating.
- 1 1/2 cups heavy whipping cream, kept cold – This gives the mousse its light, airy body. Cold cream whips better and holds stiff peaks more easily.
- 1 package unflavored gelatin, or 2 1/4 teaspoons – This helps the mousse set so it can hold its shape in serving dishes or as a cake filling.
Special Dietary Options
- Vegan: Use coconut cream instead of heavy whipping cream, and replace gelatin with agar-agar or another plant-based setting option. Mix a small test batch first so you can check the texture.
- Gluten-free: This recipe is naturally gluten-free as written, which makes it a nice dessert choice for many guests.
- Low-calorie: Swap the sugar for a zero-calorie sweetener like stevia. Avoid monk fruit here because it can cause crystallization in some recipes.
| Ingredient | Amount | Why It Matters |
|---|---|---|
| Raspberries | 12 oz | Bring the fruit flavor and color |
| Sugar | 2/3 cup | Rounds out the tart berry taste |
| Water | 1/4 cup + 1/4 cup cold water | One part cooks the fruit, one part softens gelatin |
| Heavy whipping cream | 1 1/2 cups | Adds the fluffy mousse texture |
| Unflavored gelatin | 1 package or 2 1/4 teaspoons | Helps the mousse set |
How to Prepare the Perfect Raspberry Mousse: Step-by-Step Guide
This no bake raspberry mousse is easy to manage if you take it one step at a time. Having your ingredients ready before you start will make the whole process smoother, especially because the warm berry mixture needs to cool before folding it into the whipped cream.
First Step: Soften the gelatin
Start by stirring the unflavored gelatin into 1/4 cup cold water. Let it sit for a few minutes so it softens properly. This step helps the gelatin dissolve smoothly later, which is important if you want a creamy fruit mousse without lumps.
Second Step: Cook the raspberries
Place the raspberries, sugar, and 1/4 cup water for the raspberries into a saucepan. Heat the mixture over medium heat until the berries soften and begin to break down. Stir often so the sugar dissolves and the fruit does not stick to the pan. This usually only takes a few minutes.
If you are using frozen raspberries, there is no need to fully thaw them first. They will break down as they heat, which makes this a very practical quick raspberry mousse dessert for any season.
Third Step: Puree and strain
Transfer the hot berry mixture to a blender and puree until smooth. If you want a silkier texture, strain the puree through a fine mesh sieve to remove the seeds. That step is optional, but it gives the mousse a smoother finish that many people prefer, especially when serving it in pretty glasses.
For the smoothest raspberry dessert, straining the seeds makes a big difference in both texture and presentation.
Fourth Step: Add the gelatin and boil briefly
Return the strained berry puree to the saucepan. Add the softened gelatin and stir well. Bring the mixture to a boil for 1 minute while stirring. This helps the gelatin fully dissolve and prepares the base so it can set later in the fridge.
After boiling, remove the pan from the heat and let the mixture cool to room temperature, about 70 to 80 degrees F. This cooling step matters because if the berry base is too warm, it can melt the whipped cream and ruin the airy texture.
Fifth Step: Whip the cream
While the berry mixture cools, pour the 1 1/2 cups heavy whipping cream into a cold bowl. Whip it until stiff peaks form. Using a cold bowl and cold cream gives you better volume, so the mousse turns out light and fluffy. This is one of the best tips for homemade mousse, especially if you like a stable dessert that holds its shape.
Sixth Step: Fold everything together
Once the raspberry mixture has cooled, gently fold it into the whipped cream. Use a spatula and move slowly so you do not knock out the air from the cream. Fold just until the color looks even and no white streaks remain. Overmixing can make the mousse too soft, so keep the motion gentle.
This is the step where the dessert begins to look like a classic raspberry mousse. The filling becomes pale pink, creamy, and smooth, with a soft fruity aroma that feels perfect for any occasion.
Final Step: Chill and serve
Spoon or pour the mousse into serving dishes, dessert cups, or a prepared crust if you plan to use it as a filling. Chill for 4 to 24 hours before serving so it can set properly. If you need to pipe it later, chill the mixture for about 30 minutes first. If you want to pipe it right away, let it sit for at least 1 hour in the fridge before using it.
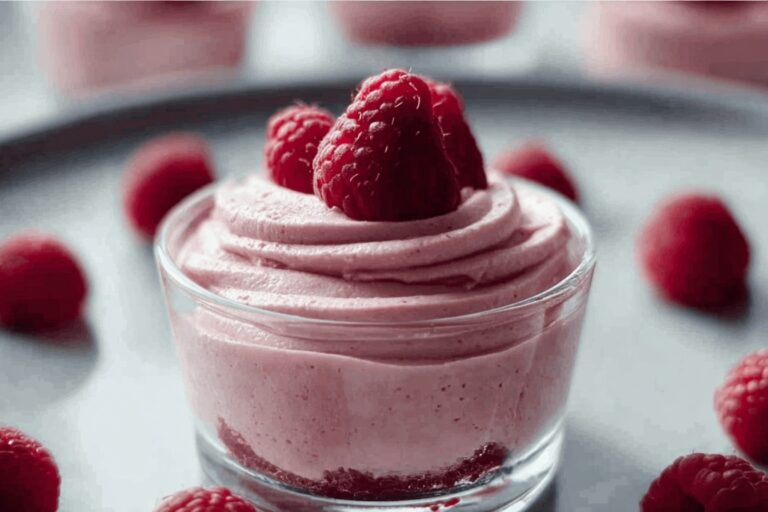
For a beautiful finish, top each serving with fresh raspberries, mint leaves, or a small cookie on the side. This homemade raspberry mousse recipe makes about 3 1/2 cups, which is usually enough for 4 to 6 servings depending on portion size.
Prep time: 10 minutes
Cook time: 5 minutes
Additional time: 1 hour
Total time: 1 hour 15 minutes

Dietary Substitutions to Customize Your Raspberry Mousse
Protein and Main Component Alternatives
If you want to change the texture or meet different diet needs, there are a few easy swaps you can try. Instead of heavy whipping cream, use chilled coconut cream for a dairy-free version. Chill the can first, then scoop out the thick cream from the top for the best whipping result.
For a gelatin-free version, use agar-agar or aquafaba. Agar-agar needs to be heated so it can set correctly, while aquafaba can be whipped until fluffy and folded into the raspberry base. If you want extra richness, some cooks blend in a little Greek yogurt for a softer mousse that still feels creamy.
Vegetable, Sauce, and Seasoning Modifications
Raspberry mousse is already simple, but you can still change the flavor in small ways. A little lemon juice can brighten the berries if you like a sharper fruit taste. You can also mix raspberries with strawberries or blackberries for a blended fruit mousse variation.
If you want a more dessert-style version, use the mousse as a filling for cupcakes, eclairs, or layer cakes. It pairs nicely with vanilla, chocolate, or almond flavors. For a richer serving idea, try it alongside homemade eclairs or as a light ending after a bakery-style treat like vanilla custard cream squares.
Mastering Raspberry Mousse: Advanced Tips and Variations
Pro cooking techniques
A few small habits can make your raspberry mousse turn out even better. First, keep the bowl and cream cold before whipping. This gives you more volume and helps the cream stay stiff. Second, let the berry mixture cool fully before folding it in, because warm puree can deflate the cream.
Also, do not rush the chilling stage. The mousse needs time in the fridge to set up and develop the right texture. If you are using it as a filling, the extra chill time helps it hold its shape better when sliced or piped.
Flavor variations
You can add a few simple twists to make the recipe feel new. A splash of vanilla gives the mousse a softer, rounder flavor. A little lemon zest adds brightness. You can also make a layered dessert by spooning the mousse over crushed cookies, sponge cake, or fresh berries.
For a more festive dessert table, serve it with fruit-forward sweets like chocolate covered strawberries. The mix of creamy raspberry and chocolate-dipped fruit is always a crowd-pleaser.
Presentation tips
Serve the mousse in clear cups, small jars, or stemmed glasses so the pink color can shine. Add a few fresh raspberries on top, a sprig of mint, or a dusting of powdered sugar. If you are piping it into tart shells or cupcakes, chill the mixture first so it keeps a neat shape.
Make-ahead options
This dessert is a strong choice for busy schedules because it can be made ahead. You can prepare it the day before and let it chill overnight. If you are planning to pipe it, chill the mousse for 30 minutes before piping later, or at least 1 hour if you need it sooner. That makes it useful for parties, potlucks, and holiday desserts.
How to Store Raspberry Mousse: Best Practices
Refrigeration
Store raspberry mousse in the fridge in covered cups or an airtight container. It keeps well for 3 to 4 days, and the texture stays best when it is chilled and protected from air. If you are storing several servings, press plastic wrap lightly against the surface before sealing the container.
Freezing
You can freeze portions for up to 1 month, though the texture may soften a little after thawing. For the best result, freeze in single servings and thaw overnight in the refrigerator. This works well if you want to make dessert ahead for guests or save leftovers for later.
Reheating
This dessert does not need reheating. In fact, warming it will change the texture and can make it lose its airy feel. Just serve it cold straight from the fridge.
Meal prep considerations
Raspberry mousse is great for meal prep because it can be made in batches and portioned ahead of time. If you are packing it for a party or lunchbox-style dessert, keep it chilled until serving. Since it uses dairy, avoid leaving it at room temperature for more than 2 hours.
FAQs: Frequently Asked Questions About Raspberry Mousse
What is raspberry mousse?
Raspberry mousse is a light, airy dessert made primarily from fresh or frozen raspberries, whipped cream, sugar, and a setting agent like gelatin or whipped egg whites. It has a creamy texture with a vibrant pink color and tangy berry flavor, without needing to be baked. This no-bake treat is popular for its elegance at dinner parties or summer gatherings. Typically served chilled in glasses or molds, it sets in the fridge for a few hours. A standard recipe serves 4-6 people and takes about 20 minutes of active prep time plus chilling. It’s naturally gluten-free and can be adapted for dairy-free diets using coconut cream. Pair it with fresh berries or mint for garnish. (78 words)
How do you make easy raspberry mousse at home?
To make easy raspberry mousse, puree 2 cups fresh raspberries with 1/2 cup sugar and strain for smoothness. Soften 1 tablespoon gelatin in 1/4 cup water, then heat gently to dissolve. Whip 1.5 cups heavy cream to stiff peaks. Fold raspberry puree into the gelatin, then gently mix in whipped cream. Spoon into glasses and chill for 2-3 hours until set. For best results, use room-temperature ingredients and chill bowls beforehand. This yields 4 servings. Total time: 25 minutes prep + chilling. Avoid overmixing to keep it fluffy. Serve topped with extra raspberries. (92 words)
What ingredients do I need for raspberry mousse?
Basic raspberry mousse requires: 2 cups fresh or frozen raspberries, 1/2 cup granulated sugar, 1.5 cups heavy whipping cream, 1 tablespoon unflavored gelatin, 1/4 cup cold water, and optional lemon juice for brightness. For a richer version, add 2 egg whites whipped with sugar for stability. Use fresh berries for best flavor, but frozen work too—just thaw first. This keeps it simple with pantry staples. No special equipment beyond a blender, strainer, and mixer. Adjust sugar to taste based on raspberry tartness. Yields a dessert that’s low-carb friendly at about 200 calories per serving. (98 words)
Can you make raspberry mousse without gelatin?
Yes, make raspberry mousse without gelatin using aquafaba (chickpea liquid) or agar-agar for vegan options, or Greek yogurt stabilized with whipped cream. Puree 2 cups raspberries with sugar, whip 1 cup aquafaba to stiff peaks with 1/4 cup sugar, and fold together. For dairy version, mix strained puree with 2 cups whipped yogurt-cream blend and chill. Agar needs boiling first: dissolve 1 tsp in water, mix in puree, then fold into whipped topping. Chill 3-4 hours. These hold shape well and taste just as fresh. Test small batch for set firmness. Great for gelatin-free diets. (96 words)
How long does raspberry mousse last in the fridge?
Homemade raspberry mousse lasts 3-4 days in the fridge when stored airtight in covered glasses or a container. For longer storage, freeze portions up to 1 month—thaw overnight in fridge for best texture, though it may soften slightly. Avoid leaving at room temperature over 2 hours to prevent spoilage from dairy. Signs it’s gone bad: off smell, separation, or mold. Pro tip: layer with plastic wrap directly on surface before covering to block air and maintain fluffiness. Always use fresh ingredients to extend shelf life. Perfect for meal prepping desserts ahead. (89 words)
Raspberry Mousse
🍓 Indulge in silky, vibrant raspberry mousse that’s light, refreshing, and bursting with fresh berry flavor for an elegant treat.
🧁 This easy homemade version is versatile as a dessert or cake filling, naturally sweet and ready with minimal effort.
- Total Time: 4 hours 15 minutes
- Yield: 3 1/2 cups (6 servings)
Ingredients
– 12 oz fresh or frozen raspberries for fruit flavor and color
– 2/3 cup sugar for rounding out the tart berry taste
– 1/4 cup water for raspberries for cooking the fruit
– 1/4 cup cold water for softening gelatin
– 1 1/2 cups heavy whipping cream kept cold for fluffy mousse texture
– 1 package or 2 1/4 teaspoons unflavored gelatin for helping the mousse set
Instructions
1-First Step: Soften the gelatin Start by stirring the unflavored gelatin into 1/4 cup cold water. Let it sit for a few minutes so it softens properly. This step helps the gelatin dissolve smoothly later, which is important if you want a creamy fruit mousse without lumps.
2-Second Step: Cook the raspberries Place the raspberries, sugar, and 1/4 cup water for the raspberries into a saucepan. Heat the mixture over medium heat until the berries soften and begin to break down. Stir often so the sugar dissolves and the fruit does not stick to the pan. This usually only takes a few minutes. If you are using frozen raspberries, there is no need to fully thaw them first. They will break down as they heat, which makes this a very practical quick raspberry mousse dessert for any season.
3-Third Step: Puree and strain Transfer the hot berry mixture to a blender and puree until smooth. If you want a silkier texture, strain the puree through a fine mesh sieve to remove the seeds. That step is optional, but it gives the mousse a smoother finish that many people prefer, especially when serving it in pretty glasses.
4-Fourth Step: Add the gelatin and boil briefly Return the strained berry puree to the saucepan. Add the softened gelatin and stir well. Bring the mixture to a boil for 1 minute while stirring. This helps the gelatin fully dissolve and prepares the base so it can set later in the fridge. After boiling, remove the pan from the heat and let the mixture cool to room temperature, about 70 to 80 degrees F. This cooling step matters because if the berry base is too warm, it can melt the whipped cream and ruin the airy texture.
5-Fifth Step: Whip the cream While the berry mixture cools, pour the 1 1/2 cups heavy whipping cream into a cold bowl. Whip it until stiff peaks form. Using a cold bowl and cold cream gives you better volume, so the mousse turns out light and fluffy. This is one of the best tips for homemade mousse, especially if you like a stable dessert that holds its shape.
6-Sixth Step: Fold everything together Once the raspberry mixture has cooled, gently fold it into the whipped cream. Use a spatula and move slowly so you do not knock out the air from the cream. Fold just until the color looks even and no white streaks remain. Overmixing can make the mousse too soft, so keep the motion gentle. This is the step where the dessert begins to look like a classic raspberry mousse. The filling becomes pale pink, creamy, and smooth, with a soft fruity aroma that feels perfect for any occasion.
7-Final Step: Chill and serve Spoon or pour the mousse into serving dishes, dessert cups, or a prepared crust if you plan to use it as a filling. Chill for 4 to 24 hours before serving so it can set properly. If you need to pipe it later, chill the mixture for about 30 minutes first. If you want to pipe it right away, let it sit for at least 1 hour in the fridge before using it. For a beautiful finish, top each serving with fresh raspberries, mint leaves, or a small cookie on the side. This homemade raspberry mousse recipe makes about 3 1/2 cups, which is usually enough for 4 to 6 servings depending on portion size.
Notes
🥶 Use a chilled bowl and beaters for heavy cream to achieve maximum volume and stiff peaks quickly.
🍓 Strain raspberry puree through a sieve for ultra-smooth mousse without seeds.
⏳ Chill mousse at least 4 hours or overnight for perfect set; cover loosely to avoid condensation.
- Prep Time: 10 minutes
- Chill: 4 hours
- Cook Time: 5 minutes
- Category: Dessert
- Method: No-Bake
- Cuisine: French
- Diet: Vegetarian
Nutrition
- Serving Size: 1/2 cup
- Calories: 273
- Sugar: 23g
- Sodium: 15mg
- Fat: 19g
- Saturated Fat: 12g
- Unsaturated Fat: 6g
- Trans Fat: 1g
- Carbohydrates: 26g
- Fiber: 3g
- Protein: 2g
- Cholesterol: 58mg


