
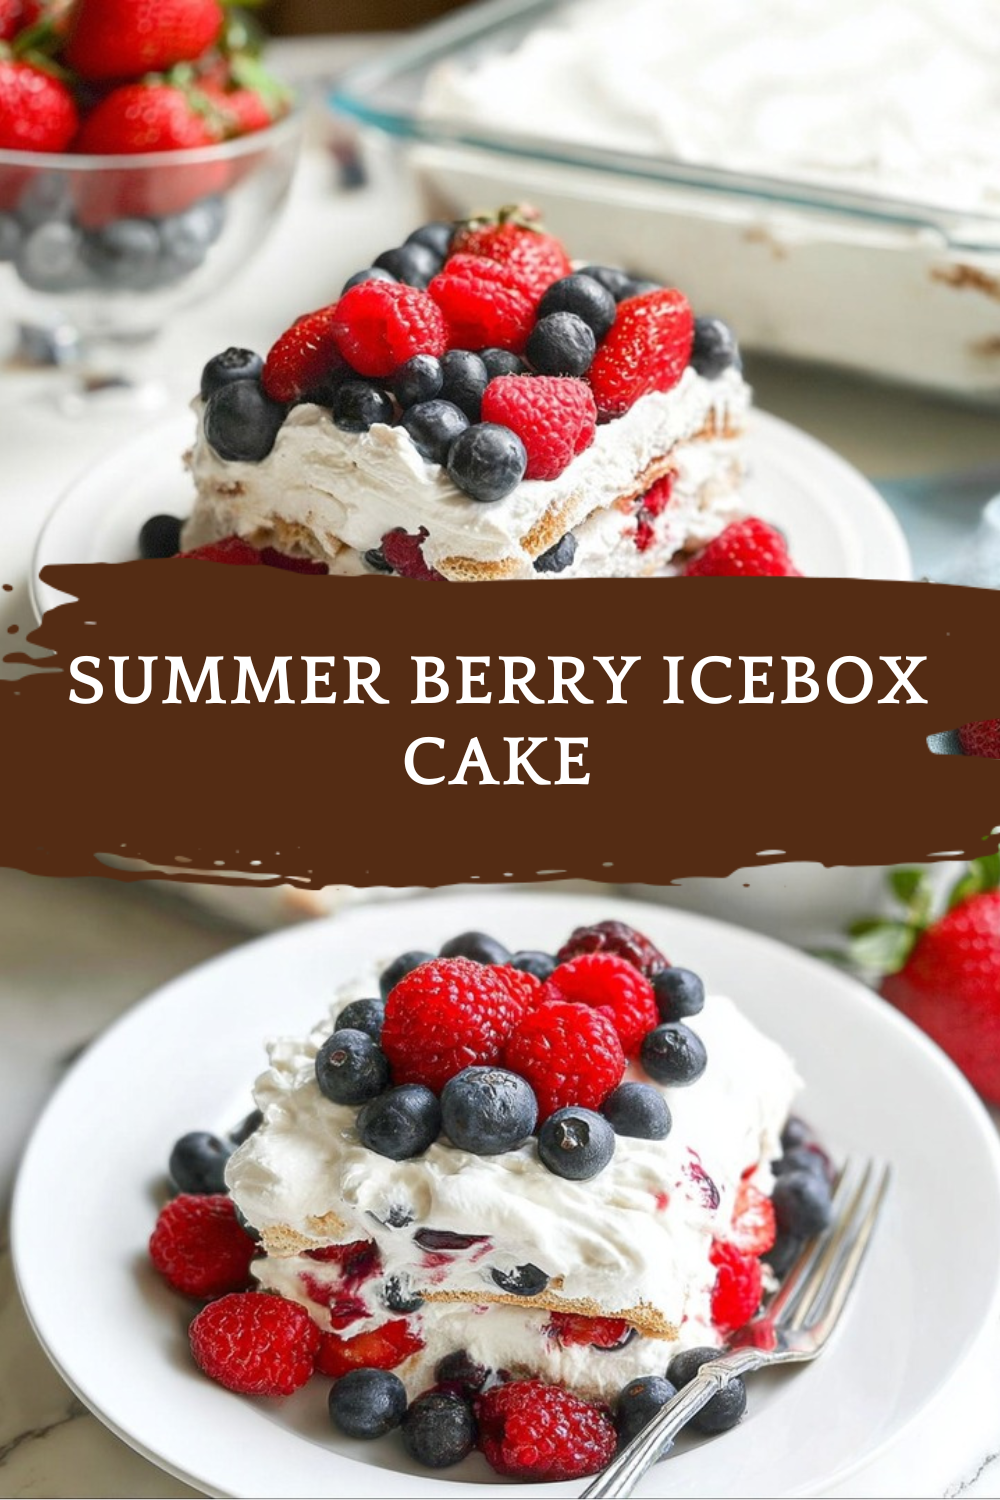
Why You’ll Love This Summer Berry Icebox Cake
When the temperatures rise and the sun stays out late, the last thing anyone wants is to turn on a hot oven. That’s exactly why this summer berry icebox cake has become a go-to favorite for families everywhere. It’s the kind of dessert that feels fancy but requires minimal effort, leaving you more time to enjoy those precious summer moments with the people you love.
This no-bake berry icebox cake checks all the boxes for busy home cooks who still want to impress. Here’s why it deserves a permanent spot in your recipe rotation:
- Ease of Preparation: With just 15 minutes of active prep time, this summer berry icebox cake recipe comes together faster than you can preheat an oven. The assembly is straightforward, making it perfect for beginner bakers or anyone short on time. If you’ve been searching for an easy summer berry icebox cake that doesn’t sacrifice flavor for convenience, this is it.
- Fresh and Light Flavor: Unlike heavy cakes that weigh you down, this berry cake celebrates the natural sweetness of fresh strawberries and blueberries. The creamy pudding layer paired with whipped topping creates a light, airy texture that’s refreshing on hot days. It’s the quintessential summer dessert that feels indulgent without being overly rich.
- Make-Ahead Convenience: Need a dessert for a potluck, barbecue, or family gathering? This icebox cake actually tastes better after chilling overnight, so you can prep it a day in advance and forget about it until serving time. No last-minute scrambling required.
- Versatility for All Occasions: Whether you’re feeding a crowd of 16 at a Fourth of July party or enjoying slices with your immediate family throughout the week, this recipe adapts beautifully. You can even customize the berries based on what’s in season or what your family prefers.
If you’ve ever been in a rush but still want a tasty treat, this no-bake berry dessert comes together in minutes and waits patiently in your fridge until you’re ready to indulge, perfect for those hectic summer days when turning on the oven is the last thing on your mind.
Jump To
- 1. Why You’ll Love This Summer Berry Icebox Cake
- 2. Essential Ingredients for Summer Berry Icebox Cake
- 3. How to Prepare the Perfect Summer Berry Icebox Cake: Step-by-Step Guide
- 4. Dietary Substitutions to Customize Your Summer Berry Icebox Cake
- 5. Mastering Summer Berry Icebox Cake: Advanced Tips and Variations
- 6. How to Store Summer Berry Icebox Cake: Best Practices
- 7. FAQs: Frequently Asked Questions About Summer Berry Icebox Cake
- 8. Summer Berry Icebox Cake
Essential Ingredients for Summer Berry Icebox Cake
Before you start assembling this no-bake summer berry icebox cake, let’s gather everything you need. Having all ingredients prepped and measured makes the process smooth and stress-free.
Complete Ingredient List
- 19 ounces graham crackers – These form the cake’s structure and soften beautifully as they absorb moisture from the pudding layer, creating a cake-like texture without any baking.
- 8 ounces softened cream cheese – Adds a subtle tanginess and helps create a thick, stable filling that holds its shape when sliced.
- Two 3.4-ounce packages vanilla instant pudding mix – The backbone of the creamy layer, providing flavor and helping the filling set properly.
- 2 1/2 cups cold milk – Used to prepare the pudding mixture; keep it cold for the best consistency.
- 12 ounces whipped topping or homemade whipped cream – Lightens the pudding mixture and adds fluffy texture to each layer.
- 3 cups fresh sliced strawberries – Sweet, juicy berries that provide bursts of fresh flavor in every bite.
- 1 1/2 cups fresh blueberries – Add lovely color contrast and a slightly different berry flavor that complements the strawberries.
- 2 ounces white chocolate chips – Melted and drizzled on top for an elegant finishing touch that makes this dessert party-worthy.
Special Dietary Options
Good news for those with dietary restrictions! This summer berry icebox cake can be easily adapted:
- Gluten-Free: Simply swap regular graham crackers for gluten-free graham crackers or your favorite gluten-free vanilla cookies. The texture and flavor remain delicious.
- Lower Calorie: Use reduced-fat cream cheese, sugar-free instant pudding mix, and light whipped topping to cut calories without sacrificing too much flavor.
- Vegetarian: This recipe is naturally vegetarian-friendly, just check your graham cracker labels if strict vegetarianism is important to you.
For more delicious berry-based treats that highlight fresh fruit, check out our blueberry cream cake recipe that’s perfect for any occasion.
How to Prepare the Perfect Summer Berry Icebox Cake: Step-by-Step Guide
Ready to create this stunning no-bake dessert? Follow these detailed steps, and you’ll have a beautiful summer berry icebox cake ready for the fridge in no time.
Step 1: Prepare the Creamy Filling Base
Start by ensuring your cream cheese is completely softened. This is crucial for achieving a smooth, lump-free filling. Leave it at room temperature for about 30 minutes before starting, or microwave it in 15-second intervals until soft but not melted.
Place the softened cream cheese in a large mixing bowl along with both packages of dry vanilla instant pudding mix. Beat these together using an electric mixer on medium speed until well blended, about 1-2 minutes. The mixture will look thick and slightly dry at this stage, which is perfectly normal.
Step 2: Add Milk Gradually
With the mixer running on low speed, gradually pour in the cold milk. Adding it slowly while mixing helps prevent lumps from forming and ensures a silky smooth consistency. Continue beating for about 2 minutes until the mixture thickens considerably.
Pro Tip: If you notice any lumps, stop and scrape down the sides of the bowl, then continue mixing. For extra insurance against lumps, you can whisk each pudding package with a small amount of milk separately before combining everything.
Step 3: Fold in the Whipped Topping
Take your whipped topping or homemade whipped cream and measure out 1/2 cup to set aside for the pan base. Gently fold the remaining whipped topping into the pudding mixture using a rubber spatula. Use a light hand and folding motion rather than vigorous stirring to keep the mixture airy and fluffy. The filling should now be thick, creamy, and spreadable.
Step 4: Prepare the Pan and First Layer
Grab a 9×13-inch pan and spread that reserved 1/2 cup of whipped topping across the bottom in a thin layer. This creates a barrier that helps the first layer of graham crackers stay in place and makes serving easier.
Now arrange 5 graham crackers across the center of the pan. You’ll likely need to break 2 additional crackers into pieces to fill in the edges where whole crackers won’t fit. Don’t worry about making it perfect, the layers above will hide any imperfections.
Step 5: Add the Pudding and Berry Layers
Scoop about one-third of your pudding mixture over the graham cracker layer. Use an offset spatula or the back of a spoon to spread it evenly to the edges. Now comes the fun part, sprinkle a generous layer of fresh blueberries and sliced strawberries over the pudding. Use roughly one-third of your berries for this layer.
Step 6: Build the Second Layer
Repeat the layering process with another round of graham crackers, pressing them gently into the pudding layer beneath. Add another portion of pudding mixture and spread evenly. Top with another layer of blueberries and strawberries. The cake is really starting to take shape now!
Step 7: Add the Final Layer
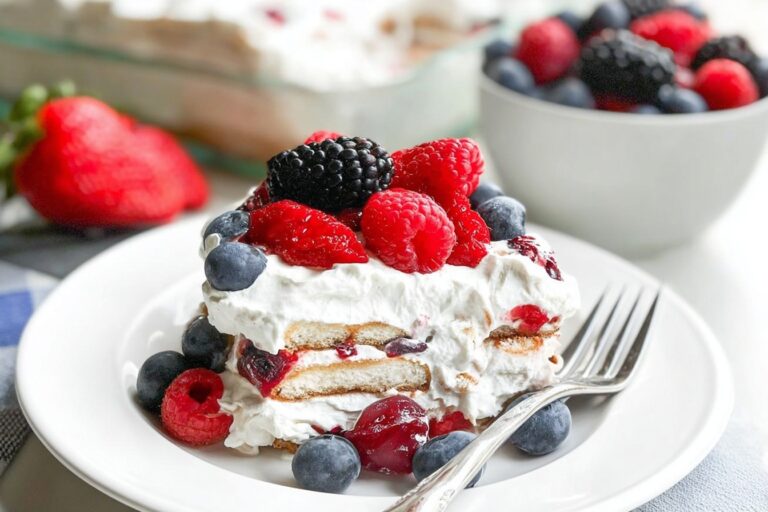
Complete your summer berry icebox cake with a third and final layer. Place the last batch of graham crackers, spread the remaining pudding mixture on top, and finish with the remaining fresh berries. The top should be beautifully decorated with colorful berry pieces peeking through the creamy white filling.
Step 8: Chill for Best Results
Cover the pan with plastic wrap or foil and refrigerate for at least 4 hours. However, overnight chilling produces the best results. During this time, the graham crackers absorb moisture from the pudding and soften into a cake-like texture while the filling sets firmly.
Step 9: Add the White Chocolate Drizzle
Just before serving, melt your white chocolate chips in the microwave in 30-second intervals, stirring between each interval until smooth. Drizzle the melted chocolate over the top of the cake in a decorative pattern. You can use a fork or a small zip-top bag with the corner snipped off for more control.
Slice and serve chilled. This summer berry icebox cake typically yields 12-16 servings, making it perfect for gatherings.
For another stunning no-bake dessert option, try our vanilla custard cream squares that are equally impressive and delicious.

Dietary Substitutions to Customize Your Summer Berry Icebox Cake
One of the best things about this no-bake summer berry icebox cake is how easily it adapts to different dietary needs and preferences. Let’s explore some smart substitutions.
Crust and Cookie Alternatives
Traditional graham crackers work wonderfully, but they’re not your only option. Vanilla wafers create a slightly sweeter, more delicate crust that softens beautifully. Ladyfingers offer a lighter, sponge-cake-like texture that absorbs the pudding mixture elegantly. For a richer flavor, try shortbread cookies like Lorna Doones, which add a buttery note to each layer.
If you’re avoiding gluten entirely, gluten-free graham crackers have become widely available and perform just as well as their wheat-based counterparts. Some bakers even use thin slices of pound cake for a truly indulgent variation that turns this icebox cake into something reminiscent of a trifle.
Berry and Filling Modifications
While strawberries and blueberries make a classic combination, this recipe welcomes all sorts of berry variations. Raspberries add a tart pop of flavor and gorgeous color. Blackberries bring deep, wine-like notes that pair beautifully with the vanilla pudding. Mixed berries work wonderfully if you want variety in every bite.
For the pudding layer, experiment with different flavors. Cheesecake-flavored instant pudding intensifies the cream cheese notes. Lemon pudding adds a bright, citrusy dimension that feels especially refreshing in summer. White chocolate pudding creates an even sweeter, more indulgent base.
Fresh berries provide the best flavor and texture, but if they’re out of season, frozen berries can work in a pinch. Just thaw and drain them thoroughly before layering to prevent excess moisture from making your cake soggy. According to berry nutrition experts, berries pack impressive health benefits including antioxidants and vitamins, making this dessert a smarter choice than many alternatives.
For the whipped component, heavy whipping cream whipped to stiff peaks creates a richer, more homemade taste compared to store-bought whipped topping. Heavy whipping cream adds a luxurious mouthfeel and can be sweetened to your preference. Either option works well, so choose based on convenience and taste preference.
Mastering Summer Berry Icebox Cake: Advanced Tips and Variations
Ready to take your summer berry icebox cake from good to absolutely spectacular? These expert tips and creative variations will help you become a no-bake dessert master.
Professional Techniques for Perfect Results
The number one secret to success lies in temperature management. Your cream cheese must be fully softened before mixing, or you’ll end up with pesky lumps throughout your filling. Test it by pressing your finger into the block; it should leave an easy indentation without feeling cold.
When adding milk, pour it in a thin stream while the mixer runs on low. This gradual incorporation prevents the mixture from becoming soupy and ensures a silky texture. If your filling seems too runny after mixing, reduce the milk slightly in future batches.
Berry preparation matters more than you might think. Wash your strawberries and blueberries, then spread them on paper towels to dry completely. Excess moisture causes color bleeding and can make layers soupy over time. Take those extra few minutes to pat berries dry.
Creative Flavor Variations
Transform this summer berry icebox cake into entirely new desserts with simple tweaks:
- Tropical Version: Swap berries for sliced bananas and crushed pineapple, use coconut pudding, and top with toasted coconut flakes.
- Chocolate Lover’s Dream: Use chocolate graham crackers, chocolate pudding mix, and layer with raspberries for a sophisticated black forest vibe.
- Peaches and Cream: Replace berries with fresh sliced peaches and use cheesecake pudding for a Southern-inspired twist.
- Red, White, and Blue: Perfect for the Fourth of July, layer strawberries and blueberries in visible patterns for a patriotic presentation.
Presentation and Garnishing Ideas
For potlucks and parties, presentation elevates this simple dessert. Pipe whipped cream rosettes around the edges for a bakery-style finish. Arrange berries in patterns rather than scattering randomly for a more polished look. A dusting of graham cracker crumbs or a few fresh mint leaves adds that professional touch.
When slicing, dip your knife in hot water and wipe it clean between cuts for picture-perfect pieces that show off those beautiful layers.
Make-Ahead Strategies
This summer berry icebox cake recipe is ideal for busy schedules. Assemble it up to 24 hours before serving for the best texture. If you need to prep even earlier, prepare the pudding mixture and store it separately from the berries and crackers, then assemble the day of your event. The white chocolate drizzle should always be added just before serving for the most dramatic presentation.
How to Store Summer Berry Icebox Cake: Best Practices
Proper storage keeps your summer berry icebox cake tasting fresh and maintaining its beautiful texture for days after you make it.
Refrigeration Guidelines
Cover your 9×13-inch pan tightly with plastic wrap or transfer individual slices to airtight containers. The cake stays fresh in the refrigerator for 4-5 days, though the graham crackers will continue softening over time. For the best texture experience, enjoy within the first 2-3 days when the contrast between creamy filling and slightly chewy graham cracker layers is at its peak.
Freezing for Extended Storage
Yes, you can freeze this no-bake berry icebox cake! Wrap the entire pan or individual portions in plastic wrap, then add a layer of aluminum foil for extra protection against freezer burn. Frozen properly, it keeps for 1-2 weeks, though the texture may be slightly different after thawing. Thaw frozen slices in the refrigerator overnight rather than at room temperature.
Room Temperature Considerations
This dessert doesn’t hold up well at room temperature for extended periods. Limit exposure to 1-2 hours maximum, especially at outdoor summer gatherings where heat and humidity can quickly affect quality. The dairy-based filling needs to stay chilled for both safety and texture reasons.
Quick Reference Storage Table
| Storage Method | Duration | Best Practices |
|---|---|---|
| Refrigerator | 4-5 days | Cover tightly with plastic wrap; add chocolate drizzle just before serving |
| Freezer | 1-2 weeks | Wrap in plastic and foil; thaw overnight in fridge |
| Room Temperature | 1-2 hours max | Keep out of direct sunlight; serve at potlucks from a chilled dish |
For the best slices, freeze the assembled cake for 20-30 minutes right before cutting. This firms up the layers for cleaner, more photogenic pieces.
FAQs: Frequently Asked Questions About Summer Berry Icebox Cake
What size pan do I need for summer berry icebox cake?
Use a 9×13-inch pan for this summer berry icebox cake recipe. This size allows for even layering of graham crackers, pudding mixture, and fresh berries while providing about 12-16 servings. Line the pan with plastic wrap or parchment for easy removal if desired. Before assembling, spread 1/2 cup of reserved Cool Whip on the bottom to help the first layer of graham crackers stick and prevent sticking. If you have a smaller crowd, halve the recipe and use an 8×8-inch pan, adjusting layers accordingly. This standard size ensures clean slices after chilling for at least 4-6 hours or overnight. (78 words)
How many pudding mixes for summer berry icebox cake and how to mix without lumps?
You’ll need two 3.4-ounce packages of instant pudding mix (vanilla or cheesecake flavor works best) for summer berry icebox cake. To avoid lumps, beat softened cream cheese first until smooth, then add one pudding mix and beat well. Gradually pour in the milk while mixing on low speed. For extra smoothness, whisk each pudding package with a small amount of milk separately before combining, or use a blender to incorporate the milk slowly. Chill the mixture briefly if needed before layering. This method creates a thick, creamy filling that sets perfectly with the berries and graham crackers. (102 words)
Can I substitute graham crackers in summer berry icebox cake?
Yes, you can substitute graham crackers in summer berry icebox cake with vanilla wafers, ladyfingers, shortbread cookies like Lorna Doones, or even sliced pound cake. Regular graham crackers are ideal as they soften perfectly when soaked in the pudding, but these alternatives provide similar structure and flavor. Use the same quantity to fill the 9×13 pan in single layers. Avoid overly crumbly cookies to prevent sogginess. The pudding and berries will soak in similarly, creating that classic icebox texture. Test a small batch if unsure, and layer tightly for best results after chilling. (94 words)
How to fix runny summer berry icebox cake?
If your summer berry icebox cake turns out runny or mushy, add more graham crackers between layers to absorb excess moisture, or reduce the milk by 1/4 cup next time. Drain fresh berries thoroughly on paper towels and pat dry before layering to remove extra juice. Use full-fat cream cheese and pudding mixes for better thickness. After assembling, chill for at least 6-8 hours or overnight to fully set. For slicing, freeze briefly (20-30 minutes) to firm up without long-term freezing. These steps keep layers distinct and easy to cut for potlucks or parties. (92 words)
Can I freeze summer berry icebox cake and how long does it last at room temperature?
Yes, freeze summer berry icebox cake leftovers wrapped tightly in plastic and foil for up to 1-2 weeks; thaw in the fridge overnight before serving. For firmer slices, freeze the whole cake for 30 minutes right before cutting. It doesn’t hold up well at room temperature—limit to 1-2 hours max, as it gets soggy from the dairy and berries. Refrigerate for up to 4-5 days covered. Drizzle white chocolate just before serving for best texture. Ideal for make-ahead prep, but avoid extended room-temp exposure at potlucks. (89 words)
Summer Berry Icebox Cake
🍓 Cool, creamy no-bake icebox cake layers fresh summer berries between pudding and graham crackers for refreshing delight.
🧁 Effortless assembly chills overnight – light, fruity dessert perfect for hot days without turning on the oven!
- Total Time: 4 hours 15 minutes
- Yield: 12 servings
Ingredients
– 19 ounces graham crackers
– 8 ounces softened cream cheese
– Two 3.4-ounce packages vanilla instant pudding mix
– 2 1/2 cups cold milk
– 12 ounces whipped topping or homemade whipped cream
– 3 cups fresh sliced strawberries
– 1 1/2 cups fresh blueberries
– 2 ounces white chocolate chips
Instructions
1-Step 1: Prepare the Creamy Filling Base Start by ensuring your cream cheese is completely softened. This is crucial for achieving a smooth, lump-free filling. Leave it at room temperature for about 30 minutes before starting, or microwave it in 15-second intervals until soft but not melted. Place the softened cream cheese in a large mixing bowl along with both packages of dry vanilla instant pudding mix. Beat these together using an electric mixer on medium speed until well blended, about 1-2 minutes. The mixture will look thick and slightly dry at this stage, which is perfectly normal.
2-Step 2: Add Milk Gradually With the mixer running on low speed, gradually pour in the cold milk. Adding it slowly while mixing helps prevent lumps from forming and ensures a silky smooth consistency. Continue beating for about 2 minutes until the mixture thickens considerably.
3-Step 3: Fold in the Whipped Topping Take your whipped topping or homemade whipped cream and measure out 1/2 cup to set aside for the pan base. Gently fold the remaining whipped topping into the pudding mixture using a rubber spatula. Use a light hand and folding motion rather than vigorous stirring to keep the mixture airy and fluffy. The filling should now be thick, creamy, and spreadable.
4-Step 4: Prepare the Pan and First Layer Grab a 9×13-inch pan and spread that reserved 1/2 cup of whipped topping across the bottom in a thin layer. This creates a barrier that helps the first layer of graham crackers stay in place and makes serving easier. Now arrange 5 graham crackers across the center of the pan. You’ll likely need to break 2 additional crackers into pieces to fill in the edges where whole crackers won’t fit. Don’t worry about making it perfect, the layers above will hide any imperfections.
5-Step 5: Add the Pudding and Berry Layers Scoop about one-third of your pudding mixture over the graham cracker layer. Use an offset spatula or the back of a spoon to spread it evenly to the edges. Now comes the fun part, sprinkle a generous layer of fresh blueberries and sliced strawberries over the pudding. Use roughly one-third of your berries for this layer.
6-Step 6: Build the Second Layer Repeat the layering process with another round of graham crackers, pressing them gently into the pudding layer beneath. Add another portion of pudding mixture and spread evenly. Top with another layer of blueberries and strawberries. The cake is really starting to take shape now!
7-Step 7: Add the Final Layer Complete your summer berry icebox cake with a third and final layer. Place the last batch of graham crackers, spread the remaining pudding mixture on top, and finish with the remaining fresh berries. The top should be beautifully decorated with colorful berry pieces peeking through the creamy white filling.
8-Step 8: Chill for Best Results Cover the pan with plastic wrap or foil and refrigerate for at least 4 hours. However, overnight chilling produces the best results. During this time, the graham crackers absorb moisture from the pudding and soften into a cake-like texture while the filling sets firmly.
9-Step 9: Add the White Chocolate Drizzle Just before serving, melt your white chocolate chips in the microwave in 30-second intervals, stirring between each interval until smooth. Drizzle the melted chocolate over the top of the cake in a decorative pattern. You can use a fork or a small zip-top bag with the corner snipped off for more control. Slice and serve chilled. This summer berry icebox cake typically yields 12-16 servings, making it perfect for gatherings.
Notes
🧀 Soften cream cheese completely to avoid lumps in the creamy filling.
🍇 Wash and thoroughly dry berries to prevent excess moisture and color bleeding.
⏰ Chill overnight for softest graham crackers and best flavor infusion.
- Prep Time: 15 minutes
- Chilling: 4 hours (overnight best)
- Category: Dessert
- Method: No Bake
- Cuisine: American
- Diet: Vegetarian
Nutrition
- Serving Size: 1 piece
- Calories: 350
- Sugar: 25g
- Sodium: 300mg
- Fat: 15g
- Saturated Fat: 8g
- Unsaturated Fat: 7g
- Trans Fat: 0g
- Carbohydrates: 45g
- Fiber: 2g
- Protein: 4g
- Cholesterol: 30mg


