

Why You’ll Love This Takoyaki
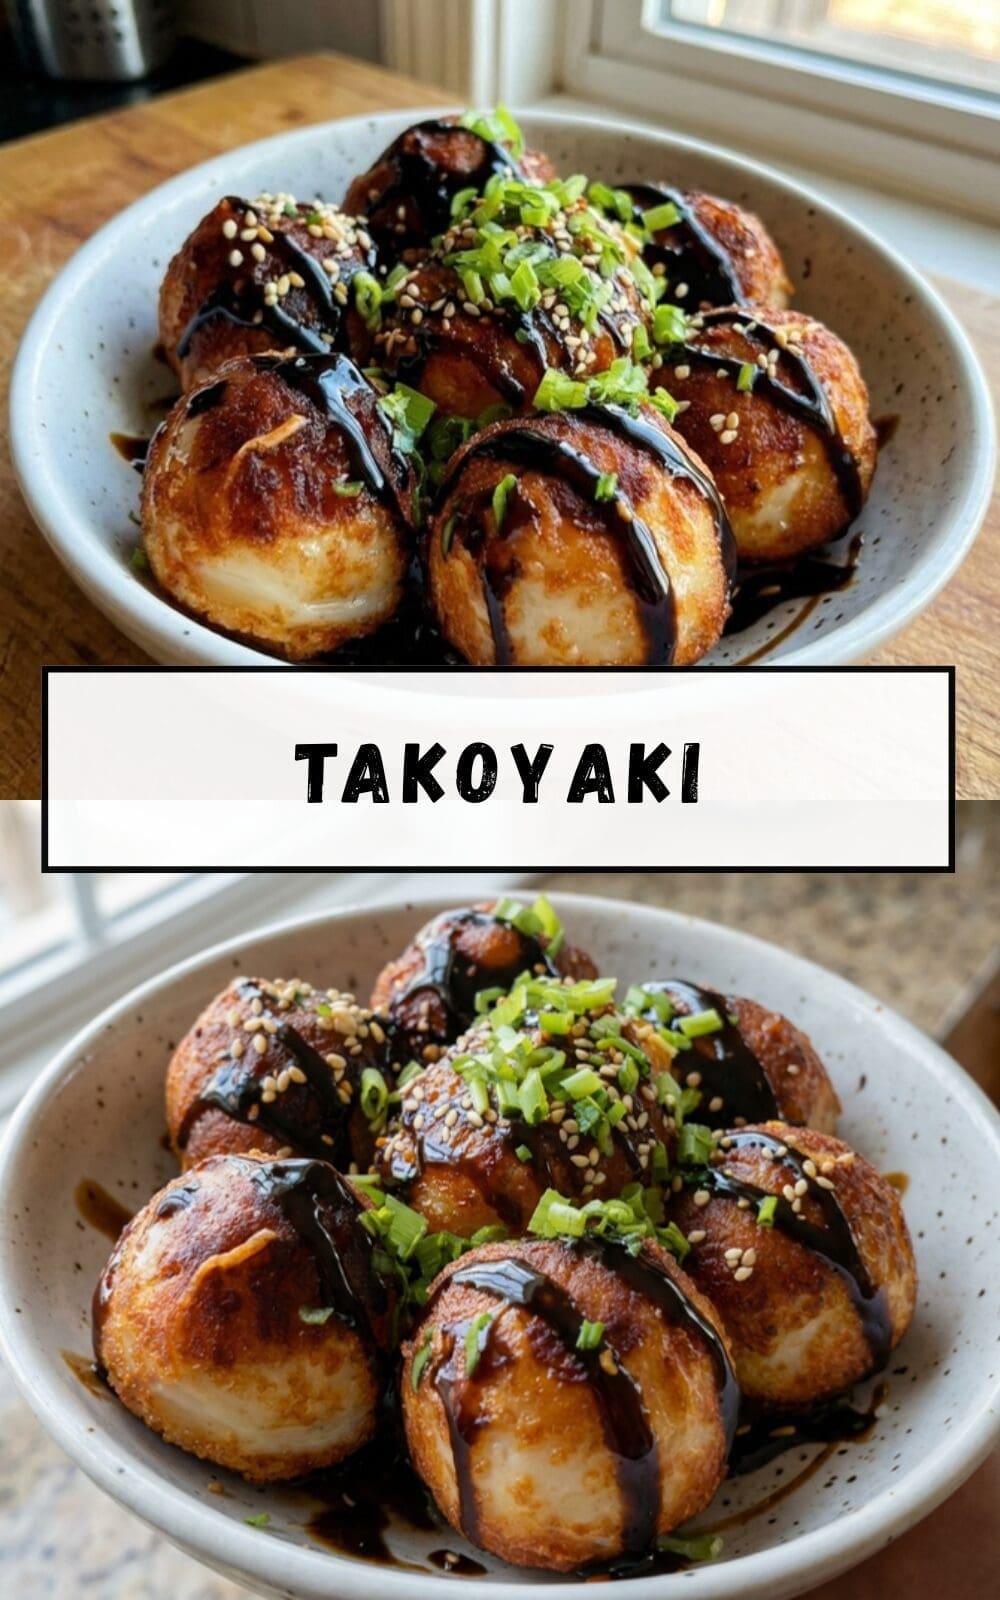
Takoyaki is a classic Japanese street food that brings together a soft wheat flour batter, savory fillings, and a crisp golden exterior. This takoyaki recipe is a practical way to make octopus balls at home with simple steps and familiar ingredients. It is especially appealing for home cooks who want a snack that feels special but does not require complicated methods.
- Easy preparation: A takoyaki recipe uses a simple wheat flour batter and a special molded pan, so the cooking process is straightforward once the pan is hot. The batter cooks quickly, and turning the balls with a pick becomes easier with practice. For busy parents and working professionals, homemade takoyaki can be made in a short cooking session.
- Balanced and satisfying: Takoyaki includes octopus, green onion, pickled ginger, and tempura scraps, which gives each bite a mix of texture and flavor. Octopus is a lean seafood choice, and you can read more about its food profile from this WebMD overview of octopus nutrition. The finished dish feels hearty without being heavy.
- Flexible for many diets: While traditional takoyaki uses octopus, the batter and fillings can be adjusted. Cheese, bacon, or vegetables can be used in place of or alongside the classic filling. This makes crispy takoyaki a useful option for students, seniors, and anyone cooking for a mixed group.
- Distinctive flavor: The combination of takoyaki sauce, mayonnaise, dried seaweed, and dried bonito flakes gives these Japanese octopus balls their signature taste. The sauce is usually Worcestershire sauce based, which adds a savory tang that balances the rich toppings and soft center.
Takoyaki is best known for its contrast of textures: crisp outside, tender center, and savory toppings that finish each bite with depth.
For readers who enjoy other savory snacks and side dishes, you may also like this easy queso dip or a batch of crispy corn fritters for a similar snack-friendly style.
Jump To
- 1. Why You’ll Love This Takoyaki
- 2. Essential Ingredients for Takoyaki
- 3. How to Prepare the Perfect Takoyaki: Step-by-Step Guide
- 4. Dietary Substitutions to Customize Your Takoyaki
- 5. Mastering Takoyaki: Advanced Tips and Variations
- 6. How to Store Takoyaki: Best Practices
- 7. FAQs: Frequently Asked Questions About Takoyaki
- 8. Takoyaki
Essential Ingredients for Takoyaki
The ingredient list for homemade takoyaki is simple, but each item has a clear job in the final dish. The batter gives structure, the fillings add flavor, and the toppings bring the classic look and taste that people expect from an authentic takoyaki recipe.
Main Ingredients
- Wheat flour-based batter, quantity not specified – Forms the base of the takoyaki balls and cooks into a soft, lightly crisp shell.
- Minced or diced octopus, quantity not specified – Provides the traditional seafood filling and the main savory bite in the center.
- Tempura scraps, quantity not specified – Add crunch and a subtle toasted flavor inside the batter.
- Pickled ginger, quantity not specified – Gives bright sharpness that balances the richness of the sauce and batter.
- Green onion, quantity not specified – Adds freshness and mild onion flavor.
- Takoyaki sauce, quantity not specified – A Worcestershire sauce based topping that coats the finished balls with a deep savory flavor.
- Mayonnaise, quantity not specified – Adds creaminess and a familiar finish on top of the sauce.
- Dried seaweed, quantity not specified – Brings a briny note and visual contrast.
- Dried bonito flakes, quantity not specified – Add aroma, umami, and the traditional moving garnish on hot takoyaki.
Ingredient Notes
| Ingredient | Role in the recipe | Helpful note |
|---|---|---|
| Wheat flour batter | Structure | Should be thin enough to flow into the pan molds |
| Octopus | Traditional filling | Use cooked octopus cut into small pieces |
| Tempura scraps | Texture | Adds a light crispy bite inside the center |
| Pickled ginger | Flavor balance | Use small amounts so the flavor stays balanced |
| Green onion | Freshness | Can be finely sliced for even distribution |
| Sauce and toppings | Finish | These create the classic takoyaki look and taste |
Special Dietary Options
- Vegan: Replace octopus with diced mushrooms, tofu, or finely chopped cabbage. Use vegan mayonnaise and a plant-based sauce.
- Gluten-free: Choose a gluten-free flour blend designed for batter and confirm that the sauce and tempura scraps are gluten-free.
- Low-calorie: Use a lighter mayonnaise, reduce the sauce slightly, and fill the balls with more green onion or vegetables.
If you enjoy savory seafood recipes, you may also want to try shrimp and corn or crispy marinated baby octopus for more seafood-focused meal ideas.
How to Prepare the Perfect Takoyaki: Step-by-Step Guide
First Step: Make the batter and prepare the fillings
Start by preparing a wheat flour-based batter. The batter should be smooth and fairly thin so it can flow easily into the molded pan. While the batter rests briefly, cut the cooked octopus into small bite-sized pieces, slice the green onion, and have the pickled ginger and tempura scraps ready. Setting out every ingredient before heating the pan makes the cooking process smoother and faster.
At this stage, it also helps to place the takoyaki sauce, mayonnaise, dried seaweed, and dried bonito flakes nearby. That way, you can finish the dish while the balls are still hot. For an easy takoyaki recipe, organization matters as much as technique.
Second Step: Heat the takoyaki pan
Heat a special molded takoyaki pan over medium heat. The molds should be evenly hot before you add the batter. This step is important because the round shape forms best when the pan is well heated. Brush or lightly oil the molds if needed to prevent sticking.
The pan is one of the most important tools in takoyaki cooking. It helps create the round shape and supports even cooking on all sides. If you do not heat it enough, the batter may cling to the pan and the balls may tear when turned.
Third Step: Fill the molds with batter and toppings
Pour the batter into each mold until it overflows a little. Then add a piece of octopus, some tempura scraps, a little pickled ginger, and green onion to each section. It is normal for some batter to spill over the mold edges at first. That extra batter helps form the outer shell as the balls are turned.
For a more flexible homemade takoyaki, you can keep some molds filled with extra vegetables or small pieces of cheese if you are making a variation for different eaters. Families often make a mix of classic and modified fillings at the same time.
Fourth Step: Turn the balls as they cook
When the bottom starts to set, use a pick or skewer to turn each piece of batter inward. Keep turning the batter little by little so it rounds out into a ball. This is the part of the process that gives takoyaki balls their signature shape. The goal is to cook the batter on all sides until the exterior becomes golden and crisp.
Continue turning the balls several times during cooking. A takoyaki pan makes this much easier because the molds guide the batter into a round shape. If you are making crispy takoyaki for the first time, do not worry if the first batch is not perfect. The shape improves as you get used to the timing.
Fifth Step: Finish the cooking and check the texture
Let the takoyaki balls cook until the outside is firm and lightly browned. The inside should remain soft and tender. Traditional takoyaki has a delicate center, so it should not be cooked until dry. If the balls seem too pale, give them a little more time in the pan and continue turning them so they brown evenly.
Once the balls hold their shape and feel set on the outside, remove them carefully from the pan. Place them on a serving plate while they are still hot.
Final Step: Add the toppings and serve
Brush each ball with takoyaki sauce, then drizzle with mayonnaise. Sprinkle dried seaweed over the top, and finish with dried bonito flakes. The contrast of dark sauce, white mayonnaise, and light flakes gives the dish its familiar street-food look. Serve immediately for the best texture.
For the most authentic takoyaki recipe, serve the balls right after cooking so the outside stays crisp and the center stays soft.
Takoyaki is usually eaten as a snack, but it also works as a side dish with rice. If you want another savory dish to serve alongside it, try garlic noodles or curried rice for a simple meal combination.

Dietary Substitutions to Customize Your Takoyaki
Protein and Main Component Alternatives
If you cannot find octopus or want a different flavor, there are several practical swaps for takoyaki. Small pieces of cooked shrimp, crab, diced chicken, or even tofu can work in place of the traditional filling. Cheese and bacon are also popular in modern versions, and both fit the tip for experimenting with fillings.
For a seafood-forward but different option, squid or small pieces of white fish can be used. If you want a richer snack, bacon gives the balls a smoky taste. These changes make takoyaki recipe variations useful for families with different preferences.
Vegetable, Sauce, and Seasoning Modifications
You can also adjust the vegetable mix by adding cabbage, corn, or finely chopped mushrooms. The pickled ginger can be reduced if you want a milder flavor. Green onion can be increased for a fresher finish, especially if the dish is served with rice.
The sauce and toppings can also be changed. If you prefer a lighter finish, use less mayonnaise or choose a reduced-fat version. For a stronger savory note, add a little extra takoyaki sauce. Some cooks also use a mild soy-based drizzle in place of part of the sauce, though the classic flavor comes from the Worcestershire sauce based topping.
Mastering Takoyaki: Advanced Tips and Variations
Pro cooking techniques
Good takoyaki comes from steady heat and patient turning. Keep the pan hot, but not so hot that the outside browns before the center sets. Use a pick to tuck the edges inward, and rotate each ball several times for a more even shape. A well-heated takoyaki pan gives the most reliable results.
If your batter is too thick, the balls may cook unevenly. If it is too thin, they may not hold together. A smooth, pourable batter is the best starting point for crispy takoyaki with a tender center.
Flavor variations
Classic takoyaki uses octopus, but modern home cooks often add cheese, bacon, or extra green onions. Some cooks mix in corn for sweetness or use a little kimchi for a sharper flavor. These changes keep the recipe interesting while still following the same basic method.
You can also vary the toppings. More mayonnaise gives a creamy finish, while extra seaweed adds a more pronounced ocean flavor. Dried bonito flakes bring the traditional aroma that makes freshly cooked takoyaki so recognizable.
Presentation tips
Serve takoyaki on a plate while the balls are still hot and the bonito flakes are moving slightly from the steam. A light drizzle pattern with sauce and mayonnaise creates the familiar street-food appearance. Keep the garnish simple so the round shape stays visible.
For a fuller snack plate, pair takoyaki with a crisp side dish or a simple soup. That makes the meal feel complete without adding much work in the kitchen.
Make-ahead options
You can prepare the batter, slice the green onion, and cut the octopus ahead of time. The sauce and toppings can also be set out before cooking begins. This is helpful for busy schedules and small gatherings. If you are cooking for a group, making the fillings in advance keeps the process calm and orderly.
For more quick meal ideas that fit a busy home kitchen, see this chicken stir fry recipe or tuna pasta bake.
How to Store Takoyaki: Best Practices
Refrigeration
Store leftover takoyaki in an airtight container in the refrigerator for up to 2 days. The texture will soften as it sits, but it can still be reheated successfully. Keep the sauce and mayonnaise separate if possible, since toppings applied too early can make the balls soggy.
Freezing
For longer storage, freeze cooked takoyaki in a single layer on a tray before transferring them to a freezer bag or container. This helps keep them from sticking together. Frozen takoyaki is best used within 1 month for good quality.
Reheating
Reheat takoyaki in an oven, toaster oven, or air fryer so the outside can regain some crispness. Microwaving is faster, but it will make the texture softer. After reheating, add fresh sauce, mayonnaise, seaweed, and bonito flakes for the best flavor.
Meal prep considerations
If you want to make takoyaki for meal prep, prepare the batter and fillings ahead of time, then cook only the amount you need. The dish is best fresh, but a batch can still work well for next-day snacking or lunch boxes. For students and working professionals, this can be a convenient way to enjoy homemade takoyaki during a busy week.
FAQs: Frequently Asked Questions About Takoyaki
Print
Takoyaki
🐙 Indulge in crispy golden takoyaki balls filled with tender octopus, delivering authentic Japanese street food flavors right in your kitchen with minimal effort.
🥞 Packed with savory fillings and customizable toppings, this fun recipe is perfect for parties, snacks, or appetizers that everyone will love flipping and devouring.
- Total Time: 1 hour
- Yield: 40 balls (serves 4)
Ingredients
– Wheat flour-based batter
– Minced or diced octopus
– Tempura scraps
– Pickled ginger
– Green onion
– Takoyaki sauce
– Mayonnaise
– Dried seaweed
– Dried bonito flakes
Instructions
1-First Step: Make the batter and prepare the fillings Start by preparing a wheat flour-based batter. The batter should be smooth and fairly thin so it can flow easily into the molded pan. While the batter rests briefly, cut the cooked octopus into small bite-sized pieces, slice the green onion, and have the pickled ginger and tempura scraps ready. Setting out every ingredient before heating the pan makes the cooking process smoother and faster. At this stage, it also helps to place the takoyaki sauce, mayonnaise, dried seaweed, and dried bonito flakes nearby. That way, you can finish the dish while the balls are still hot. For an easy takoyaki recipe, organization matters as much as technique.
2-Second Step: Heat the takoyaki pan Heat a special molded takoyaki pan over medium heat. The molds should be evenly hot before you add the batter. This step is important because the round shape forms best when the pan is well heated. Brush or lightly oil the molds if needed to prevent sticking. The pan is one of the most important tools in takoyaki cooking. It helps create the round shape and supports even cooking on all sides. If you do not heat it enough, the batter may cling to the pan and the balls may tear when turned.
3-Third Step: Fill the molds with batter and toppings Pour the batter into each mold until it overflows a little. Then add a piece of octopus, some tempura scraps, a little pickled ginger, and green onion to each section. It is normal for some batter to spill over the mold edges at first. That extra batter helps form the outer shell as the balls are turned. For a more flexible homemade takoyaki, you can keep some molds filled with extra vegetables or small pieces of cheese if you are making a variation for different eaters. Families often make a mix of classic and modified fillings at the same time.
4-Fourth Step: Turn the balls as they cook When the bottom starts to set, use a pick or skewer to turn each piece of batter inward. Keep turning the batter little by little so it rounds out into a ball. This is the part of the process that gives takoyaki balls their signature shape. The goal is to cook the batter on all sides until the exterior becomes golden and crisp. Continue turning the balls several times during cooking. A takoyaki pan makes this much easier because the molds guide the batter into a round shape. If you are making crispy takoyaki for the first time, do not worry if the first batch is not perfect. The shape improves as you get used to the timing.
5-Fifth Step: Finish the cooking and check the texture Let the takoyaki balls cook until the outside is firm and lightly browned. The inside should remain soft and tender. Traditional takoyaki has a delicate center, so it should not be cooked until dry. If the balls seem too pale, give them a little more time in the pan and continue turning them so they brown evenly. Once the balls hold their shape and feel set on the outside, remove them carefully from the pan. Place them on a serving plate while they are still hot.
6-Final Step: Add the toppings and serve Brush each ball with takoyaki sauce, then drizzle with mayonnaise. Sprinkle dried seaweed over the top, and finish with dried bonito flakes. The contrast of dark sauce, white mayonnaise, and light flakes gives the dish its familiar street-food look. Serve immediately for the best texture.
Notes
🔥 Generously oil the takoyaki pan between batches to prevent sticking and ensure crispy exteriors.
🕒 Master the flip by using two skewers; practice makes perfect spherical balls.
🍴 Experiment with fillings like cheese, shrimp, or bacon for fun variations on the classic.
- Prep Time: 20 minutes
- Resting Time: 15-30 minutes
- Cook Time: 30 minutes
- Category: Appetizer
- Method: Pan-fry
- Cuisine: Japanese
- Diet: Pescatarian
Nutrition
- Serving Size: 10 balls
- Calories: 300 kcal
- Sugar: 3g
- Sodium: 800mg
- Fat: 12g
- Saturated Fat: 2g
- Unsaturated Fat: 9g
- Trans Fat: 0g
- Carbohydrates: 35g
- Fiber: 2g
- Protein: 12g
- Cholesterol: 100mg


