
Why You’ll Love This Chocolate Glaze
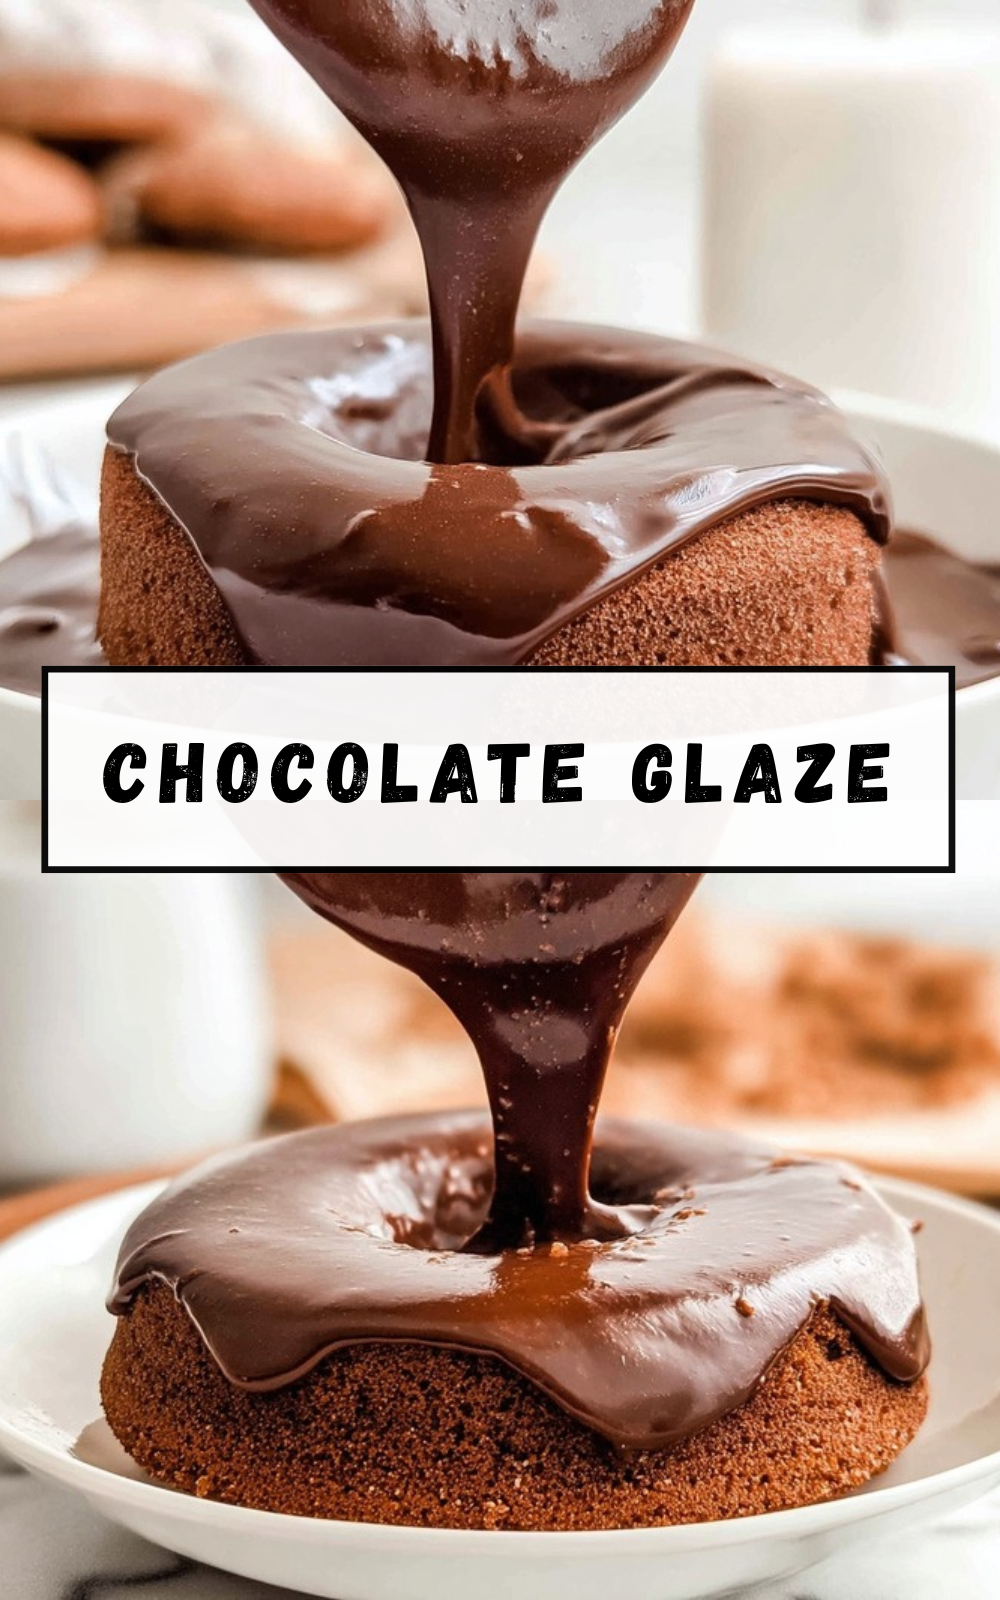
There’s something truly magical about a rich, glossy chocolate glaze drizzled over a freshly baked treat. Whether you’re preparing a birthday cake, a batch of homemade donuts, or simply want to add a touch of sweetness to your desserts, this chocolate glaze recipe is about to become your go-to kitchen companion. As someone who has tested countless variations, I can confidently say this version hits all the right notes.
- Ease of preparation: This homemade chocolate glaze comes together in just 10 minutes from start to finish. With simple pantry staples and no complicated techniques required, even beginner bakers can achieve professional-looking results. The straightforward steps mean you can whip up this cake glaze whenever the craving strikes, without any stress or fuss.
- Health benefits: While this is certainly an indulgent treat, chocolate contains beneficial compounds like antioxidants. According to health experts, enjoying chocolate in moderation can be part of a balanced approach to eating. The cocoa powder in this glaze recipe provides iron and fiber, making it a more nutritious choice than many store-bought frostings.
- Versatility: One of the best things about this simple chocolate glaze is how easily it adapts to different needs. Whether you’re glazing donuts, coating a layer cake, or dipping cookies, the consistency can be adjusted by adding more or less milk. It works beautifully for vegan diets when you swap dairy milk for plant-based alternatives.
- Distinctive flavor: The combination of half salted and half unsalted butter creates a perfectly balanced taste that’s rich without being overly sweet. The cocoa powder delivers deep chocolate flavor that pairs wonderfully with everything from vanilla sponge cakes to chocolate-covered strawberries. This glaze sets to a beautiful shine that makes any dessert look bakery-worthy.
Jump To
- 1. Why You’ll Love This Chocolate Glaze
- 2. Essential Ingredients for Chocolate Glaze
- 3. How to Prepare the Perfect Chocolate Glaze: Step-by-Step Guide
- 4. Dietary Substitutions to Customize Your Chocolate Glaze
- 5. Mastering Chocolate Glaze: Advanced Tips and Variations
- 6. How to Store Chocolate Glaze: Best Practices
- 7. FAQs: Frequently Asked Questions About Chocolate Glaze
- 8. Chocolate Glaze
Essential Ingredients for Chocolate Glaze
Creating the perfect chocolate glaze starts with gathering the right ingredients. Each component plays a specific role in achieving that smooth, glossy finish and rich taste. Here’s everything you’ll need to make this easy chocolate glaze recipe:
Main Ingredients List
- 2 cups sifted powdered sugar – This forms the sweet base of your glaze and creates that smooth, spreadable consistency. Always sift to remove any lumps for a silky finish.
- 1/3 cup sifted cocoa powder – The star ingredient that delivers deep, rich chocolate flavor. Sifting is essential to prevent grainy texture in your finished glaze.
- 1/4 cup melted butter (half salted, half unsalted) – This combination provides richness and a perfectly balanced flavor profile. The salted portion enhances the chocolate taste while the unsalted keeps it from becoming too salty.
- 3 to 5 tablespoons whole milk – Creates the creamy consistency that makes this donut glaze so easy to work with. Start with 3 tablespoons and gradually add more until you reach your desired thickness.
- 1 tablespoon corn syrup (optional) – Adds a beautiful glossy shine to your chocolate icing. While optional, it’s highly recommended for that professional bakery appearance.
Special Dietary Options
Vegan: Replace whole milk with soy milk, almond milk, or coconut milk. Substitute butter with vegan butter or coconut oil, though the texture and creaminess may vary slightly.
Gluten-free: This recipe is naturally gluten-free as written, making it suitable for those with gluten sensitivities or celiac disease.
Lower calorie: For a lighter version, you can reduce the powdered sugar slightly or use a sugar alternative designed for baking, though this may affect the setting properties.
How to Prepare the Perfect Chocolate Glaze: Step-by-Step Guide
Making this chocolate glaze for cakes and donuts is incredibly straightforward. Follow these detailed steps to achieve a smooth, glossy finish every single time.
Step 1: Prepare Your Dry Ingredients
Begin by measuring out your powdered sugar and cocoa powder. This is perhaps the most important step for achieving a lump-free glaze. Place a fine mesh sieve over a large mixing bowl and sift both ingredients together. Take your time with this step because any lumps left behind will show up in your finished glaze. If you notice any stubborn lumps, use the back of a spoon to press them through the sieve or discard them.
The sifting process also helps incorporate air into the powdered sugar, which contributes to a lighter, more spreadable consistency. Your bowl should contain a uniform, chocolate-colored powder with no visible dark spots or white clumps.
Step 2: Add Wet Ingredients
Melt your butter in the microwave or on the stovetop until completely liquid but not boiling hot. Remember to use a combination of half salted and half unsalted butter for the best flavor balance. Pour the melted butter over your sifted dry ingredients.
Add 3 tablespoons of whole milk to start, along with the corn syrup if you’re using it. The corn syrup is optional but makes a noticeable difference in achieving that glossy, professional appearance that catches the light beautifully on finished desserts.
Step 3: Mix Until Combined
Using a whisk, begin mixing all the ingredients together. Start slowly to prevent the dry ingredients from flying out of the bowl. As you continue whisking, you’ll notice the mixture starts to thicken and come together into a cohesive mixture.
Pro tip: Whisk in one direction consistently for the smoothest results. This helps align the sugar particles and creates a silkier texture.
At this stage, your glaze will be quite thick. Don’t worry, this is exactly what you want before the next step of adjusting the consistency.
Step 4: Adjust Consistency
This is where you customize your chocolate glaze for its intended use. Continue mixing while gradually adding more milk, one tablespoon at a time, until the glaze reaches your desired consistency. The amount of milk needed can vary based on humidity, the brand of powdered sugar, and personal preference.
For a thick cake glaze that stays in place: aim for a consistency like heavy cream. It should coat the back of a spoon and leave a clear trail when you run your finger through it.
For a thinner donut glaze: add more milk until the mixture flows easily but still coats a spoon with a thin layer. It should drip smoothly without running off completely.
The glaze is ready when it’s smooth, thick, and creamy with absolutely no lumps. Test it by lifting your whisk and observing how it falls back into the bowl. It should ribbon off smoothly.
Step 5: Use Immediately or Store
Your homemade chocolate glaze is now ready to use! For the best results, apply it immediately while it’s still at room temperature. The glaze spreads most easily when slightly warm and will set as it cools on your baked goods.
If you’re glazing cakes, make sure they’ve cooled completely before applying the glaze. A warm cake will cause the glaze to melt and slide right off. For donuts, dip the tops directly into the glaze, lift and let excess drip off, then place on a wire rack set over parchment paper to catch drips.
If not using right away, see the storage section below for proper handling instructions.
Quick Reference Table: Glaze Consistency Guide
| Use | Milk Amount | Consistency | Application Method |
|---|---|---|---|
| Layer cakes | 3-4 tablespoons | Thick, spreads smoothly | Pour and spread with spatula |
| Donuts | 4-5 tablespoons | Medium-thin, dips easily | Dip top directly into bowl |
| Cookies | 5+ tablespoons | Thin, drizzles easily | Drizzle with fork or spoon |
| Pastries | 3-4 tablespoons | Medium, coats evenly | Brush on or dip |
Nutritional Information
Understanding what goes into your glaze helps you make informed choices. Here’s the complete nutritional breakdown for this recipe (per batch, approximately 1.5 cups total):
- Calories: 955 kcal
- Carbohydrates: 172g
- Protein: 5g
- Fat: 34g
- Saturated Fat: 22g
- Polyunsaturated Fat: 1g
- Monounsaturated Fat: 9g
- Trans Fat: 1g
- Cholesterol: 85mg
- Sodium: 262mg
- Potassium: 348mg
- Fiber: 7g
- Sugar: 158g
- Vitamin A: 994 IU
- Calcium: 72mg
- Iron: 3mg
Preparation Time Summary
- Prep time: 10 minutes
- Total time: 10 minutes
- Yields: Approximately 1.5 cups

Dietary Substitutions to Customize Your Chocolate Glaze
One of the wonderful things about making your own chocolate glaze at home is the ability to customize it for different dietary needs and preferences. Whether you’re baking for someone with allergies, following a specific diet, or simply want to experiment with flavors, this recipe adapts beautifully.
Protein and Main Component Alternatives
Butter substitutions: While the combination of salted and unsalted butter creates the ideal flavor profile, you can make changes based on availability or dietary restrictions. For a fully dairy-free version, use vegan butter or coconut oil. Keep in mind that coconut oil will add a slight coconut flavor, which can actually complement chocolate nicely. If using coconut oil, the glaze may set firmer at cooler temperatures.
Milk alternatives: Whole milk provides the creamiest consistency due to its fat content. For those avoiding dairy, soy milk, almond milk, or coconut milk all work well. Each will yield slightly different results. Soy milk comes closest to whole milk in terms of creaminess. Almond milk creates a lighter glaze. Coconut milk adds richness and a subtle coconut undertone.
Vegetable, Sauce, and Seasoning Modifications
Extract additions: The basic glaze recipe welcomes all sorts of flavor additions. Vanilla extract is the most common addition, typically 1 teaspoon adds warmth and depth. Almond extract pairs beautifully with chocolate. Peppermint extract transforms this into a festive holiday glaze perfect for cookies or cakes.
Spice variations: A pinch of cinnamon adds warmth and complexity. Pumpkin spice works wonderfully in autumn for seasonal treats. A tiny amount of cayenne pepper creates an interesting Mexican chocolate profile.
Fruit purees: For natural sweetness and added flavor, try incorporating fruit purees. Raspberry or strawberry puree swirled into the finished glaze creates beautiful color and flavor contrast. This works especially well for special occasions.
Mastering Chocolate Glaze: Advanced Tips and Variations
Once you’ve mastered the basic technique, you can take your chocolate glaze skills to the next level with these professional tips and creative variations. These suggestions will help you achieve consistent results and expand your dessert-decorating repertoire.
Pro Cooking Techniques
The temperature of your glaze significantly affects its performance. Room temperature glaze spreads most easily and provides the smoothest finish. If your glaze has been refrigerated, let it come to room temperature before using, or microwave it in 10-second bursts, stirring between each burst until spreadable.
Always, always sift your dry ingredients. This cannot be emphasized enough. Even if your powdered sugar looks smooth, those tiny lumps will create an uneven texture in your finished glaze. A fine mesh sieve works best for this task.
When mixing, start with less milk than you think you need. You can always add more, but you cannot remove it once added. This gives you maximum control over the final consistency.
Flavor Variations
Beyond the basic recipe, try these delicious variations to create unique desserts that stand out:
- Mocha glaze: Add 1 teaspoon of instant coffee granules or espresso powder to the milk before mixing for a coffee-chocolate flavor that pairs wonderfully with chocolate cakes.
- Orange chocolate glaze: Add 1 teaspoon of orange zest and a drop of orange extract for a bright, citrusy twist that cuts through the richness.
- Peanut butter swirl: Drop spoonfuls of melted peanut butter into the finished glaze and swirl gently for a beautiful marbled effect. Try this on our peanut butter chocolate molten lava cake for an extra indulgent treat.
- Salted chocolate glaze: Finish your glazed dessert with a sprinkle of flaky sea salt for a sophisticated sweet and salty profile.
Presentation Tips
The way you apply your glaze can transform an ordinary dessert into something spectacular. For cakes, pour the glaze in the center and use an offset spatula to gently push it toward the edges, letting it cascade down the sides naturally. For donuts, dip and twist for even coverage, then let excess drip off before setting on a rack.
Consider the visual impact of add-ons. Sprinkles added while the glaze is still wet create a festive look. Chopped nuts, coconut, or crushed cookies pressed into the wet glaze add both texture and visual interest.
Make-Ahead Options
For busy schedules, you can prepare this glaze ahead of time and store it properly until needed. This is especially helpful when you’re planning to bake multiple items for an event or gathering. The glaze stores beautifully and can be reheated gently when you’re ready to use it.
How to Store Chocolate Glaze: Best Practices
Proper storage ensures your homemade chocolate glaze stays fresh and maintains its quality for future use. Whether you have leftovers from a baking project or want to prepare it in advance, following these guidelines will help you get the most out of your glaze recipe.
Refrigeration Guidelines
Store leftover glaze in an airtight container in the refrigerator for up to 3 days. Glass containers with tight-fitting lids work best as they prevent any odors from affecting the glaze and allow you to see the contents easily. Press a piece of plastic wrap directly onto the surface of the glaze before sealing to prevent a skin from forming.
Reheating Instructions
When you’re ready to use refrigerated glaze, remove it from the refrigerator and let it sit at room temperature for about 30 minutes to soften. Then stir vigorously until smooth again. If it’s still too thick, microwave in 10-second bursts, stirring well between each burst, until it reaches the desired consistency. Be careful not to overheat, as this can cause separation.
Meal Prep Considerations
If you frequently bake glazed treats, consider making a double batch and storing portions in separate containers. Label each container with the date made. This way, you always have glaze ready when inspiration strikes. Having glaze on hand makes decorating our chocolate covered strawberries or other desserts quick and convenient.
Freezing Tips
For longer storage, this glaze can be frozen for up to 3 months. Portion it into ice cube trays for easy thawing of small amounts. Once frozen solid, transfer the cubes to a freezer bag. Thaw overnight in the refrigerator before using, then reheat gently as described above.
FAQs: Frequently Asked Questions About Chocolate Glaze
How do you make simple chocolate glaze for cakes and donuts?
To make a basic chocolate glaze, sift together 1 cup powdered sugar and 3 tablespoons unsweetened cocoa powder in a bowl to avoid lumps. Stir in 2 tablespoons softened butter, 3-4 tablespoons warm milk (start with 3), and 1 teaspoon vanilla extract. Whisk until smooth and glossy—add more milk drop by drop if too thick. It should drizzle easily off a spoon. Dip cooled cakes, donuts, or pastries directly into the glaze, or spoon it over for even coverage. Let excess drip off on a wire rack over parchment paper. This recipe yields about 1 cup, perfect for 12 donuts, and sets in 10-15 minutes at room temperature. For thicker glaze, reduce milk; for thinner, add more. Store leftovers covered at room temp for up to 2 days. (92 words)
Does chocolate glaze need to be refrigerated?
Yes, refrigerate chocolate glaze if it contains milk, butter, or cream, as these dairy ingredients can spoil at room temperature within a few hours, especially in warm kitchens. Transfer to an airtight container and store in the fridge for up to 5-7 days. Before reusing, let it sit out for 30 minutes to soften, then stir vigorously or microwave in 10-second bursts until pourable—avoid overheating to prevent separation. If your recipe is dairy-free (using water or corn syrup instead), it can last 1-2 weeks at room temp in a sealed jar. Always check for off smells or mold before use. Pro tip: Frosted items with glaze are fine at room temp for 1-2 days if fully set. (118 words)
What’s the difference between chocolate glaze and ganache?
Chocolate glaze is a thin, shiny topping made from cocoa powder, powdered sugar, milk, and butter—quick to mix, pourable, and sets to a smooth, crackly finish ideal for drizzling over cakes, donuts, or cookies. Ganache, however, uses melted chocolate chunks or chips stirred into hot heavy cream, creating a thicker, richer, velvety mixture that can be poured (like for truffles) or whipped into frosting. Glaze is lighter and sweeter with a glassy sheen; ganache is denser and more chocolate-forward. Use glaze for quick dips; ganache for layered cakes. Both store similarly, but ganache firms up more in the fridge. Swap them based on texture needs—glaze for shine, ganache for indulgence. (124 words)
Why is my chocolate glaze grainy and how do I fix it?
Graininess usually comes from unsifted powdered sugar or cocoa powder, which clumps during mixing, or from cold ingredients causing sugar crystals to form. To fix, sift dry ingredients twice before starting. If already grainy, push through a fine mesh sieve, then rewarm gently over a double boiler while whisking in 1 teaspoon hot milk or water at a time until smooth—don’t boil. Prevent issues by using room-temp milk and butter, mixing slowly at first. For ultra-smooth results, blend briefly with an immersion blender. Test consistency on a spoon; it should ribbon off smoothly. This saves most batches without remaking. Store fixed glaze as usual. (102 words)
How long does homemade chocolate glaze last and how should I store it?
Homemade chocolate glaze lasts 5-7 days in the fridge in an airtight container, or 1-2 days at room temperature if dairy-free. Freezing extends life up to 3 months—spoon into ice cube trays, freeze solid, then transfer to a bag for easy thawing. To use frozen portions, microwave 15-20 seconds or let thaw overnight in the fridge, then stir. On frosted baked goods, it stays fresh 2-3 days at room temp or 1 week chilled. Discard if it smells sour or shows mold. Label containers with dates. For best flavor, remake fresh batches weekly to enjoy peak shine and taste. (108 words)
Chocolate Glaze
🍫 Glossy easy chocolate glaze pours silky shine over cakes and donuts – 10-minute effortless upgrade for bakery-fresh desserts at home!
🎂 Customizable no-cook icing sets smooth without tempering, perfect for bundts, donuts, or cookies with shine that lasts.
- Total Time: 10 minutes
- Yield: 1 1/2 cups
Ingredients
– 2 cups sifted powdered sugar
– 1/3 cup sifted cocoa powder
– 1/4 cup melted butter (half salted, half unsalted)
– 3 to 5 tablespoons whole milk
– 1 tablespoon corn syrup (optional)
Instructions
1-Step 1: Prepare Your Dry IngredientsBegin by measuring out your powdered sugar and cocoa powder. This is perhaps the most important step for achieving a lump-free glaze. Place a fine mesh sieve over a large mixing bowl and sift both ingredients together. Take your time with this step because any lumps left behind will show up in your finished glaze. If you notice any stubborn lumps, use the back of a spoon to press them through the sieve or discard them.The sifting process also helps incorporate air into the powdered sugar, which contributes to a lighter, more spreadable consistency. Your bowl should contain a uniform, chocolate-colored powder with no visible dark spots or white clumps.
2-Step 2: Add Wet IngredientsMelt your butter in the microwave or on the stovetop until completely liquid but not boiling hot. Remember to use a combination of half salted and half unsalted butter for the best flavor balance. Pour the melted butter over your sifted dry ingredients.Add 3 tablespoons of whole milk to start, along with the corn syrup if you’re using it. The corn syrup is optional but makes a noticeable difference in achieving that glossy, professional appearance that catches the light beautifully on finished desserts.
3-Step 3: Mix Until CombinedUsing a whisk, begin mixing all the ingredients together. Start slowly to prevent the dry ingredients from flying out of the bowl. As you continue whisking, you’ll notice the mixture starts to thicken and come together into a cohesive mixture.At this stage, your glaze will be quite thick. Don’t worry, this is exactly what you want before the next step of adjusting the consistency.
4-Step 4: Adjust ConsistencyThis is where you customize your chocolate glaze for its intended use. Continue mixing while gradually adding more milk, one tablespoon at a time, until the glaze reaches your desired consistency. The amount of milk needed can vary based on humidity, the brand of powdered sugar, and personal preference.For a thick cake glaze that stays in place: aim for a consistency like heavy cream. It should coat the back of a spoon and leave a clear trail when you run your finger through it.For a thinner donut glaze: add more milk until the mixture flows easily but still coats a spoon with a thin layer. It should drip smoothly without running off completely.The glaze is ready when it’s smooth, thick, and creamy with absolutely no lumps. Test it by lifting your whisk and observing how it falls back into the bowl. It should ribbon off smoothly.
5-Step 5: Use Immediately or StoreYour homemade chocolate glaze is now ready to use! For the best results, apply it immediately while it’s still at room temperature. The glaze spreads most easily when slightly warm and will set as it cools on your baked goods.If you’re glazing cakes, make sure they’ve cooled completely before applying the glaze. A warm cake will cause the glaze to melt and slide right off. For donuts, dip the tops directly into the glaze, lift and let excess drip off, then place on a wire rack set over parchment paper to catch drips.If not using right away, see the storage section below for proper handling instructions.
Notes
🧷 Always sift powdered sugar and cocoa to prevent lumps for ultra-smooth glaze.
🥛 Add milk gradually to achieve the perfect pourable consistency without thinning too much.
✨ Include corn syrup for extra glossy shine, or skip for matte finish.
- Prep Time: 10 minutes
- Category: Dessert
- Method: No Cook
- Cuisine: American
- Diet: Vegetarian
Nutrition
- Serving Size: 2 tablespoons
- Calories: 80 kcal
- Sugar: 13g
- Sodium: 22mg
- Fat: 3g
- Saturated Fat: 2g
- Unsaturated Fat: 1g
- Trans Fat: 0g
- Carbohydrates: 14g
- Fiber: 1g
- Protein: 1g
- Cholesterol: 7mg


