
Why You’ll Love This Homemade Pie Crust
Making a homemade pie crust from scratch might seem intimidating at first, but once you master this simple technique, you’ll never want to go back to store-bought versions. This recipe delivers a perfectly flaky, buttery crust that works beautifully with both sweet and savory fillings. The best part? It comes together in just minutes with basic pantry ingredients you likely already have on hand.
This homemade pie crust stands out from others because it strikes the perfect balance between tender and flaky. The cold butter creates steam pockets during baking, resulting in those gorgeous, flaky layers that make every bite memorable. Whether you’re a seasoned baker or just starting out, this foolproof method will give you consistent results every single time.
Key Benefits of This Recipe
- Ease of preparation: With only 5 simple ingredients and about 10 minutes of active prep time, this recipe fits perfectly into busy schedules. The food processor does most of the work, though a pastry cutter works just as well for those who prefer hands-on techniques.
- Superior flavor and texture: Unlike pre-made crusts that can taste processed, this homemade version offers pure, buttery richness. The texture stays tender rather than tough, thanks to minimal handling and proper chilling techniques.
- Incredible versatility: This crust works wonderfully for fruit pies, custard-based desserts, quiches, pot pies, and galettes. You can easily adapt it with herbs, spices, or cheese for savory applications.
- Make-ahead convenience: The dough stores beautifully in the refrigerator for up to 3 days or freezes for up to 3 months, making it perfect for holiday prep or batch cooking sessions.
Jump To
- 1. Why You’ll Love This Homemade Pie Crust
- 2. Essential Ingredients for Homemade Pie Crust
- 3. How to Prepare the Perfect Homemade Pie Crust: Step-by-Step Guide
- 4. Dietary Substitutions to Customize Your Homemade Pie Crust
- 5. Mastering Homemade Pie Crust: Advanced Tips and Variations
- 6. How to Store Homemade Pie Crust: Best Practices
- 7. FAQs: Frequently Asked Questions About Homemade Pie Crust
- 8. Homemade Pie Crust
Essential Ingredients for Homemade Pie Crust
Quality ingredients make all the difference when creating a pie crust that tastes as good as it looks. Each component plays a specific role in achieving that perfect balance of flakiness and tenderness. Understanding what each ingredient does helps you troubleshoot issues and make informed substitutions when needed.
Main Ingredients List
- 2 1/2 cups all-purpose flour, plus more for dusting – Forms the structural foundation of your crust. All-purpose flour provides the right protein content for a tender yet sturdy crust. If you’re interested in learning more about flour varieties and their uses, you can read about all-purpose flour facts and benefits.
- 1/2 tablespoon sugar – Adds just a touch of sweetness and helps the crust brown evenly during baking. For savory pies, you can omit this ingredient entirely.
- 1/2 teaspoon salt – brings out the buttery flavor and balances the overall taste. Always use fine salt for even distribution throughout the dough.
- 1/2 pound cold unsalted butter (2 sticks), diced into 1/4-inch pieces – The star ingredient that creates flaky layers. Cold butter is absolutely essential; as it melts during baking, it releases steam that separates the flour layers into those coveted flaky sheets. For more information about butter’s role in baking and its nutritional profile, visit dairy nutrition and butter facts.
- 7 tablespoons ice water (7 to 8 tablespoons) – Binds the dough together without developing too much gluten. Always use ice-cold water to keep the butter solid until baking time.
Special Dietary Options
For those with dietary restrictions, this recipe can be adapted to suit various needs:
- Vegan option: Replace the unsalted butter with an equal amount of cold vegan butter or coconut oil. Note that coconut oil will add a slight coconut flavor, so vegan butter is often the better choice for neutral-tasting crusts.
- Gluten-free option: Use a 1:1 gluten-free flour blend designed for baking. These blends typically contain xanthan gum, which helps replicate the binding properties of gluten. The texture will be slightly different but still delicious.
- Lower calorie option: While not recommended for the best results, you can substitute half the butter with plain Greek yogurt or reduced-fat cream cheese. Keep in mind this significantly changes the texture and flakiness.
How to Prepare the Perfect Homemade Pie Crust: Step-by-Step Guide
Creating a flawless pie crust requires attention to detail and proper technique. Follow these detailed steps to achieve bakery-quality results in your own kitchen. The process takes approximately 10 minutes of active preparation, plus 1 hour of chilling time for the best results.
Step 1: Prepare Your Dry Ingredients
Start by measuring your ingredients accurately. Place 2 1/2 cups all-purpose flour, 1/2 tablespoon sugar, and 1/2 teaspoon salt into a food processor bowl. Pulse the mixture a few times to combine everything evenly. This step ensures the salt and sugar are distributed throughout the flour, preventing pockets of seasoning in your finished crust.
If you prefer working by hand or don’t have a food processor, whisk the dry ingredients together in a large mixing bowl until well combined. This traditional method works beautifully when using a pastry cutter.
Step 2: Cut in the Cold Butter
Add the cold diced butter to your flour mixture. The butter should come straight from the refrigerator, diced into small 1/4-inch pieces for easier incorporation. Pulse the food processor until the mixture forms coarse crumbs with some pea-sized pieces of butter still visible.
Important: The mixture should remain dry and powdery at this stage. Those visible butter pieces are exactly what create flaky layers during baking. Don’t process until smooth!
For the hand method, add the diced cold butter to your flour mixture and toss lightly to coat the pieces. Use a pastry cutter to work the butter into the flour, pressing and cutting until the mixture looks coarse with those characteristic pea-sized butter pieces throughout. This usually takes about 5-7 minutes by hand.
Step 3: Add Ice Water Gradually
With the food processor running, add 7 tablespoons of ice water. Pulse just until moist clumps or small balls of dough begin to form. The dough should start coming together but won’t form a completely cohesive ball yet.
Test the consistency by pressing a small piece of dough between your fingertips. If it sticks together nicely, you’ve added enough water. If the dough crumbles and falls apart, add more ice water one teaspoon at a time, pulsing briefly between additions. Be careful not to over-wet the dough, as this creates a tough, dense crust.
When using the hand method, gradually add water one tablespoon at a time while stirring with a firm spatula. Stop adding water once large clumps form in the bowl.
Step 4: Gather and Shape the Dough
Transfer the dough to a clean, lightly floured work surface. Gather all the loose crumbs and pieces together, pressing them into a rough ball. Fold the dough over itself once or twice, kneading just enough to hold everything together.
Critical tip: The dough should not be smooth! You want to see visible pockets and streaks of butter running through the dough. These butter pockets create steam during baking, which produces those beautiful flaky layers everyone loves in a homemade pie crust.
Avoid the temptation to overwork the dough. Excessive kneading develops gluten, resulting in a tough, chewy crust rather than a tender, flaky one.
Step 5: Divide, Wrap, and Chill
Using a sharp knife or bench scraper, divide the dough in half. Flatten each portion into a disk about 1 inch thick. Wrap each disk tightly in plastic wrap to prevent the dough from drying out or absorbing refrigerator odors.
Refrigerate for at least 1 hour before using. This chilling time serves two important purposes: it allows the gluten to relax (preventing shrinkage during baking) and firms up the butter so the crust bakes up flaky rather than greasy.
Shaping and Preparing Your Pie Crust
After the dough has chilled properly, you’re ready to roll it out and fit it into your pie plate. Here’s the proper technique for achieving a professional-looking crust:
Dust your work surface generously with flour to prevent sticking. Remove one disk of dough from the refrigerator and let it rest for 5-10 minutes if it feels too firm. Roll the dough from the center outward, rotating the dough a quarter turn after each roll to maintain an even thickness and circular shape.
Continue rolling until you have a 12-inch circle that’s approximately 1/8 inch thick. Carefully transfer the dough to your pie plate by gently wrapping it around your rolling pin, then unrolling it over the pan. If the dough sticks or tears, use a bench scraper or spatula to lift and move it.
Gently press the dough into the bottom and sides of the pan, being careful not to stretch it. Trim any excess dough, leaving about 1 inch of overhang. Tuck the overhang under itself to create a thick edge, then crimp or flute the edges using your thumb and index finger for a decorative finish.

Dietary Substitutions to Customize Your Homemade Pie Crust
Butter and Fat Alternatives
While butter creates the most flavorful crust with excellent flaking properties, several alternatives work well depending on your dietary needs or preferences. Each option brings different characteristics to your finished pie.
| Fat Type | Ratio | Best For | Notes |
|---|---|---|---|
| Unsalted butter | 1:1 | All-purpose, best flavor | Keep very cold for flakiness |
| Vegan butter | 1:1 | Dairy-free diets | Choose stick form, not tub |
| Coconut oil | 1:1 | Vegan, Paleo | Chill solid, slight coconut taste |
| Shortening | 1:1 | Very flaky texture | Less flavor than butter |
| Lard | 1:1 | Traditional recipes | Creates very tender crust |
For a hybrid approach, try using half butter and half shortening. This combination gives you the flavor of butter with the extra flakiness that shortening provides. Many bakers consider this the perfect balance for fruit pies.
Flour and Seasoning Modifications
The type of flour you choose affects both texture and nutrition. For standard all-purpose flour, measure by spooning into the measuring cup and leveling with a knife rather than dipping directly into the flour bag. This technique prevents packing, which can result in too much flour and a dry, tough crust.
For whole grain options, substitute up to half the all-purpose flour with whole wheat flour. Keep in mind that whole wheat creates a heartier, nuttier flavor and denser texture. This works beautifully for savory pies like quiche or chicken pot pie. For sweet applications, you may prefer sticking with all-purpose flour or trying a white whole wheat flour, which has a milder flavor.
Spice additions can customize your crust for specific recipes. Add 1/2 teaspoon of cinnamon to the flour for apple or pumpkin pies. For savory applications, try mixing in 1 teaspoon of dried herbs, 1/4 teaspoon of black pepper, or even 1/2 cup of grated Parmesan cheese for an extra flavorful foundation.
Mastering Homemade Pie Crust: Advanced Tips and Variations
Once you’ve mastered the basic technique, these professional tips will take your pie crust from good to exceptional. Understanding the science behind each step helps you troubleshoot problems and achieve consistent bakery-quality results.
Professional Techniques for Perfect Results
Temperature control is everything. Every element must stay cold throughout the process. Cold butter creates flaky layers as it melts during baking. If your kitchen is warm or your hands tend to run hot, work quickly and consider chilling your bowl and tools beforehand. Some bakers even keep a bowl of ice water nearby to dip their fingers into when working the dough by hand.
Don’t skip the resting period. The 1-hour chill time isn’t optional. This rest allows the flour to fully hydrate and the gluten to relax. Rushing this step results in a crust that shrinks during baking and becomes tough rather than tender. If you’ve chilled the dough longer than an hour and it becomes too hard to roll, let it rest at room temperature for 10-20 minutes before attempting to roll.
Handle with care. Overworking the dough develops gluten, making your crust tough and chewy instead of tender and flaky. Work gently and minimally. When gathering the dough, a few folds are sufficient. The goal is simply to bring everything together, not to create a smooth, uniform ball.
Creative Variations to Try
Expand your baking repertoire with these delicious variations on the classic pie crust:
- Spiced crust: Add 1 teaspoon of cinnamon, 1/2 teaspoon of nutmeg, and 1/4 teaspoon of ginger to the flour for fall pies.
- Chocolate crust: Replace 1/4 cup of flour with unsweetened cocoa powder and increase sugar to 1 tablespoon for cream pies.
- Herb crust: Mix in 2 tablespoons of fresh chopped herbs like thyme, rosemary, or sage for savory tarts and quiches.
- Cheese crust: Add 1/2 cup of finely grated sharp cheddar or Parmesan to the flour for savory applications.
- Nut crust: Replace 1/2 cup of flour with finely ground pecans or walnuts for added richness and nutty flavor.
Make-Ahead and Meal Prep Strategies
This homemade pie crust recipe fits perfectly into meal prep routines. Make a double or triple batch on weekends, then store for future use. Your future self will thank you when holiday baking season arrives!
For refrigerated storage, wrap dough disks tightly in plastic wrap and place in a resealable bag. The dough keeps for up to 3 days in the refrigerator. For longer storage, freeze the wrapped disks for up to 3 months. Thaw completely in the refrigerator overnight before rolling.
You can also pre-roll your crusts and freeze them flat between sheets of parchment paper. This method allows you to pull out a ready-to-bake crust whenever the mood strikes for a quick dessert or savory pie.
How to Store Homemade Pie Crust: Best Practices
Proper storage ensures your homemade pie crust maintains its quality and performs beautifully when you’re ready to use it. Follow these guidelines to get the most from your dough.
Refrigerator Storage
For short-term storage, wrap your dough disks tightly in plastic wrap, pressing out any air pockets. Place the wrapped disks in a resealable plastic bag for extra protection against refrigerator odors and drying. Label with the date and use within 3 days for best results. The dough may darken slightly as the butter oxidizes, but this doesn’t affect the taste or texture.
If you’ve already rolled out your crust and lined your pie plate, you can refrigerate the unbaked crust for up to 2 days. Cover tightly with plastic wrap to prevent drying. This actually improves the crust by allowing more time for gluten relaxation.
Freezer Storage
For long-term storage, freezing is your best option. Double-wrap dough disks in plastic wrap, then place in a freezer bag or airtight container. Remove as much air as possible before sealing. Properly stored, frozen pie dough maintains quality for up to 3 months.
Thaw frozen dough overnight in the refrigerator, not at room temperature. Slow thawing prevents condensation from making the dough soggy. Once thawed, the dough may need to rest at room temperature for 10-15 minutes before rolling if it feels too firm.
Storing Baked Pie Crust
If you’ve blind baked your crust ahead of time, let it cool completely before storing. Wrap tightly in plastic or store in an airtight container at room temperature for up to 2 days. For longer storage, freeze the baked, cooled crust for up to 1 month. Thaw at room temperature before filling.
Never refrigerate a baked unfilled pie crust, as the humidity can make it soggy. Once filled, follow storage instructions for your specific pie recipe, as fillings have different storage requirements.
FAQs: Frequently Asked Questions About Homemade Pie Crust
What ingredients do I need for homemade pie crust?
For a basic homemade pie crust that serves 8-10 people (one 9-inch double crust), gather 2 1/2 cups all-purpose flour, 1 teaspoon salt, 1 teaspoon sugar, 1 cup (2 sticks) cold unsalted butter cut into 1/2-inch cubes, and 4-6 tablespoons ice water. The cold butter creates flaky layers when it melts during baking. Measure flour by spooning it into the cup and leveling with a knife to avoid packing. Chill all ingredients beforehand for best results. This simple recipe yields a tender, buttery crust perfect for fruit pies or quiches. Mix flour, salt, and sugar first, then cut in butter until pea-sized crumbs form, adding ice water gradually until the dough just holds together when pinched. (92 words)
Can I make pie dough by hand without a food processor?
Yes, use a pastry cutter or two forks to cut cold butter into the flour mixture by hand. Start with 2 1/2 cups flour, 1 tsp salt, and 1 tsp sugar in a bowl. Add 1 cup cubed cold butter and work it in with the pastry cutter until the mixture resembles coarse crumbs with pea-sized butter pieces—about 5-7 minutes. This method gives you full control over texture for a flakier crust. Drizzle in ice water 1 tbsp at a time, mixing with a fork until dough clumps. Form into two disks, wrap in plastic, and chill 1 hour. Hand method takes longer but works great for small batches or if you lack equipment. (112 words)
How do I know when pie dough has enough water?
Test by pinching a small piece of dough between your fingers—it should hold together firmly without crumbling but not feel sticky or wet. Start with 4 tbsp ice water for 2 1/2 cups flour, adding 1 tsp at a time while mixing gently with a fork. Over-hydrated dough becomes tough and shrinks during baking; under-hydrated cracks when rolled. After mixing, press the dough into a ball—if it holds without falling apart, it’s ready. Factors like humid weather may require less water. Gather into two disks, wrap tightly, and refrigerate 1-2 hours to rest gluten and hydrate evenly for easy rolling. This step prevents common issues like dry, brittle crusts. (118 words)
How do I roll out and fit pie crust into a pan?
After chilling dough 1-2 hours, let it rest 10-15 minutes if too firm. Dust a clean surface and rolling pin lightly with flour. Place dough in center, roll from middle outward into a 12-13 inch circle (1/8-inch thick), rotating quarter turns for evenness. Fold gently in half, transfer to 9-inch pie pan, unfold, and press into bottom and sides. Trim overhang to 1 inch, fold under, and crimp edges. For double-crust pies, repeat for top. Avoid stretching dough to prevent shrinking. If cracks appear, patch with scraps and a dab of water. Chill formed crust 30 minutes before baking for stability. This yields a neat, professional fit. (124 words)
How do I blind bake a homemade pie crust?
Blind baking prevents soggy bottoms in custard or fruit pies. After fitting dough into pan, chill 30 minutes. Line with parchment, fill with pie weights, beans, or rice (about 2 cups). Bake at 425°F for 15-17 minutes until edges are set. Remove liner and weights, prick bottom 10-12 times with fork to vent steam, then bake 5-10 more minutes at 375°F until golden and dry. Cool completely before filling. Use dry beans or rice as weights—discard beans after, but rice can reuse. For partially blind baked crusts, stop after first bake. This technique works for pumpkin pie or tarts, ensuring crisp texture every time. (108 words)
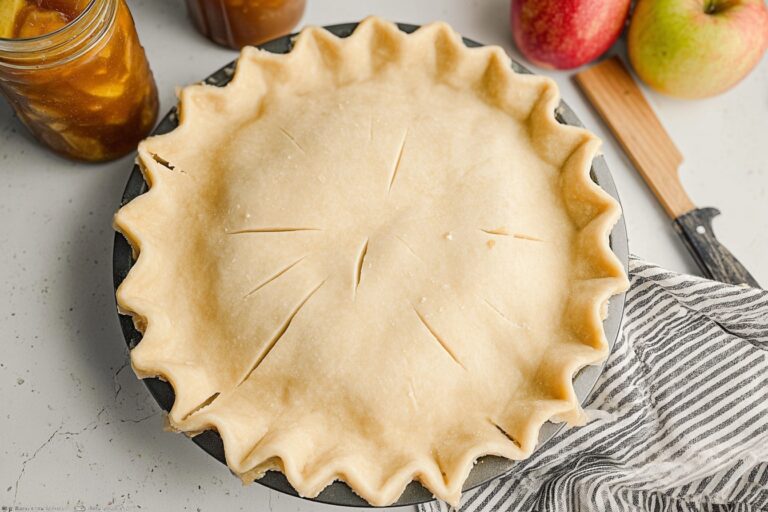
Homemade Pie Crust
🥧 Achieve flaky, tender homemade pie crust that elevates any pie – buttery layers far superior to store-bought.
🛠️ Foolproof recipe ready in minutes plus chill time, perfect for beginners and pros alike!
- Total Time: 1 hour 10 minutes
- Yield: 2 (9-inch) crusts
Ingredients
– 2 1/2 cups all-purpose flour, plus more for dusting
– 1/2 tablespoon sugar
– 1/2 teaspoon salt
– 1/2 pound cold unsalted butter (2 sticks), diced into 1/4-inch pieces
– 7 tablespoons ice water (7 to 8 tablespoons)
Instructions
1-Step 1: Prepare Your Dry Ingredients Start by measuring your ingredients accurately. Place 2 1/2 cups all-purpose flour, 1/2 tablespoon sugar, and 1/2 teaspoon salt into a food processor bowl. Pulse the mixture a few times to combine everything evenly. This step ensures the salt and sugar are distributed throughout the flour, preventing pockets of seasoning in your finished crust. If you prefer working by hand or don’t have a food processor, whisk the dry ingredients together in a large mixing bowl until well combined. This traditional method works beautifully when using a pastry cutter.
2-Step 2: Cut in the Cold Butter Add the cold diced butter to your flour mixture. The butter should come straight from the refrigerator, diced into small 1/4-inch pieces for easier incorporation. Pulse the food processor until the mixture forms coarse crumbs with some pea-sized pieces of butter still visible. Important: The mixture should remain dry and powdery at this stage. Those visible butter pieces are exactly what create flaky layers during baking. Don’t process until smooth! For the hand method, add the diced cold butter to your flour mixture and toss lightly to coat the pieces. Use a pastry cutter to work the butter into the flour, pressing and cutting until the mixture looks coarse with those characteristic pea-sized butter pieces throughout. This usually takes about 5-7 minutes by hand.
3-Step 3: Add Ice Water Gradually With the food processor running, add 7 tablespoons of ice water. Pulse just until moist clumps or small balls of dough begin to form. The dough should start coming together but won’t form a completely cohesive ball yet. Test the consistency by pressing a small piece of dough between your fingertips. If it sticks together nicely, you’ve added enough water. If the dough crumbles and falls apart, add more ice water one teaspoon at a time, pulsing briefly between additions. Be careful not to over-wet the dough, as this creates a tough, dense crust. When using the hand method, gradually add water one tablespoon at a time while stirring with a firm spatula. Stop adding water once large clumps form in the bowl.
4-Step 4: Gather and Shape the Dough Transfer the dough to a clean, lightly floured work surface. Gather all the loose crumbs and pieces together, pressing them into a rough ball. Fold the dough over itself once or twice, kneading just enough to hold everything together. Critical tip: The dough should not be smooth! You want to see visible pockets and streaks of butter running through the dough. These butter pockets create steam during baking, which produces those beautiful flaky layers everyone loves in a homemade pie crust. Avoid the temptation to overwork the dough. Excessive kneading develops gluten, resulting in a tough, chewy crust rather than a tender, flaky one.
5-Step 5: Divide, Wrap, and Chill Using a sharp knife or bench scraper, divide the dough in half. Flatten each portion into a disk about 1 inch thick. Wrap each disk tightly in plastic wrap to prevent the dough from drying out or absorbing refrigerator odors. Refrigerate for at least 1 hour before using. This chilling time serves two important purposes: it allows the gluten to relax (preventing shrinkage during baking) and firms up the butter so the crust bakes up flaky rather than greasy.
6-Shaping and Preparing Your Pie Crust: After the dough has chilled properly, you’re ready to roll it out and fit it into your pie plate. Here’s the proper technique for achieving a professional-looking crust: Dust your work surface generously with flour to prevent sticking. Remove one disk of dough from the refrigerator and let it rest for 5-10 minutes if it feels too firm. Roll the dough from the center outward, rotating the dough a quarter turn after each roll to maintain an even thickness and circular shape. Continue rolling until you have a 12-inch circle that’s approximately 1/8 inch thick. Carefully transfer the dough to your pie plate by gently wrapping it around your rolling pin, then unrolling it over the pan. If the dough sticks or tears, use a bench scraper or spatula to lift and move it. Gently press the dough into the bottom and sides of the pan, being careful not to stretch it. Trim any excess dough, leaving about 1 inch of overhang. Tuck the overhang under itself to create a thick edge, then crimp or flute the edges using your thumb and index finger for a decorative finish.
Notes
❄️ Keep butter and water ice-cold for ultimate flakiness and tenderness.
🙌 Handle dough minimally to prevent gluten development and tough crust.
⏰ Chill dough at least 1 hour; freeze up to 3 months for future pies.
- Prep Time: 10 minutes
- Chilling: 1 hour
- Category: Baking
- Method: Mixing
- Cuisine: American
- Diet: Vegetarian
Nutrition
- Serving Size: 1/8 crust
- Calories: 232
- Sugar: 1g
- Sodium: 99mg
- Fat: 15g
- Saturated Fat: 9g
- Unsaturated Fat: 6g
- Trans Fat: 0g
- Carbohydrates: 20g
- Fiber: 1g
- Protein: 2g
- Cholesterol: 40mg


