Ingredients
– 2 1/2 cups all-purpose flour, plus more for dusting
– 1/2 tablespoon sugar
– 1/2 teaspoon salt
– 1/2 pound cold unsalted butter (2 sticks), diced into 1/4-inch pieces
– 7 tablespoons ice water (7 to 8 tablespoons)
Instructions
1-Step 1: Prepare Your Dry Ingredients Start by measuring your ingredients accurately. Place 2 1/2 cups all-purpose flour, 1/2 tablespoon sugar, and 1/2 teaspoon salt into a food processor bowl. Pulse the mixture a few times to combine everything evenly. This step ensures the salt and sugar are distributed throughout the flour, preventing pockets of seasoning in your finished crust. If you prefer working by hand or don’t have a food processor, whisk the dry ingredients together in a large mixing bowl until well combined. This traditional method works beautifully when using a pastry cutter.
2-Step 2: Cut in the Cold Butter Add the cold diced butter to your flour mixture. The butter should come straight from the refrigerator, diced into small 1/4-inch pieces for easier incorporation. Pulse the food processor until the mixture forms coarse crumbs with some pea-sized pieces of butter still visible. Important: The mixture should remain dry and powdery at this stage. Those visible butter pieces are exactly what create flaky layers during baking. Don’t process until smooth! For the hand method, add the diced cold butter to your flour mixture and toss lightly to coat the pieces. Use a pastry cutter to work the butter into the flour, pressing and cutting until the mixture looks coarse with those characteristic pea-sized butter pieces throughout. This usually takes about 5-7 minutes by hand.
3-Step 3: Add Ice Water Gradually With the food processor running, add 7 tablespoons of ice water. Pulse just until moist clumps or small balls of dough begin to form. The dough should start coming together but won’t form a completely cohesive ball yet. Test the consistency by pressing a small piece of dough between your fingertips. If it sticks together nicely, you’ve added enough water. If the dough crumbles and falls apart, add more ice water one teaspoon at a time, pulsing briefly between additions. Be careful not to over-wet the dough, as this creates a tough, dense crust. When using the hand method, gradually add water one tablespoon at a time while stirring with a firm spatula. Stop adding water once large clumps form in the bowl.
4-Step 4: Gather and Shape the Dough Transfer the dough to a clean, lightly floured work surface. Gather all the loose crumbs and pieces together, pressing them into a rough ball. Fold the dough over itself once or twice, kneading just enough to hold everything together. Critical tip: The dough should not be smooth! You want to see visible pockets and streaks of butter running through the dough. These butter pockets create steam during baking, which produces those beautiful flaky layers everyone loves in a homemade pie crust. Avoid the temptation to overwork the dough. Excessive kneading develops gluten, resulting in a tough, chewy crust rather than a tender, flaky one.
5-Step 5: Divide, Wrap, and Chill Using a sharp knife or bench scraper, divide the dough in half. Flatten each portion into a disk about 1 inch thick. Wrap each disk tightly in plastic wrap to prevent the dough from drying out or absorbing refrigerator odors. Refrigerate for at least 1 hour before using. This chilling time serves two important purposes: it allows the gluten to relax (preventing shrinkage during baking) and firms up the butter so the crust bakes up flaky rather than greasy.
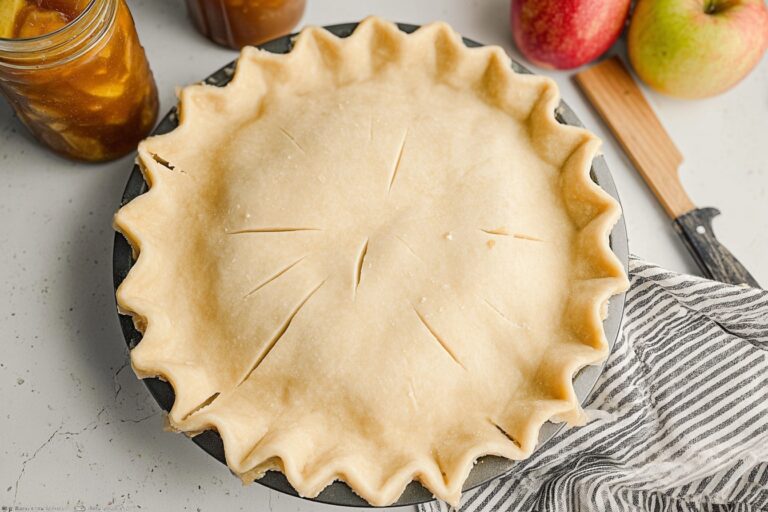
6-Shaping and Preparing Your Pie Crust: After the dough has chilled properly, you’re ready to roll it out and fit it into your pie plate. Here’s the proper technique for achieving a professional-looking crust: Dust your work surface generously with flour to prevent sticking. Remove one disk of dough from the refrigerator and let it rest for 5-10 minutes if it feels too firm. Roll the dough from the center outward, rotating the dough a quarter turn after each roll to maintain an even thickness and circular shape. Continue rolling until you have a 12-inch circle that’s approximately 1/8 inch thick. Carefully transfer the dough to your pie plate by gently wrapping it around your rolling pin, then unrolling it over the pan. If the dough sticks or tears, use a bench scraper or spatula to lift and move it. Gently press the dough into the bottom and sides of the pan, being careful not to stretch it. Trim any excess dough, leaving about 1 inch of overhang. Tuck the overhang under itself to create a thick edge, then crimp or flute the edges using your thumb and index finger for a decorative finish.
Notes
❄️ Keep butter and water ice-cold for ultimate flakiness and tenderness.
🙌 Handle dough minimally to prevent gluten development and tough crust.
⏰ Chill dough at least 1 hour; freeze up to 3 months for future pies.
- Prep Time: 10 minutes
- Chilling: 1 hour
- Category: Baking
- Method: Mixing
- Cuisine: American
- Diet: Vegetarian
Nutrition
- Serving Size: 1/8 crust
- Calories: 232
- Sugar: 1g
- Sodium: 99mg
- Fat: 15g
- Saturated Fat: 9g
- Unsaturated Fat: 6g
- Trans Fat: 0g
- Carbohydrates: 20g
- Fiber: 1g
- Protein: 2g
- Cholesterol: 40mg