Ingredients
– 4 eggs, separated
– 1/4 cup granulated sugar
– 1/2 cup cake flour
– 1/2 teaspoon baking powder
– 1 pinch salt
– 3 tablespoons whole milk
– 1/2 teaspoon vanilla extract
– 4 tablespoons water for cooking
– Butter for cooking
Instructions
1-Step 1: Prepare Your Egg Yolk Mixture Start by separating your eggs carefully. You’ll want four yolks in one bowl and four whites in another make sure not a speck of yolk gets into the whites, or they won’t whip properly. In the bowl with the yolks, whisk together the milk and vanilla extract until fully combined. The mixture should look smooth and slightly thickened. This yolk mixture forms the base of your batter. The fat from the yolks and milk creates richness, while the vanilla adds that classic pancake aroma that makes your kitchen smell wonderful.
2-Step 2: Incorporate Dry Ingredients Sift the cake flour, baking powder, and salt directly into your yolk mixture. Sifting isn’t just fancy it removes lumps and incorporates air, which contributes to the final fluffiness. Using a whisk or spatula, mix until completely smooth with no visible flour streaks. Set this mixture aside while you work on the meringue.
3-Step 3: Whip Egg Whites to Stiff Peaks This is where the magic happens and it’s the step that makes souffle pancakes so different from regular ones. Using an electric mixer, beat your egg whites on medium speed until they become frothy and opaque. This usually takes about 1-2 minutes. Gradually add the granulated sugar while continuing to beat. Adding sugar slowly helps it dissolve evenly and creates a more stable meringue. Increase the speed to medium-high and continue beating until you achieve stiff peaks. How do you know when you’ve reached stiff peaks? Lift the beaters out of the meringue the peaks should stand straight up without flopping over. The meringue should look glossy and smooth, not dry or clumpy. If you’re new to whipping egg whites, don’t worry just watch a quick video or two to spot those stiff peaks, and you’ll be surprised how easy it is to get that perfect fluffy texture for your pancakes. For extra stability, add a pinch of cream of tartar before you start whipping. This acidic powder helps strengthen the protein structure in the egg whites.
4-Step 4: Heat Your Cooking Surface While you could whip the egg whites first and then heat the pan, I recommend heating your skillet during Step 3 so it’s ready when your batter is. Use a deep-sided 12-inch skillet a nonstick pan or well-seasoned cast iron works best. Heat it over low heat and melt a small pat of butter, swirling to coat the bottom. Low heat is absolutely crucial here. These pancakes need time to cook through without burning the bottom, and high heat will give you a charred exterior with a raw center.
5-Step 5: Fold Meringue into Yolk Batter Gently fold one-third of the whipped egg whites into the yolk mixture using a spatula. This first addition lightens the base batter, making it easier to incorporate the remaining meringue. Use a folding motion cut down through the center, scoop from the bottom, and turn over. Don’t stir vigorously or you’ll deflate all those precious air bubbles. Once the first portion is incorporated, add the remaining egg whites in two more additions, folding gently until no white streaks remain. The batter should look homogeneous and feel light, like a cloud in a bowl.
6-Step 6: Build Your Pancakes in the Pan Here’s the technique that creates those tall, restaurant-style stacks. Using a cookie scoop or large spoon, scoop 4-5 portions of batter into your heated skillet, spacing them about 2 inches apart. Then and this is the secret add a second layer of scoops directly on top of each portion. This builds height and creates that signature tall look. Work quickly but carefully. The batter will start to settle if left sitting too long, so don’t dillydally between scooping and cooking.
7-Step 7: Add Steam and Cook the First Side Add 1 tablespoon of water to the pan, positioning it away from the batter so it doesn’t splash onto the pancakes. Immediately cover with a tight-fitting lid. The steam creates a humid environment that helps the pancakes rise and cook evenly without drying out. Cook for 2 minutes on low heat. Then uncover, add a bit more batter to each stack if needed to maintain height, re-cover, and continue cooking on low-medium heat for another 5-6 minutes. You’ll know the bottoms are ready to flip when they’re golden brown and the pancakes feel set around the edges.
8-Step 8: Flip and Finish Cooking Flipping these tall stacks requires a gentle touch. Slide a thin spatula completely underneath each pancake, supporting the weight with the spatula. Flip in one smooth, confident motion hesitation can cause the batter to wobble and collapse. If you’re looking for more breakfast inspiration, try these fluffy cheese chive biscuits that pair wonderfully with savory breakfast spreads. After flipping, add another tablespoon of water to the pan (away from the pancakes), cover again, and cook for 4 more minutes. The pancakes are done when both sides are golden brown and they feel springy to the touch. A toothpick inserted into the center should come out clean.
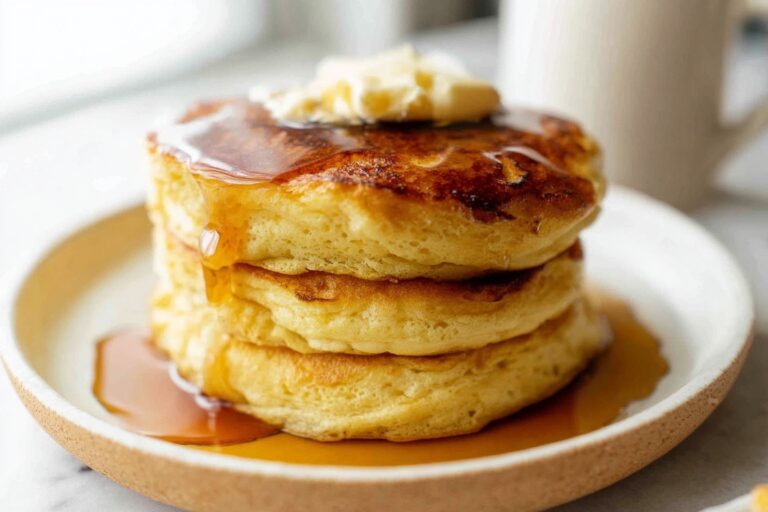
9-Step 9: Serve Immediately Transfer your finished pancakes to plates and serve right away while they’re still fluffy and tall. These pancakes are best enjoyed hot they’ll start to settle and lose some height as they cool. Top with butter, maple syrup, fresh berries, whipped cream, or a dusting of powdered sugar. Repeat with any remaining batter, wiping the pan and adding fresh butter between batches. This recipe makes about 10 pancakes total.
Notes
🏔️ Whip egg whites to stiff peaks (add cream of tartar for extra stability).
🔥 Cook low and slow with lid to steam for maximum fluff without burning.
💧 Add water drops during cooking to create steam for airy rise.
- Prep Time: 10 minutes
- Cook Time: 30 minutes
- Category: Breakfast
- Method: Stovetop
- Cuisine: Japanese
- Diet: Vegetarian
Nutrition
- Serving Size: 2 pancakes
- Calories: 220 kcal
- Sugar: 12g
- Sodium: 150mg
- Fat: 10g
- Saturated Fat: 4g
- Unsaturated Fat: 6g
- Trans Fat: 0g
- Carbohydrates: 25g
- Fiber: 0g
- Protein: 8g
- Cholesterol: 200mg