
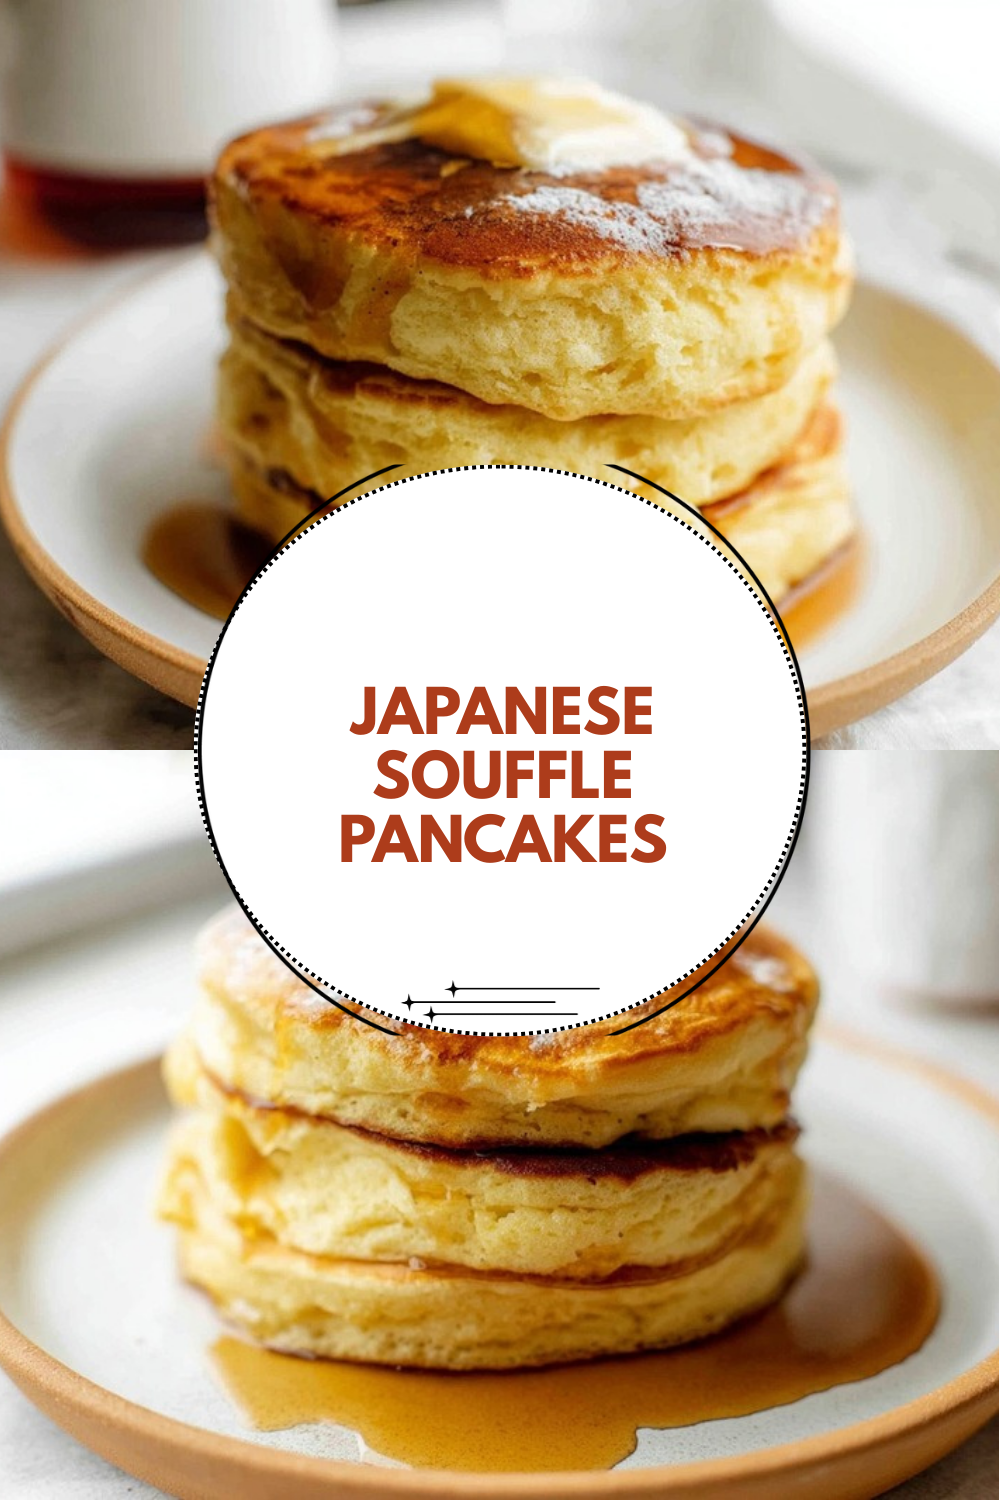
Why You’ll Love This Japanese Souffle Pancakes
If you’ve ever watched those mesmerizing videos of jiggly, cloud-like pancakes bouncing on a plate, you already know the magic of Japanese souffle pancakes. These towering treats have taken the breakfast world by storm, and for good reason. They’re not just visually stunning they deliver a texture and flavor experience that regular pancakes simply can’t match.
What makes this Japanese souffle pancakes recipe so special? Here’s why you’ll want to add it to your cooking repertoire:
- Ease of preparation: Despite their fancy appearance, these pancakes use simple pantry staples you probably already have. The whole process takes about 40 minutes from start to finish perfect for weekend mornings or a special weekday breakfast. No fancy equipment required beyond an electric mixer and a good skillet.
- Health benefits: These pancakes pack a protein punch thanks to four whole eggs. According to WebMD’s guide to eggs health benefits, eggs provide essential nutrients like choline, vitamin D, and high-quality protein that supports muscle health and keeps you feeling full longer. Compared to traditional pancakes loaded with butter and oil, these rely on air-whipped egg whites for their lift.
- Versatility: Whether you need a gluten-free option, want to cut calories, or prefer plant-based alternatives, this recipe adapts beautifully. Serve them for breakfast with maple syrup, as an afternoon snack with fresh berries, or dress them up for dessert with whipped cream and chocolate sauce.
- Distinctive flavor: The texture is somewhere between a souffle and a chiffon cake light, airy, and melt-in-your-mouth tender. They have a delicate sweetness with vanilla undertones that pairs perfectly with both sweet and savory toppings.
Ready to create these fluffy wonders at home? Let’s gather everything you need.
Jump To
- 1. Why You’ll Love This Japanese Souffle Pancakes
- 2. Essential Ingredients for Japanese Souffle Pancakes
- 3. How to Prepare the Perfect Japanese Souffle Pancakes: Step-by-Step Guide
- 4. Dietary Substitutions to Customize Your Japanese Souffle Pancakes
- 5. Mastering Japanese Souffle Pancakes: Advanced Tips and Variations
- 6. How to Store Japanese Souffle Pancakes: Best Practices
- 7. FAQs: Frequently Asked Questions About Japanese Souffle Pancakes
- 8. Japanese Souffle Pancakes
Essential Ingredients for Japanese Souffle Pancakes
Creating the perfect fluffy Japanese pancakes recipe starts with understanding each ingredient’s role. Here’s your complete ingredient breakdown with precise measurements:
Main Ingredients
- 4 eggs, separated The foundation of this recipe. Separated eggs allow you to whip the whites into a meringue that creates that signature airy texture. Use room temperature eggs for best results.
- 1/4 cup granulated sugar Adds sweetness and helps stabilize the whipped egg whites. The sugar creates a glossy meringue that holds its shape better.
- 1/2 cup cake flour Cake flour has a lower protein content than all-purpose flour, resulting in a more tender crumb. You can substitute with all-purpose flour if needed, though the texture may be slightly denser.
- 1/2 teaspoon baking powder Provides additional lift and helps the pancakes maintain their structure during cooking.
- 1 pinch salt Enhances the overall flavor and balances the sweetness.
- 3 tablespoons whole milk Adds moisture and richness. The liquid helps create a smooth batter consistency.
- 1/2 teaspoon vanilla extract Imparts a warm, aromatic flavor that makes these pancakes feel special.
- 4 tablespoons water (for cooking) Added to the pan during cooking to create steam, which helps the pancakes cook evenly and stay fluffy.
- Butter (for cooking) Prevents sticking and adds a subtle buttery flavor to the exterior.
Special Dietary Options
Good news for those with dietary restrictions easy Japanese souffle pancakes can be adapted to suit various needs:
Vegan: Replace eggs with aquafaba (chickpea liquid) for the meringue 3 tablespoons aquafaba equals approximately 1 egg white. Use a flax egg (1 tablespoon ground flaxseed mixed with 3 tablespoons water) for the yolk portion. Swap dairy milk for almond or oat milk.
Gluten-free: Substitute cake flour with a 1:1 gluten-free flour blend. Look for one that contains xanthan gum for better structure, or add 1/4 teaspoon xanthan gum separately.
Low-calorie: Reduce sugar to 2 tablespoons or use a zero-calorie sweetener like stevia. Use skim milk instead of whole milk. Consider serving with fresh fruit rather than syrup.
How to Prepare the Perfect Japanese Souffle Pancakes: Step-by-Step Guide
Learning how to make Japanese souffle pancakes might seem intimidating at first, but breaking it down into clear steps makes the process approachable for any home cook. Follow these detailed instructions for pancakes that turn out fluffy and impressive every time.
Step 1: Prepare Your Egg Yolk Mixture
Start by separating your eggs carefully. You’ll want four yolks in one bowl and four whites in another make sure not a speck of yolk gets into the whites, or they won’t whip properly. In the bowl with the yolks, whisk together the milk and vanilla extract until fully combined. The mixture should look smooth and slightly thickened.
This yolk mixture forms the base of your batter. The fat from the yolks and milk creates richness, while the vanilla adds that classic pancake aroma that makes your kitchen smell wonderful.
Step 2: Incorporate Dry Ingredients
Sift the cake flour, baking powder, and salt directly into your yolk mixture. Sifting isn’t just fancy it removes lumps and incorporates air, which contributes to the final fluffiness. Using a whisk or spatula, mix until completely smooth with no visible flour streaks. Set this mixture aside while you work on the meringue.
Pro Tip: If you don’t have a sifter, simply whisk the dry ingredients together in a separate bowl before adding them to the wet ingredients. The goal is to eliminate any flour clumps that could create dense spots in your finished pancakes.
Step 3: Whip Egg Whites to Stiff Peaks
This is where the magic happens and it’s the step that makes souffle pancakes so different from regular ones. Using an electric mixer, beat your egg whites on medium speed until they become frothy and opaque. This usually takes about 1-2 minutes.
Gradually add the granulated sugar while continuing to beat. Adding sugar slowly helps it dissolve evenly and creates a more stable meringue. Increase the speed to medium-high and continue beating until you achieve stiff peaks.
How do you know when you’ve reached stiff peaks? Lift the beaters out of the meringue the peaks should stand straight up without flopping over. The meringue should look glossy and smooth, not dry or clumpy. If you’re new to whipping egg whites, don’t worry just watch a quick video or two to spot those stiff peaks, and you’ll be surprised how easy it is to get that perfect fluffy texture for your pancakes.
For extra stability, add a pinch of cream of tartar before you start whipping. This acidic powder helps strengthen the protein structure in the egg whites.
Step 4: Heat Your Cooking Surface
While you could whip the egg whites first and then heat the pan, I recommend heating your skillet during Step 3 so it’s ready when your batter is. Use a deep-sided 12-inch skillet a nonstick pan or well-seasoned cast iron works best. Heat it over low heat and melt a small pat of butter, swirling to coat the bottom.
Low heat is absolutely crucial here. These pancakes need time to cook through without burning the bottom, and high heat will give you a charred exterior with a raw center.
Step 5: Fold Meringue into Yolk Batter
Gently fold one-third of the whipped egg whites into the yolk mixture using a spatula. This first addition lightens the base batter, making it easier to incorporate the remaining meringue. Use a folding motion cut down through the center, scoop from the bottom, and turn over. Don’t stir vigorously or you’ll deflate all those precious air bubbles.
Once the first portion is incorporated, add the remaining egg whites in two more additions, folding gently until no white streaks remain. The batter should look homogeneous and feel light, like a cloud in a bowl.
Step 6: Build Your Pancakes in the Pan
Here’s the technique that creates those tall, restaurant-style stacks. Using a cookie scoop or large spoon, scoop 4-5 portions of batter into your heated skillet, spacing them about 2 inches apart. Then and this is the secret add a second layer of scoops directly on top of each portion. This builds height and creates that signature tall look.
Work quickly but carefully. The batter will start to settle if left sitting too long, so don’t dillydally between scooping and cooking.
Step 7: Add Steam and Cook the First Side
Add 1 tablespoon of water to the pan, positioning it away from the batter so it doesn’t splash onto the pancakes. Immediately cover with a tight-fitting lid. The steam creates a humid environment that helps the pancakes rise and cook evenly without drying out.
Cook for 2 minutes on low heat. Then uncover, add a bit more batter to each stack if needed to maintain height, re-cover, and continue cooking on low-medium heat for another 5-6 minutes. You’ll know the bottoms are ready to flip when they’re golden brown and the pancakes feel set around the edges.
| Cooking Stage | Heat Setting | Time | Visual Cue |
|---|---|---|---|
| Initial cook | Low | 2 minutes | Batter starts setting |
| Second stage | Low-medium | 5-6 minutes | Golden bottom, set edges |
| After flip | Low-medium | 4 minutes | Golden both sides, cooked through |
Step 8: Flip and Finish Cooking
Flipping these tall stacks requires a gentle touch. Slide a thin spatula completely underneath each pancake, supporting the weight with the spatula. Flip in one smooth, confident motion hesitation can cause the batter to wobble and collapse. If you’re looking for more breakfast inspiration, try these fluffy cheese chive biscuits that pair wonderfully with savory breakfast spreads.
After flipping, add another tablespoon of water to the pan (away from the pancakes), cover again, and cook for 4 more minutes. The pancakes are done when both sides are golden brown and they feel springy to the touch. A toothpick inserted into the center should come out clean.
Step 9: Serve Immediately
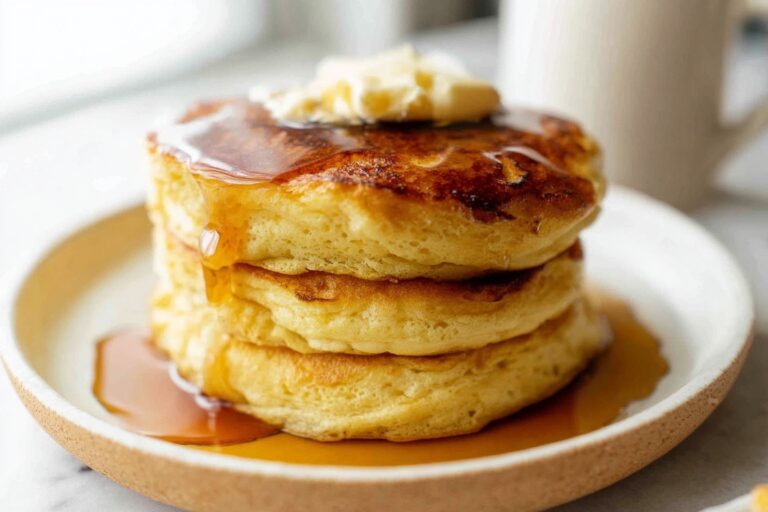
Transfer your finished pancakes to plates and serve right away while they’re still fluffy and tall. These pancakes are best enjoyed hot they’ll start to settle and lose some height as they cool. Top with butter, maple syrup, fresh berries, whipped cream, or a dusting of powdered sugar.
Repeat with any remaining batter, wiping the pan and adding fresh butter between batches. This recipe makes about 10 pancakes total.

Dietary Substitutions to Customize Your Japanese Souffle Pancakes
One of the beauties of this Japanese souffle pancakes recipe is how adaptable it is. Whether you’re cooking for someone with food allergies, dietary preferences, or simply want to switch things up, here are some thoughtful substitutions that keep the fluffy texture intact.
Protein and Main Component Alternatives
The eggs in this recipe serve two purposes: the yolks provide richness and structure, while the whipped whites create lift. If you need to avoid eggs, you’ll need alternatives for both functions.
For a plant-based version, aquafaba works remarkably well as an egg white substitute. Use 3 tablespoons of aquafaba per egg white, and whip it exactly as you would regular egg whites it forms stiff peaks beautifully. Replace the yolks with a mixture of 1 tablespoon cornstarch and 3 tablespoons of milk alternative per yolk. The texture will be slightly different but still fluffy and enjoyable.
If you want to boost the protein content, consider adding 2 tablespoons of plain Greek yogurt to the yolk mixture. This increases protein while also adding a subtle tanginess that complements the sweet flavors. Another option is stirring in a scoop of unflavored protein powder add it to the dry ingredients before sifting.
Vegetable, Sauce, and Seasoning Modifications
While traditional Japanese souffle pancakes lean sweet, you can absolutely experiment with savory variations. The key is keeping the batter itself relatively plain so the toppings shine.
For a savory breakfast twist, skip the vanilla extract and sugar in the yolk mixture. Instead, add 1/4 cup of finely grated cheese (Parmesan or cheddar work well) and 1 tablespoon of fresh herbs like chives or parsley. Serve with a dollop of sour cream and smoked salmon. If you enjoy savory breakfast options, this mini quiche recipe offers another delicious make-ahead option.
Seasonal fruit additions can also customize your pancakes. While heavy add-ins like whole berries can cause the batter to collapse, folding in 1/4 cup of lemon zest or a sprinkle of cinnamon into the finished batter adds flavor without compromising structure. Serve topped with seasonal fruits instead the pancakes pair beautifully with sliced strawberries in spring, peaches in summer, sauteed apples in fall, or citrus segments in winter.
For sauce alternatives beyond maple syrup, consider a drizzle of honey, agave nectar, or a quick fruit compote made by simmering frozen berries with a touch of sugar. A dollop of yogurt mixed with a little honey makes a tangy, protein-rich topping.
Mastering Japanese Souffle Pancakes: Advanced Tips and Variations
Once you’ve mastered the basic technique, you might wonder how to make your japanese pancakes even better. Here are professional techniques and creative ideas to take your souffle pancakes from good to extraordinary.
Pro Cooking Techniques
The difference between good souffle pancakes and great ones often comes down to a few key details:
Temperature control is everything. If your pancakes brown too quickly on the bottom while remaining raw inside, your heat is too high. Every stove is different you might need to experiment to find the sweet spot. Start on the lowest setting and increase slightly if the pancakes aren’t browning at all after several minutes.
Use the right pan. A nonstick skillet with a tight-fitting lid is ideal. The nonstick surface prevents sticking without requiring excessive butter, and the lid traps steam for even cooking. If you only have a cast iron pan, make sure it’s well-seasoned and use a bit more butter.
Don’t skip the water. That tablespoon of water creates essential steam. Without it, the pancakes develop a tough exterior and don’t rise properly. According to Just One Cookbook’s souffle pancake guide, the steam method is what distinguishes these from other pancake styles.
Flavor Variations
While classic vanilla souffle pancakes are delicious, try these flavor variations for something different:
- Matcha pancakes: Add 1 teaspoon matcha powder to the dry ingredients. The earthy, slightly bitter flavor pairs wonderfully with sweet toppings.
- Chocolate pancakes: Fold in 2 tablespoons of cocoa powder with the flour. Serve with sliced bananas and a drizzle of chocolate sauce.
- Earl Grey pancakes: Steep 2 Earl Grey tea bags in the warm milk for 10 minutes before mixing. The bergamot creates a sophisticated, aromatic flavor.
- Cardamom-orange pancakes: Add 1/4 teaspoon ground cardamom and 1 teaspoon orange zest to the yolk mixture.
Presentation Tips
These pancakes are as much about visual appeal as they are about taste. Present them like a pro with these simple techniques:
Stack them 3-4 pancakes high for maximum impact. The tower effect showcases their height and makes for an Instagram-worthy presentation. Dust the entire stack with powdered sugar using a fine mesh strainer for even coverage. Add a small pat of butter on top that slowly melts down the sides. Arrange fresh berries or edible flowers around the base for color.
Make-Ahead Options
While souffle pancakes are best cooked fresh, you can do some prep work in advance:
Separte your eggs the night before and store the yolks covered in the refrigerator. Bring them to room temperature before using. Measure out all your dry ingredients into a container so you just need to sift and add. The whipped egg whites, however, cannot be made ahead they’ll deflate and lose their lifting power. Plan to whip them right before cooking.
How to Store Japanese Souffle Pancakes: Best Practices
Let’s be honest these pancakes are at their absolute best right off the stove. But sometimes you have leftovers, or you want to prep ahead for a busy morning. Here’s how to store them properly.
Refrigeration
Store leftover pancakes in an airtight container at room temperature for same-day consumption, or refrigerate for up to 2 days. Place a paper towel in the container to absorb excess moisture, which prevents the pancakes from becoming soggy. Stack them loosely with wax paper between layers if you have multiple pancakes.
Freezing
For longer storage, freeze cooked pancakes for up to 1 month. Arrange them in a single layer on a baking sheet and freeze until solid about 2 hours. Then transfer to a freezer-safe bag or container. This initial freeze prevents them from sticking together. Label with the date so you remember when you made them.
Reheating
The key to reheating souffle pancakes is gentleness. Microwaving on high will make them rubbery and cause further deflation. Instead, try these methods:
- Steaming method: Place pancakes in a steamer basket over simmering water for 3-4 minutes. This gentle heat restores some of the fluffiness.
- Oven method: Wrap pancakes in foil and warm in a 300°F oven for 10 minutes. The foil traps moisture.
- Skillet method: Heat a nonstick pan on low, add a small pat of butter, and warm pancakes covered for 2-3 minutes per side.
Meal Prep Considerations
If you want freshly cooked pancakes without the morning prep, consider making the yolk batter the night before. Store it covered in the refrigerator, then bring to room temperature before folding in freshly whipped egg whites. You’ll still get that fluffy texture with minimal morning effort.
Alternatively, cook a double batch on the weekend and freeze half for weekday breakfasts. Your future self will thank you on those hectic mornings.
FAQs: Frequently Asked Questions About Japanese Souffle Pancakes
What are Japanese souffle pancakes?
Japanese souffle pancakes are ultra-fluffy, tall stacks of pancakes that resemble mini sponge cakes, typically 3-4 inches wide and 2-3 inches high. Unlike flat American pancakes, they get their airy texture from whipped egg whites folded into a light batter, creating a jiggly, melt-in-your-mouth bite. Originating from trendy cafes in Japan like those in Tokyo’s Harajuku district, they exploded in popularity on Instagram around 2018, drawing lines at specialty spots. Serve them for breakfast or dessert with powdered sugar, fresh berries, whipped cream, or maple syrup. They’re not ancient tradition but a modern treat perfect for impressing guests at home. (87 words)
How do Japanese souffle pancakes differ from regular pancakes?
Regular pancakes are thin, dense, and quick to cook on a hot griddle, relying on baking powder for lift. Japanese souffle pancakes stand out with their dramatic height and cloud-like fluffiness from meringue—stiffly whipped egg whites folded into a batter of yolks, flour, milk, and sugar. They cook low and slow under a lid with steam for even rising without collapsing. The result is a tender, sweet interior that’s more dessert-like, often stacked 3-4 high and topped generously. This method takes 15-20 minutes per batch but yields restaurant-quality results worth the extra care. (98 words)
How do you make Japanese souffle pancakes step by step?
Start with separated eggs: beat 2-3 yolks with sugar, milk, flour, and baking powder into a smooth batter. Whip 3-4 whites with cream of tartar to stiff peaks. Gently fold meringue into batter in thirds. Heat a non-stick skillet on low, add oil, scoop tall mounds of batter (use two spoons or a cookie scoop), add 1 tbsp water, cover, and cook 4-5 minutes until edges set. Flip carefully, add water again, cover, and cook another 4-5 minutes. Stack while warm. Total time: 30-40 minutes for 6-8 pancakes. Patience prevents deflation. (102 words)
Do you need molds to make Japanese souffle pancakes?
No, molds aren’t required for homemade Japanese souffle pancakes. Many recipes use metal rings or silicone molds to shape and support the batter’s height, but you can skip them by scooping batter generously (about 1/3 cup per pancake) and cooking low heat with a lid to trap steam. This lets them rise naturally to 2+ inches tall. If batter spreads too much, chill it 15 minutes first or use a piping bag for precision. A deep-sided skillet helps contain the fluff. Practice makes perfect—no fancy gear needed for cafe-style stacks. (92 words)
What are common mistakes to avoid when making Japanese souffle pancakes?
Key pitfalls include overmixing the meringue into the batter, which deflates air bubbles and ruins fluffiness—fold gently with a spatula. Cooking too hot burns the bottom before the inside sets; keep heat low and use the water-steam trick under the lid. Don’t flip too early or the batter splatters. Use room-temperature eggs for better whipping, and avoid greasy bowls for meringue. If pancakes sink post-cook, they overcooked. Store leftovers in an airtight container up to 1 day, reheat gently in a steamer. These fixes yield consistent, jiggly results every time. (96 words)
Japanese Souffle Pancakes
🥞 Towering fluffy Japanese soufflé pancakes rise sky-high with jiggly texture – impressive brunch showstopper using basic pantry staples!
☁️ Low-slow steam cooking yields airy egg clouds sweeter and lighter than American pancakes, perfect for Instagram or special mornings.
- Total Time: 40 minutes
- Yield: 10 pancakes
Ingredients
– 4 eggs, separated
– 1/4 cup granulated sugar
– 1/2 cup cake flour
– 1/2 teaspoon baking powder
– 1 pinch salt
– 3 tablespoons whole milk
– 1/2 teaspoon vanilla extract
– 4 tablespoons water for cooking
– Butter for cooking
Instructions
1-Step 1: Prepare Your Egg Yolk Mixture Start by separating your eggs carefully. You’ll want four yolks in one bowl and four whites in another make sure not a speck of yolk gets into the whites, or they won’t whip properly. In the bowl with the yolks, whisk together the milk and vanilla extract until fully combined. The mixture should look smooth and slightly thickened. This yolk mixture forms the base of your batter. The fat from the yolks and milk creates richness, while the vanilla adds that classic pancake aroma that makes your kitchen smell wonderful.
2-Step 2: Incorporate Dry Ingredients Sift the cake flour, baking powder, and salt directly into your yolk mixture. Sifting isn’t just fancy it removes lumps and incorporates air, which contributes to the final fluffiness. Using a whisk or spatula, mix until completely smooth with no visible flour streaks. Set this mixture aside while you work on the meringue.
3-Step 3: Whip Egg Whites to Stiff Peaks This is where the magic happens and it’s the step that makes souffle pancakes so different from regular ones. Using an electric mixer, beat your egg whites on medium speed until they become frothy and opaque. This usually takes about 1-2 minutes. Gradually add the granulated sugar while continuing to beat. Adding sugar slowly helps it dissolve evenly and creates a more stable meringue. Increase the speed to medium-high and continue beating until you achieve stiff peaks. How do you know when you’ve reached stiff peaks? Lift the beaters out of the meringue the peaks should stand straight up without flopping over. The meringue should look glossy and smooth, not dry or clumpy. If you’re new to whipping egg whites, don’t worry just watch a quick video or two to spot those stiff peaks, and you’ll be surprised how easy it is to get that perfect fluffy texture for your pancakes. For extra stability, add a pinch of cream of tartar before you start whipping. This acidic powder helps strengthen the protein structure in the egg whites.
4-Step 4: Heat Your Cooking Surface While you could whip the egg whites first and then heat the pan, I recommend heating your skillet during Step 3 so it’s ready when your batter is. Use a deep-sided 12-inch skillet a nonstick pan or well-seasoned cast iron works best. Heat it over low heat and melt a small pat of butter, swirling to coat the bottom. Low heat is absolutely crucial here. These pancakes need time to cook through without burning the bottom, and high heat will give you a charred exterior with a raw center.
5-Step 5: Fold Meringue into Yolk Batter Gently fold one-third of the whipped egg whites into the yolk mixture using a spatula. This first addition lightens the base batter, making it easier to incorporate the remaining meringue. Use a folding motion cut down through the center, scoop from the bottom, and turn over. Don’t stir vigorously or you’ll deflate all those precious air bubbles. Once the first portion is incorporated, add the remaining egg whites in two more additions, folding gently until no white streaks remain. The batter should look homogeneous and feel light, like a cloud in a bowl.
6-Step 6: Build Your Pancakes in the Pan Here’s the technique that creates those tall, restaurant-style stacks. Using a cookie scoop or large spoon, scoop 4-5 portions of batter into your heated skillet, spacing them about 2 inches apart. Then and this is the secret add a second layer of scoops directly on top of each portion. This builds height and creates that signature tall look. Work quickly but carefully. The batter will start to settle if left sitting too long, so don’t dillydally between scooping and cooking.
7-Step 7: Add Steam and Cook the First Side Add 1 tablespoon of water to the pan, positioning it away from the batter so it doesn’t splash onto the pancakes. Immediately cover with a tight-fitting lid. The steam creates a humid environment that helps the pancakes rise and cook evenly without drying out. Cook for 2 minutes on low heat. Then uncover, add a bit more batter to each stack if needed to maintain height, re-cover, and continue cooking on low-medium heat for another 5-6 minutes. You’ll know the bottoms are ready to flip when they’re golden brown and the pancakes feel set around the edges.
8-Step 8: Flip and Finish Cooking Flipping these tall stacks requires a gentle touch. Slide a thin spatula completely underneath each pancake, supporting the weight with the spatula. Flip in one smooth, confident motion hesitation can cause the batter to wobble and collapse. If you’re looking for more breakfast inspiration, try these fluffy cheese chive biscuits that pair wonderfully with savory breakfast spreads. After flipping, add another tablespoon of water to the pan (away from the pancakes), cover again, and cook for 4 more minutes. The pancakes are done when both sides are golden brown and they feel springy to the touch. A toothpick inserted into the center should come out clean.
9-Step 9: Serve Immediately Transfer your finished pancakes to plates and serve right away while they’re still fluffy and tall. These pancakes are best enjoyed hot they’ll start to settle and lose some height as they cool. Top with butter, maple syrup, fresh berries, whipped cream, or a dusting of powdered sugar. Repeat with any remaining batter, wiping the pan and adding fresh butter between batches. This recipe makes about 10 pancakes total.
Notes
🏔️ Whip egg whites to stiff peaks (add cream of tartar for extra stability).
🔥 Cook low and slow with lid to steam for maximum fluff without burning.
💧 Add water drops during cooking to create steam for airy rise.
- Prep Time: 10 minutes
- Cook Time: 30 minutes
- Category: Breakfast
- Method: Stovetop
- Cuisine: Japanese
- Diet: Vegetarian
Nutrition
- Serving Size: 2 pancakes
- Calories: 220 kcal
- Sugar: 12g
- Sodium: 150mg
- Fat: 10g
- Saturated Fat: 4g
- Unsaturated Fat: 6g
- Trans Fat: 0g
- Carbohydrates: 25g
- Fiber: 0g
- Protein: 8g
- Cholesterol: 200mg


