Ingredients
– 2 1/2 cups all-purpose flour (300g)
– 2/3 cup powdered sugar (66g)
– 1/2 teaspoon salt
– 12 tablespoons unsalted butter, melted (170g)
– 1 teaspoon vanilla extract (optional)
– 3 cups granulated sugar (600g)
– Zest of three lemons (about 3 tablespoons)
– 1/2 cup all-purpose flour (60g)
– 8 large eggs, room temperature
– 1 cup fresh lemon juice (240mL)
– Powdered sugar for dusting
Instructions
1-Step 1: Prepare Your Baking Dish Start by preheating your oven to 350°F. This temperature ensures the crust bakes evenly without browning too quickly while giving the filling the right amount of gentle heat to set properly. Line a 9×13-inch baking dish with parchment paper, leaving some overhang on the sides. This overhang becomes your built-in handles for lifting the bars out later, making cutting so much easier and keeping your pan clean.
2-Step 2: Make the Shortbread Crust In a large mixing bowl, whisk together 2 1/2 cups of flour, 2/3 cup of powdered sugar, and 1/2 teaspoon of salt until well combined. Pour in the melted butter and stir until everything comes together into a cohesive dough. If you’d like an extra layer of flavor, add 1 teaspoon of vanilla extract to the butter before mixing. The dough will feel soft and slightly sticky, which is exactly what you want. Transfer the dough to your prepared pan and press it evenly across the bottom. Aim for a uniform thickness so the crust bakes consistently. A flat-bottomed measuring cup or glass works wonderfully for pressing the dough into place, giving you a nice, even surface.
3-Step 3: Bake the Crust Place the crust in your preheated oven and bake for 20 minutes until it turns lightly golden around the edges. You’re looking for a subtle color change, not a deep brown. While the crust bakes, you’ll have perfect timing to prepare the lemon filling.
4-Step 4: Prepare the Lemon Sugar This step is the secret to incredibly flavorful lemon bars. Place 3 cups of granulated sugar in your food processor along with the zest of three lemons. Pulse until the sugar becomes fragrant and takes on a beautiful yellow tint. This process releases the essential oils from the zest, infusing the sugar with intense lemon flavor throughout every bite. Don’t have a food processor? No problem at all. Simply mince the zest as finely as possible with a sharp knife, then use your fingers to rub it into the sugar until fragrant and well combined.
5-Step 5: Mix the Filling Transfer your zesty lemon sugar to a large mixing bowl and add the remaining 1/2 cup of flour. Whisk to combine so the flour doesn’t clump when you add the wet ingredients. Add 1 cup of fresh lemon juice and 8 room temperature eggs. Whisk everything together until completely smooth. Using room temperature eggs helps them incorporate more easily and prevents any streaks in your filling. Take your time whisking to ensure no bits of sugar or flour remain on the bottom of the bowl.
6-Step 6: Assemble and Bake When the crust comes out of the oven, pour the lemon filling directly over the warm crust. The residual heat helps the filling begin setting immediately. Return the pan to the oven and bake for 25 minutes at 350°F, rotating the pan halfway through for even baking. The filling is done when the edges are set and the center has just a slight jiggle, similar to firm Jell-O. Trust your instincts here, the bars will continue setting as they cool. Overbaking leads to a rubbery texture, so remove them when they still have that gentle wobble in the center.
7-Step 7: Cool Completely Patience is essential at this stage. Allow the bars to cool at room temperature for 1 hour, then transfer them to the refrigerator to chill for at least 2 hours. This cooling time allows the filling to set properly and makes cutting clean slices much easier.
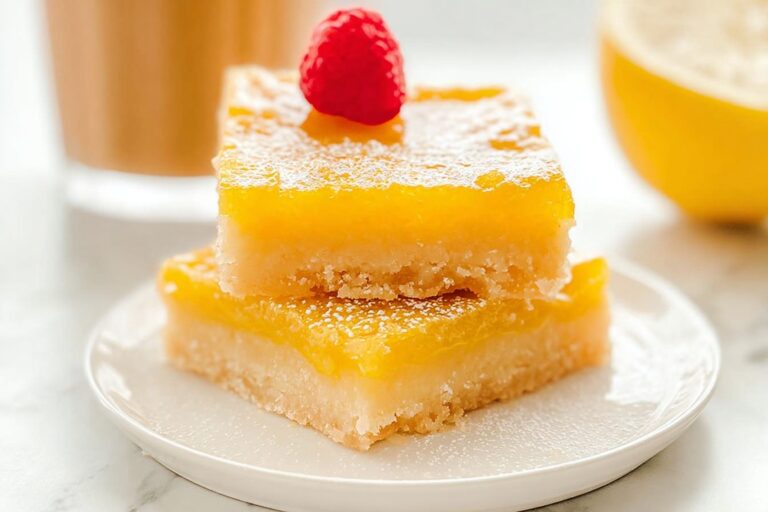
8-Step 8: Cut and Serve Once fully chilled, lift the bars out of the pan using the parchment paper overhang. Dust generously with powdered sugar using a fine mesh sieve for that classic bakery finish. Use a sharp knife dipped in hot water to cut clean slices, wiping the blade between each cut. A damp knife prevents the sticky filling from clinging to the blade. Cut into 15 bars for generous portions, or make smaller squares for a larger crowd. These bars store beautifully and taste even better the next day when the flavors have had time to meld together. If you love citrus desserts, you might also enjoy our lemon tart recipe for another tangy treat.
Notes
🍋 Always use fresh lemons for juice and zest to maximize bright flavor.
🧊 Chill fully before cutting for clean slices that hold shape.
❄️ Freeze bars up to 3 months; thaw and dust with powdered sugar before serving.
- Prep Time: 20 minutes
- Chilling: 3 hours
- Cook Time: 45 minutes
- Category: Dessert
- Method: Bake
- Cuisine: American
- Diet: Vegetarian
Nutrition
- Serving Size: 1 bar
- Calories: 385 kcal
- Sugar: 46g
- Sodium: 113mg
- Fat: 12g
- Saturated Fat: 7g
- Unsaturated Fat: 5g
- Trans Fat: 0g
- Carbohydrates: 66g
- Fiber: 1g
- Protein: 6g
- Cholesterol: 111mg