Ingredients
– 2 ½ cups all-purpose flour (spooned and leveled), divided into 1 ½ cups for the initial mixture and 1 cup added later This forms the base structure, providing the necessary gluten for holding the dough together while keeping it tender.
– 1 cup unsalted butter, very cold, cut into 1/2-inch cubes The cold butter creates those flaky layers and imparts a rich, buttery flavor that makes the crust irresistible.
– 1/2 teaspoon fine sea salt Salt enhances the overall taste and balances the flavors, making your tart base more enjoyable.
– 1 teaspoon kosher salt Salt enhances the overall taste and balances the flavors, making your tart base more enjoyable.
– 1 tablespoon sugar (optional) This adds a touch of sweetness for sweet pies or helps with browning, but you can skip it for savory options.
– 6 to 8 tablespoons ice water, or more as needed (added 4 tablespoons initially) It binds the dough without making it tough, with the cold temperature helping maintain flakiness.
– 1 egg yolk (for optional egg wash) Mixed with a small amount of cream, it gives the crust a shiny finish and helps seal it for baking.
– A small amount cream (for optional egg wash) This combines with the egg yolk to create a glaze that adds appeal and prevents sogginess.
– 1 cup vegan butter or solid coconut oil (vegan substitute for unsalted butter) This keeps the flakiness intact and offers a plant-based option that works well for a dairy-free crust.
– 2 ½ cups 1:1 gluten-free flour blend (gluten-free substitute for all-purpose flour)
– 1 teaspoon xanthan gum (added if needed when using gluten-free flour) It helps bind the dough properly, ensuring a similar tender texture without the gluten.
– 1 cup reduced-fat spread (low-calorie substitute for butter)
– unsweetened applesauce (low-calorie substitute, mixed with butter) These adjustments lower the calorie count while still achieving a workable dough that bakes up nicely.
Instructions
1-First Step: Get Everything Ready Start by measuring out all your ingredients to make the process smooth. Measure 2 ½ cups of all-purpose flour, cube 1 cup of very cold unsalted butter, and have 6 to 8 tablespoons of ice water on hand. Chill the butter in the fridge beforehand to keep it cold, which is key for flakiness, and preheat your oven if you’re planning to bake right away. This mise en place takes just a few minutes and sets you up for success, especially if you’re adapting for dietary needs like using vegan butter.
2-Second Step: Combine Dry Ingredients Take 1 ½ cups of the flour and mix it with 1/2 teaspoon of fine sea salt and 1 tablespoon of sugar if you’re using it. You can whisk these together in a bowl or use a food processor for speed. Sifting the flour helps avoid lumps and ensures even distribution, which is crucial for a tender crust. For gluten-free versions, add xanthan gum here to help with binding without changing the basic technique.
3-Third Step: Cut in the Fat Now, add the 1 cup of cold butter cubes to the flour mixture. If using a food processor, pulse until the flour coats the butter and it starts to hold shape; if doing it by hand, use a pastry cutter or your fingers to work the butter in until you have pea-sized pieces. Aim for a crumbly texture that looks like coarse crumbs, as this creates the layers for flakiness. Remember to keep everything cold to prevent the butter from melting, and for low-calorie options, use a lighter spread at this stage.
4-Fourth Step: Add Liquid and Form Dough Sprinkle in the remaining 1 cup of flour and stir it in until it’s evenly mixed. Gradually add 4 tablespoons of ice water, pressing the dough together in the bowl until it starts to hold. If it’s too dry, add more water one tablespoon at a time until the dough forms without being sticky total might reach 6 to 8 tablespoons. Avoid overworking to keep the crust tender; shape into two disks, wrap them, and chill for at least 1 hour. For vegan adaptations, use plant-based milk if needed to adjust moisture.
5-Fifth Step: Roll Out the Dough Let the chilled dough sit at room temperature for about 5 minutes to make it easier to handle. Lightly flour your surface and rolling pin, then roll one disk into a 12-inch circle, turning it frequently to prevent sticking. If tears occur, patch them with extra dough and a bit of water. For gluten-free dough, handle it gently to avoid breaking, and aim for an even thickness of about 1/8 inch for the best results.
6-Sixth Step: Fit into the Pan Carefully transfer the rolled dough to your pie dish by wrapping it around the rolling pin. Gently press it in without stretching, then trim and crimp the edges by folding the dough under and pinching for a decorative finish. For blind baking, prick the bottom with a fork, line with parchment, add weights, and bake at 375°F for 15 minutes, then another 15 to 20 minutes until golden. Use pie weights to prevent slumping, and for double crust pies, chill the assembled pie for 30 minutes before baking.
7-Seventh Step: Fill and Bake Once your crust is ready, add your filling whether it’s for a sweet pie or savory one and cover with the second crust if needed. Brush with an egg wash made from 1 egg yolk and a small amount of cream for a shiny top, then vent the crust by cutting slits. Bake at the recommended temperature, like 375°F, and check for doneness after 30 to 45 minutes; shield edges with foil if they brown too fast. For wet fillings, fully blind bake first to avoid sogginess, and adjust for low-fat techniques by monitoring bake times.
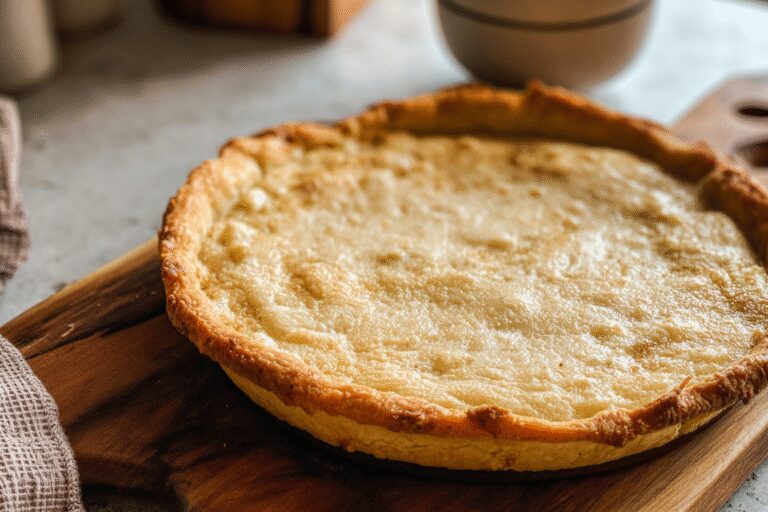
8-Final Step: Finish and Serve Let the pie cool for at least 30 minutes to set, making it easier to slice. Add any finishing touches like a sprinkle of sugar or a glaze for extra appeal. Serve warm for the best flavor, and store leftovers properly to keep that flaky texture. This step ensures your pie crust shines in every bite, whether you’re making it vegan or gluten-free.
Notes
🔪 Use very cold butter for flakiness and tender texture.
🧊 Add ice water gradually as needed, depending on humidity.
⏲️ Chill dough for at least one hour before rolling for best results.
- Prep Time: 15 minutes
- Chilling time: 1 hour
- Cook Time: 35 minutes
- Category: Baking
- Method: Mixing and Rolling
- Cuisine: American
- Diet: Vegetarian
Nutrition
- Serving Size: 1/8 of dough
- Calories: 345
- Sugar: 0g
- Sodium: 160mg
- Fat: 23g
- Saturated Fat: 15g
- Unsaturated Fat: 7g
- Trans Fat: 0g
- Carbohydrates: 30g
- Fiber: 1g
- Protein: 4g
- Cholesterol: 61mg