
Why You’ll Love This Pina Colada Truffles
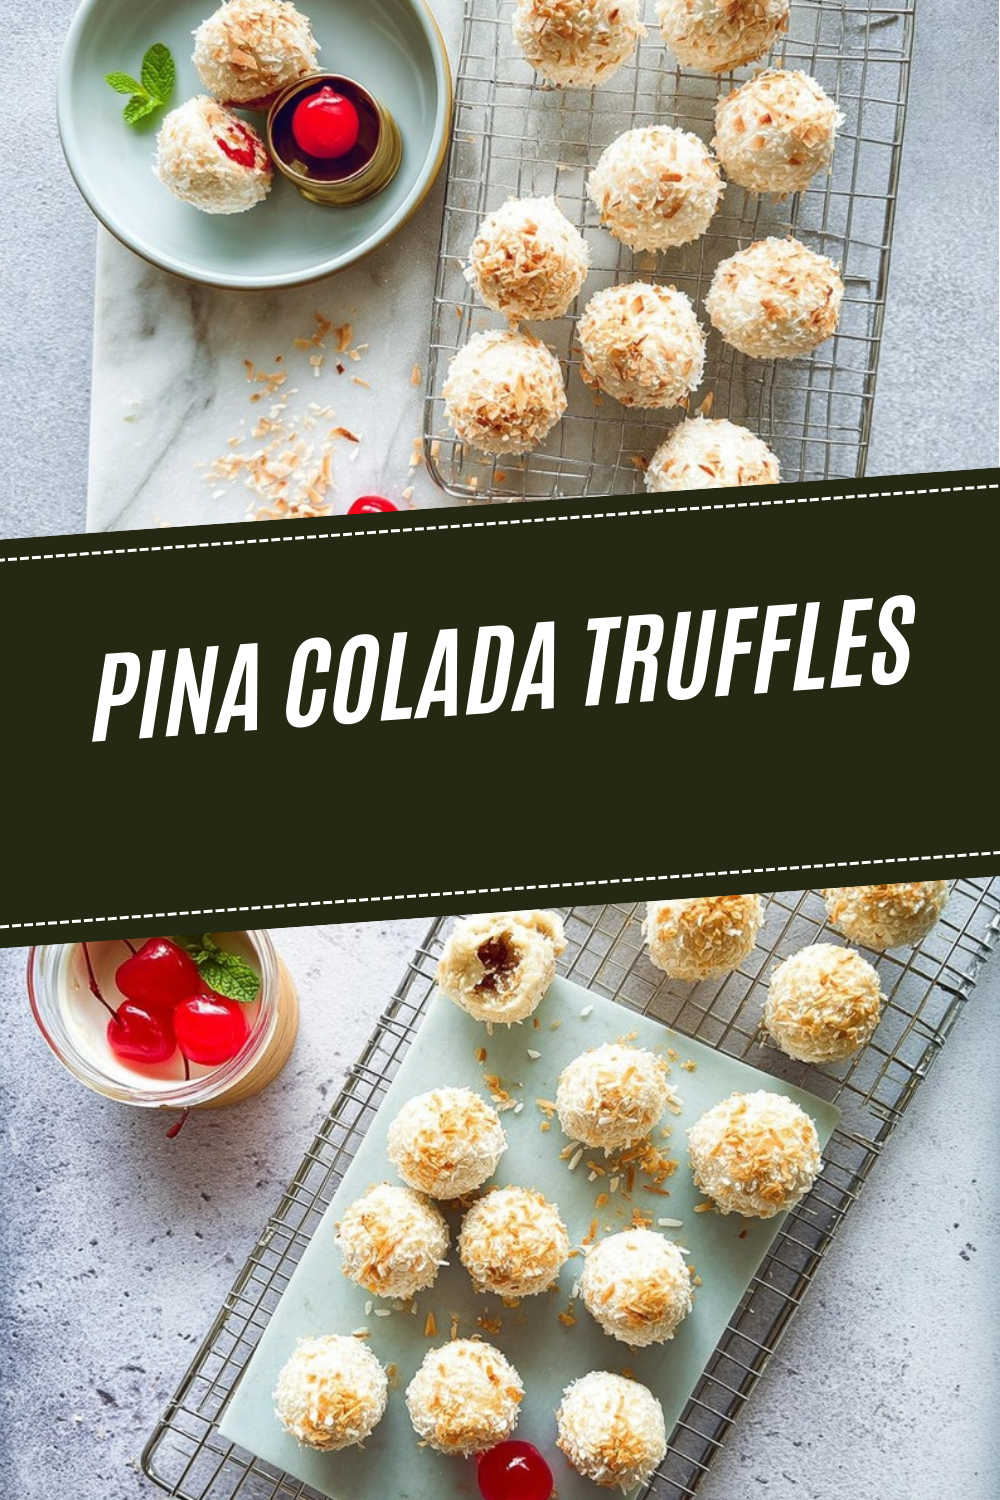
These Pina Colada Truffles bring the tropical vacation vibe straight to your kitchen without requiring a plane ticket or hours of work. This easy truffles recipe combines the classic flavors of coconut and pineapple into bite-sized treats that taste like sunshine in every mouthful. Whether you’re looking for a quick dessert to impress guests or a fun weekend project with the kids, these tropical truffles deliver on every front.
- Ease of preparation: With just 30 minutes of active prep time and no baking required, these no bake truffles are perfect for busy home cooks who want something special without spending hours in the kitchen. The simple process involves basic mixing, scooping, and dipping techniques that even beginners can master.
- Make-ahead convenience: You can prepare the toasted coconut garnish up to a week in advance, making party prep a breeze. These truffles store beautifully in the refrigerator for up to 5 days, giving you flexibility for entertaining.
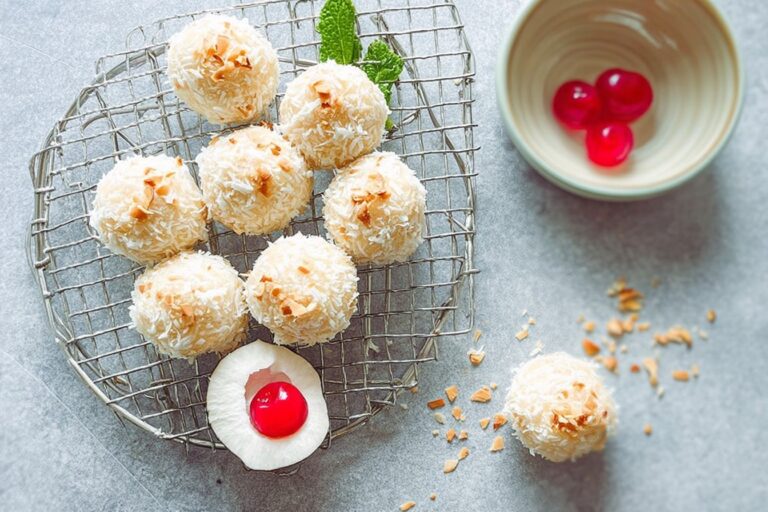
- Distinctive flavor: The combination of creamy cookie-crumb base, zesty pineapple, smooth coconut rum, and luscious white chocolate creates a flavor profile that tastes just like the beloved cocktail. Each bite delivers that signature piña colada essence in a fun, poppable format.
- Versatility for occasions: These truffles work beautifully for holiday gatherings, summer parties, baby showers, or as a sweet gift for friends and neighbors. Their elegant appearance makes them look bakery-worthy, yet the recipe is simple enough for everyday treats.
If you enjoy making chocolate-dipped treats, you might also love these chocolate covered strawberries for another elegant yet simple dessert option.
Jump To
- 1. Why You’ll Love This Pina Colada Truffles
- 2. Essential Ingredients for Pina Colada Truffles
- 3. How to Prepare the Perfect Pina Colada Truffles: Step-by-Step Guide
- 4. Dietary Substitutions to Customize Your Pina Colada Truffles
- 5. Mastering Pina Colada Truffles: Advanced Tips and Variations
- 6. How to Store Pina Colada Truffles: Best Practices
- 7. FAQs: Frequently Asked Questions About Pina Colada Truffles
- 8. Pina Colada Truffles
Essential Ingredients for Pina Colada Truffles
Creating the perfect Pina Colada Truffles starts with gathering quality ingredients that work together to deliver that signature tropical taste. Each component plays a specific role in building the flavor, texture, and overall success of these treats.
Main Ingredients
- ½ cup sweetened shredded coconut, toasted for garnish – Adds a golden, nutty crunch on top while reinforcing the coconut flavor throughout each truffle.
- 33 golden cream-filled cookies (13.29 ounce package) – Forms the sweet, buttery base of the truffles and creates the perfect crumbly yet bindable texture when mixed with cream cheese.
- 8 ounce block cream cheese, softened to room temperature – Binds the cookie crumbs and pineapple together while adding a tangy creaminess that balances the sweetness.
- 8 ounce can crushed pineapple in 100% pineapple juice, drained well (about ⅓ cup after draining) – Infuses authentic tropical flavor and moisture into the truffle mixture, making them taste like a true piña colada.
- 2 tablespoons coconut rum – Deepens the coconut flavor and adds that signature cocktail essence. You can substitute with coconut extract if preferred.
- 20 ounces white chocolate melting wafers, melted according to package directions – Creates the smooth, sweet coating that seals in the flavors and gives the truffles their beautiful finish.
Special Dietary Options
| Dietary Need | Substitution Options |
|---|---|
| Gluten-free | Replace golden cream-filled cookies with gluten-free vanilla sandwich cookies (about 36 cookies) |
| Dairy-free | Use vegan cream cheese (8 oz block) and dairy-free white chocolate melting wafers |
| Non-alcoholic | Replace coconut rum with 1 tsp coconut extract mixed with 2 tbsp pineapple juice or coconut milk |
| Lower calorie | Use reduced-fat cream cheese and sugar-free white chocolate chips with 1 tsp coconut oil |
The beauty of this truffles recipe lies in how these simple ingredients transform into something truly special. For another tropical treat your family might enjoy, check out this homemade mango ice cream recipe that pairs wonderfully with these truffles for a complete dessert spread.
How to Prepare the Perfect Pina Colada Truffles: Step-by-Step Guide
Making these easy Pina Colada Truffles is straightforward when you follow each step carefully. The process requires minimal equipment and produces stunning results that look like they came from a fancy chocolatier. Set aside about 75 minutes total, including chilling time, and you’ll have 28 gorgeous truffles ready to enjoy.
Step 1: Prepare Your Workspace
Start by lining two large rimmed baking sheets with parchment paper. This prevents sticking and makes cleanup a breeze. Having both sheets ready now saves time later when you’re working with the melted chocolate and need to move quickly. Clear your counter space and gather all your ingredients so everything is within reach.
Step 2: Toast the Coconut Garnish
Place the sweetened shredded coconut in a dry skillet over medium-high heat. Toast for 3-4 minutes, stirring constantly with a wooden spoon or silicone spatula to prevent any burning. The coconut will turn golden brown and release a wonderful nutty aroma when ready. Remove from heat immediately once golden and transfer to a small bowl to cool completely. Set aside for the final garnish step. This toasted coconut can be prepared up to a week in advance and stored in an airtight container.
Step 3: Create the Cookie Crumb Base
Place all 33 golden cream-filled cookies into your food processor. Process until fine crumbs form, which should take about 30-45 seconds of pulsing. Don’t remove the cream filling from the cookies; it actually helps bind the mixture together beautifully. If you don’t have a food processor, place the cookies in a sturdy Ziploc bag and crush them with a rolling pin until you achieve the same fine crumb consistency. This takes a bit more elbow grease but works just as well.
Step 4: Mix the Truffle Filling
Add the softened cream cheese to the food processor with the cookie crumbs. Make sure your cream cheese is truly at room temperature, as cold cream cheese will leave lumps in your mixture. Drain the crushed pineapple very thoroughly using a spoon pressed into a wire mesh sieve. You should have about ⅓ cup of pineapple after draining. Add this drained pineapple and the coconut rum to the food processor. Pulse everything together until the mixture is smooth and fully combined, scraping down the sides once or twice to ensure even mixing. The result should be a cohesive, slightly sticky dough that holds together when pressed.
Pro Tip: Properly draining the pineapple is crucial for preventing soggy truffles. Press firmly with the back of a spoon for 2-3 minutes until no liquid drips from the sieve.
Step 5: Scoop and Form the Truffles
Using a small cookie scoop (1 ½ tablespoon capacity), portion out the truffle mixture onto one of your prepared baking sheets. Repeat until you’ve formed 28 balls. Work quickly but don’t worry about making them perfectly round yet. At this stage, they’ll be soft and slightly sticky. Place the entire baking sheet in the freezer for 30-45 minutes until the truffles are firm to the touch. This chilling step is essential for successful coating later.
Step 6: Roll into Smooth Balls
Once the truffles are firm, remove them from the freezer and roll each one between your palms to create smooth, round balls. Work quickly as the heat from your hands can soften them. If the truffles start to lose their shape, return them to the freezer for 5-10 minutes to firm up again before continuing. Place the rolled truffles back on the baking sheet and keep them in the refrigerator while you prepare the chocolate coating.
Step 7: Melt the White Chocolate
Pour the white chocolate melting wafers into a microwave-safe bowl. Heat for 1 minute, then remove and stir thoroughly. Continue heating in 30-second increments, stirring well after each interval, until the chocolate is completely smooth. Be careful not to overheat, as white chocolate can seize and become grainy if it gets too hot. For a reference on chocolate-dipped techniques, you can check out this Delish piña colada truffles recipe for additional tips.
Step 8: Dip the Truffles
Working with one truffle at a time, drop it into the melted white chocolate. Use a fork to turn it gently, ensuring complete coverage. Lift the truffle with the fork and tap gently against the side of the bowl to remove excess chocolate. Use a toothpick to slide the truffle off the fork and onto your second prepared baking sheet. This toothpick method prevents those dreaded chocolate drips and keeps your truffles looking neat and professional.
Step 9: Add the Toasted Coconut Topping
While the white chocolate coating is still wet, immediately sprinkle the toasted coconut on top of each truffle. Work one truffle at a time: dip, place on sheet, sprinkle with coconut, then move to the next. If you wait too long, the chocolate will set and the coconut won’t stick properly. This step gives each truffle its signature tropical look and adds a delightful textural contrast.
Step 10: Set and Serve
Refrigerate the finished truffles for at least 5 minutes to allow the coating to fully set. Once set, they’re ready to serve! Keep the truffles refrigerated until serving time, as the cream cheese filling should stay chilled. For best flavor, let them sit at room temperature for about 10 minutes before enjoying, which allows the chocolate to soften slightly and the flavors to fully bloom.

Dietary Substitutions to Customize Your Pina Colada Truffles
One of the wonderful things about this Pina Colada Truffles recipe is how easily it adapts to different dietary needs and preferences. Whether you’re cooking for guests with restrictions or simply want to modify the recipe to suit your lifestyle, these substitutions maintain the delicious tropical flavor while accommodating various requirements.
Gluten-Free Alternatives
For those avoiding gluten, swap the golden cream-filled cookies with gluten-free vanilla sandwich cookies. Brands like Glutino or Enjoy Life offer excellent options that crush and mix just like regular sandwich cookies. Use approximately 36 gluten-free cookies to match the volume of the original recipe. The cream filling in these alternatives works the same way, creating that bindable crumb texture essential for tropical truffles that hold their shape.
Dairy-Free Modifications
Making dairy-free coconut truffles requires a few thoughtful swaps. Replace the 8-ounce block of cream cheese with vegan cream cheese alternatives from brands like Kite Hill or Daiya. Use dairy-free white chocolate melting wafers or chips, adding 1 teaspoon of coconut oil to achieve a smoother consistency for dipping. The coconut oil helps compensate for the different melting properties of dairy-free chocolate. Test a small batch first since vegan cream cheese varieties differ in firmness and texture.
Non-Alcoholic Options
Not everyone wants alcohol in their treats, and that’s perfectly fine. Replace the 2 tablespoons of coconut rum with 1 teaspoon of coconut extract mixed with 2 tablespoons of pineapple juice or plain coconut milk. The coconut extract delivers that concentrated tropical flavor without the booze, while the juice or coconut milk maintains proper moisture balance. Start with half the extract, taste your mixture, then add more if needed. This version is perfect for kids’ parties or family gatherings where you want everyone to enjoy the same dessert.
Lower-Calorie Adjustments
For those watching their calorie intake, use reduced-fat cream cheese in the same quantity. Sugar-free white chocolate chips with a small amount of coconut oil can replace the melting wafers. Keep in mind that each truffle contains about 134 calories, so portion awareness helps. These modifications can reduce calories by roughly 20-30 per truffle while still delivering satisfying tropical flavor.
Mastering Pina Colada Truffles: Advanced Tips and Variations
Once you’ve mastered the basic easy tropical truffles recipe, you might want to experiment with different techniques and flavor combinations. These advanced tips help you achieve professional-looking results and discover creative variations that keep the recipe fresh and exciting.
Professional Coating Techniques
Getting that perfectly smooth, bakery-quality coating takes practice but is absolutely achievable at home. The key is maintaining your melted white chocolate at the right consistency. If it starts to thicken while you’re working, pop it back in the microwave for 10-15 seconds and stir well. Always dip cold truffles straight from the refrigerator or freezer. The temperature difference helps the chocolate set faster, creating a thicker, more even coating. For extra insurance against drips, try the double-dip method: let the first coat set completely, then dip again for a thicker, more luxurious shell.
Flavor Variations to Try
- Dark Chocolate Version: Replace white chocolate wafers with dark chocolate for a sophisticated contrast with the tropical filling.
- Coating Add-ins: Mix finely chopped macadamia nuts or freeze-dried pineapple pieces into the melted white chocolate before dipping.
- Rum-Soaked Pineapple: Drain the pineapple as directed, then soak it in additional coconut rum for 30 minutes before mixing into the base.
- Layered Truffles: Make half the batch with white chocolate coating and half with dark chocolate for a beautiful presentation.
Presentation Ideas
These no bake Pina Colada Truffles look stunning when presented thoughtfully. Place them in decorative mini cupcake liners for individual servings. Arrange on a tiered dessert stand with other treats like carrot cake cheesecake bars for a dessert spread at your next gathering. For gift-giving, pack them in a decorative box with parchment paper between layers. The white chocolate exterior and golden coconut topping photograph beautifully, making them perfect for social media-worthy dessert tables.
Make-Ahead Strategies
Planning ahead makes entertaining so much easier. The toasted coconut garnish can be prepared up to a week in advance and stored at room temperature in an airtight container. For even longer storage, refrigerate for up to one month or freeze for up to three months. The undipped truffle balls can stay in the freezer for up to 24 hours before coating. This gives you flexibility to prepare the base one day and dip the next if needed. However, avoid freezing the finished truffles, as the moisture from pineapple causes texture issues upon thawing.
How to Store Pina Colada Truffles: Best Practices
Proper storage ensures your homemade Pina Colada Truffles maintain their delicious taste and appealing appearance. Understanding the right way to store these treats keeps them fresh and ready for whenever the craving strikes.
Refrigeration Guidelines
Store your finished truffles in an airtight container in the refrigerator for up to 5 days. Layer parchment paper between truffle layers to prevent them from sticking together or damaging the chocolate coating. The cream cheese in the filling requires refrigeration, so never leave these truffles at room temperature for extended periods. For best flavor and texture, remove them from the refrigerator about 10 minutes before serving. This brief rest period allows the white chocolate to soften slightly and the tropical flavors to fully develop.
Freezing Considerations
Unlike many truffle recipes, these tropical Pina Colada Truffles do not freeze well after they’re completed. The high moisture content from the pineapple and coconut rum creates texture issues during thawing, resulting in a mushy, unappealing consistency. However, you can freeze the undipped truffle balls for up to one month. Thaw them in the refrigerator overnight, then proceed with the chocolate coating steps. This make-ahead strategy works well for party preparation when you want to spread the work over multiple days.
Travel and Gift-Giving Tips
When transporting these truffles, keep them in a cooler bag with an ice pack to maintain proper temperature. For gift-giving, package them in decorative tins or boxes with plenty of cushioning. Include storage instructions for recipients, noting that refrigeration is necessary. Since each truffle is a single serving (134 calories per piece), they make thoughtful, portion-controlled gifts for friends, teachers, or neighbors during holidays or special occasions.
Meal Prep Considerations
For those who enjoy meal prep, consider making a double batch of the toasted coconut at the beginning of the week. Store it in a labeled jar at room temperature, ready to use not just for these truffles but for topping oatmeal, yogurt, or ice cream. Pineapple offers numerous health benefits, as noted by Healthline’s article on pineapple nutrition, making these truffles a treat with some redeeming nutritional value.
FAQs: Frequently Asked Questions About Pina Colada Truffles
How do I crush Oreo cookies for Pina Colada Truffles without a food processor?
If you lack a food processor, place the Golden Oreos (with filling) in a sturdy Ziploc bag and seal it tightly. Use a rolling pin to crush them into fine crumbs by rolling back and forth firmly. For even texture, fold the bag over and crush any larger pieces. This method takes about 5 minutes and yields the same consistency needed for the truffle base. Avoid over-crushing to prevent a powdery mix. Once crushed, mix immediately with softened cream cheese, drained pineapple, and coconut rum for best results. This no-equipment hack keeps your kitchen simple and mess-free. (78 words)
How can I prevent Pina Colada Truffles from getting soggy?
Soggy truffles happen from excess moisture in the crushed pineapple. Start by opening a can of pineapple tidbits or chunks and draining it thoroughly. Place in a fine mesh sieve over a bowl, then press firmly with the back of a spoon or spatula for 2-3 minutes until no liquid drips out. Pat dry with paper towels for extra assurance. This removes about 1/2 cup of juice, helping the mixture firm up during chilling. Combine with cookie crumbs, cream cheese, and a splash of coconut rum right away. Chill the balls for 30 minutes before dipping in melted white chocolate. Properly drained, your truffles hold shape perfectly and stay tropical-tasting for up to 5 days in the fridge. (112 words)
Can I make Pina Colada Truffles gluten-free or dairy-free?
Yes, adapt for dietary needs easily. For gluten-free, swap Golden Oreos with gluten-free vanilla sandwich cookies like Glutino or Enjoy Life brands—crush the same amount (about 36 cookies). For dairy-free, replace regular cream cheese with vegan cream cheese such as Kite Hill or Daiya (8 oz block). Use dairy-free white chocolate melting wafers or chips (add 1 tsp coconut oil for smoothness). Drain pineapple as usual and proceed with the recipe. These swaps maintain the creamy, piña colada flavor without sacrificing texture. Test a small batch first, as vegan cheese varies in firmness. Store in an airtight container in the fridge; they keep well for 4-5 days. Perfect for parties with mixed diets. (108 words)
What can I substitute for coconut rum in Pina Colada Truffles?
For a non-alcoholic version, replace 2 tablespoons coconut rum with coconut extract (1 tsp) mixed with pineapple juice (2 tbsp) or plain coconut milk (2 tbsp) for creaminess. Coconut extract delivers intense tropical notes without booze—start with 1/2 tsp and taste the mixture, adding more if needed. Pineapple juice keeps the piña colada vibe while adding natural sweetness and moisture balance. Mix into the cookie crumb base after draining pineapple well. Kids love this version, and it doesn’t alter chilling or dipping steps. Dip in white chocolate wafers as directed. Yields about 24 truffles with full flavor. Label clearly if serving with alcohol versions at events. (102 words)
How should I store homemade Pina Colada Truffles?
Store Pina Colada Truffles in an airtight container in the refrigerator for up to 5 days. Layer with parchment paper to prevent sticking from the creamy coating. Avoid freezing—the high moisture from pineapple and coconut causes texture breakdown upon thawing, making them mushy. For toasted coconut topping, prepare up to a week ahead: spread sweetened shredded coconut on a baking sheet, toast at 350°F for 5-7 minutes until golden, stirring halfway. Cool completely and store separately at room temp in a sealed jar. Reapply before serving. Bring to room temp 10 minutes prior for best flavor. Makes 24 truffles; share within days for peak freshness. (104 words)
Pina Colada Truffles
🍍 Transport your taste buds to the tropics with these easy Piña Colada truffles, packed with pineapple, coconut, and creamy goodness for an irresistible treat.
🥥 No-bake delight that’s perfect for parties, ready in under 1.5 hours with minimal effort and maximum flavor.
- Total Time: 1 hour 15 minutes
- Yield: 28 truffles
Ingredients
– ½ cup sweetened shredded coconut, toasted for garnish
– 33 golden cream-filled cookies (13.29 ounce package)
– 8 ounce block cream cheese, softened to room temperature
– 8 ounce can crushed pineapple in 100% pineapple juice, drained well (about ⅓ cup after draining)
– 2 tablespoons coconut rum
– 20 ounces white chocolate melting wafers, melted according to package directions
Instructions
1-Step 1: Prepare Your Workspace Start by lining two large rimmed baking sheets with parchment paper. This prevents sticking and makes cleanup a breeze. Having both sheets ready now saves time later when you’re working with the melted chocolate and need to move quickly. Clear your counter space and gather all your ingredients so everything is within reach.
2-Step 2: Toast the Coconut Garnish Place the sweetened shredded coconut in a dry skillet over medium-high heat. Toast for 3-4 minutes, stirring constantly with a wooden spoon or silicone spatula to prevent any burning. The coconut will turn golden brown and release a wonderful nutty aroma when ready. Remove from heat immediately once golden and transfer to a small bowl to cool completely. Set aside for the final garnish step. This toasted coconut can be prepared up to a week in advance and stored in an airtight container.
3-Step 3: Create the Cookie Crumb Base Place all 33 golden cream-filled cookies into your food processor. Process until fine crumbs form, which should take about 30-45 seconds of pulsing. Don’t remove the cream filling from the cookies; it actually helps bind the mixture together beautifully. If you don’t have a food processor, place the cookies in a sturdy Ziploc bag and crush them with a rolling pin until you achieve the same fine crumb consistency. This takes a bit more elbow grease but works just as well.
4-Step 4: Mix the Truffle Filling Add the softened cream cheese to the food processor with the cookie crumbs. Make sure your cream cheese is truly at room temperature, as cold cream cheese will leave lumps in your mixture. Drain the crushed pineapple very thoroughly using a spoon pressed into a wire mesh sieve. You should have about ⅓ cup of pineapple after draining. Add this drained pineapple and the coconut rum to the food processor. Pulse everything together until the mixture is smooth and fully combined, scraping down the sides once or twice to ensure even mixing. The result should be a cohesive, slightly sticky dough that holds together when pressed.
5-Step 5: Scoop and Form the Truffles Using a small cookie scoop (1 ½ tablespoon capacity), portion out the truffle mixture onto one of your prepared baking sheets. Repeat until you’ve formed 28 balls. Work quickly but don’t worry about making them perfectly round yet. At this stage, they’ll be soft and slightly sticky. Place the entire baking sheet in the freezer for 30-45 minutes until the truffles are firm to the touch. This chilling step is essential for successful coating later.
6-Step 6: Roll into Smooth Balls Once the truffles are firm, remove them from the freezer and roll each one between your palms to create smooth, round balls. Work quickly as the heat from your hands can soften them. If the truffles start to lose their shape, return them to the freezer for 5-10 minutes to firm up again before continuing. Place the rolled truffles back on the baking sheet and keep them in the refrigerator while you prepare the chocolate coating.
7-Step 7: Melt the White Chocolate Pour the white chocolate melting wafers into a microwave-safe bowl. Heat for 1 minute, then remove and stir thoroughly. Continue heating in 30-second increments, stirring well after each interval, until the chocolate is completely smooth. Be careful not to overheat, as white chocolate can seize and become grainy if it gets too hot. For a reference on chocolate-dipped techniques, you can check out this Delish piña colada truffles recipe for additional tips.
8-Step 8: Dip the Truffles Working with one truffle at a time, drop it into the melted white chocolate. Use a fork to turn it gently, ensuring complete coverage. Lift the truffle with the fork and tap gently against the side of the bowl to remove excess chocolate. Use a toothpick to slide the truffle off the fork and onto your second prepared baking sheet. This toothpick method prevents those dreaded chocolate drips and keeps your truffles looking neat and professional.
9-Step 9: Add the Toasted Coconut Topping While the white chocolate coating is still wet, immediately sprinkle the toasted coconut on top of each truffle. Work one truffle at a time: dip, place on sheet, sprinkle with coconut, then move to the next. If you wait too long, the chocolate will set and the coconut won’t stick properly. This step gives each truffle its signature tropical look and adds a delightful textural contrast.
10-Step 10: Set and Serve Refrigerate the finished truffles for at least 5 minutes to allow the coating to fully set. Once set, they’re ready to serve! Keep the truffles refrigerated until serving time, as the cream cheese filling should stay chilled. For best flavor, let them sit at room temperature for about 10 minutes before enjoying, which allows the chocolate to soften slightly and the flavors to fully bloom.
Notes
🍍 Drain crushed pineapple thoroughly using a sieve to prevent soggy truffles.
🥥 Toast coconut in advance and store for up to a week at room temperature.
❄️ Avoid freezing finished truffles as they won’t thaw well due to moisture.
- Prep Time: 30 minutes
- Chill/Freeze: 45 minutes
- Category: Dessert
- Method: No-bake
- Cuisine: American
- Diet: Vegetarian
Nutrition
- Serving Size: 1 truffle
- Calories: 134 kcal
- Sugar: 13g
- Sodium: 125mg
- Fat: 6g
- Saturated Fat: 3g
- Unsaturated Fat: 2g
- Trans Fat: 0g
- Carbohydrates: 18g
- Fiber: 0.4g
- Protein: 2g
- Cholesterol: 1mg


